User Interface
User Interface
In this section we will present the User Interface of the mobile App and how simple is working with eLegere with smartphone or tablet device.
Apps configuration
All the features are available according to the configuration of the Apps.
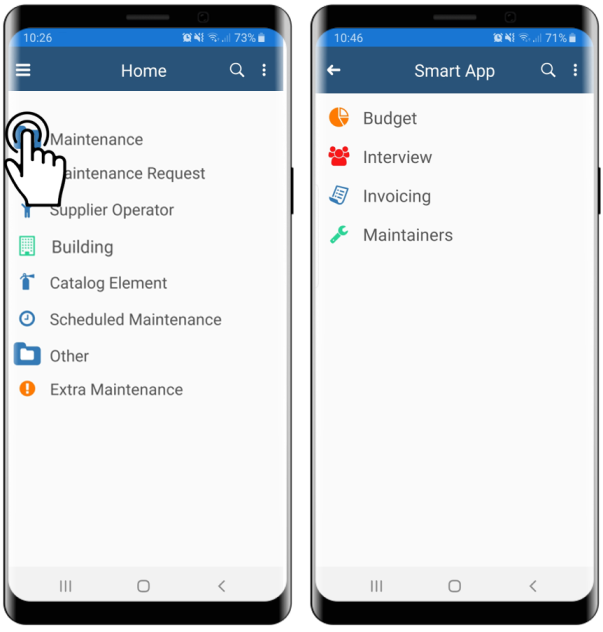
Folders Navigation
To navigate folders, simply tap on the folder icon. It will be shown the Apps' list:
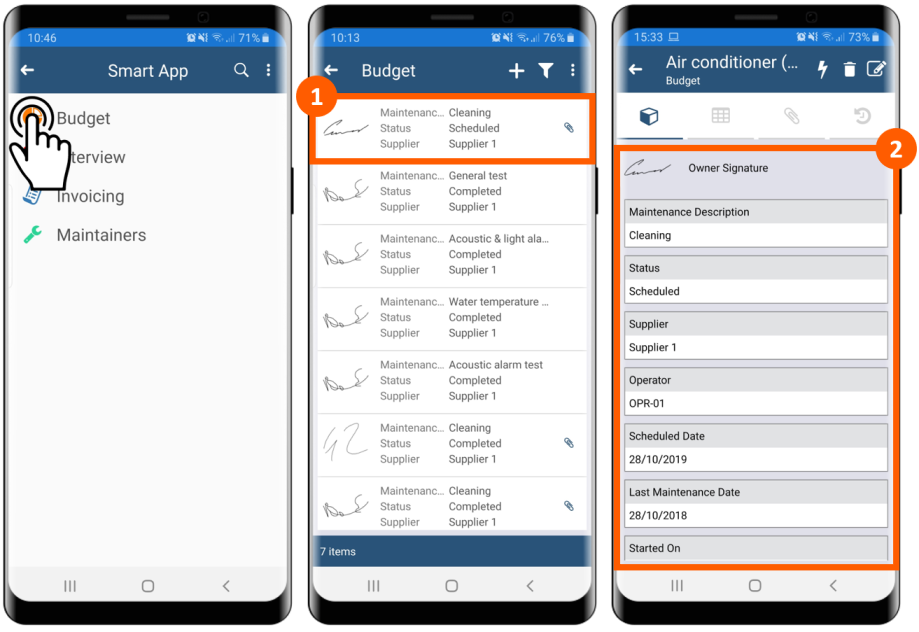
Items View
Opening an App, there will be a list with the preview of the first 3 items for each row (1). Tapping on element it will be open a page showing all the items (2) of the element selected:
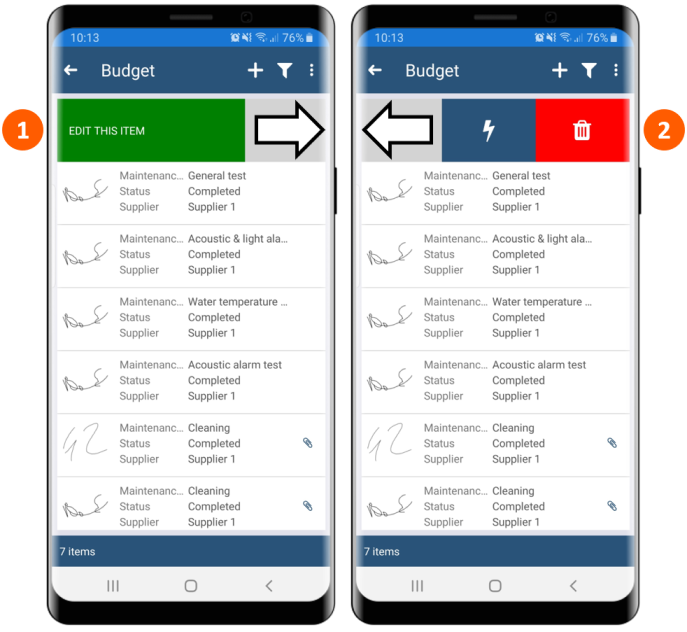
Swiping
Right swiping (1) give the possibility to Edit item, left swiping (2) to run an Action or Delete the item:
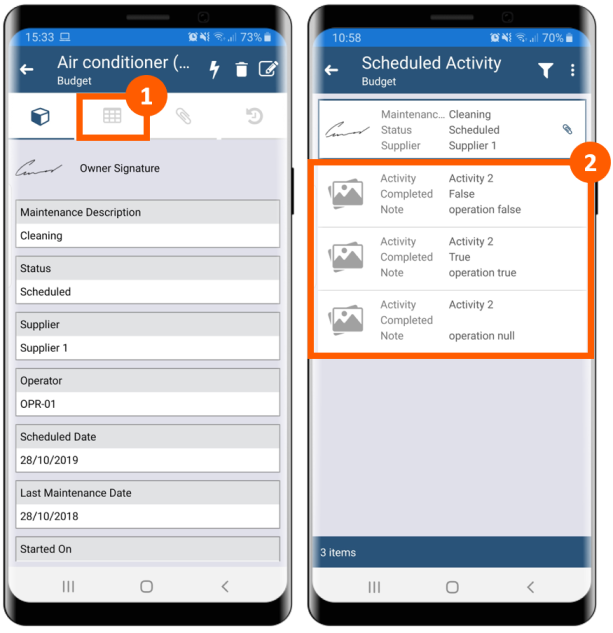
Master & Details
If the App has a Master & Details structure, the Details icon it will be tappable (1) and in the next page there will be the list with the preview of the first 3 items for each Details row (2):
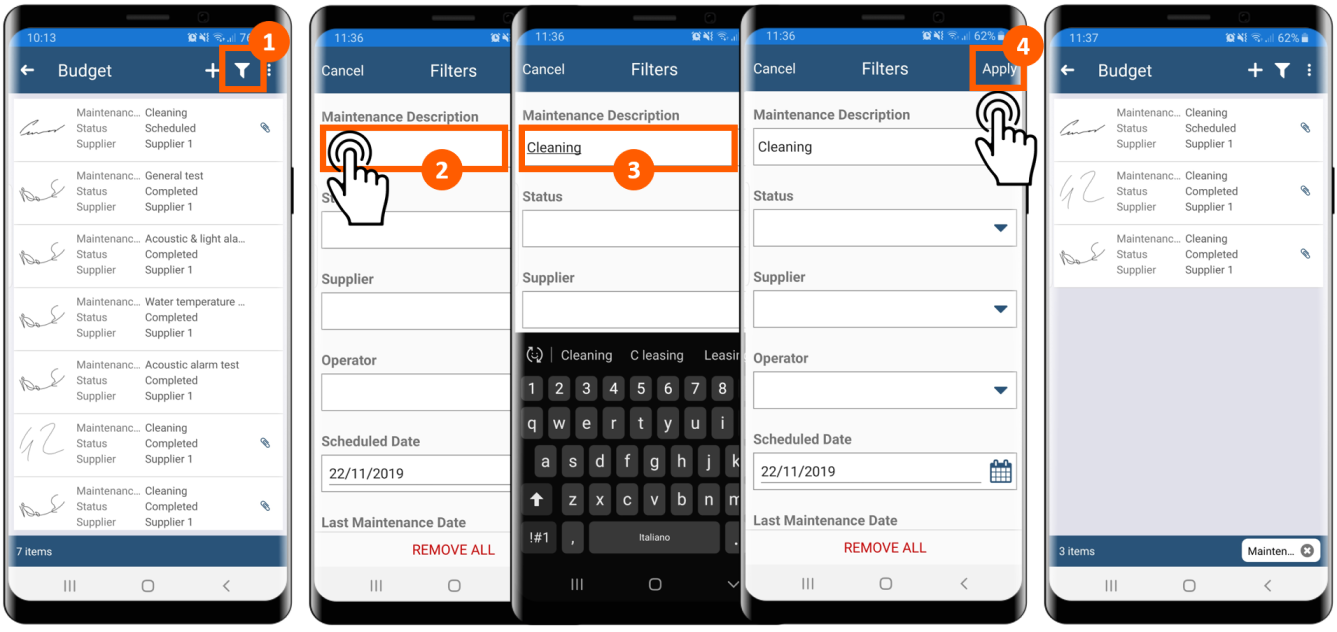
Filters
To apply an item's filter, tap on the filter icon (1), select the item that to filter (2), write the value that you want to use (3), tap on Appy (4). In the last page it will be shown all the items that match the filtered value:
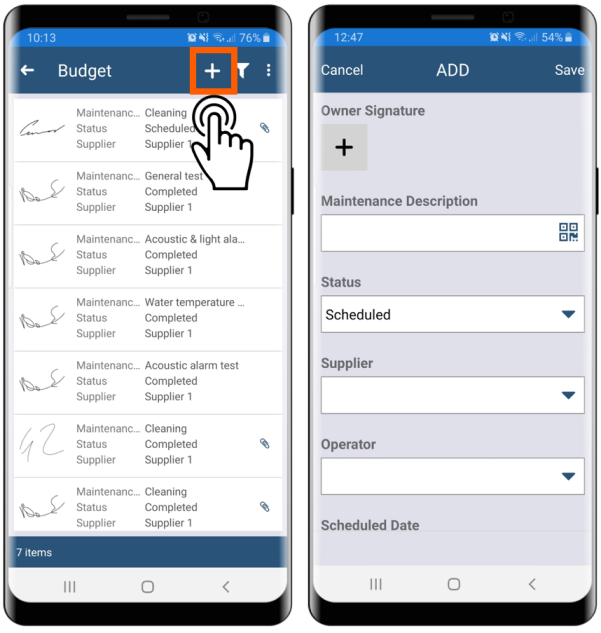
Add
To add an item tap on the plus icon . It will be open a page where adding all the information about a new item:
String field
String field is identifiable by QR Code icon
For this field there are 4 different inputing methods:
1. Manually
To insert manually data, tap on the field and write the information:

2. Smart Input barcode
To insert data using Smart Input barcode tool, tap on the QR Code icon (1) and then on the barcode icon (2):
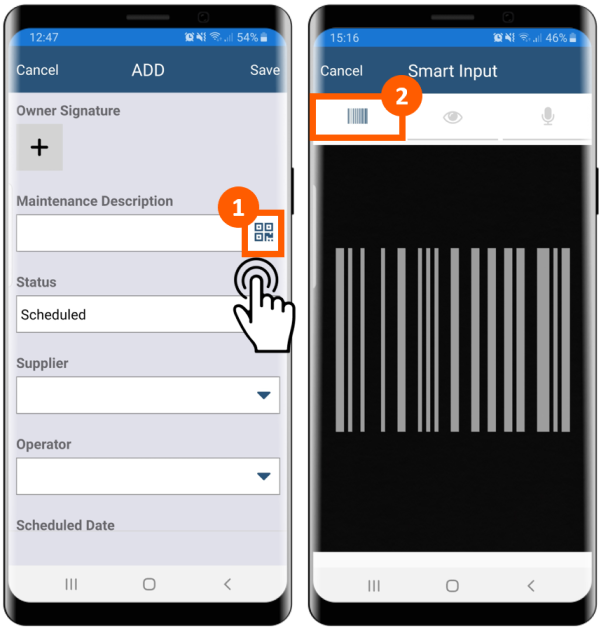
It will be activate the device's camera to scan a barcode or QR Code to import the information linked to the scanned code.
3. Smart Input OCR scan
To insert data using Smart Input OCR scan tool, tap on the QR Code icon (1) and then on the eye icon (2):

Tap on the document icon in the middle of the page. It will be activate the device's camera to scan a document to import the information using OCR technology.
4. Smart Input audio rec
To insert data using Smart Input audio rec tool, tap on the QR Code icon (1) and then on the microphone icon (2):
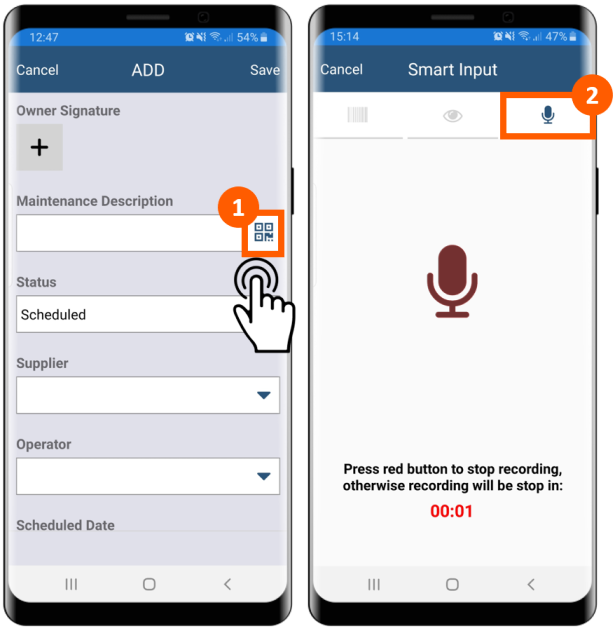
Press the microphone icon in the middle of the page. It will be activate the device's microphone to recording your voice that will be converted in text.
14 seconds recording
For now, there's a limit of 14 seconds recording.
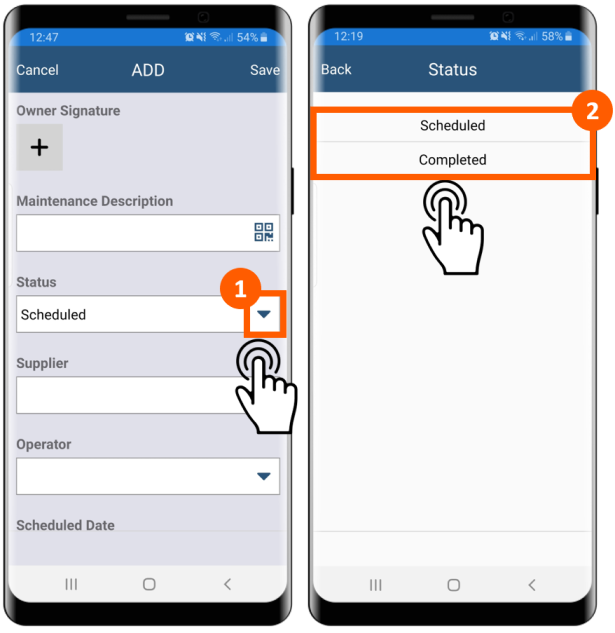
Lookup
Lookup field is identifiable by the triangle icon .
Tapping on that icon (1) it will be shown a list where choosing a value (2):
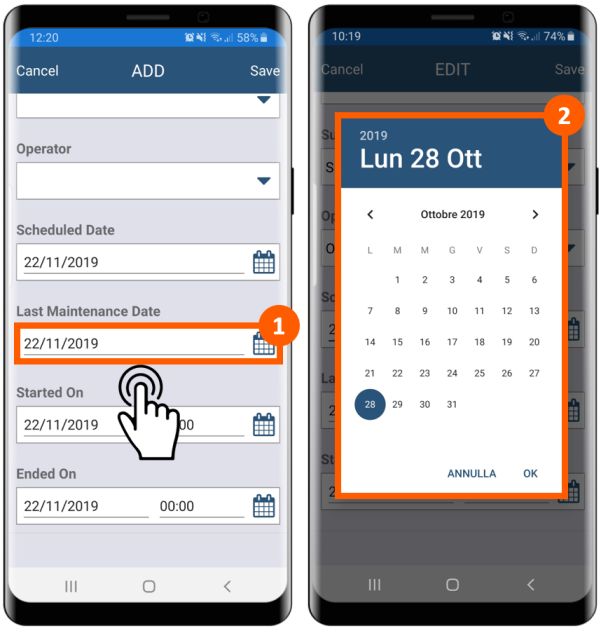
Date
Date field is identifiable by the calendar icon .
Tapping on it it (1) will be shown the calendar tool (2):
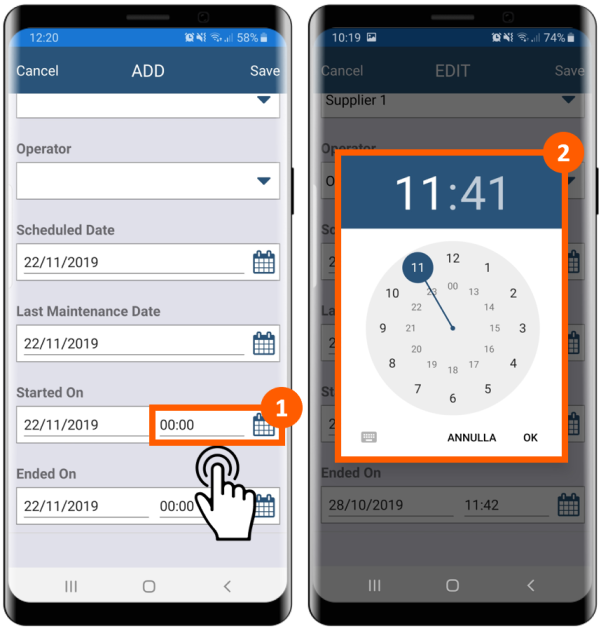
If the field is a datetime (with hours & minutes), there are 2 sections where putting the date and the time. Tapping on the second section (1) it will be shown the clock tool (2):
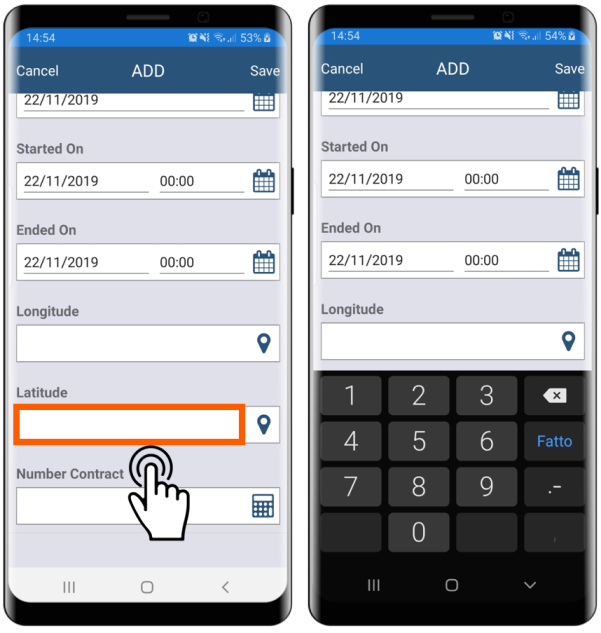
Numeric
Numeric field is identifiable by the calculator icon .
To insert manually data, tap on the field and write the information:
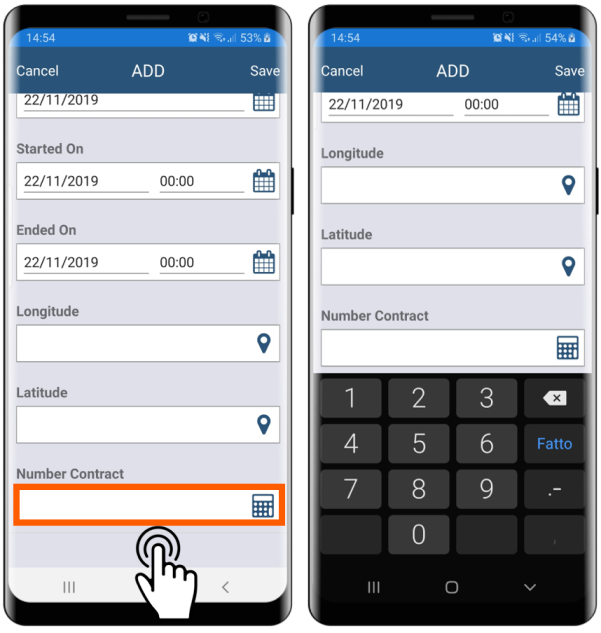
GeoLocalization
GeoLocalization field is identifiable by the pin icon .
To insert manually data, tap on the field and write the information (same behavior of a Numeric field):
If GPS is active and you tap on the pin icon Latitude & Longitude fields will be filled automatically with your position:

File
To insert data in a File field tap on the plus icon (1) and choose one of 3 different inputing methods (2):
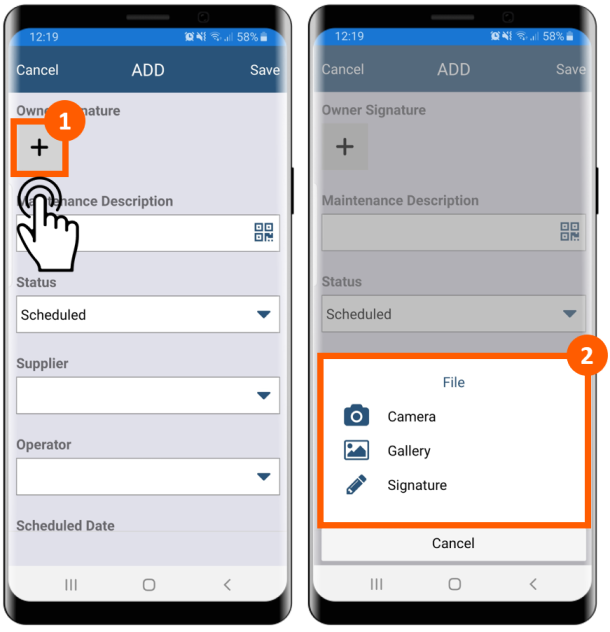
| # | Icon | Description |
|---|---|---|
| 1 | Used to open the devices' camera to upload image | |
| 2 | Used to open the device's gallery to upload an image | |
| 3 | Used to open the signature tool to upload your signature as image |
Timespan
Timespan field is identifiable by the clock icon .
Tapping on it (1) will be shown the timespan tool where insert days (2), hours (3), minutes (4) and seconds (5). Finally tap on Set (6):

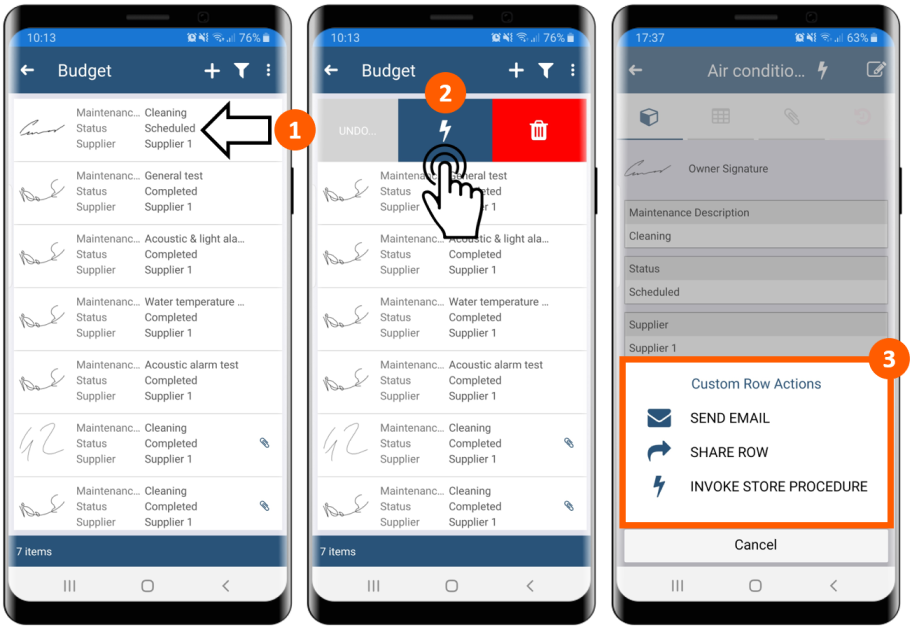
Action
To run an Action use the left swipe (1) and tap on the bolt icon (2). Then chose one of the Custom Row Actions available (3):
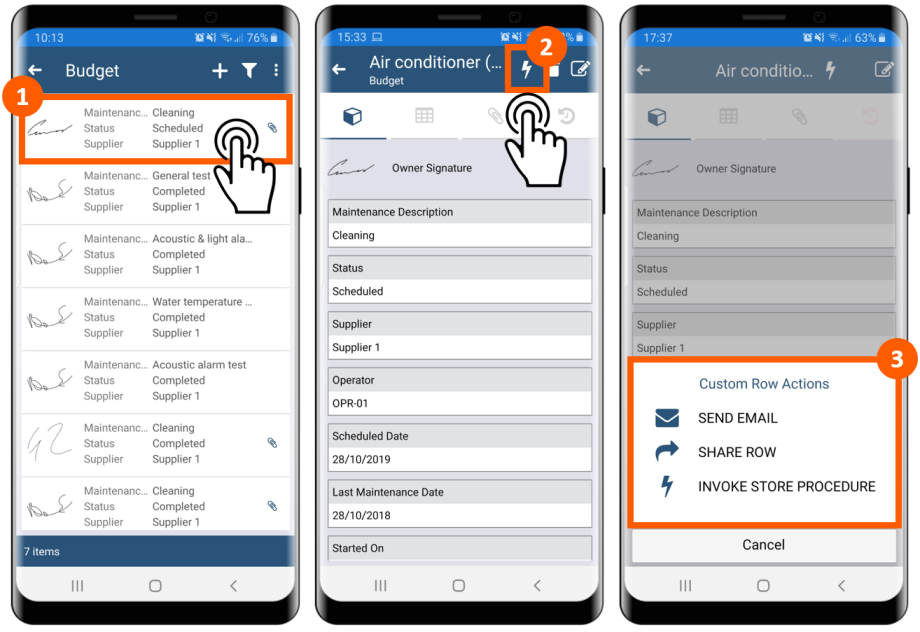
An alternative way is tap on the item (1) and then tap on the bolt icon (2). Then chose one of the Custom Row Actions available (3):
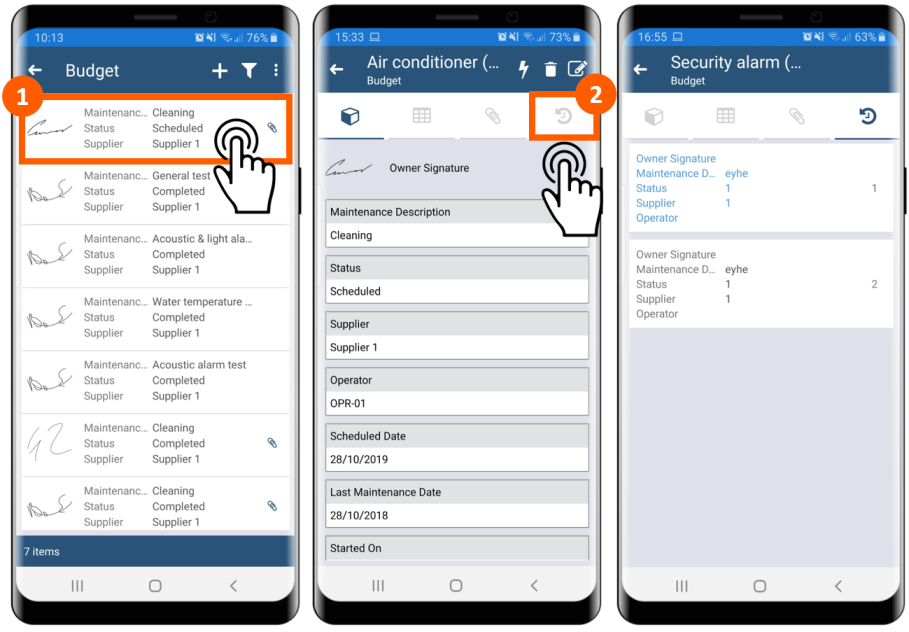
History
To open the History tap on the item (1) and then tap on the history icon (2). In the last page there will be the list of elements changed:
Attachment
To open an Attachment tap on the item (1) and then tap on the paperclip icon (2). In the next page there will be the list of uploaded file (3): tap on them to open preview/download. If you want to upload a file, tap on the plus icon (4) and choose one of 2 different uploading methods:
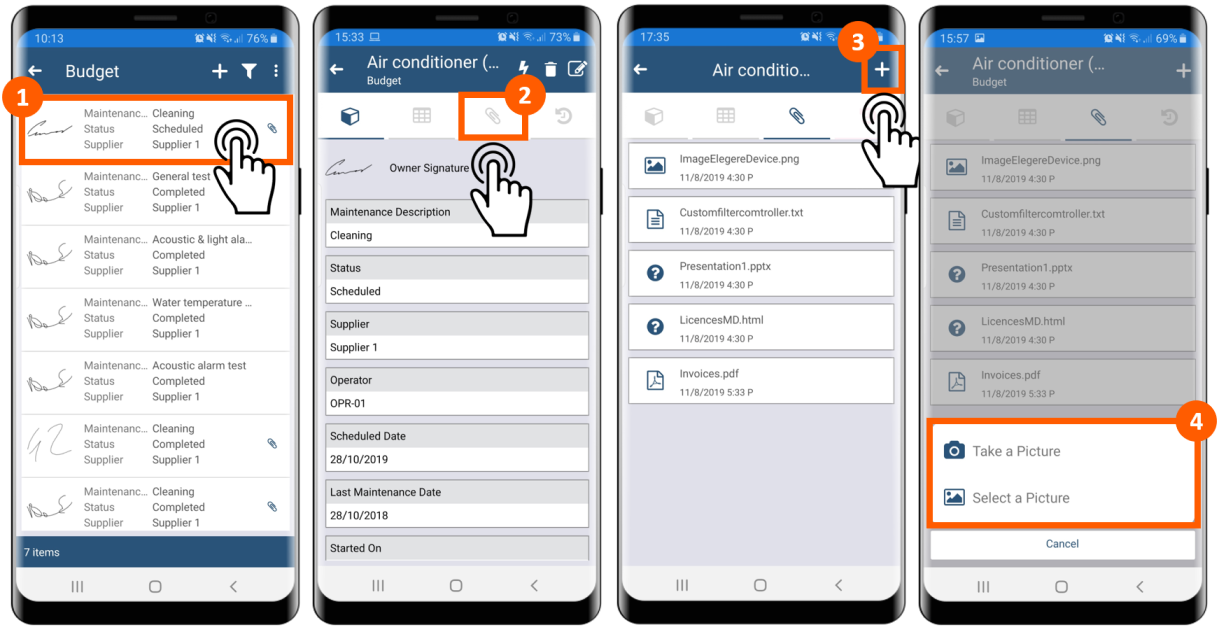
| # | Icon | Description |
|---|---|---|
| 1 | Used to open the devices' camera to upload image | |
| 2 | Used to open the device's gallery or file manager to upload file |