How do I create and manage different Organizations as administrator?
Required Permissions
Using the Instance Manager requires an Instance Admin account. The Instance Admin manages all the Organizations in your eLegere installation.
The Instance Admins can create other accounts in the same role. This document assumes that another Instance Admin has created an account for you. Contact your Instance Admin to receive an account to access the Instance Manager.
Abstract
Introduction to Instance Manager and Instance Admins
eLegere can contain many Organizations at the same time. An eLegere installation is named Instance and contains one or more Organizations.
Check Deploy, License, and Organization Type to know more about the elegere installation set up.
This document teaches you how to use the Instance Manager to create and manage different Organizations in your Instance.
The Instance Manager software enables authorized users to create and view all the Organizations from a single panel.
The Instance Manager requires an Instance Admin account to perform all the actions described in this document. An Instance Admin is a user who has the permission to perform actions related to Instances. An Instance Admin isn't a Delegate nor an eLegere user.
Note
Instance Admins oversee all the eLegere Organizations in your Instance. Instance Admins can access only the Instance Manager to perform the following actions:
- Create the Organizations.
- View an Organization's Workspaces, Users, and its Licenses.
- Create other Instance Admins and manage their credentials.
If an Instance Admin must undertake tasks in any Organization, they must create an eLegere account and request the permissions and roles needed for their tasks.
Warning
Instance Admins can view all the Organizations' information, including Users and Licenses. Verify that only trustworthy users have an Instance Admin account to access the Instance Manager.
Install the Instance Manager
Download the software for your operating system. Follow the wizard to install the Instance Manager on your computer.
Available for:
- Windows
- macOS
Add an Instance to the Instance Manager
Learn how to add an existing Instance to the Instance Manager.
-
Launch the Instance Manager on your computer.
-
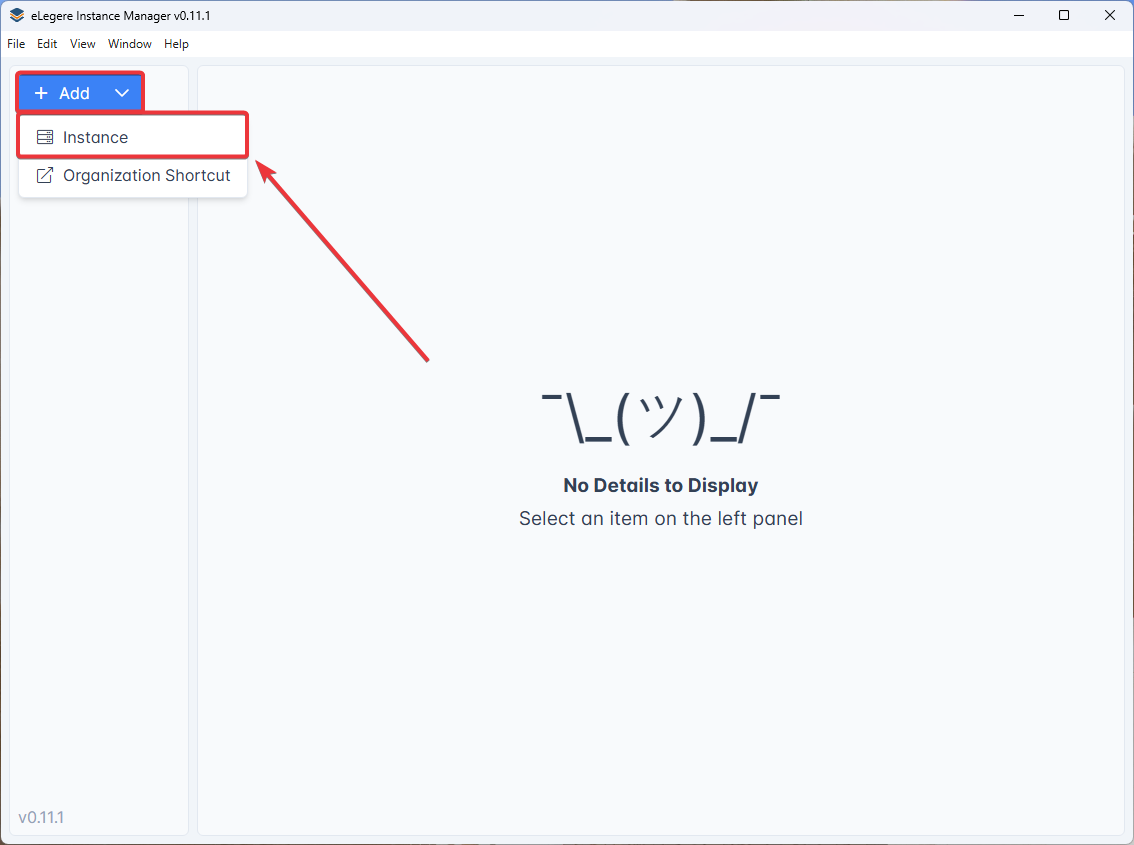
Click on Add e select Instance from the drop-down menu. The action will open the Add Instance window.
-
In the Add Instance window, choose the following information:
- (1) Group: The folder in the Instance Manager in which you can arrange the Instances. (Default Group is the standard one, created during the Install the Instance Manager step.)
- (2) Name: Choose a name to identify the Instance in the Instance Manager.
- (3) URL: Paste here the Instance URL defined by your IT Infrastructure team.

Click Add to complete the action or Cancel to abort.

The Instance just added will appear in the selected Group on the left sidebar.
Instance Navigation in the Instance Manager
Learn how to manage an eLegere instance.
In the Instance Manager you can select an Instance to create and manage its Organizations and Instance Admins.
-
Click on one of the Groups available, then on the Instance you want to manage.

-
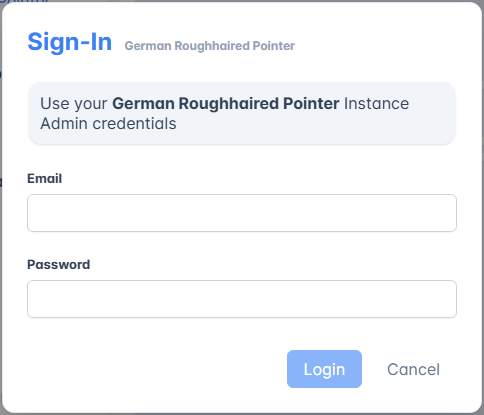
Log in with your Instance Admin credentials.
A panel displays the Instance information:
- The Instance URL to access from a browser. (Hover over the URL and click on the icon to copy the URL. Click it to access the Instance.)
- The eLegere version currently running on the Instance.
- The tabs leading to three sub-menus: Organizations, Admins, and Service Health.

Organizations Panel
In Organizations, you can manage the Instance Organizations.

You can search and sort the Organizations in the menu by alphabetical ascending and descending order.

Also, you can perform the following actions by clicking on the icons listed below.
- Click on the icon on an Organization entry to open its Home in your browser.
- Click on the icon to copy the Organization URL.
- Click on the icon on an Organization entry to open its Organization Manager.
Clicking on an Organization's name opens a subpanel listing all its Licenses, Workspaces, and Users.

The Organization's details report the following information:
- Core License's activation date and expiration date.
- The User Licenses purchased and used.
- The Application Licenses purchased and used for each type.
- Summary of Workspace Licenses and all the additional options purchased (Loard Balancer and Mobile modules).
- Clicking on this tab shows the Users' list.
- This tab displays the list of Workspaces. The related link opens in the browser.
- This tab displays all Applications. The related link opens in the browser.
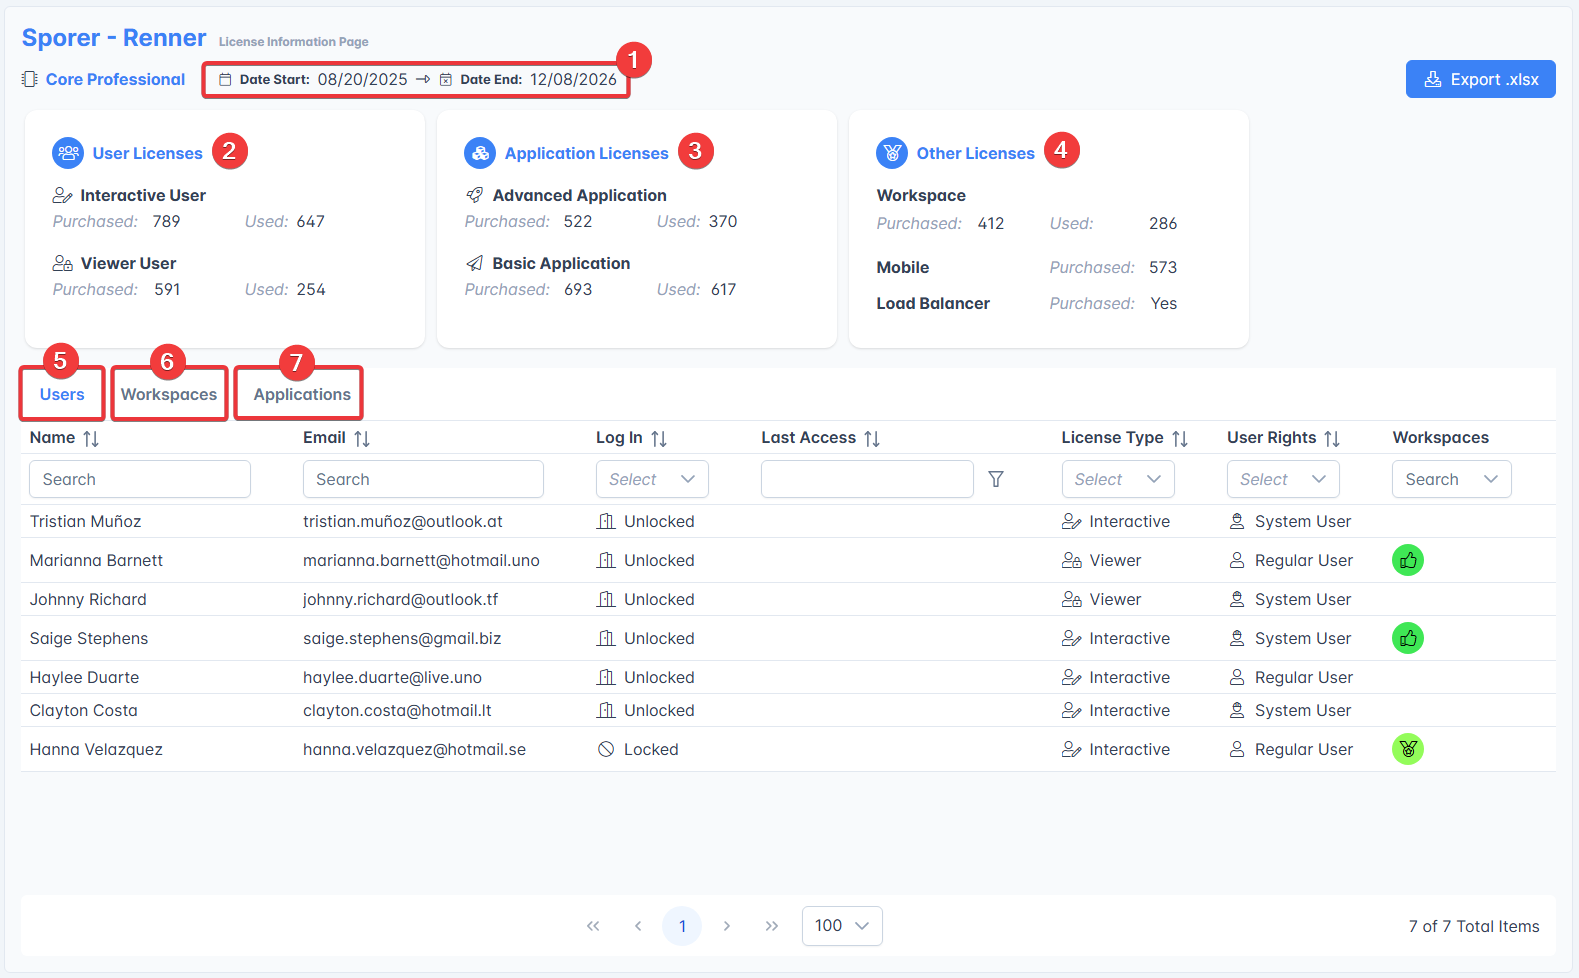
If you click on the Export .xlsx button, you can export such information in an Excel spreadsheet.

Admins Panel
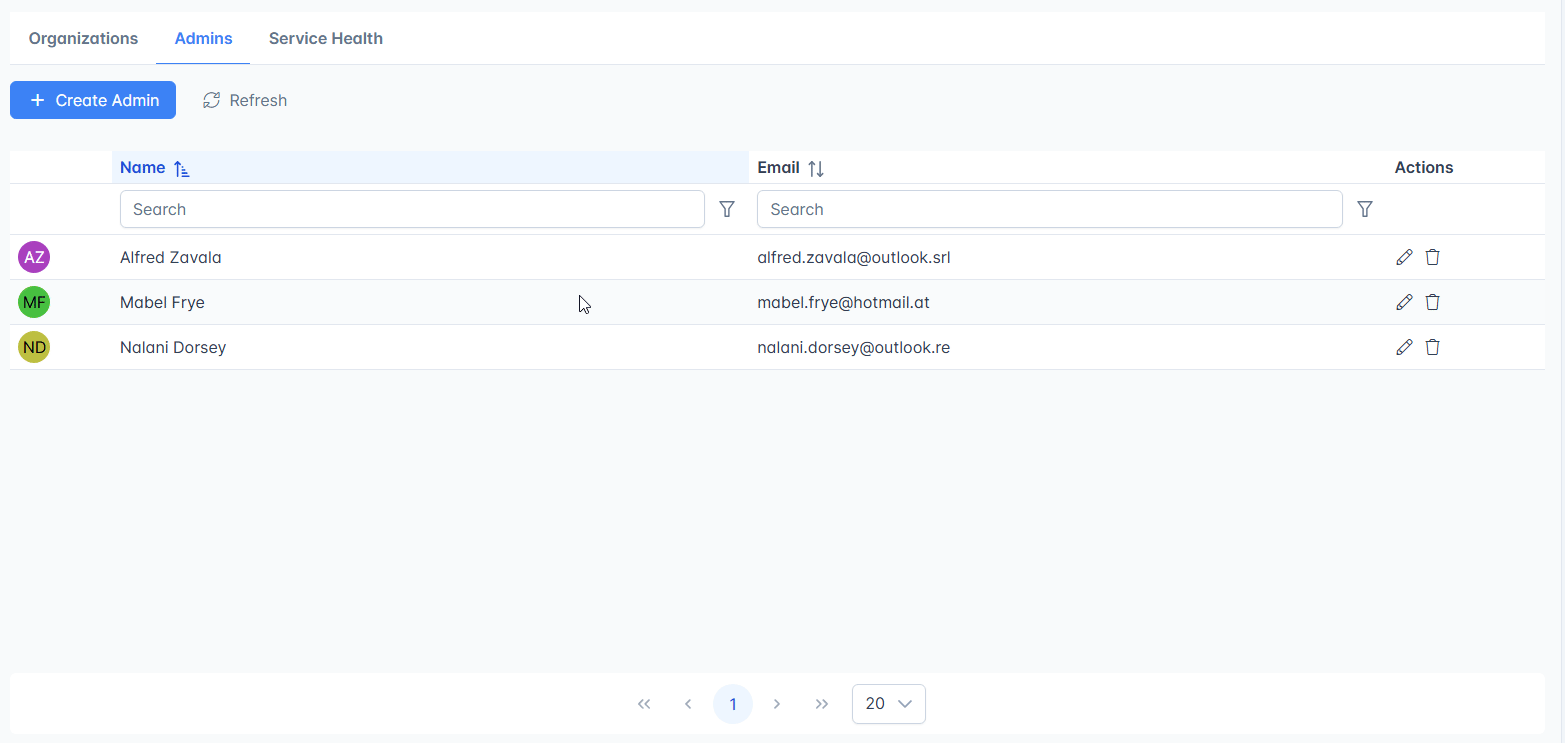
In Admins you can add new Instance Admins to the current Instance.
You can search by Name and Email the desired Instance Admin and sort them by alphabetical ascending and descending order.
Tip
For both Organizations and Users, you can define the search criteria by clicking on the icon and selecting one of the filters available from the drop-down list. (Click on No Filters to remove any filter.) The criteria apply to both Name and Email.

Service Health Panel
The Service Health Panel enables you to monitor the health status of all your services.
In this panel you will see a list of your instance's services, and a column for every node where the services are running.

Next to each service you will find a green icon if the service is running correctly, or a red icon if the service stopped working.
eLegere monitors the health status of each service every minute. You can see the date and time of the last update above the Service list.
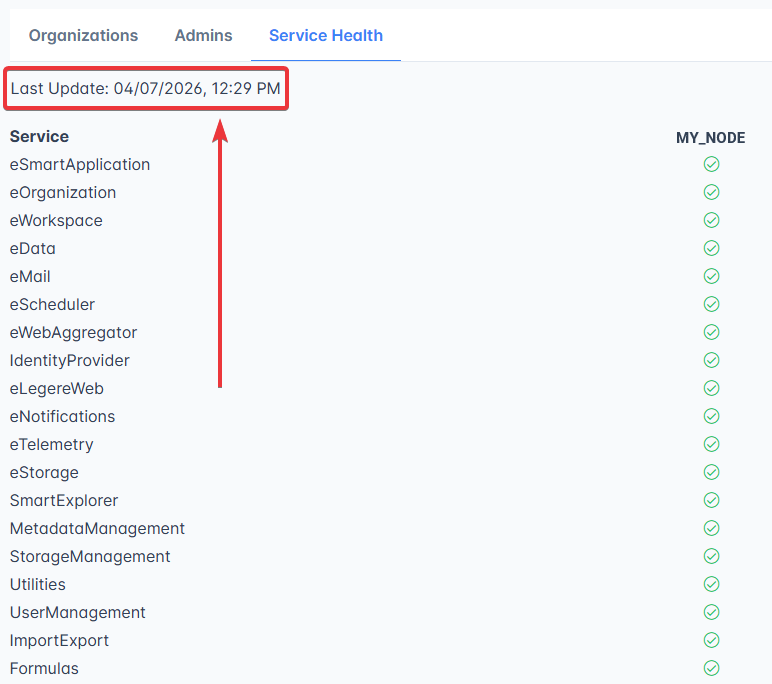
When an error occurs you will see a notification, and a red banner with the number of nodes involved will appear next to the Instance's name.

Add a New Organization
Follow the steps below to create a new Organization in the selected Instance.
-
Click on one of the Groups available, then on the Instance you want to manage.

-
Log in with your Instance Admin credentials.
-
Click on Create Organization. The action opens the Create Organization window.

-
Choose (1) a name for the Organization and (2) the Organization identifier in the URL.

Then click on Next.
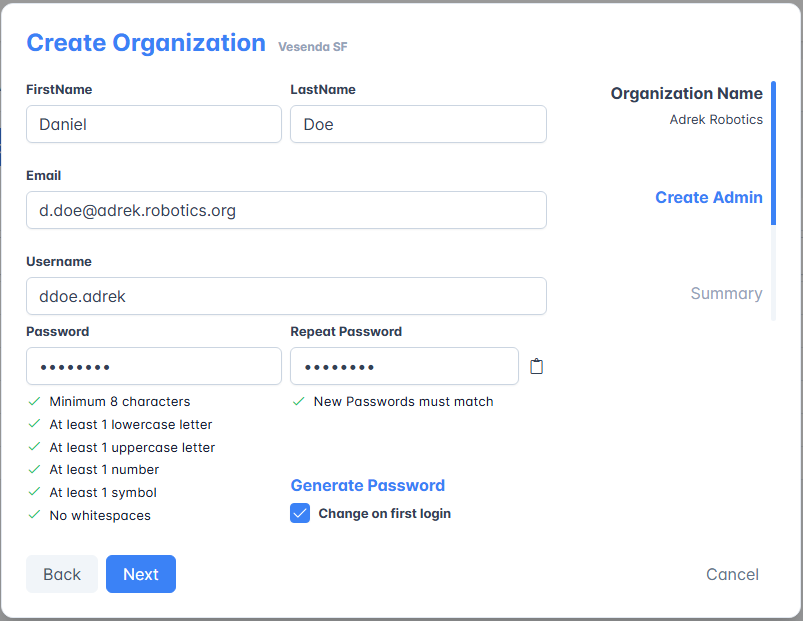
-
Create the first Admin Delegate who will manage the Organization. Type the first name and last name, email, and choose a password. (You can generate and copy a password by clicking on Generate Password, then on the icon.)
Click on Next once you've completed the form.
-
Verify that all the info is correct in the Summary. Click on Create to complete, Back to go back to earlier steps, or Cancel to abort the action.
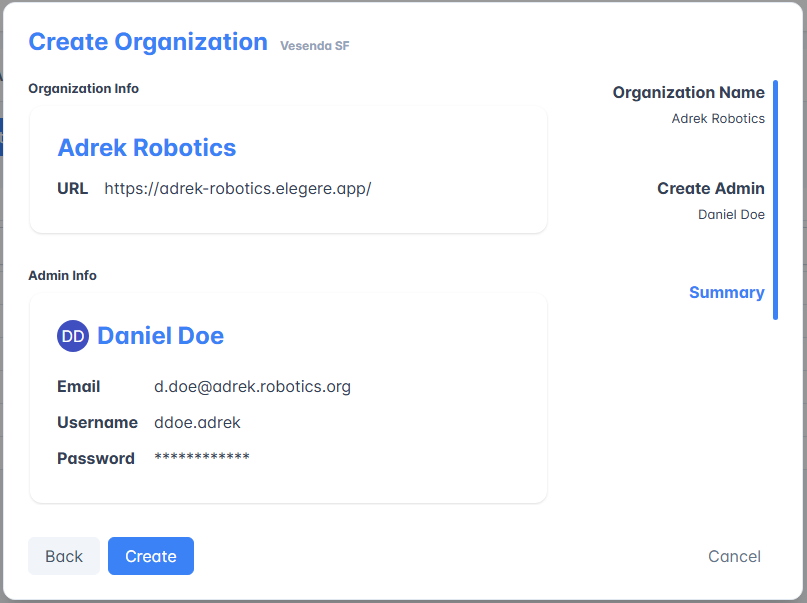
Wait for the creation. The Organization will then appear in the Organizations tab list.
Success
You've created a new Organization in the Instance through the Instance Manager.
Follow the steps below to create a Shortcut in the left sidebar to a specific Organization of one of your Instances.
-
Click on Add and select Organization Shortcut from the drop-down menu.
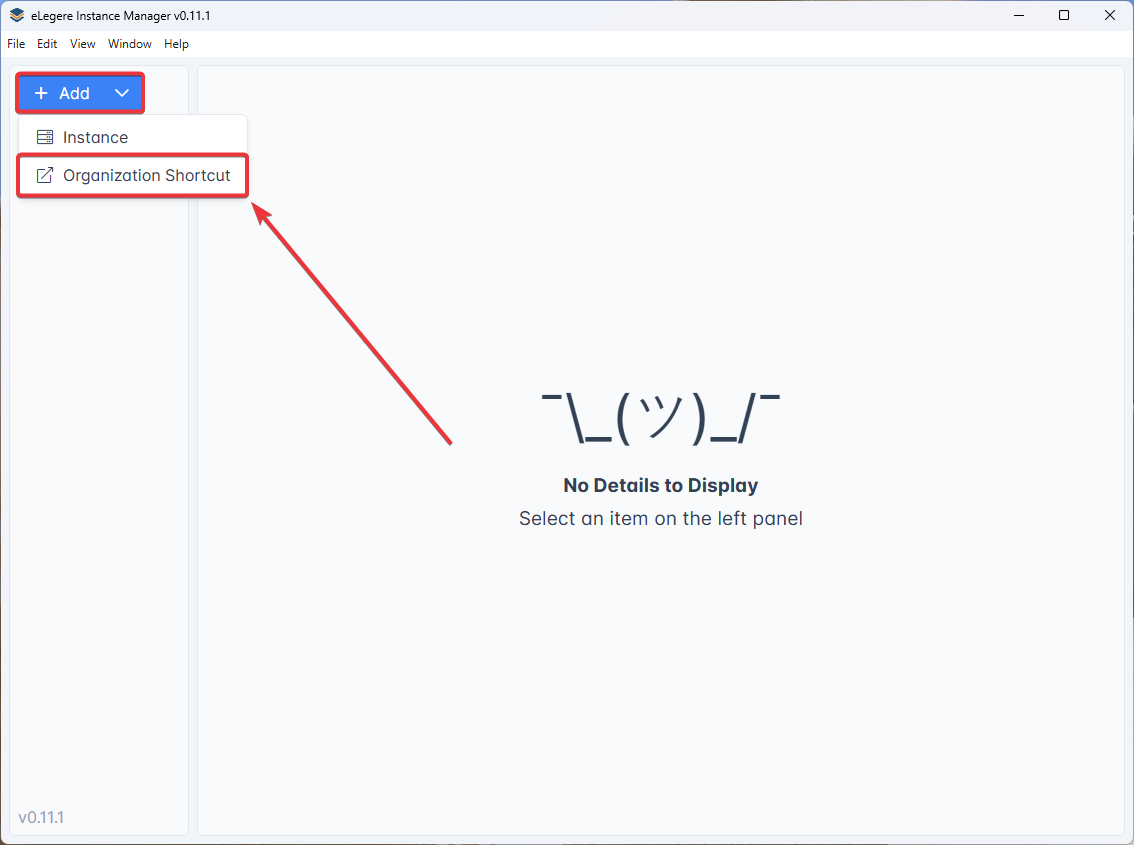
-
Fill the fields with the needed information:
- (1) The Group where you want to place the Shortcut.
- (2) The Name of the Organization.
- (3) The URL of the Organization.

The Shortcuts will appear in the left sidebar, just under the Instances list.

Success
You've created a new Shortcut for one of yours Organizations in the Instance through the Instance Manager.
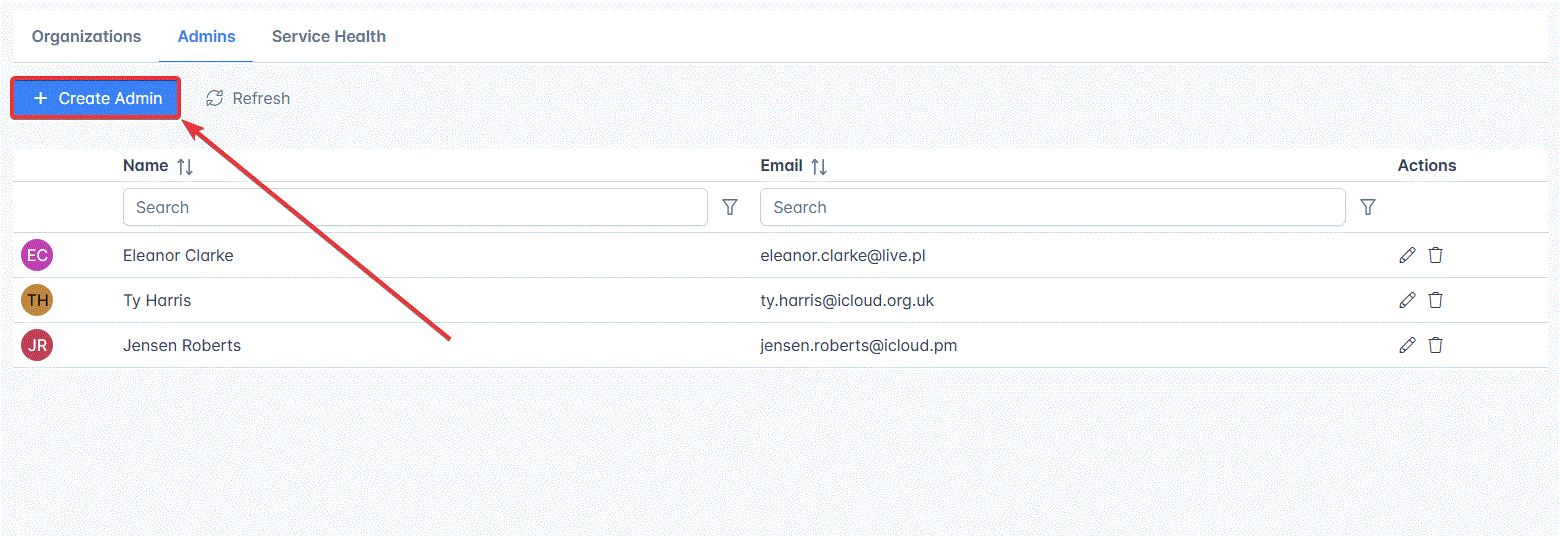
Add a New Instance Admin
Learn how to add a new Instance Admin to your Instance.
-
Click on one of the Groups available, then on the Instance you want to manage.
-
Log in with your Instance Admin credentials.
-
Click on the Admins tab.

-
Click on Create Admin. The action opens the Create Admin window.
-
In the Create Admin window, type the first name and last name, email, and choose a password. (You can generate a password and copy it by clicking on Generate Password and then on the icon.)
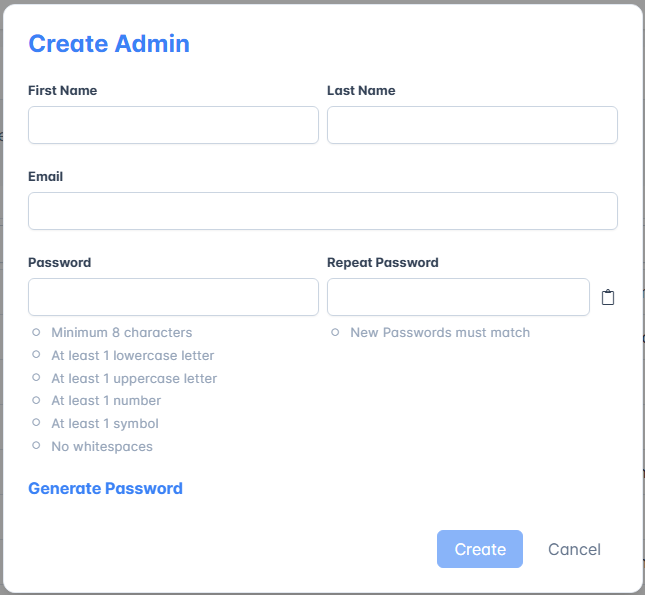
Click on Create to complete the action or Cancel to abort.
Success
You've created a new Instance Admin for your Instance through the Instance Manager.
Edit or Delete a Current Instance Admin Account
Learn how to edit or delete an Instance Admin in your Instance.
-
Click on one of the Groups available, then on the Instance you want to manage.
-
Log in with your Instance Admin credentials.
-
Click on the Admins tab.
-
Identify the Instance Admin account to be edited or deleted in the list. Click on the icon to edit their account or click on the icon to delete them.
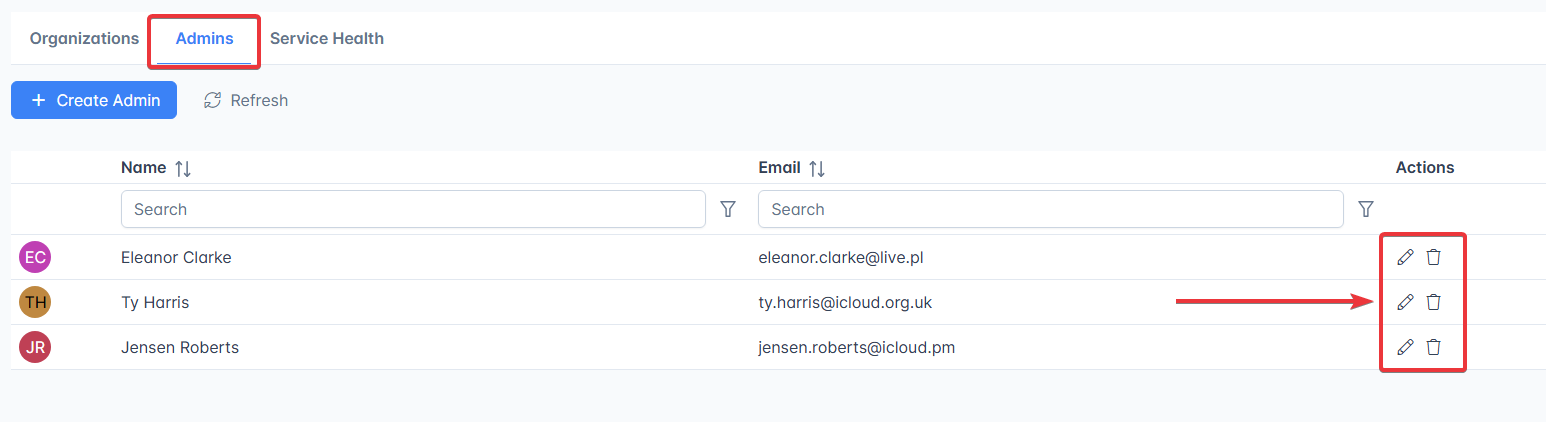
Update Admin
Click on the icon to edit an Instance Admin account.
In the Update Admin window, change the first name and last name, email, or choose a new password. (You can generate a password and copy it by clicking on Generate Password and then on the icon.)
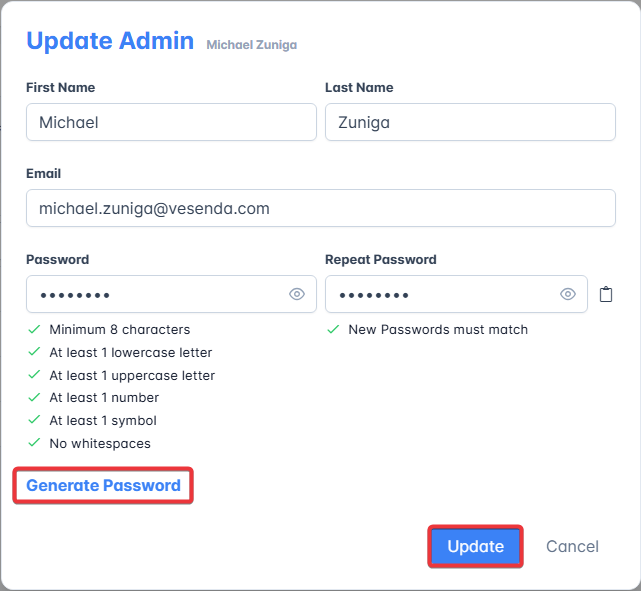
Click on Update to complete the action or Cancel to abort.
Delete Admin
Click on the icon to delete an Instance Admin account.
A window will request confirmation before proceeding.
Danger
If you delete an Instance Admin account, you won't be able to recover it after the deletion. Be sure before confirming.
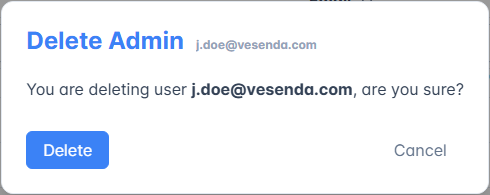
Click on Delete to confirm or Cancel to abort the action.
Success
You've successfully edited or removed an Instance Admin account from the Instance.