Organization Quick Start
Question
Before reading this document, learn what is an eLegere Organization and a Delegate from the Admin Guide's Introduction. The Organization Quick Start assumes these two concepts.
Abstract
This is a quick start to teach you the basics of how the Organization Manager works in eLegere. The quick start explains the Organization Manager's panel through the example of a Delegate who must boot the Organization for the first time.
The Organization Manager enables the Delegate to create Users, Workspaces, edit settings like email servers, authentication services or databases, and redeem the Licenses required for eLegere to work.
If you read this quick start, you've probably been tasked to be a Delegate. If you don't have any sort of Delegate permission, you can't access the Organization Manager.
The Organization Quick Start assumes that it's a newly created Organization and you've obtain the Admin Delegate role from who has configured the Organization for you.
Let's suppose you'll start from scratch. You have the credentials and your provider supplied you a License key to activate the Organization.
Note
This Organization Quick Start assumes for the sake of the example that you've the Admin Delegate role. (It's one of the Delegate roles enabling you to use the Organization Manager.) The Admin Delegate can view and access all the Organization Manager's subpanels and features without restrictions.
The other Delegate roles can view only certain Organization Manager's subpanels according to their tasks. For example, the Users & Workspaces Delegate permission unlock only the User and Workspaces subpanels while the Licenses & Billings Delegate can access only the License panel.
The Admin Guide's Introduction explains who is a Delegate and the different sort of Delegates available in an Organization. Please, check the document before proceeding.
How to Access the Organization Manager
The first step is accessing eLegere with your credentials. Insert the credentials you've received.
At the first login, you'll see the message below.
Note
Usually, users can't access an Organization without a Core License nor User Licenses. Only Delegates can still access eLegere to redeem a Core License in the Organization Manager.
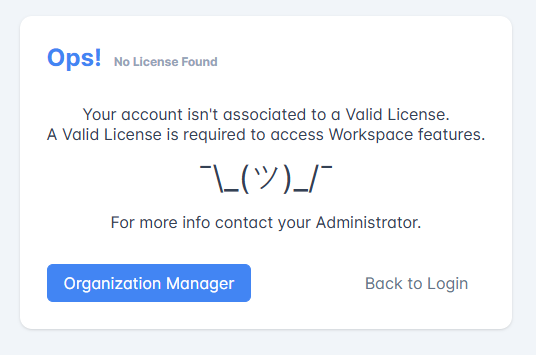
Both the Organization you're logging into and your user account don't have a License yet. You must access the Organization Manager and redeem the Core License from the key you obtained. The Core License will enable the Organization.
Click on the Organization Manager button. The action leads to the panel where you can activate your Core License.
Redeem a Core License and Boot Your Organization
You've accessed the Organization Manager.

First of all, you must redeem the Core License to activate your Organization and undertake your tasks as Delegate. You can't do much in eLegere without having enabled the Core License first.
In the Organization Manager, click on Licenses in the left side taskbar. (Don't worry! After having redeemed the License, the quick start will provide an overview of each subpanel. Let's focus now on activating the Core License.)

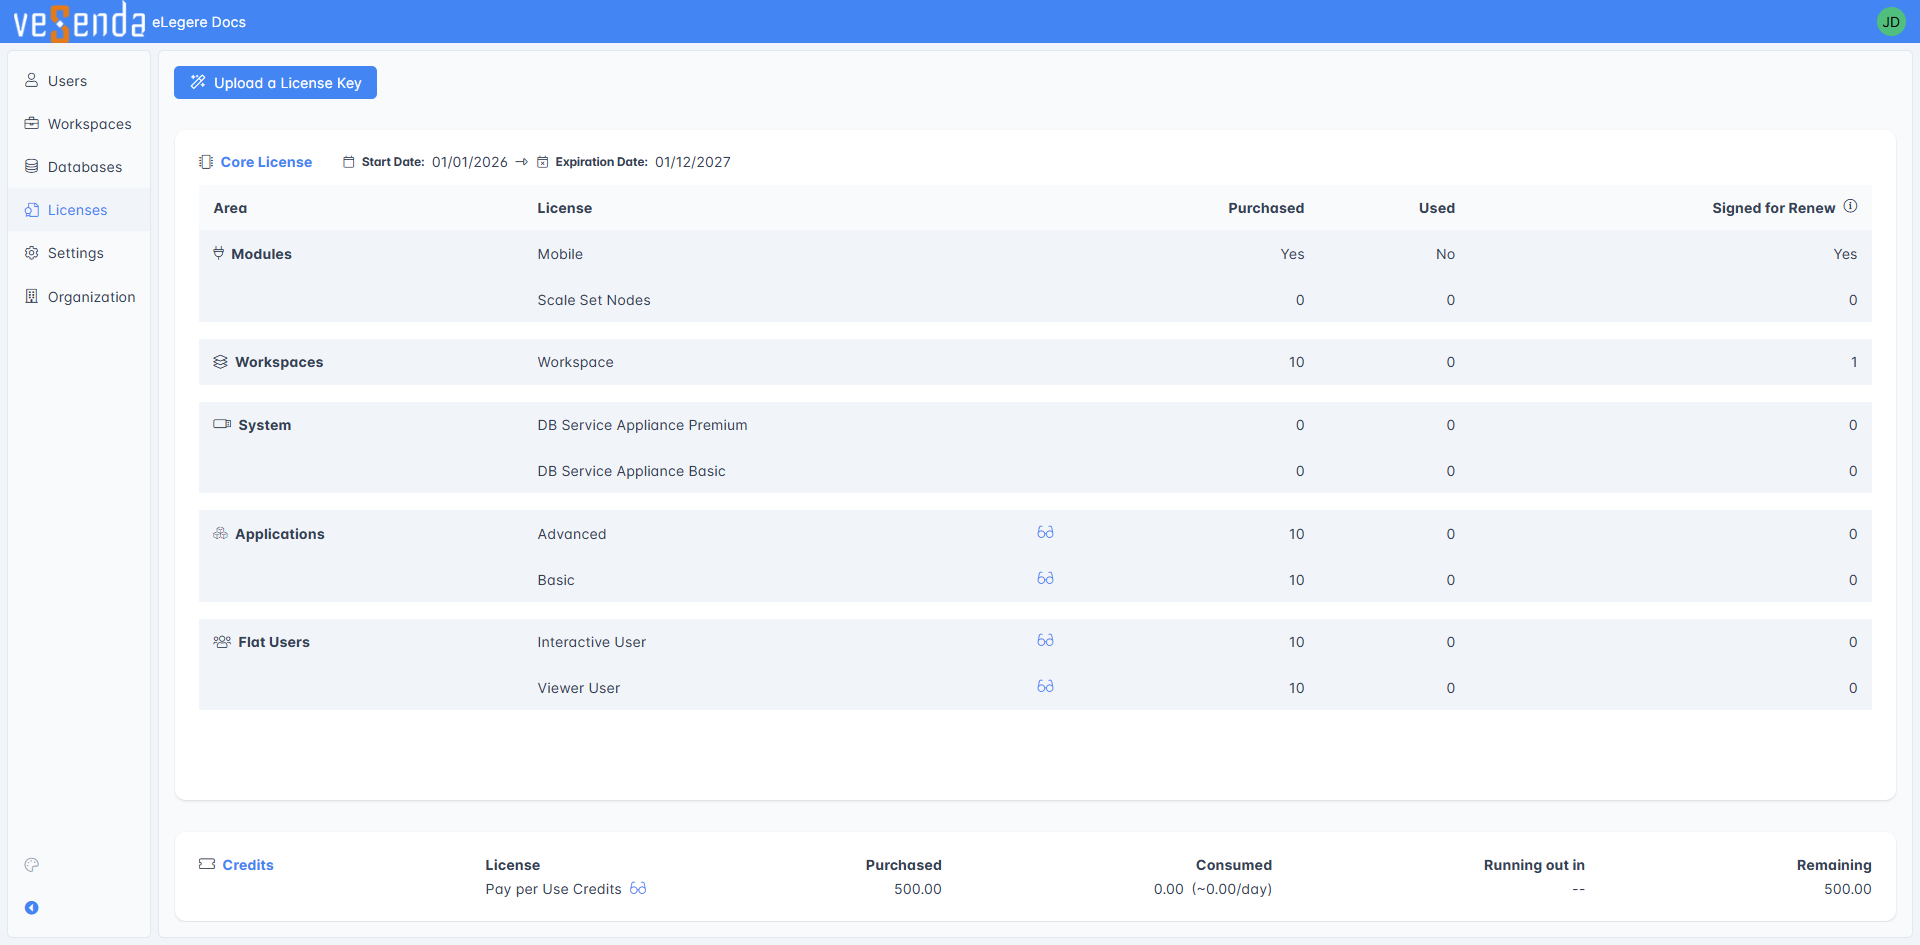
In the License subpanel, you should see the following situation.

Click on the Upload a License Key.

Drag & Drop the License's key file in your browser's window or select from your operating system's file explorer.
Warning
Verify that the table lists other resources besides the Core Licenses that you've bought from your provider. Once redeemed, the process is irreversible and the key expires. (In case the Licenses aren't enough, you could still add a further license later to increase the current amount.)

The Core License enables the Organization but it requires further Licenses to create users with unlimited actions available, credits to enable pay-per-use actions, create Workspaces, design applications, enable the applications' Mobile versions, and acquire database storage's space.

The other sorts of Licenses that the key should add are the following:
- The Mobile option to use the applications with the eLegere Mobile Application for iOS and Android.
- The Scale Set Nodes option to distribute the Organization's traffic among multiple nodes of the eLegere's installation. (It's a infrastructure tool managed under the hood, there aren't any actions you must undertake. If available in the License, it'll be enabled automatically.)
- The Database determines your Organization's database space and availability. (According to the Core License enabled, there could be differences in some features related to the database.) By default, when you start a new Organization, you've a 10 GB Common DB that you can upgrade later with further Databases.
- The Viewer User licenses enable users to access eLegere in read-only mode.
- The Flat User licenses enable users to access eLegere and perform any standard action.
- The Workspace licenses to enable the Workspaces in your Organization.
- The Basic and Advanced application slots to activate applications and make them available to the users in a Workspace.
- The Credits that you can assign to each Workspace. Users using pay-per-use options will consume Credits for each action.

Click on Confirm to redeem the key.

The Licenses subpanel provides a real-time overview of the resources redeemed through the key and what remains in the pool.
Tip
Check How many Licenses and Credits do I have still left? for more information about how the License panel work and what information you can read.
When you assign a License (Users, Workspaces, and application slots), you can check whether the Organization Manager should renew it automatically or not in their respective menus.
The subpanel reports when the Licenses will expire and how many the Organization Manager will renew automatically.

Success
You have activated your Organization's Core License. Now, you're free to add users, create Workspaces, and design applications in your Organization.
The next subsections cover:
- An overview of each Organization Manager's subpanel.
- How to add users to your Organization.
- How to set up your first Workspace: the sandbox where Designers can design applications and users can use them in their workflow.
- How to set up an email service to send email notifications and warnings.
- Assign the Delegate role to another user.
What Delegates Can Do in the Organization Manager?
You've finally redeemed your Core Licenses and the rest of the resources required for the Organization to work (e.g. application slots, Users licenses, Workspace licenses, and credits).
Let's have a general overview of what the Organization Manager can do for you! At each step of the quickstart, you'll configure one of the following Organization's features:
- Users and their Licenses.
- A Workspace.
- Layout, Authentication, and Email Server.
- Assign the Delegate role to another user.
This will help acquiring familiarity with the Organization Manager.
You can access each subpanel through the sidebar on the left.
Users
The Users panel manages everything related to user management: adding, editing, blocking or deleting user accounts.

It has the following subpanels:
- Users lists all the users in your Organization and you can search them.
- Access Requests manages all the requests of access through different authentication systems.

Note
From eLegere Scuropasso 3.0, Workspace Admins don't create users accounts in their Workspaces: a Delegate in the Users panel adds users to an Organization, then the Workspace Admins add them to their Workspaces.
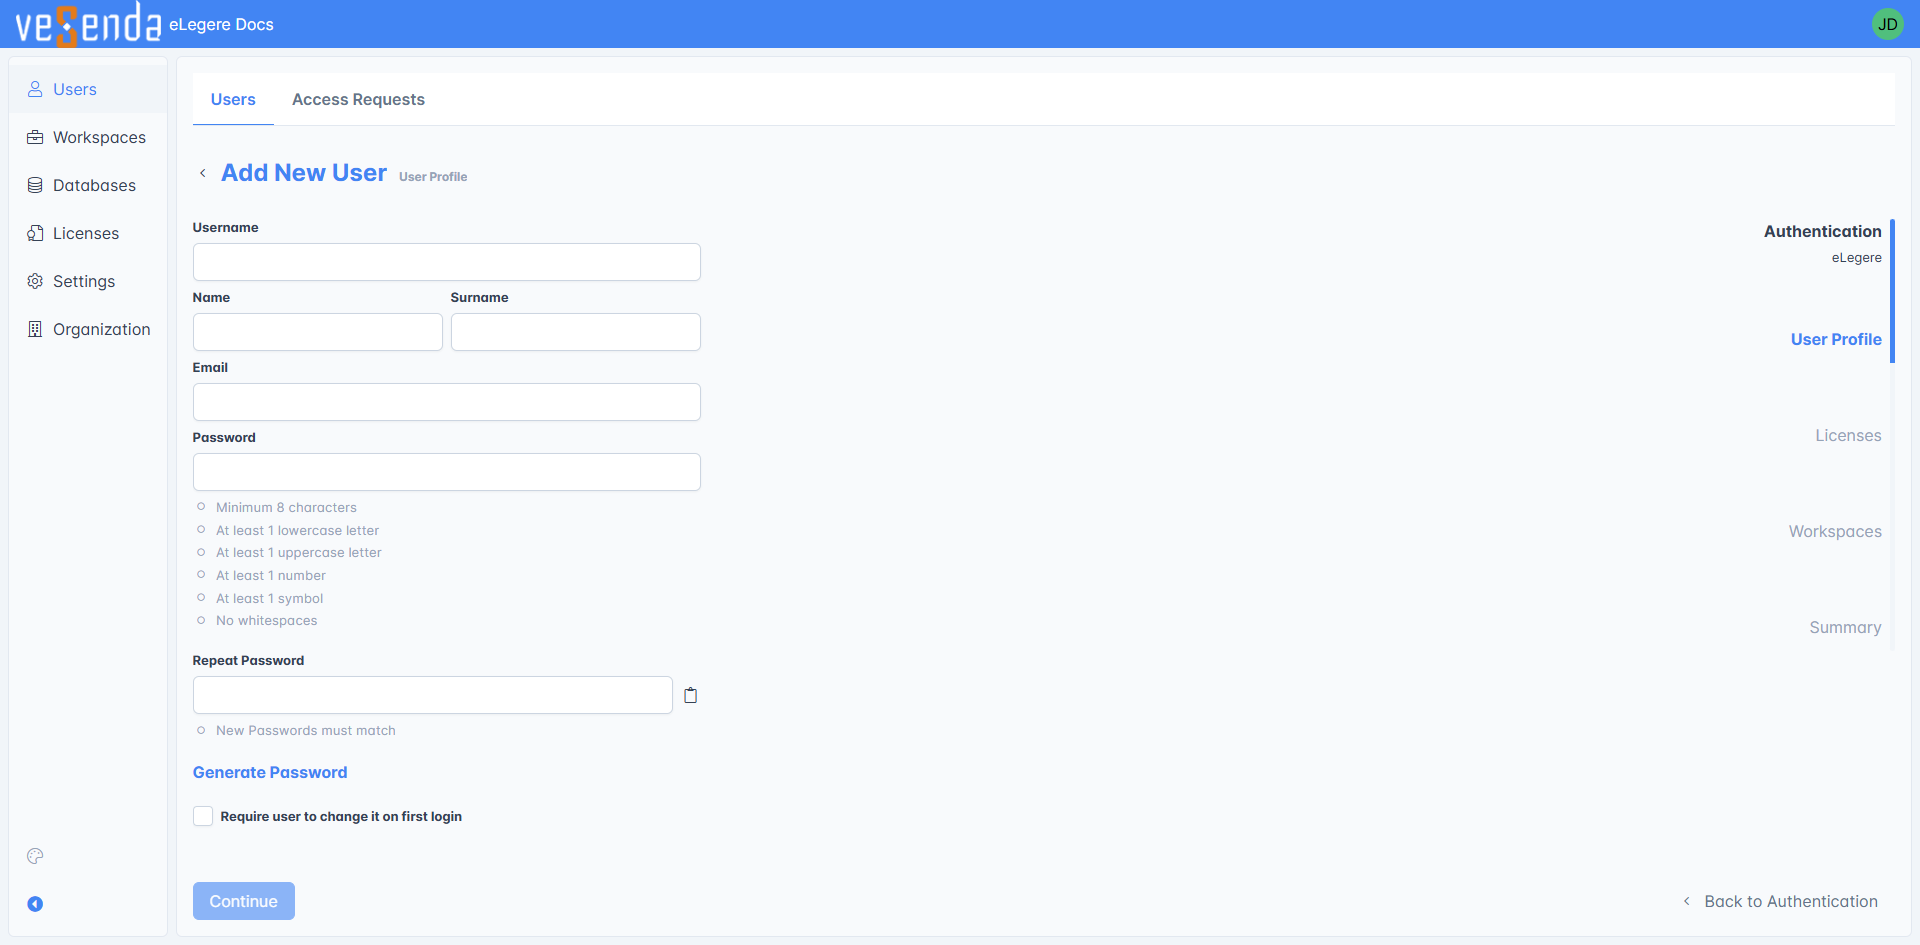
Click on Create User. The action opens the wizard where you can add new users.

Fill the form with the required information and click on Continue.
Click on the Licenses you'd like to assign to the user, then on Continue.

You can add the user to a Workspace. For now, skip this stage (you'll do it while creating a new Workspace) by clicking on Continue.

Complete the user account's creation by clicking on Create User at the last summary step. (If there's something wrong with the info or you changed your mind, click on the Back to... button to return one step back in the wizard.)
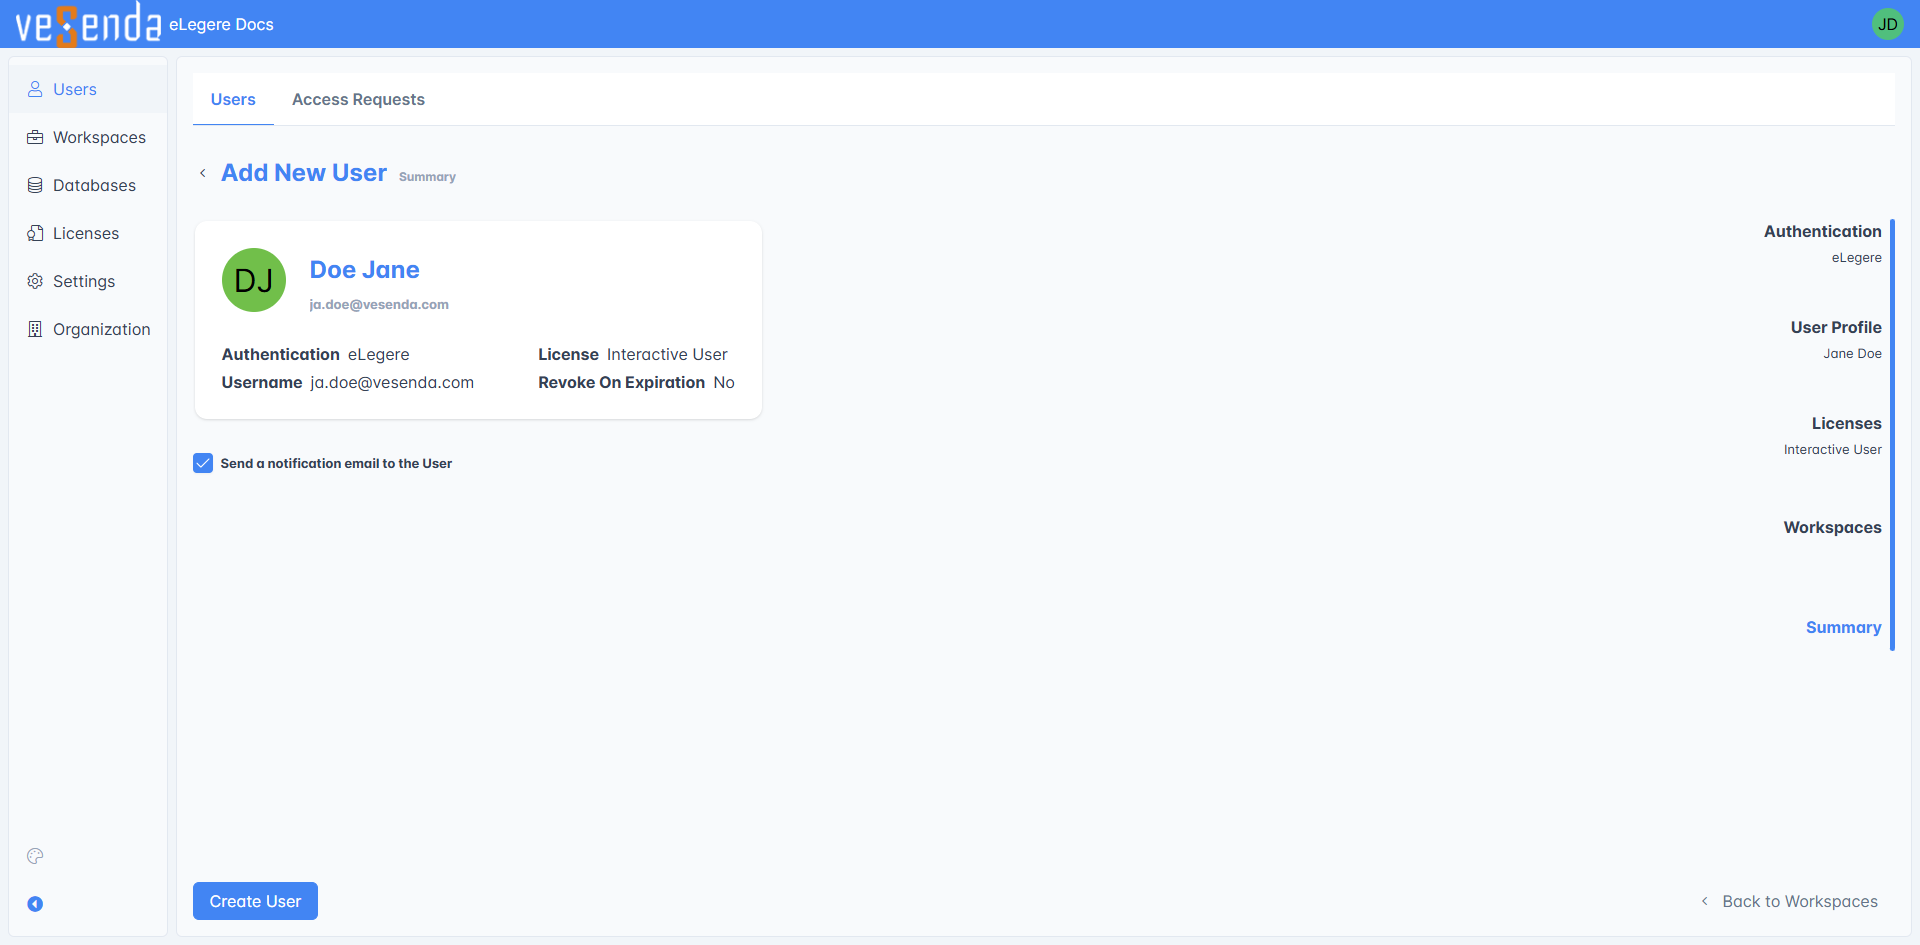
The user account will appear in the list.

Repeat the steps for each user you want to add.

Question
Check for more information about creating and managing users:
Success
You've added your first users to the Organization.
Workspaces
The Workspace panel manages everything related to Workspaces: creation, editing, and deletion plus their apps and users.
It's time to create a Workspace and add some users to it. Click on Workspaces in the sidebar.
The panel summarizes all the Workspaces available in the Organization. There'll be none since you're going to create the first one.
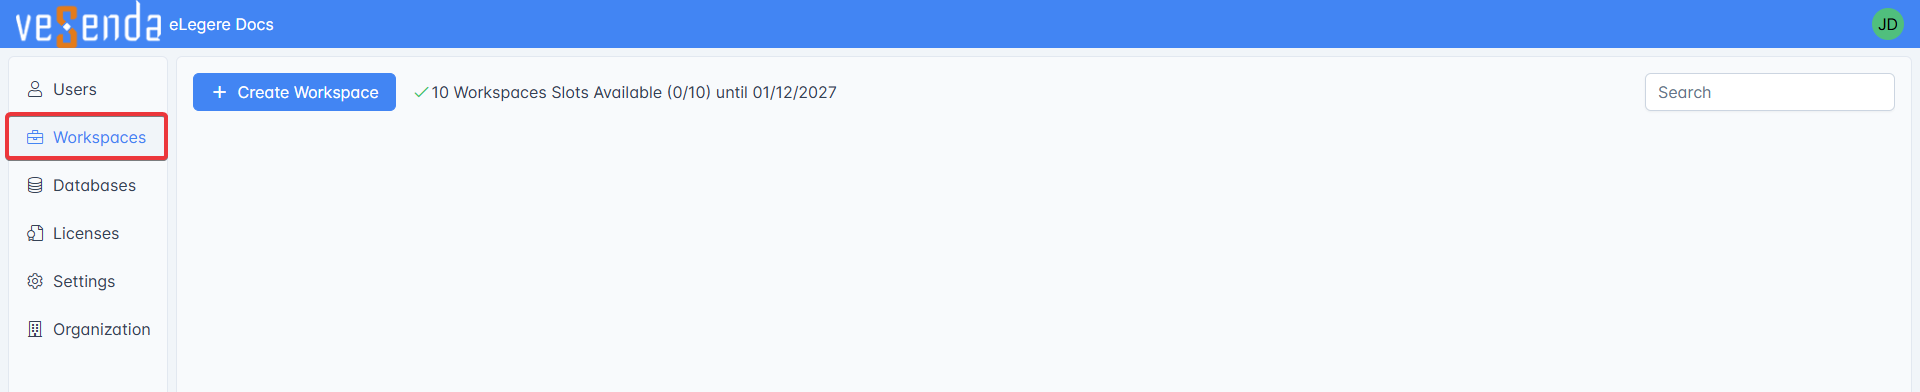
Click on Create Workspaces to proceed.
Warning
Creating a Workspace requires assigning a Workspaces License. If you don't have enough Workspace Licenses in your Organization's pool, you can't create Workspaces.

The first step is choosing a name, an icon, a color for the tile, and an optional brief description.
Provide the information, then click on the Continue button.

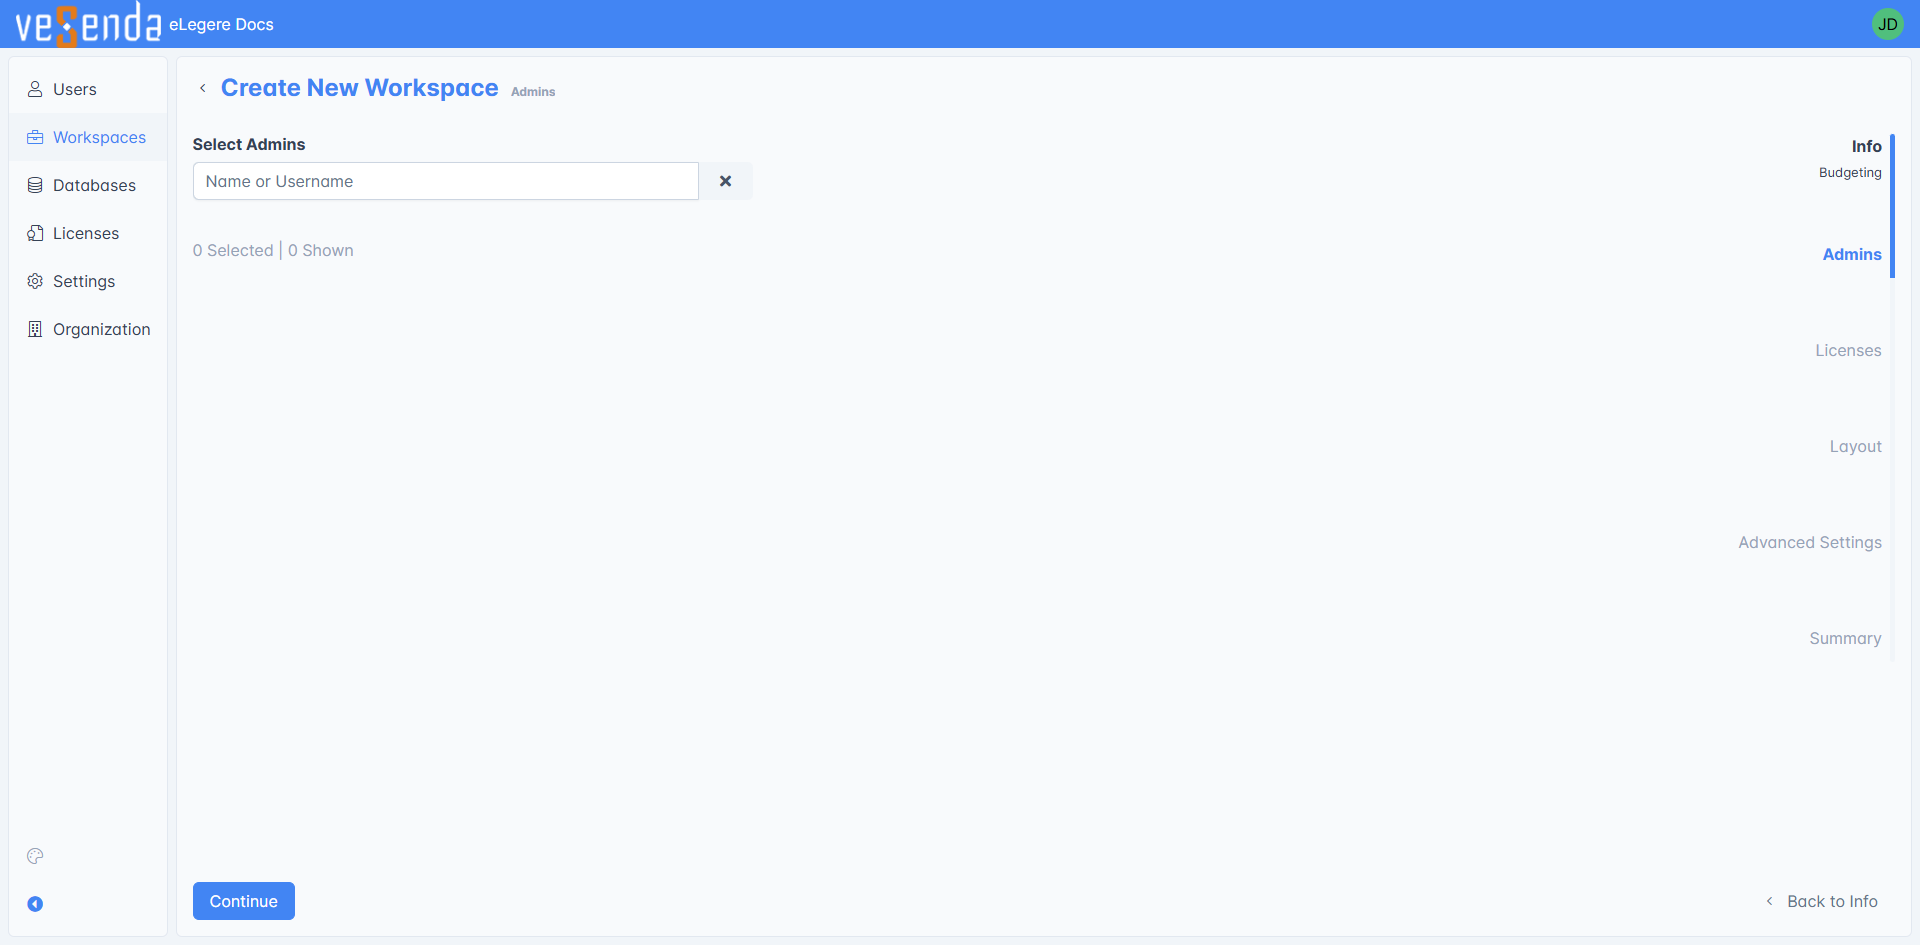
At the next step, you should select a Workspace Admin: the administrator that will manage all the users and applications in the Workspace. You can still choose a Workspace Admin later if you're undecided.
Type either a name or an email, then click on one of the results from the users' list.

Click on Continue to proceed to the next step.
At this stage, you should assign applications slots and Credits from the Organization's pool to the Workspace. If you prefer, you can still assign application slots and credits at a later time.
Note
Applications in eLegere 3.0 Scuropasso now require an application slot to work. Any application without application slots will run Trial Mode: Designers can customize and launch them, but the Workspace's users can't view them.

Type the quantity of application slots and Credits you want to add in the textbox. (Click on Undo in case you changed your mind and you want to add a different quantity.)

Click on the Continue button to the next step.
In the Layout step, you customize the appearance of this Workspace. Avoid customizing the Layout at this stage and click on the Continue button. You will customize the general Layout for all the Workspaces when you'll change the configurations in Settings later.
Note
If you customize the Workspace's Layout, the choice overrides the configurations made in the Organization's Settings. For the purpose of this Quick Start, you'll customize only the Organization's Layout that will be applied to all the Workspaces. Nevertheless, the procedure to edit a Workspace's setting is the same.

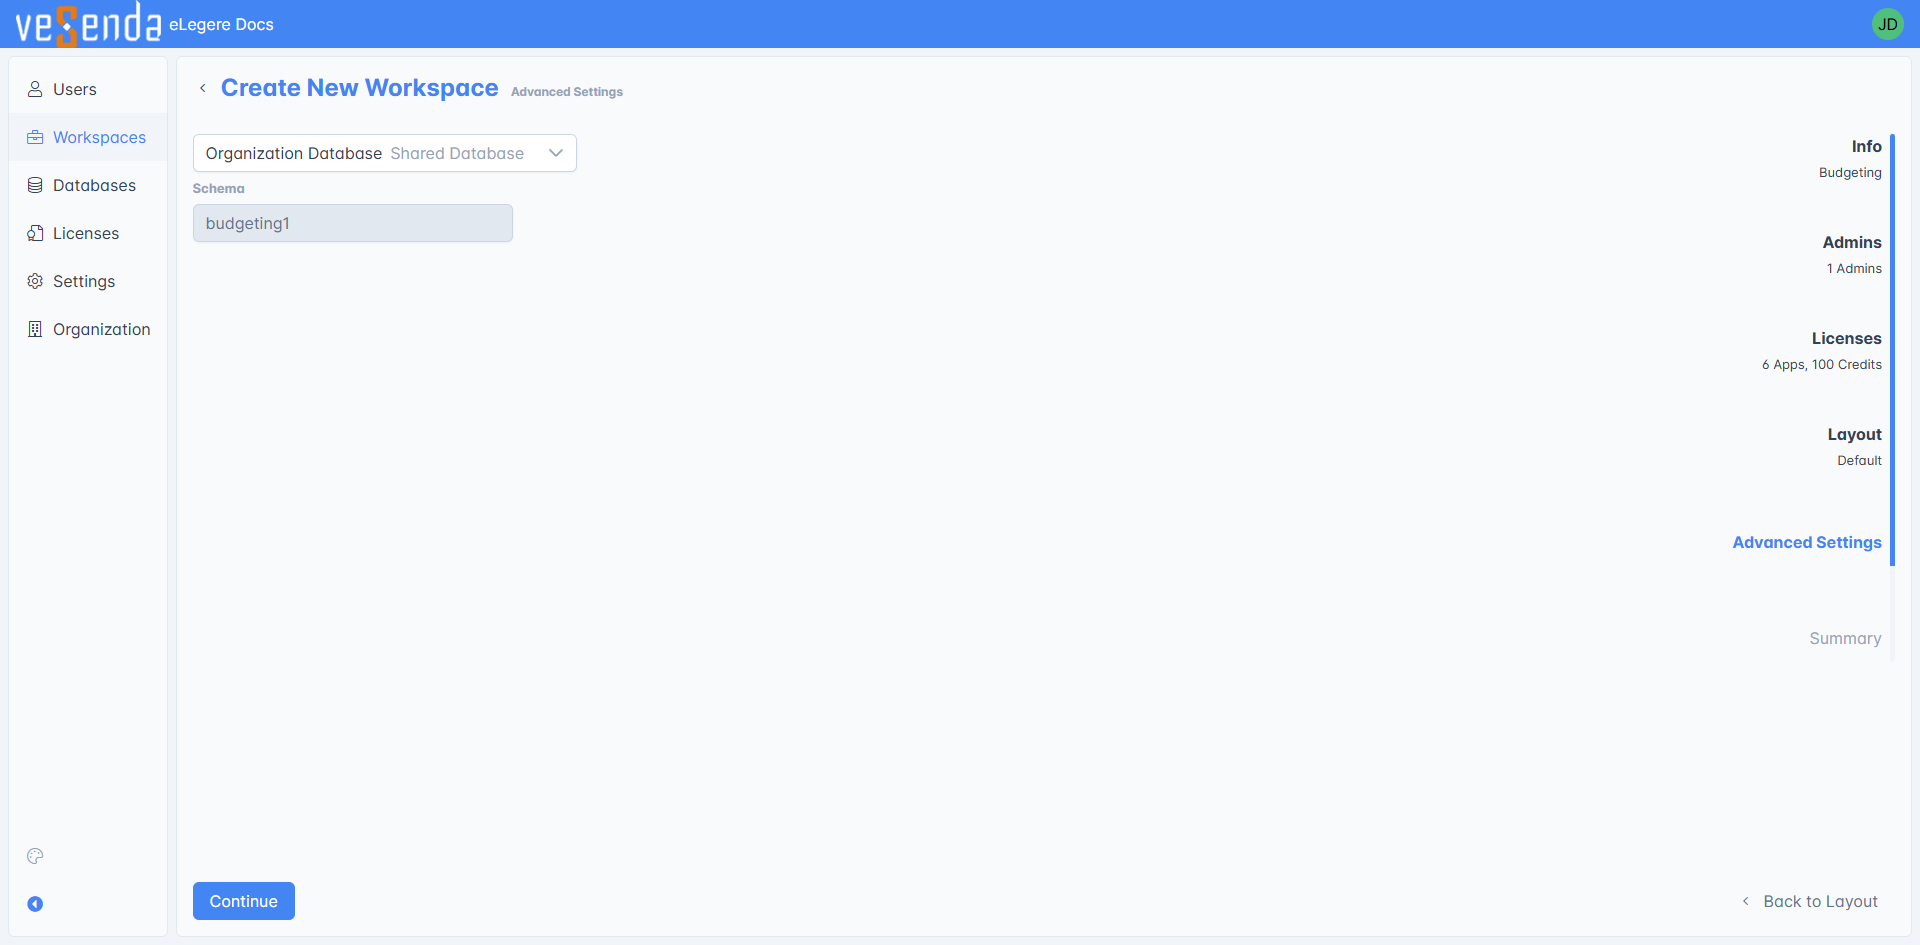
Accept the recommended Database and schema for this Workspace. Unless you know what you're doing, accept the default settings and click on Continue.
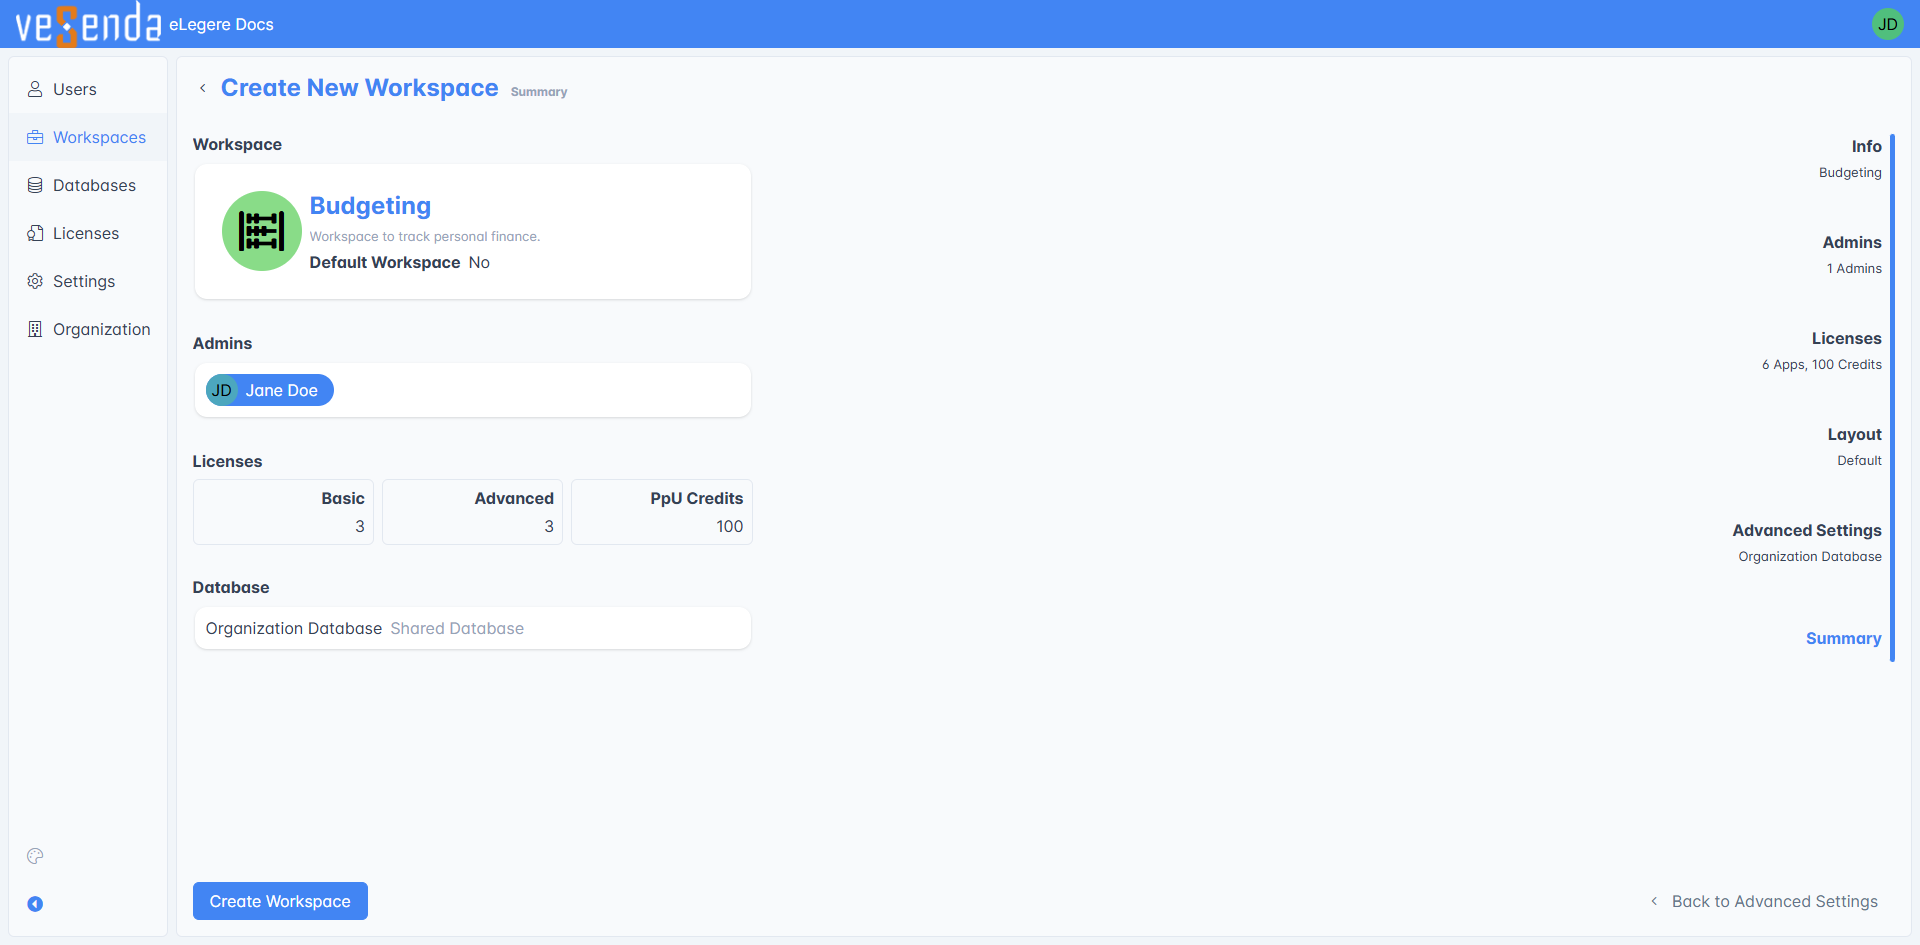
The last step is the creation's summary. Check whether all the information is correct. If so, click on the Confirm button to complete the creation. (If there's something wrong with the info or you changed your mind, click on the Back to... button to return one step back in the wizard.)
Question
Check for more information about managing Workspaces in the Organization:
Success
You've created the first Workspace of your Organizations.
There's more that you can customize. Go ahead to customize the Organization's Layout, add a new authentication system, configure a server for the email, change the Organization's name, and add a new Delegate to assist you.
Databases
Question
The goal here is reminding what's the purpose of this subpanel, you won't perform any action.
The Databases panel manages everything related to Databases: viewing and editing existing databases, or adding new ones.

You will see a tile for every existing database with information about the Database Type and Space allocated.
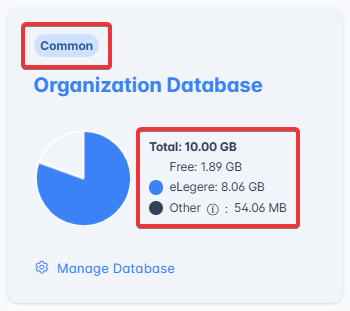
In most cases, you will kick off your Organization with a Common Database (10GB), owned and managed by Vesenda Srl (Shared Cloud).
Based on your Deploy Type you can also choose to employ your preferred Cloud service (Dedicated Cloud) or your own infrastructure (Private Cloud).
Info
Check How to Extend the Storage Space for Your Organization by Adding a New Database to learn how to add a new Database for your Organization's data.
Check How Do Delegates Manage the Organization's Data Storage? to learn how to edit or delete a Database.
Check Deploy, License, and Organization Type to learn more about Deploy Types and how they affect Database choices.
Settings
The Settings panel manages different aspects of your Organization: Layout, Authentication, Email Servers, and Plugins.
You can find a dedicated setting tab for each feature.
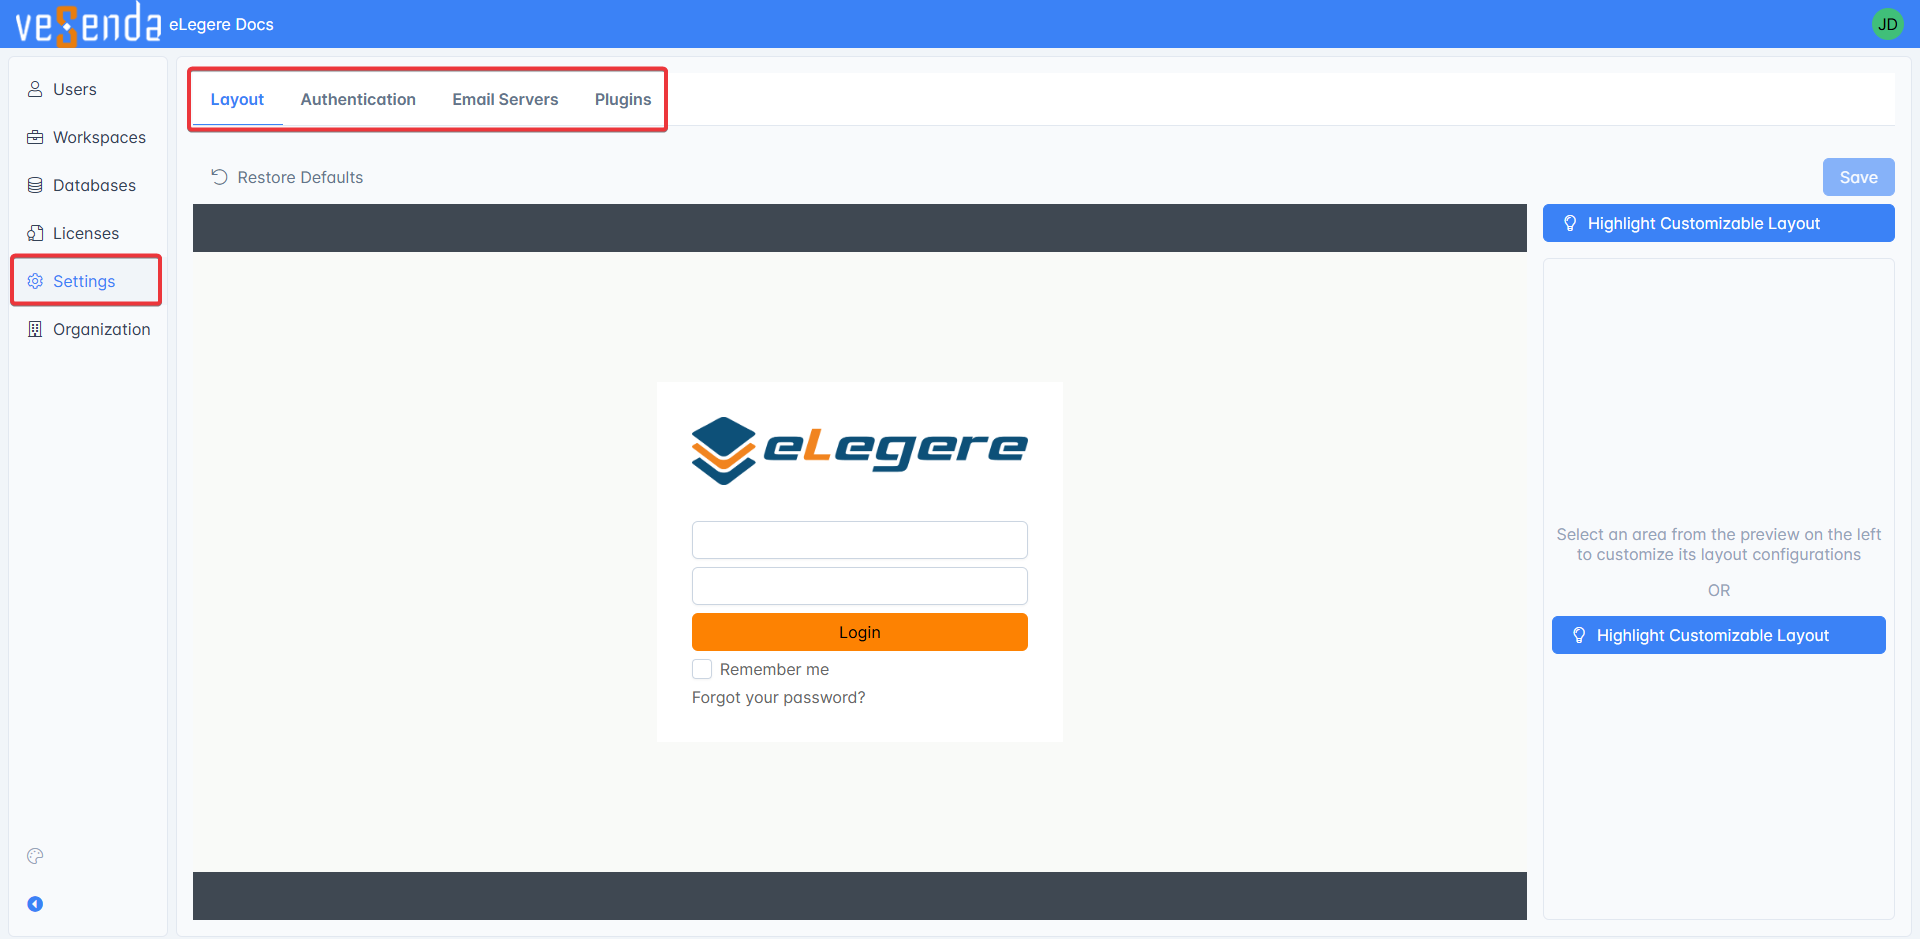
Layout
The Layout tab enables you to customize the appearance of your Organization.
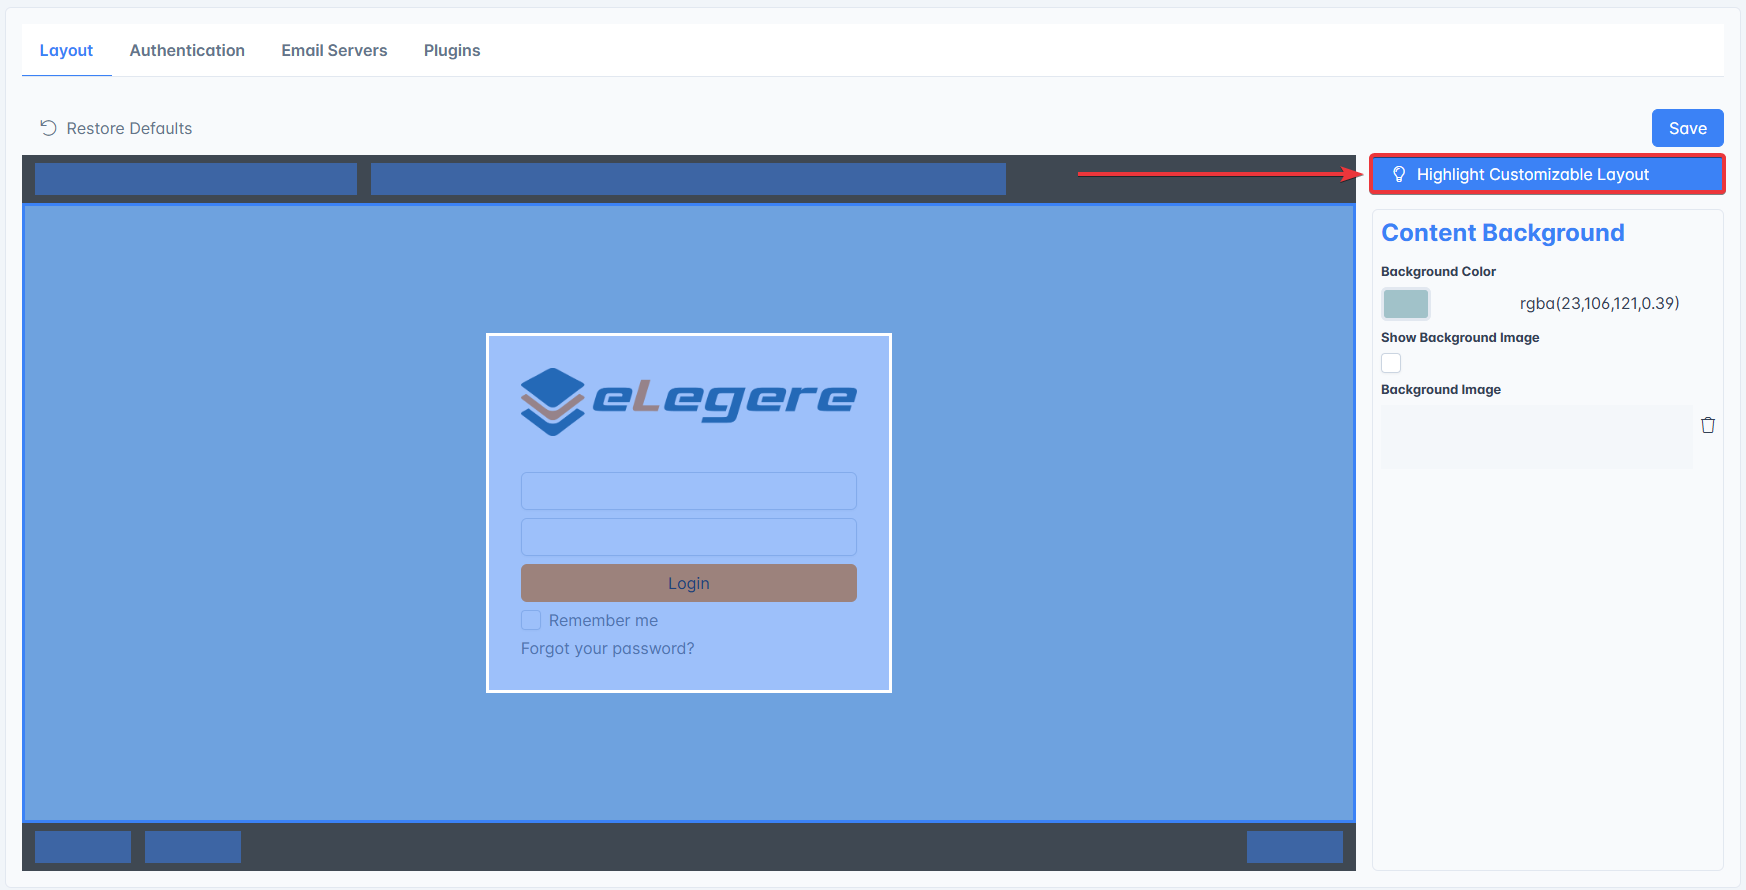
Hover the cursor over the image to highlight the customizable features.

You can customize the following features:
- Background and text color.
- Header and footer.
- Login form.

The Highlight Customizable Layout button helps you discern what elements you can customize. A light blue tint will appear over customizable features.
Tip
Click on Restore Defaults at any time to go back to the default eLegere layout.

Click on Save in the top right corner of the tab to save the changes made.
Question
Check How do I customize the Organization's colors and layout? to learn more about customizing the Organization's layout.
Success
You have customized your Organization's layout!
Authentication
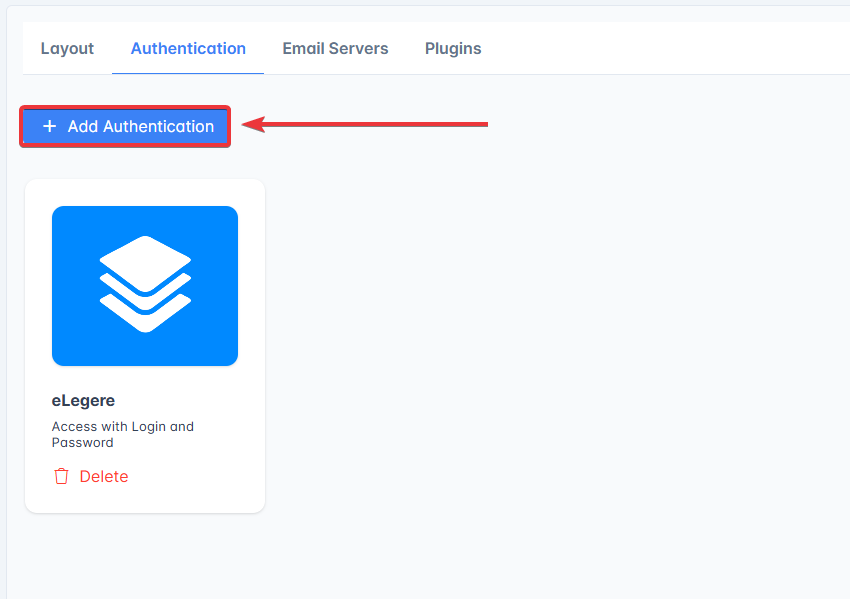
In the Authentication tab you will see tiles for your Organization's Authentication Methods.
The eLegere Authentication Method by username and password is the default option. eLegere adds this method automatically when an Administrator creates an Organization.
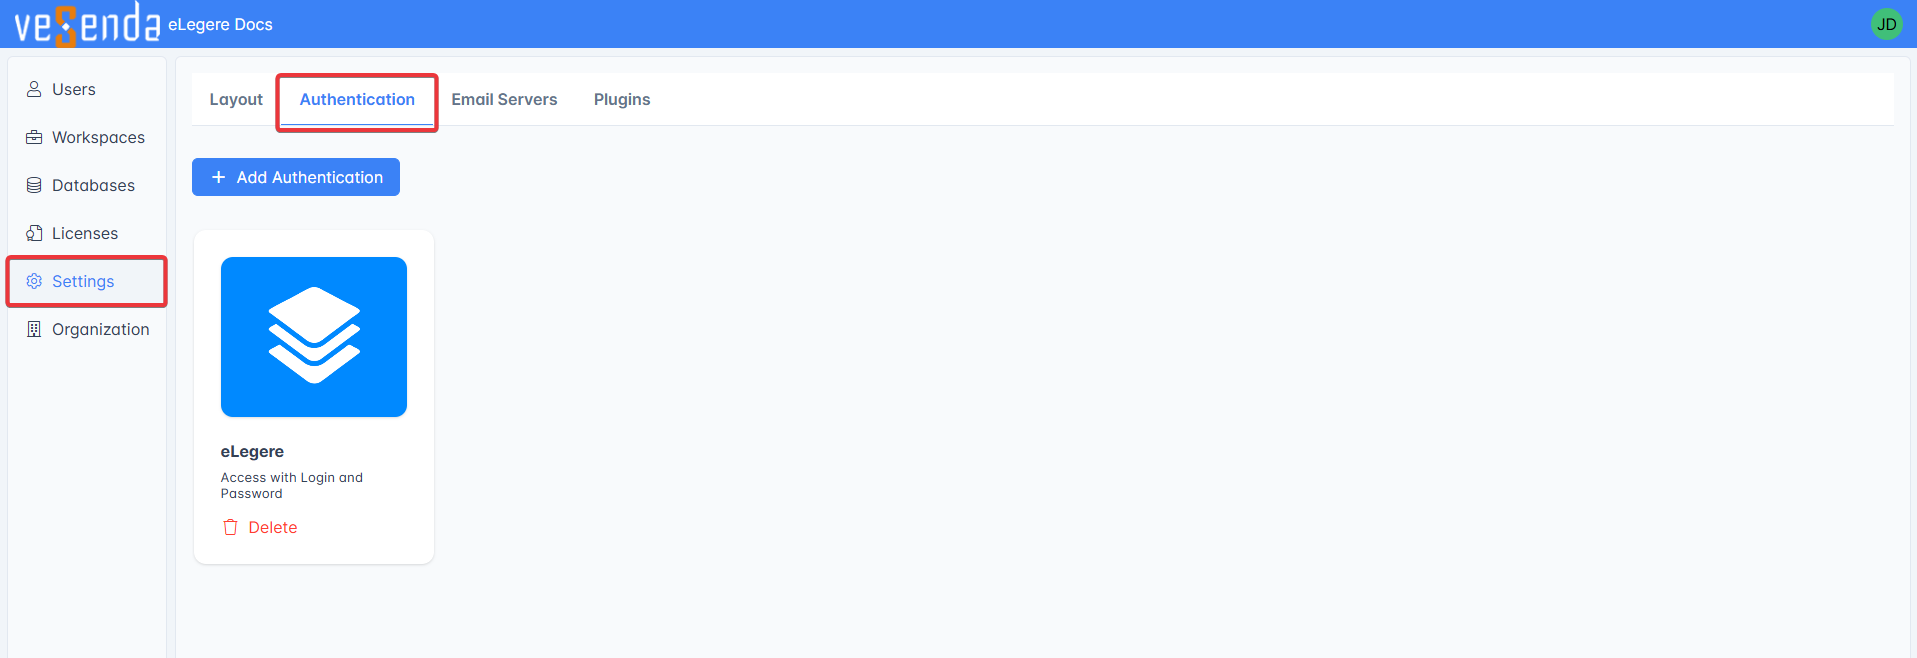
Click on Add Authentication to add a new Authentication Method.
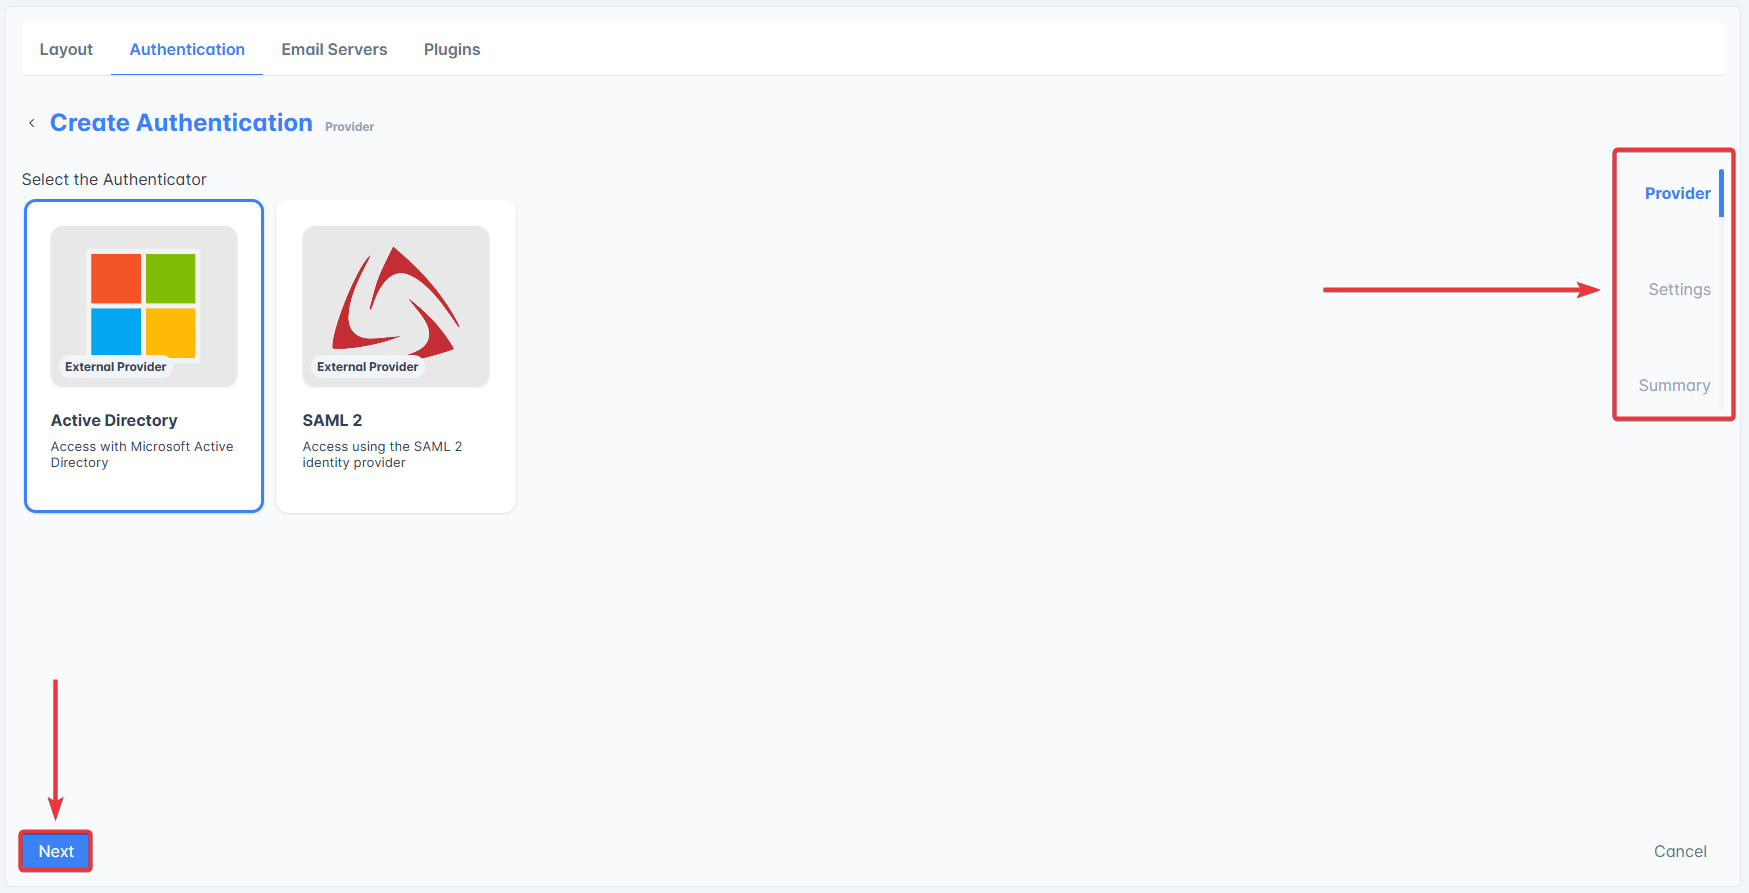
Select the desired Authentication Method then click on Next. For the sake of the example in this quick start, choose the Microsoft Active Directory method.
The sidebar on the right will show the steps of the guided procedure and highlight your position.
Configure the settings if required then click on Complete.

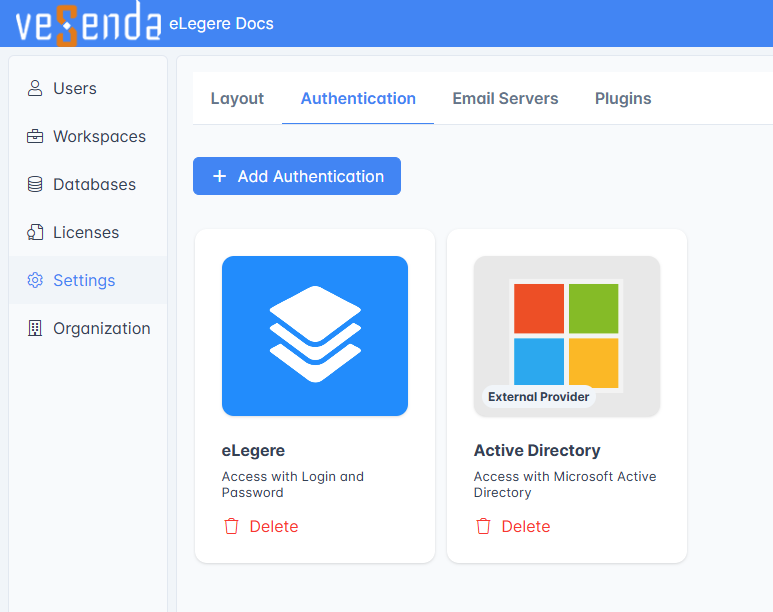
Your new Authentication Method will appear as a tile in the Authentication tab.
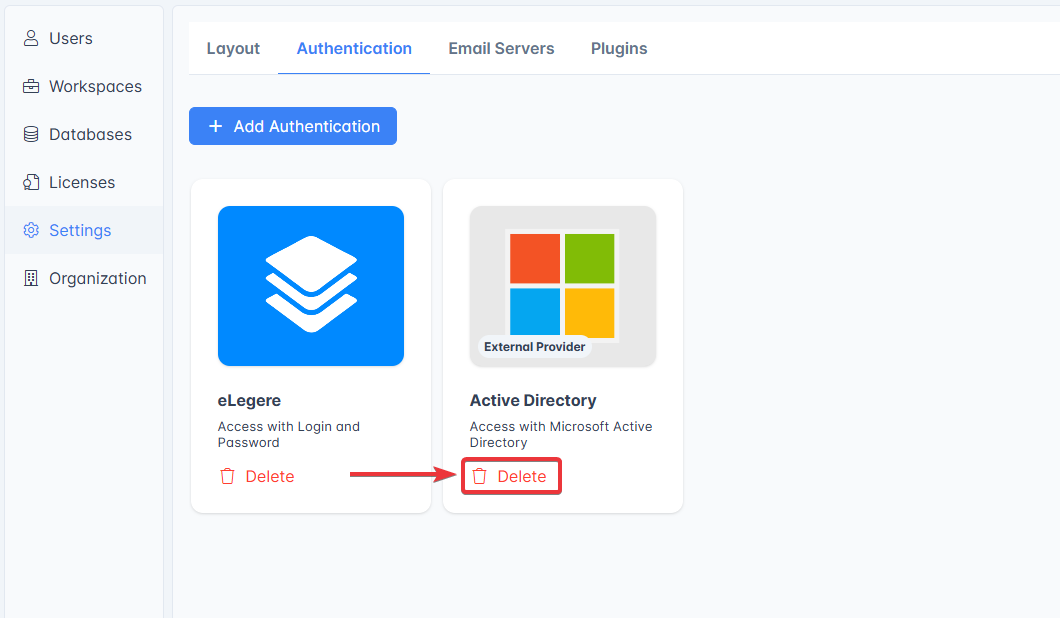
Tip
You can delete an Authentication Method by clicking on the tab's Delete button.
Question
Check How do I configure an alternative authentication system for the users in the current Organization? for more information about Authentication Methods.
Success
You have configured a new Authentication method for your Organization!
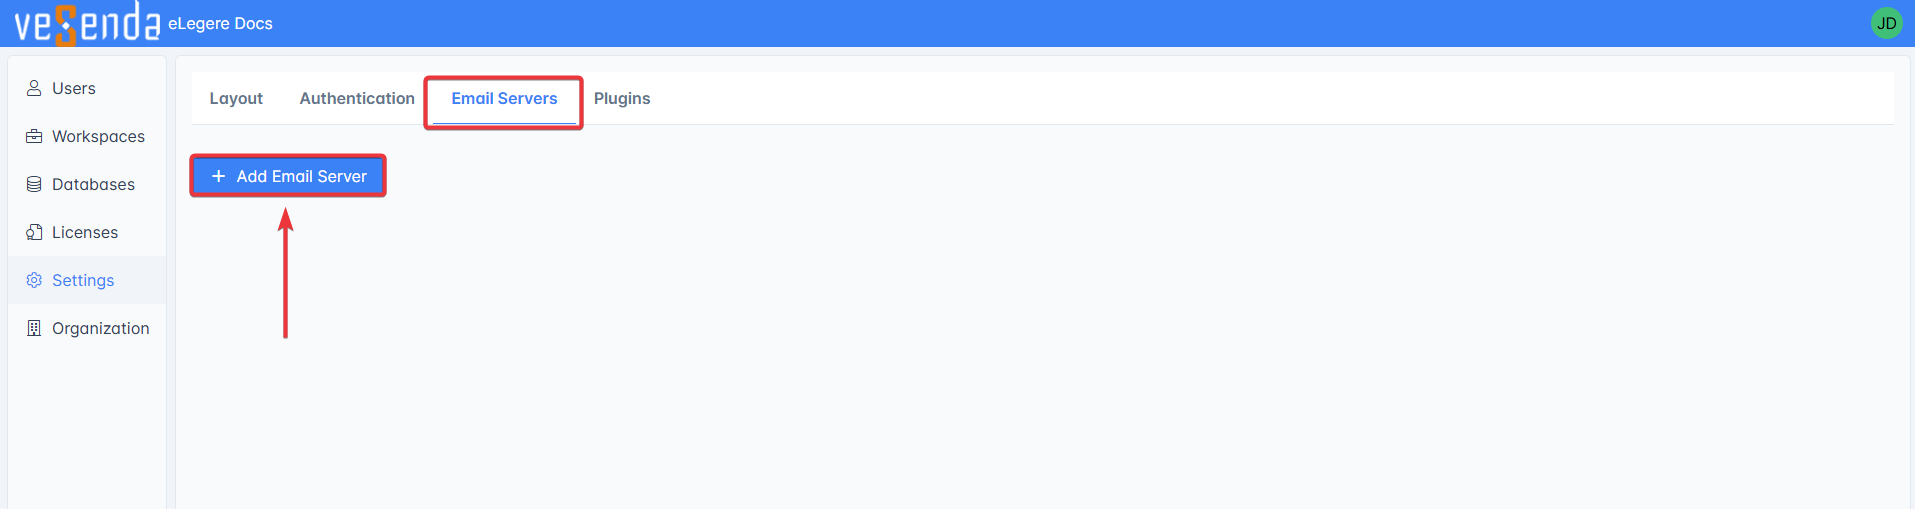
Email Servers
In the Email Servers tab you can configure the email services that eLegere will use to send email notifications from your Organization.
Note
All Workspaces in your Organization will inherit the Email Servers configured here.
Click on Add Email Server to add an Email Server
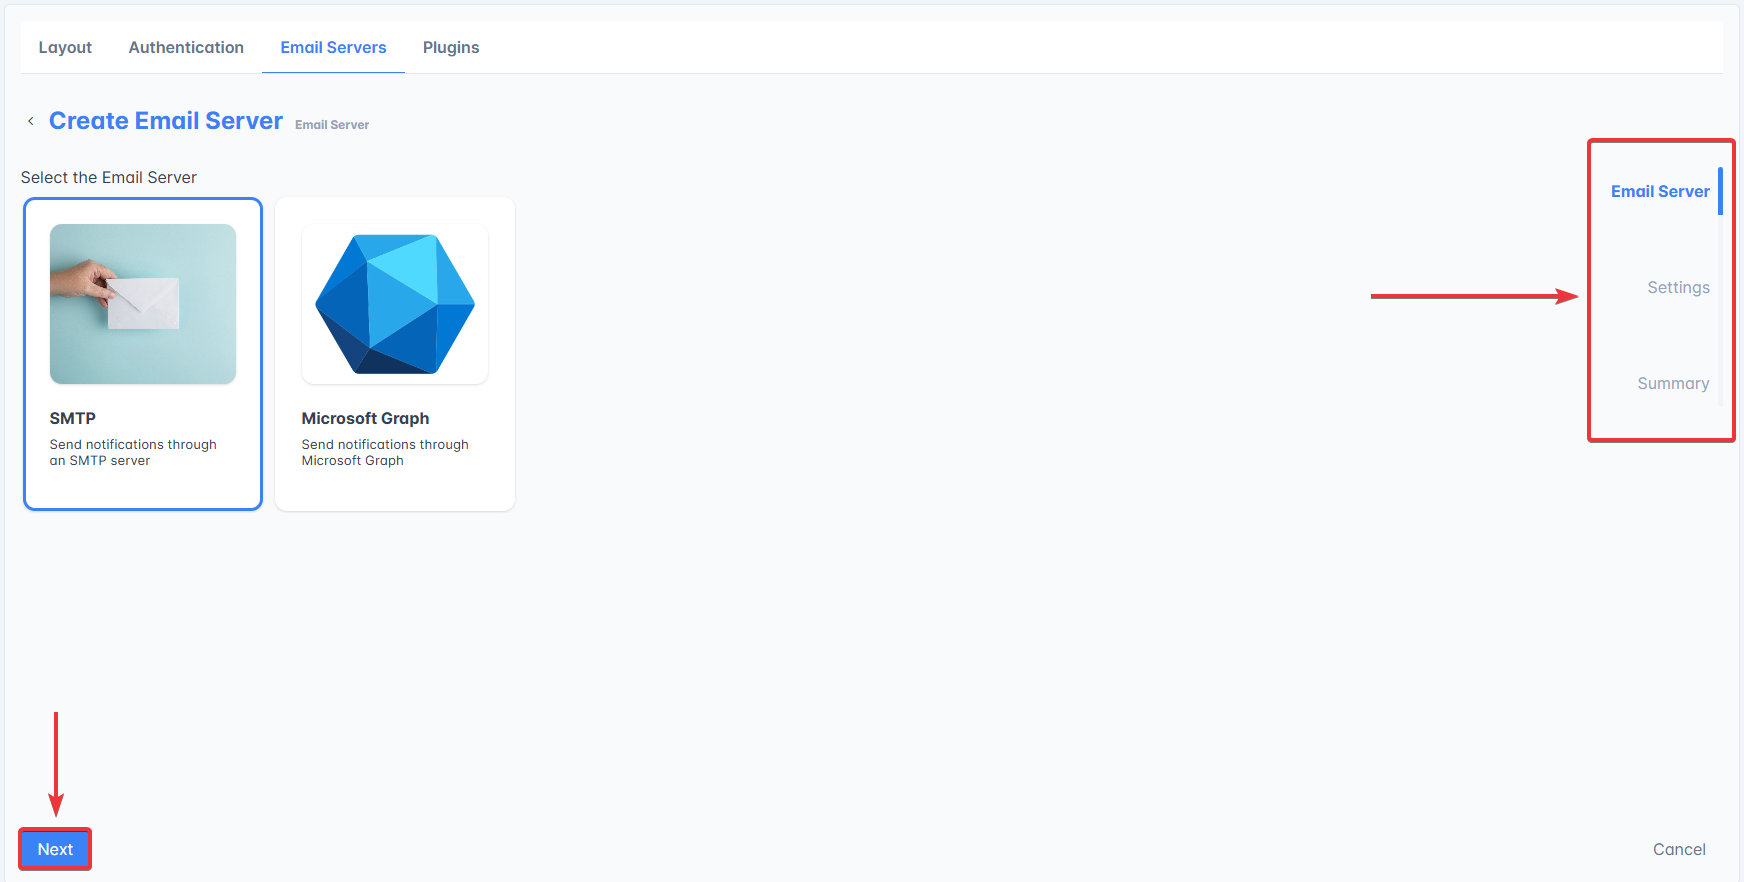
Select the desired Email Server then click on Next. The sidebar on the right will show the steps of the guided procedure and highlight your position.
Use SMTP for this example.
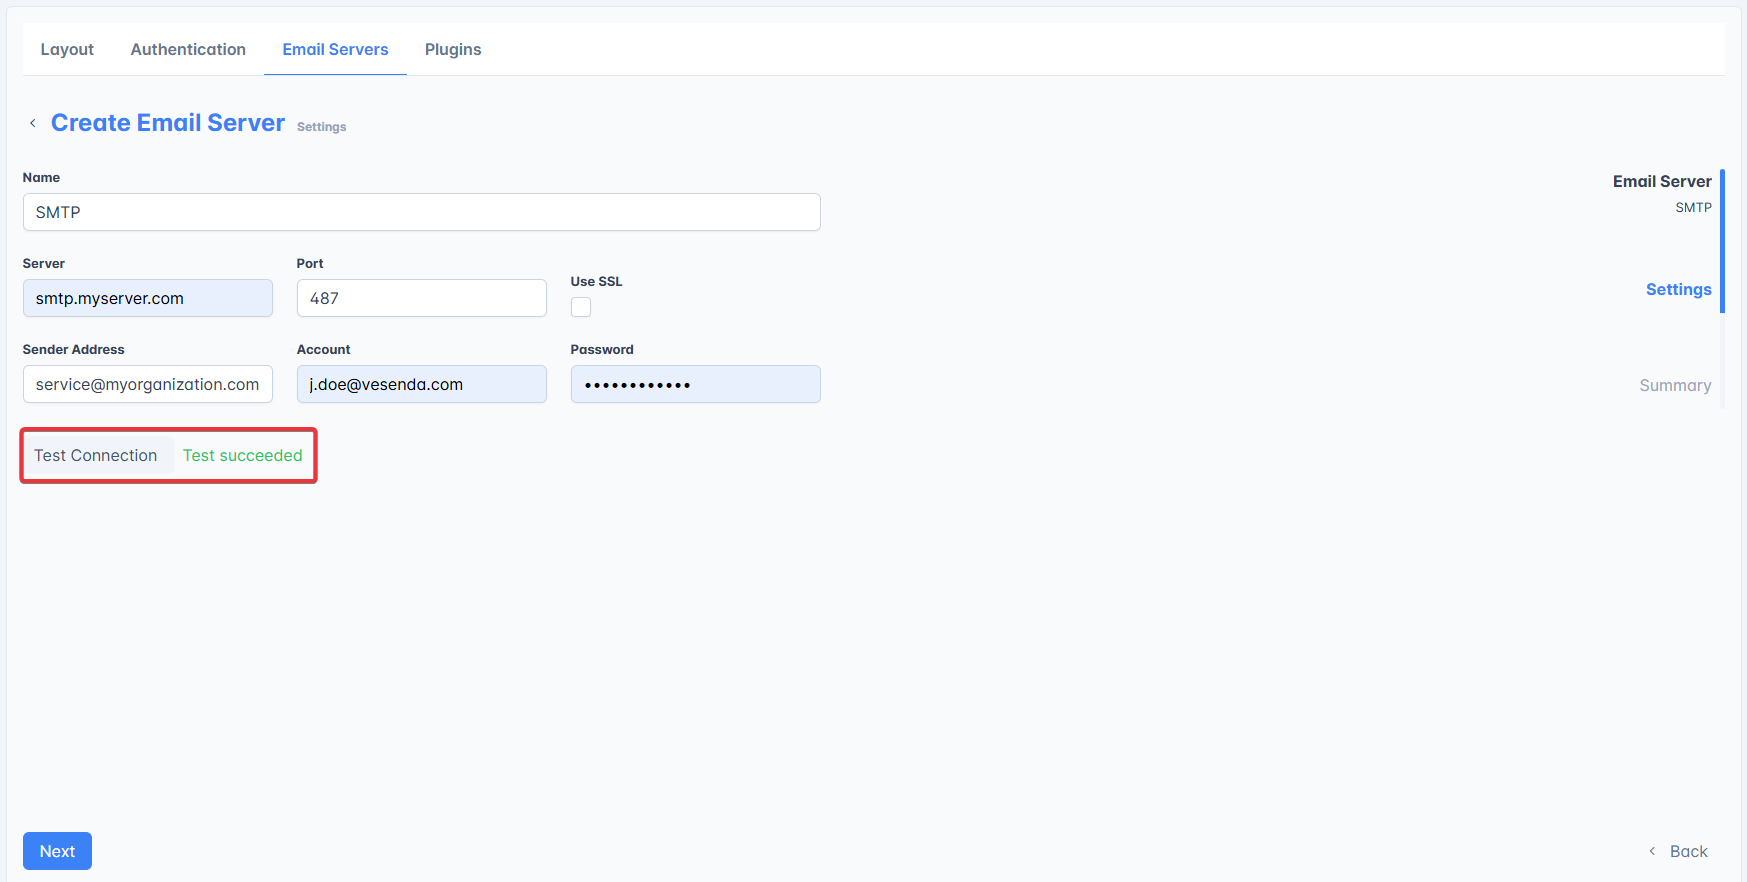
Set the requested parameters for the chosen service and test the connection to the Email Server. If the Connection Test fails, you won't be able to proceed.
Double check the inserted information in the Summary then click on Complete.

The new server will appear as a tile in the Email Servers tab.
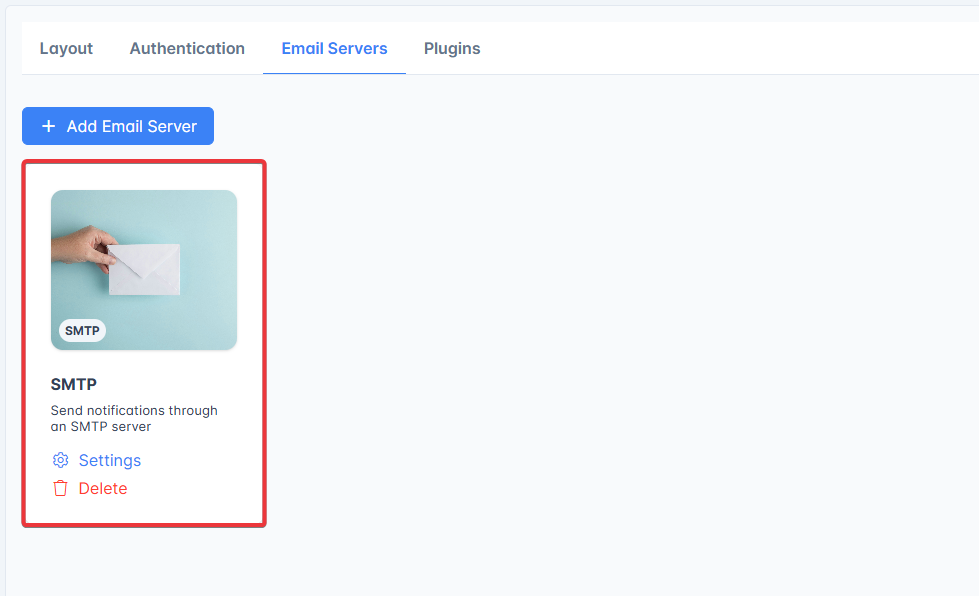
Click on the Settings button on the server's tile to revise the server's parameters or to Test Connection.

Click on the Delete button on the server's tile to delete the Email Server.
Question
Check the following sections to learn more about the Email Server subpanel:
- How can I configure an email service in my Organization? contains all the info about the Email Server's tab and their required parameters.
- Can Workspace Admins configure additional email services besides those of the Organization?
Success
You have configured a new Email Server for your Organization!
Plugins
Question
The goal here is reminding what's the purpose of this subpanel, you won't perform any action.
In the Plugins tab you can configure Plugins to embed in eLegere new features customized for your Organization.
If your Organization has any enabled Plugins you will see them in this tab as tiles.
Warning
You can only enable the Plugins that developers have made available for administrators and users. Currently the available Plugins are:
- SSRS Reporting : Enable the access to the configured SQL Server Reporting Services according to the eLegere Groups and restrictions.
- Power BI : Enable the access to Microsoft PowerBI according to the eLegere Groups and restrictions.
You can see available Plugins and add them to your Organization by clicking on Add Plugins.
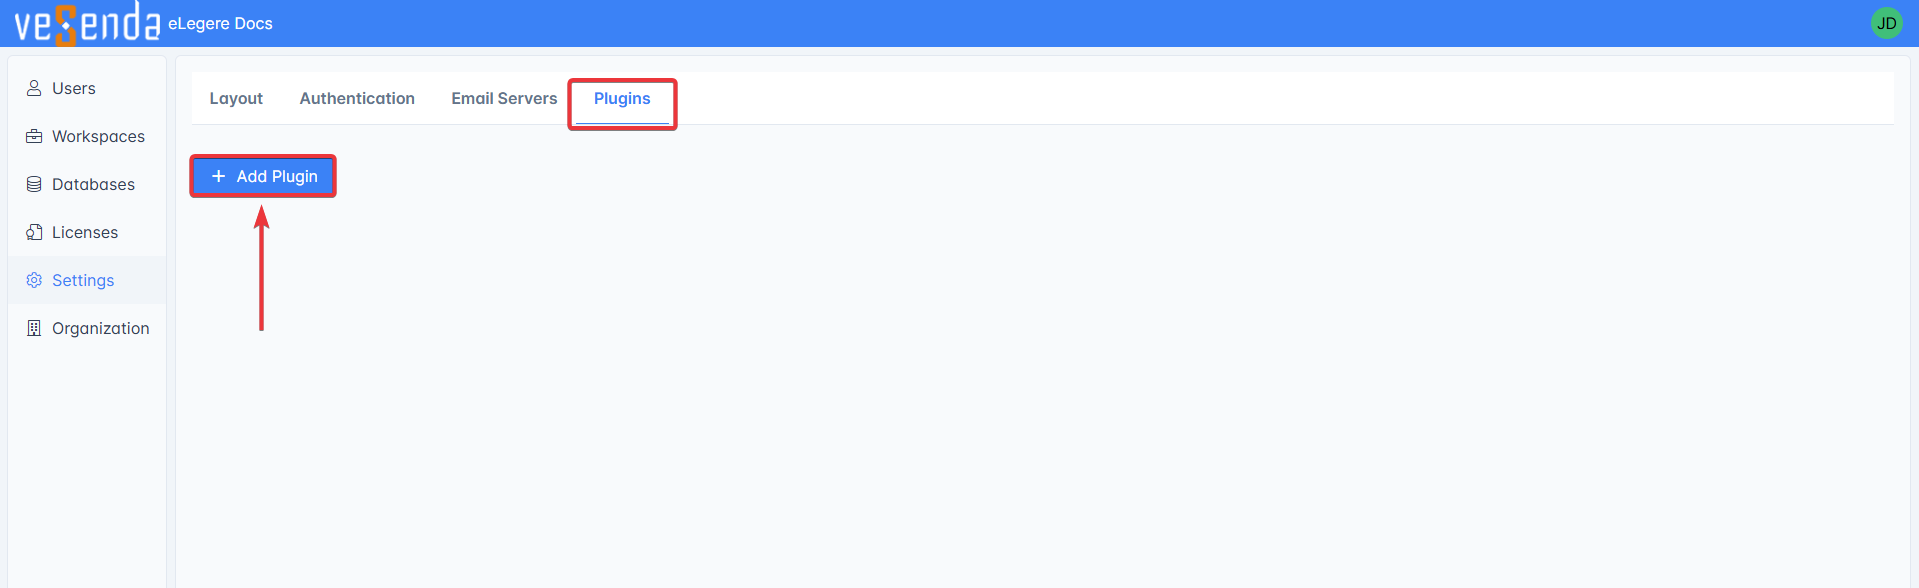
If you'll click Add Plugin, a wizard will appear to guide you in the configuration.

Question
Check How do I configure plugins in my Organization? to learn more about how to configure each available Plugin.
Organization
The Organization panel manages everything related to the Organization administration: viewing and editing the Organization Info, and managing Delegates permissions.
You can find a dedicated setting tab for each feature.
You can edit the Organization's logical name by clicking on the icon next to Details. This name will be shown in the top bar and other parts of eLegere.

Click on Save to save any changes or on Cancel to abort the action.
In the Delegates tab, you can view and edit all Delegate Permissions.
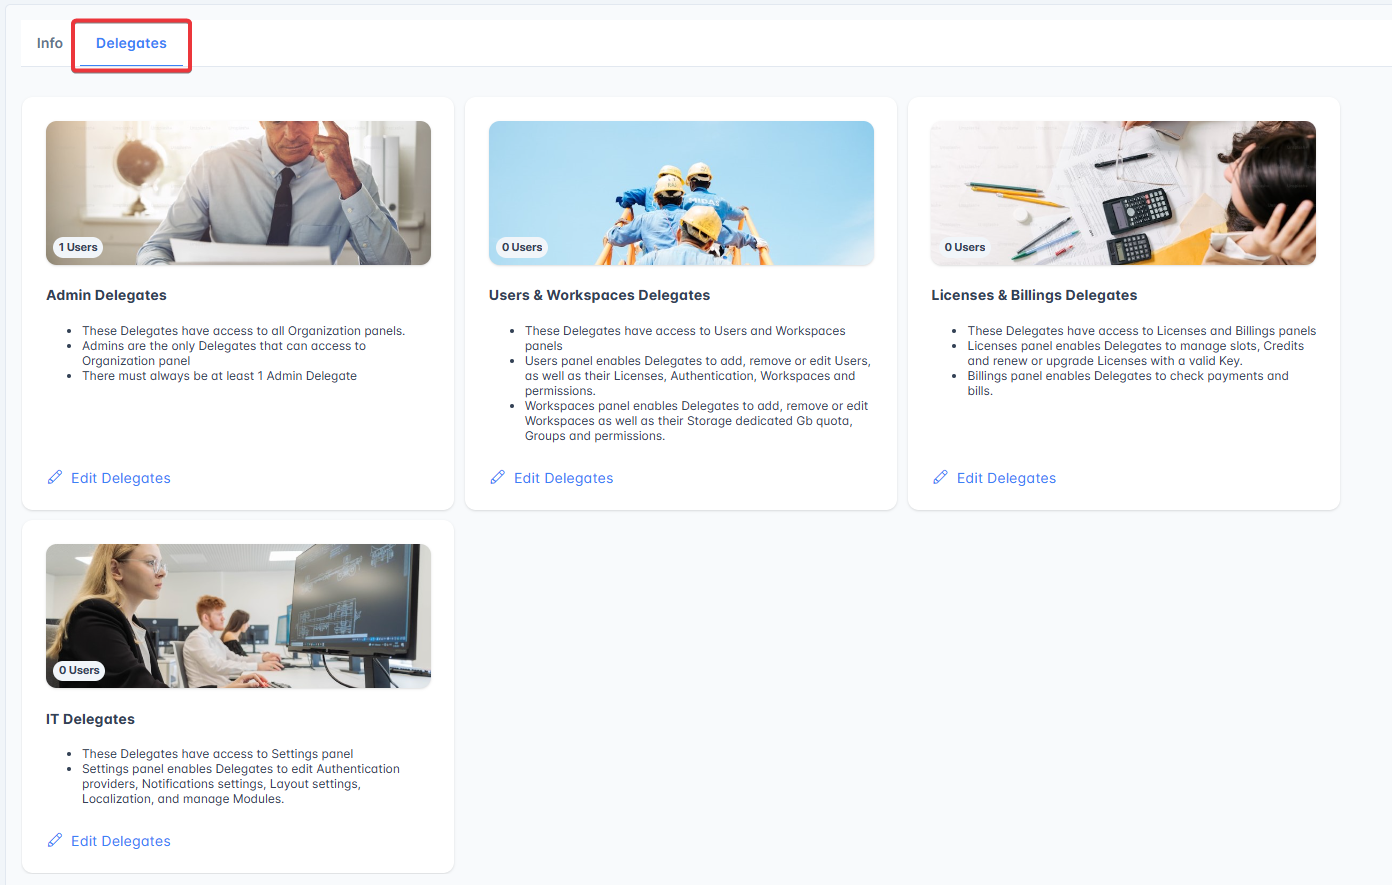
eLegere provides four different Delegates categories, each has different permissions:
- Admin Delegates
- Users & Workspaces Delegates
- Licenses & Billings Delegates
- IT Delegates
Each tile in the Delegates subpanel manages one category and summarizes its permissions. Choose which category to assign to each Delegate based on the tasks they must undertake.
You can give a user Delegate permissions:
- Click on the Edit Delegates button on the intended tile.
- Type the username and select the User from the drop-down list.
- Click on Save to save any changes, or on Cancel to abort the action.
eLegere will notify the user. If you don't wish to, uncheck "Send a notification email to the User".

You can revoke a user's Delegate permissions:
- Click on the Edit Delegates button on the intended tile.
- Click on the button next to the username.
- Click on Save to save any changes, or on Cancel to abort the action.
eLegere will notify the user. If you don't wish to, uncheck "Send a notification email to the User".

Question
Check the following sections to learn more about the Organization subpanel:
- The Who's a Delegate? section in the Admin Guide Introduction.
- How do I make (or unmake) a user Delegate?
Success
You have learnt to manage Delegate Permissions in your Organization!
You're Set!
This quick start helped you in setting up the key configurations of the Organization Manager while providing an overview of its panels. Your Workspace Admins can now invite the Organization's users and assign permissions to create Storages, applications, Connections, and schedule actions and notifications through the Scheduler.
There's still a lot to learn! But you don't need to read the Admin Guide cover to cover. It's divided by necessity and place rather than feature. This helps you look up the documentation for the goal you have in mind without having to remember a feature's name. Check when needed and learn step-by-step when you encounter something you have to do.