How do I create and manage User Groups?
Required Permissions
This section assumes that you are a Workspace Admin and you can access the Workspace Settings. See What's a Workspace? in Admin Guide's Introduction.
Learn how to create User Groups in a Workspace.
In eLegere, Workspace Admins and Designers can configure application's behaviors, access, and visibility rules based on User Groups. Workspace Admins can create as many Groups as they prefer, building restrictions and calculations based on them.
Workspace Admins can create, edit, and delete User Groups in the Groups sub-panel in the Workspace Settings.
Info
See for more information and examples about what you can do with User Groups and applications:
Example
John Doe is a Workspace Admin in the Warehouse Management. John must display the applications managing secondary data only to the warehouse's coordinators. John must create a User Group for this purpose and assign it only to the users who have to access certain applications.
Create a User Group
Follow the steps below to create a User Group in a Workspace:
-
In the Home, click on the Workspace's name in the upper-left corner.

-
Click on the icon next to the current Workspace's name in the drop-down list.

-
Click on Groups in the left sidebar. The action leads to the related sub-panel.

-
In the Groups sub-panel, click on the Create Group.

-
Type the Group's name in the textbox.

-
This step is optional. Custom User Groups can inherit permissions from other Groups. The action opens a drop-down menu to choose a permission or another Group. Click on icon next to Inherit.

The action opens a drop-down menu to choose a permission or another Group.

The current Group will have access to the same applications and actions of the inherited permissions and Groups.
Example
"Warehouse Coordinator" inherits from "Clerks", "Shipping Team". Members of "Warehouse Coordinator" will have access to the same applications enabled for "Clerks" and "Warehouse Coordinator" and they can arrange application in folders.
Tip
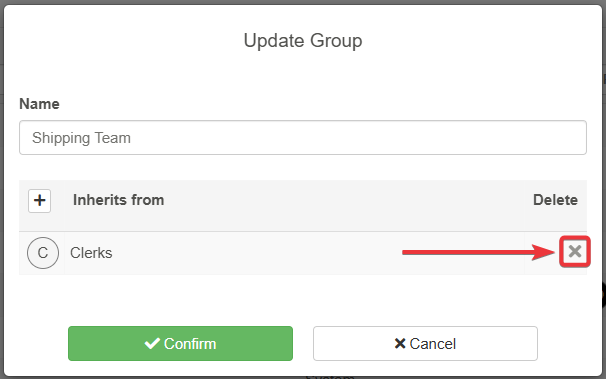
If you changed your mind about a inherited Group or Permission, click on the icon next to it to remove it.

-
Click on Confirm to create the Group. If you changed your mind, click on the Cancel button instead.

Success
You've created a User Group from the Workspace subpanel.
Edit a User Group
Follow the steps below to edit a User Group in a Workspace:
-
In the Home, click on the Workspace's name in the upper-left corner.
-
Click on the icon next to the current Workspace's name in the drop-down list menu.
-
Click on Groups in the left sidebar. The action leads to the related sub-panel.
-
In the Groups sub-panel, click on the next to the Group you want to edit. (You can't edit the System Groups representing the Workspace permissions.)
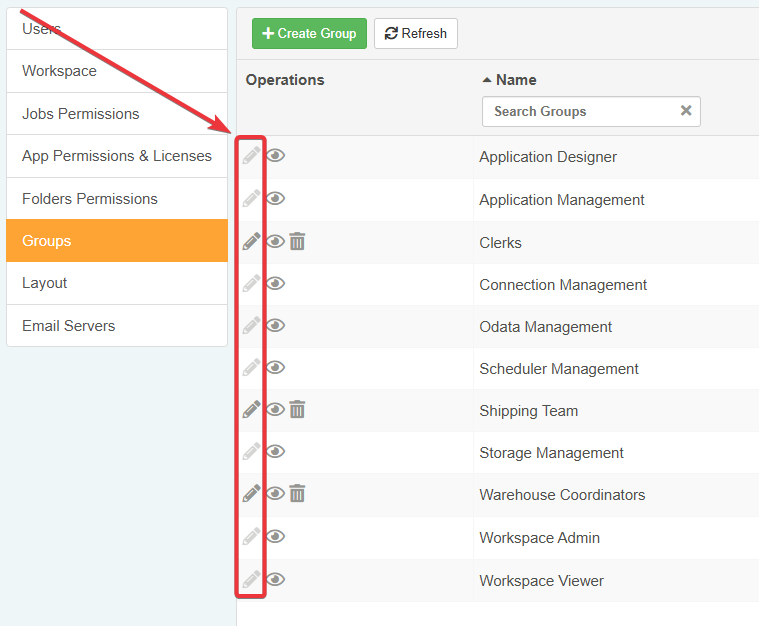
-
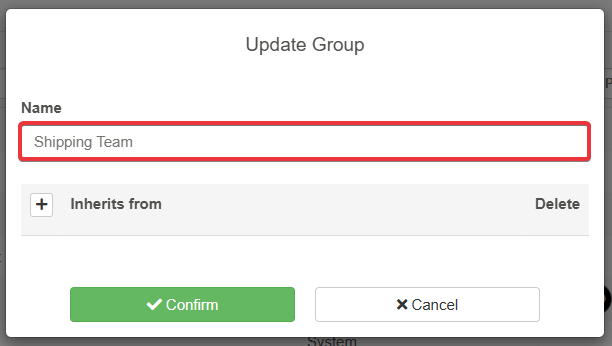
Change the Group's name in the textbox.
-
Custom User Groups can inherit permissions from other Groups. The action opens a drop-down menu to choose a permission or another Group. Click on icon next to Inherit.
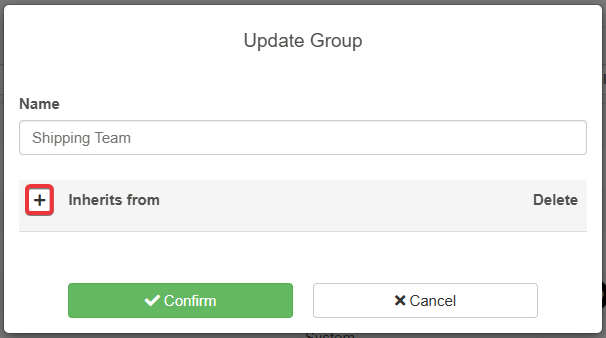
The action opens a drop-down menu to choose a permission or another Group.
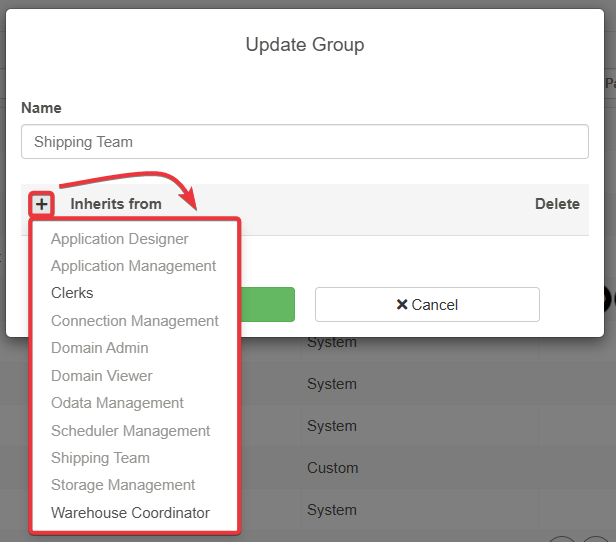
The current Group will access the same applications and actions of the inherited permissions and Groups.
Example
"Warehouse Coordinator" inherits from "Clerks", "Shipping Team", and the Application Management permission. Members of Warehouse Coordinator will have access to the same applications enabled for "Clerks" and "Warehouse Coordinator" and they can arrange application in folders.
If you want to remove a Group from the Inherit list, click on the icon next to it to remove it.
-
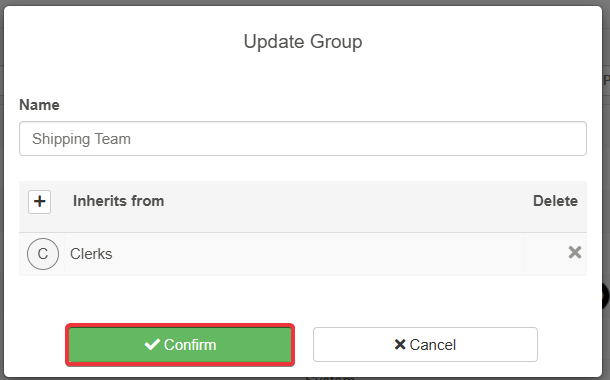
Click on Confirm to create the Group. If you changed your mind, click on the Cancel button instead.
Success
You've managed to edit a User Group's info in the Workspace subpanel.
Remove a User Group from the Workspace
Follow the steps below to remove a User Group from a Workspace.
-
In the Home, click on the Workspace's name in the upper-left corner.
-
Click on the icon next to the current Workspace's name in the drop-down list.
-
Click on Groups in the left sidebar. The action leads to the related sub-panel.
-
Click on the Delete icon () next to the Group you want to remove. (You can't remove the System Groups representing the Workspace permissions.)

-
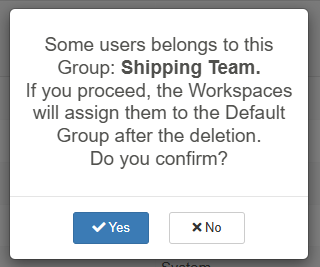
A window will ask for confirmation. Click on Yes to confirm the deletion. Alternatively, click on No if you have changed your mind.
Success
You've managed to remove a User Group from the Workspace subpanel.