How do I edit or delete a Workspace and manage its Licenses?
Required Delegate Permission
You can perform this operation if and only if you are either an Admin Delegate or a Users & Workspaces Delegate.
Check the Admin Guide's Introduction to learn more about Delegates and the Organization Manager.
Abstract
This section explains how to edit or delete a Workspace and how to manage its Licenses in your Organization.
Edit Workspace
Learn how to edit an existing Workspace.
-
In the Organization Manager, click on Workspaces in the left sidebar.

-
Click on Manage Workspace on the tile of the Workspace to edit. The action leads to the sub-panel where you can edit the Workspace's Settings.

In the Workspace's setting, choose the element you want to customize.

Details
Click on the icon next to Details.
In the Edit Workspaces Detail, you can customize:
- The Name
- The Icon
- The Workspace's tile color
- The Workspace's description

Click on 1-4 to edit the setting. Then choose Save to confirm the changes or Cancel to abort the action.
Admins
Click on the icon next to Admins.
The Workspace Admin manages the Workspace you are creating: Applications, Storages, Connections, OData Feed, Scheduler, add users and Groups in the Workspace, and its layout.
Click on the search bar and type either the user's name or email to search a user to make them Workspace Admin. Click on the user you want to select.
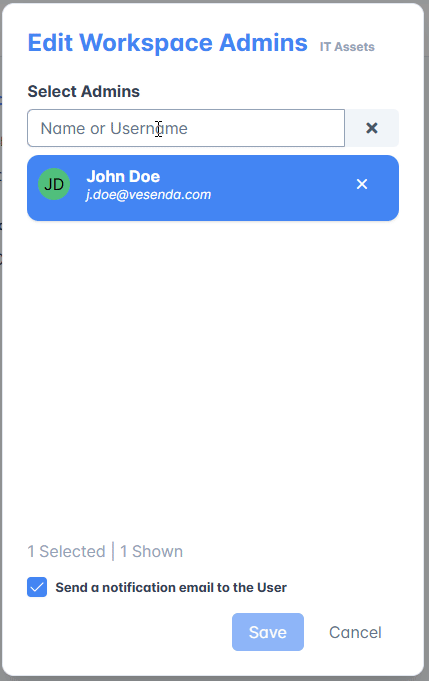
Click on icon next to the search bar to clear the research and look for another user.

Repeat the steps for each Workspace Admin you want to add or remove.
Remove any user from the Workspace Admin role by clicking the icon on their row.

You can decide whether to inform the user or not about the change by email. By default, the Send a notification email to the User option is checked. Uncheck it to avoid warning the user.
Click on Save to confirm or Cancel to abort the changes.
License
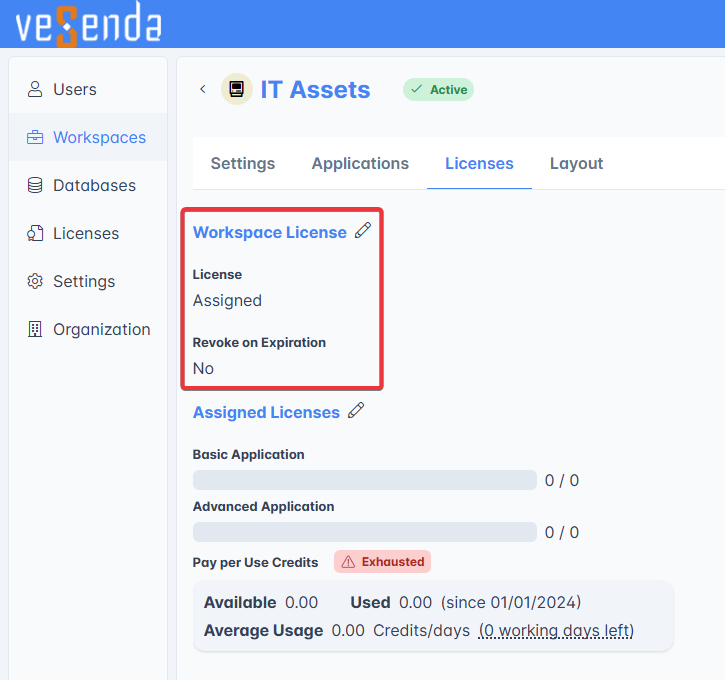
Click on Licenses tab at the top of the Settings.

You can fill in the Workspace's reserve applications slots and credits for applications and users through this sub-panel. Also, you can add or remove the Workspace License required for any Workspace to work.

Info
See for more information about Workspaces, applications, credits, and licenses.
Add or Remove a License from a Workspace
A Workspace requires a dedicated License to work.
At any time, you can assign or remove a Workspace's License.
Click on the icon next to Workspace License.
In the window, click on Workspace to assign a License from the Organization's reserve. Otherwise, click on No License to remove the License back to the Organization's reserve.
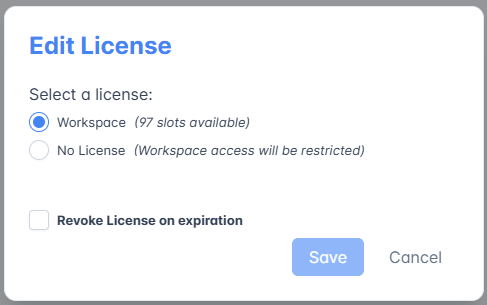
If you click on No License, confirm by typing REMOVE in the textbox.

Tip
If you check the Revoke on Expiration option, the Organization won't renew the new License automatically when the current License will expire.
Warning
If you remove a License from a Workspace, the Workspace will expire and disappear within 30 days.
- Users won't be able to access the Workspace.
- Delegates can't select the Workspace without License as Default Workspace.
A tag flags the Workspace without License as "Unlicensed".

At any moment, you can go back to the Workspace's panel in the Organization Manager to assign a License again. (Assigning and removing again the License won't restart the expiration counter. The 30 days expiration is an absolute value: if you remove for 5 days a license, assign it back, then remove it again, the counter will start at 25 days.)
Click then Save to confirm the changes or Cancel to abort the changes.
Add Application Slots and Credits
You can check the current status of the licenses looking at the bars.
Info
See the sections listed below for more information about Basic and Advance application slots and the credits:
The section highlights credits consumed, licenses employed by the current applications in the Workspace. If the Pay Per Use users have consumed all the credits, a tag Exhausted warns the Delegate about the issue.
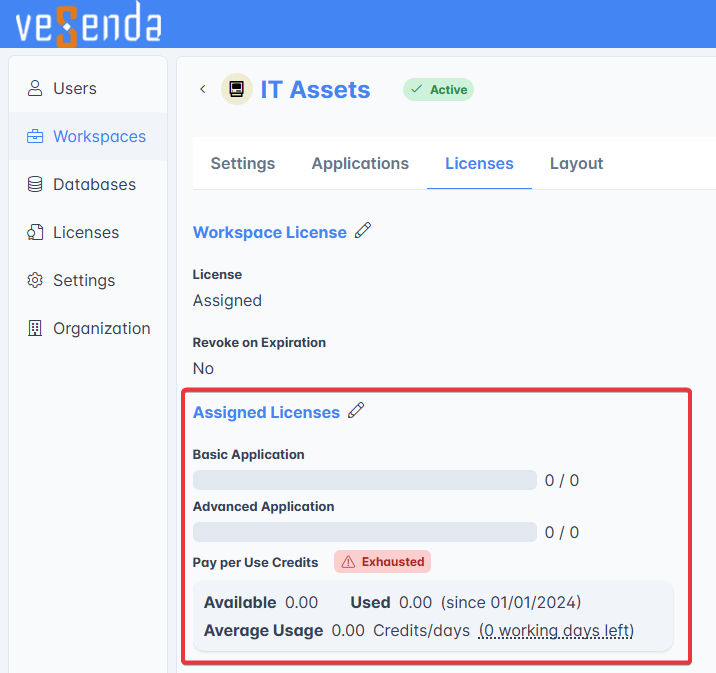
Click on the icon next to Assigned Licenses to assign application slots and credits. The action opens the Assigned Licenses window.

Type the desired amount of slots or credits in the textbox to add them to the Workspace's reserve.

Click on Undo in case you have changed your mind about the amount to assign.
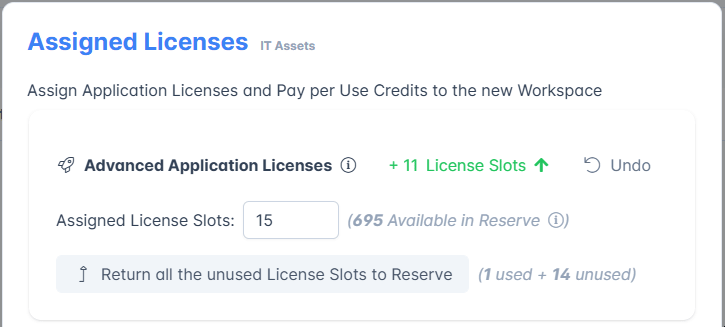
Click on Return all the unused License Slots to Reserve or Return all the unused Credits to Reserve to return all unused application slots or Pay Per Use Credits to the Organization's reserve.

Click on Save to save the changes or Cancel to abort the edits.
Organization
- Basic Licenses are available for every Organization.
- Advanced Licenses are only available for Professional Organizations.
Check Deploy, License, and Organization Type to learn more about Organization Types.
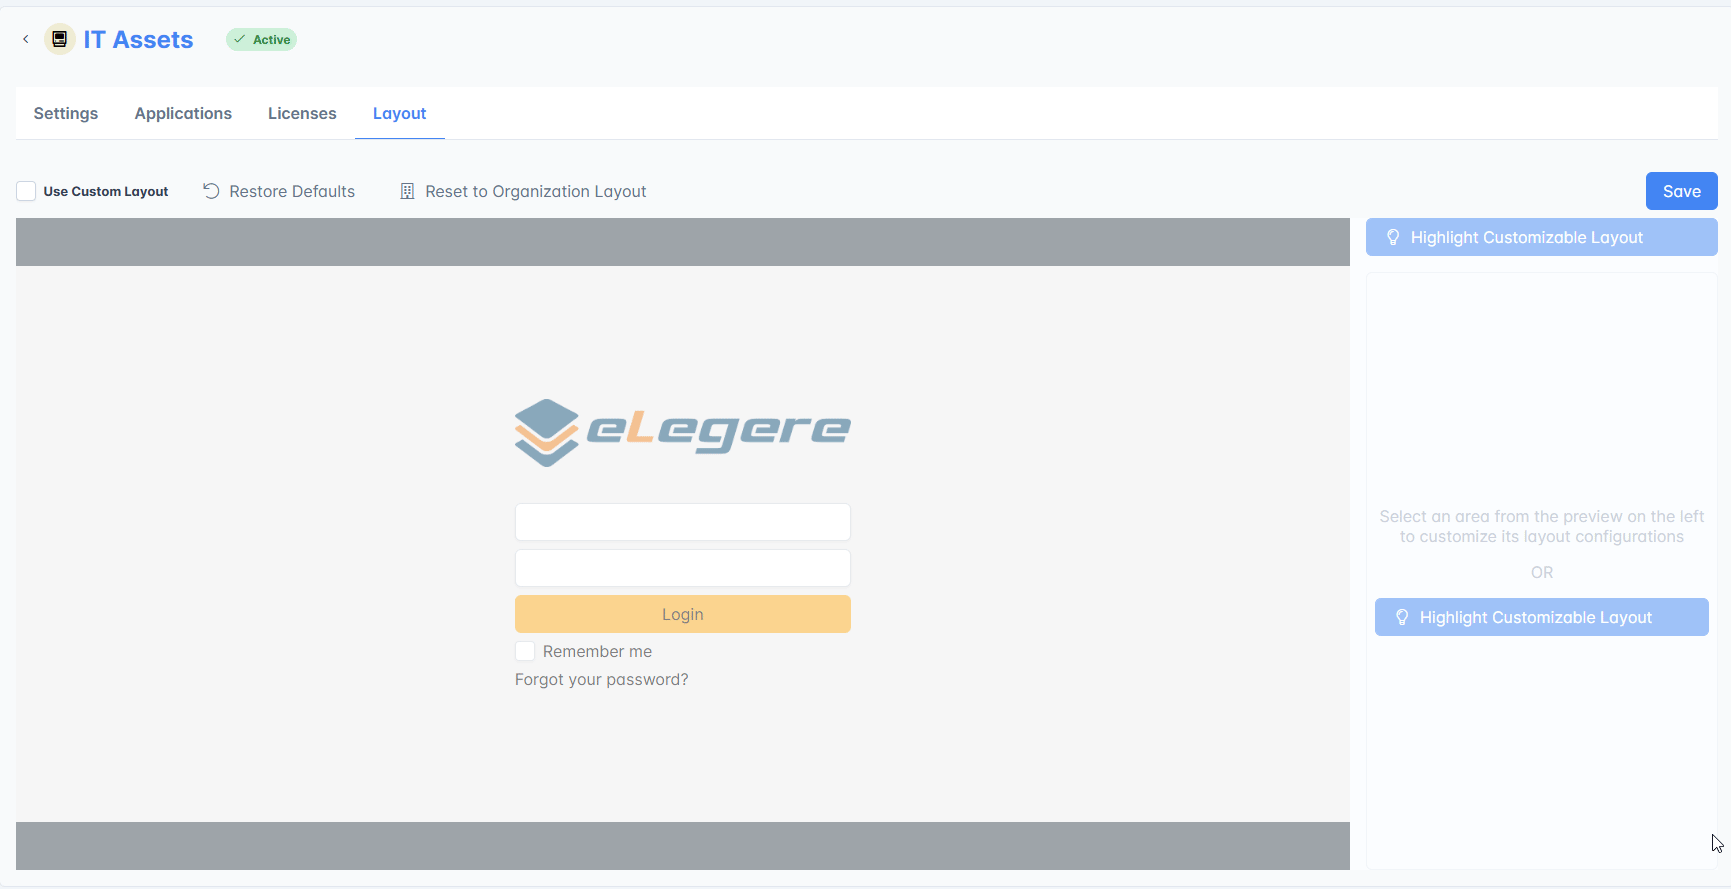
Layout
Click on Layout tab at the top of the Settings.

The tab enables to customize the Workspace's colors, icons, URLs, and background.
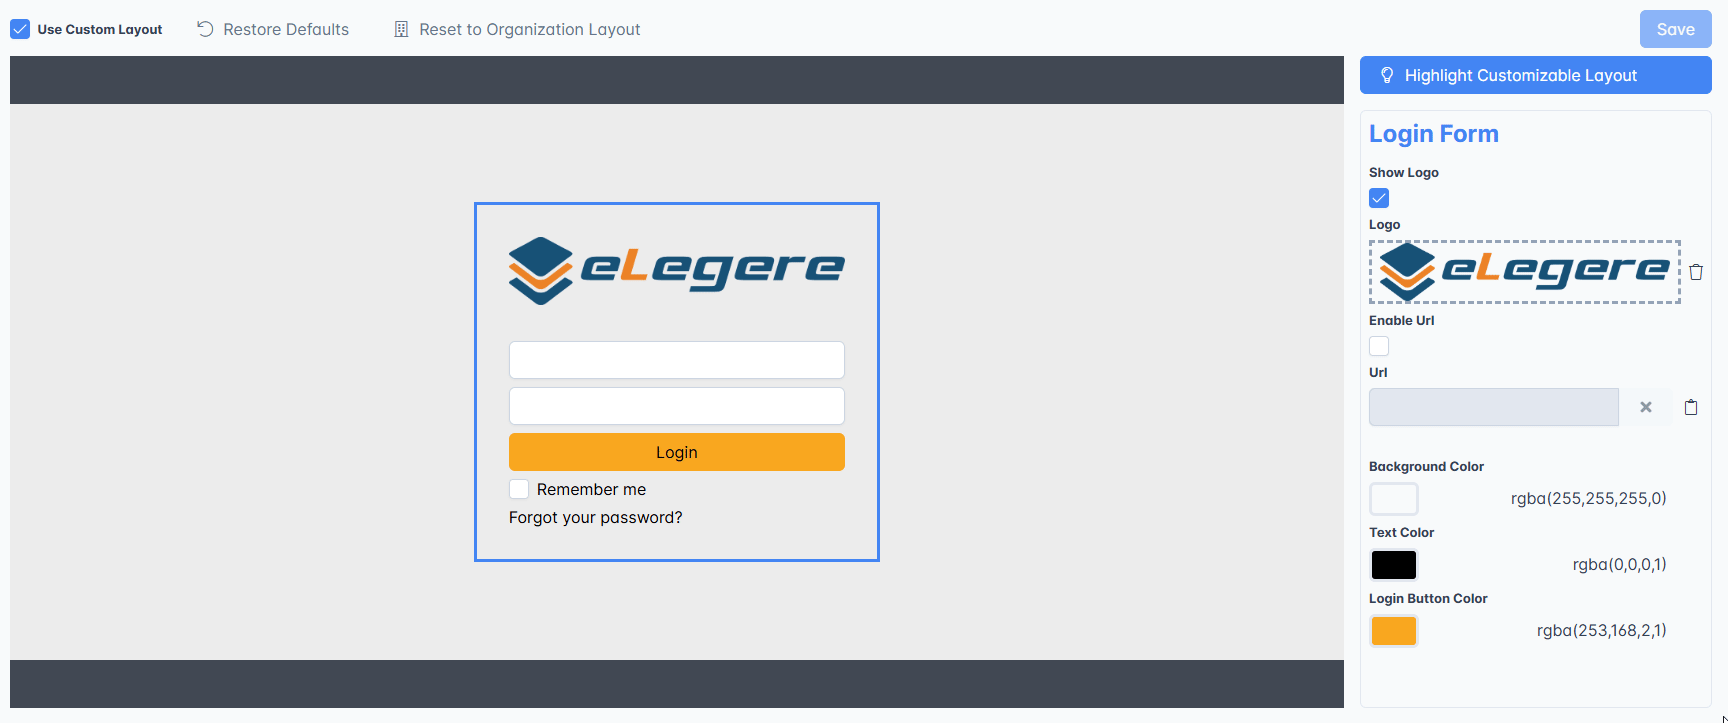
By default, the Workspaces use the Organization's Layout. Check the Use Custom Layout option to customize the Workspace's appearance. The action enables to edit the Layout. The changes will override the Organization's Layout.

Click in the preview the area you want to customize to open the customization's options.
Uncheck each property you want to hide or disable.
Tip
If you have issues identifying the Layout's customizable parts, click on the Highlight Customizable Layout. The action highlights what you can customize in the interface.
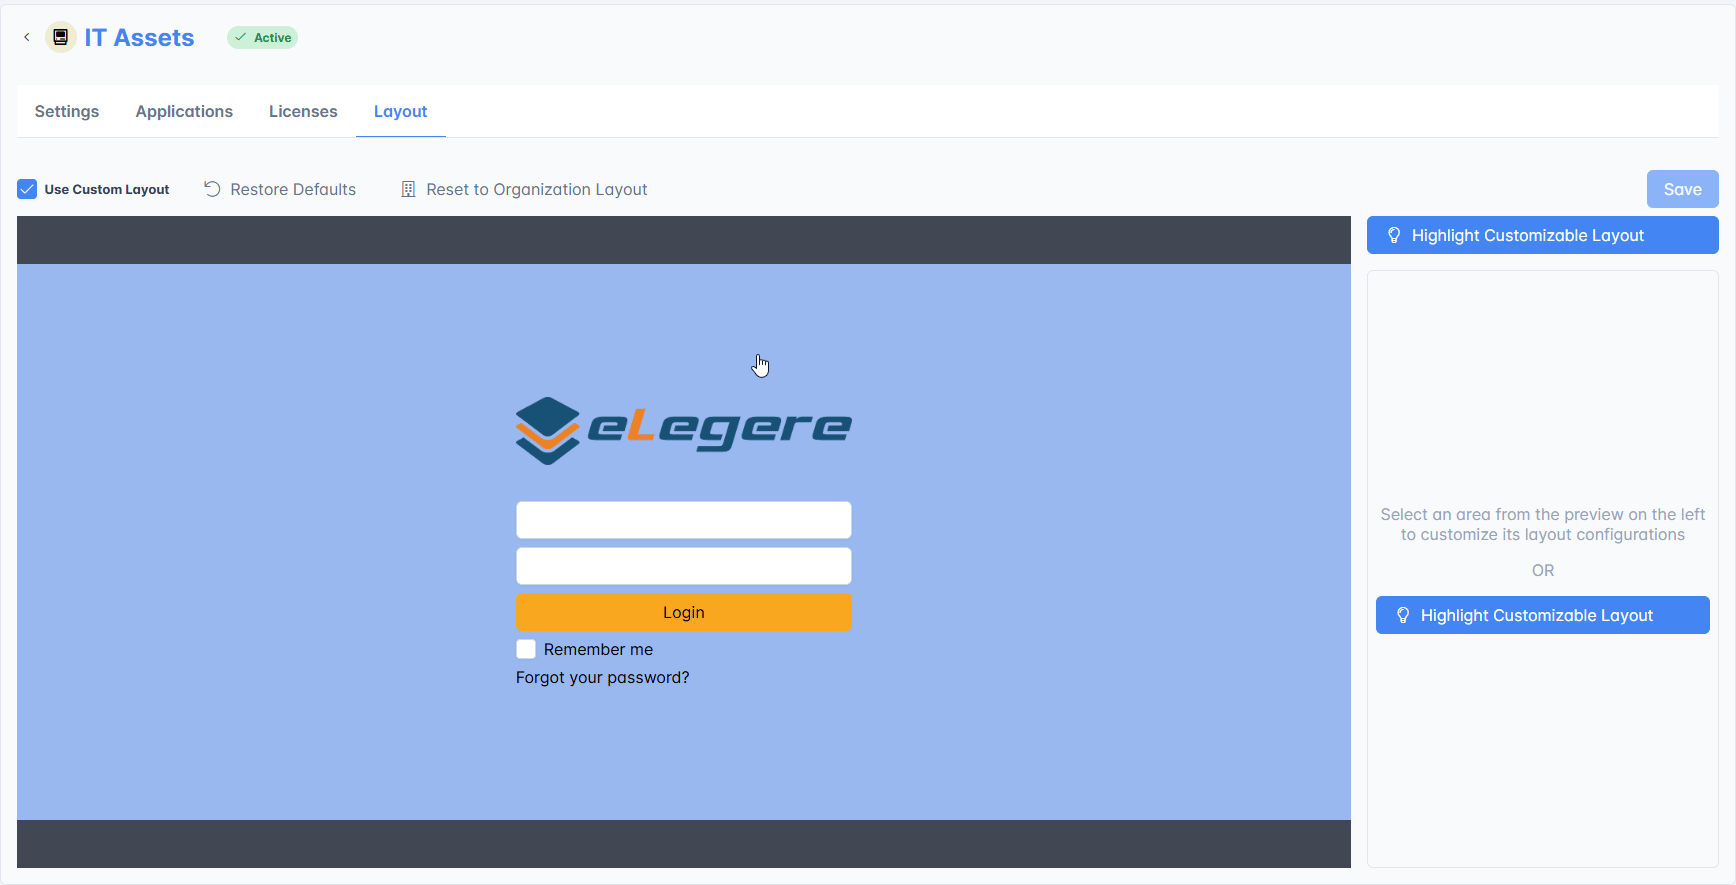
Click on the Reset to Organization Layout to revert the layout to the Organization's default.
Click on Reset to Default to return to the previous saved Layout.
Click on Save to save the changes or Cancel to abort the edits.
Delete Workspace
Learn how to delete an entire Workspace from you Organization.
Danger
You can't revert the operation once confirmed. Be sure about deleting the chosen Workspace.
-
Click on the Delete Workspace on the sub-panel right-side. The action opens the Workspace Delete Confirmation window.

-
Confirm the choice by typing DELETE in the window's textbox then clicking on Confirm. If you have changed your mind, click on Cancel instead.

Success
You have either edited or removed your Workspace in the Organization.