How do I edit users' groups and permissions in the Workspace?
Required Permissions
This section assumes that you are a Workspace Admin and you can access the Workspace Settings. See What's a Workspace? in Admin Guide's Introduction.
Learn how to assign or remove a permission (system roles like Application Designer or Storage Management) or a User Group (custom groups made by the Workspace's Admin) to a user in the Workspace Settings.
Users in the Workspace can perform different tasks according to their permissions. (See What are the Design Tasks? in the Designer Guide for more information about each permission.) And each application might have permissions to perform certain actions according to the users' groups.
The Workspace Admin can assign or remove both permissions and User Groups to the user from the Workspace Settings.
Warning
Adding or removing a permission or a User Group from a user affects their actions, applications they can view, and data they can edit. Verify before proceeding.
Follow the steps below to assign either permissions or User Groups to a user.
-
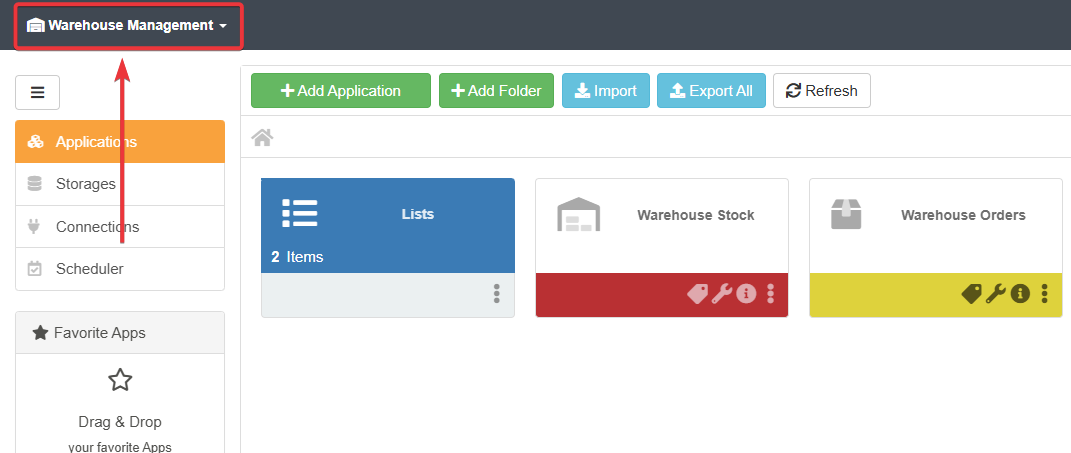
In the Home, click on the Workspace's name in the upper-left corner.
-
Click on the icon next to the current Workspace's name in the drop-down menu.

-
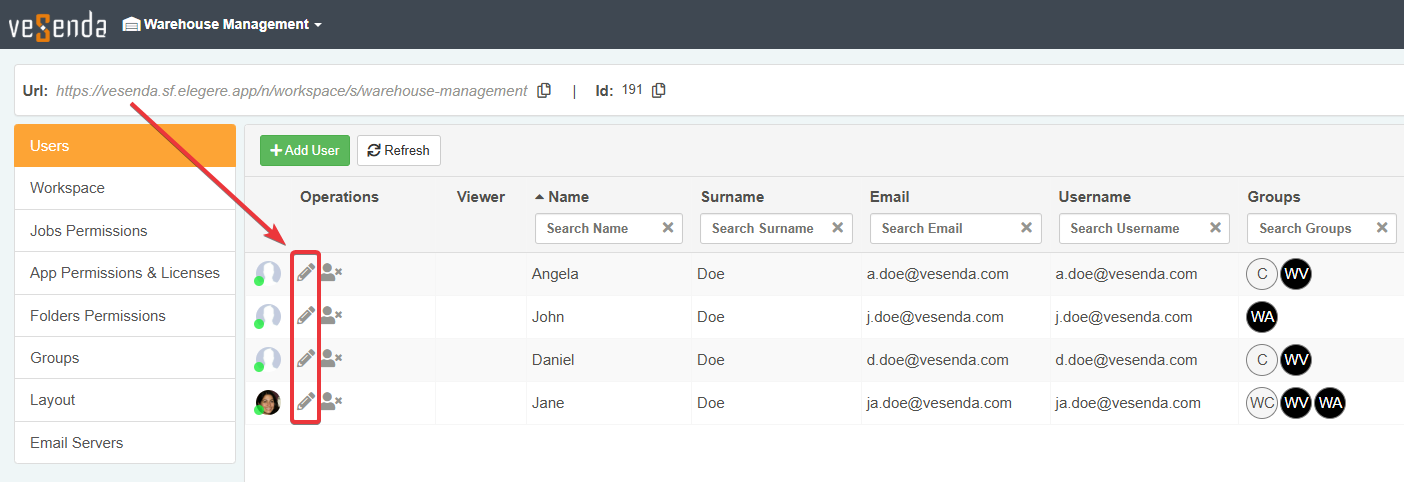
In the Users sub-panel, click on the icon next to the user you want to edit.
-
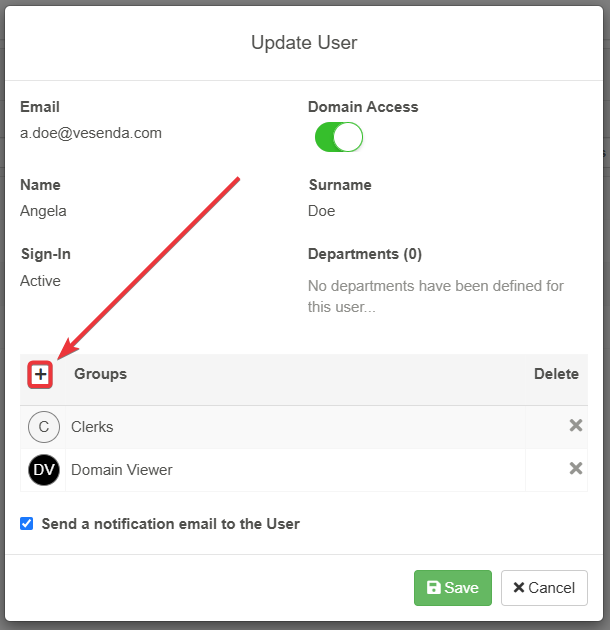
Click on button next to Groups.
-
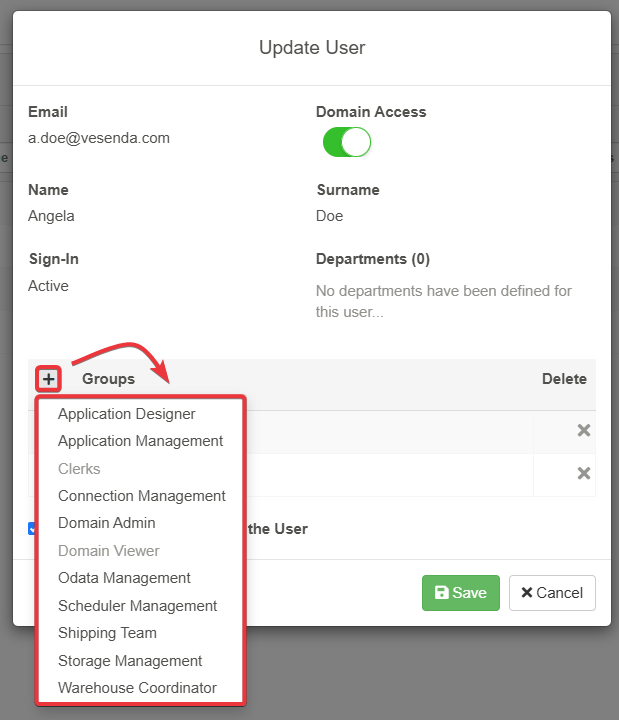
Choose the permissions or the groups to assign from the drop-down menu list.
-
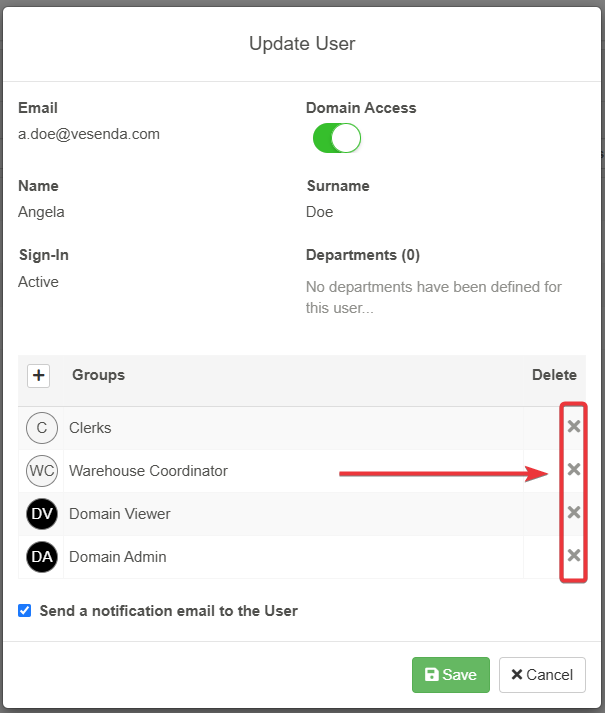
If you want to remove either a permission or a Group from a user, click on the icon next to it.
-
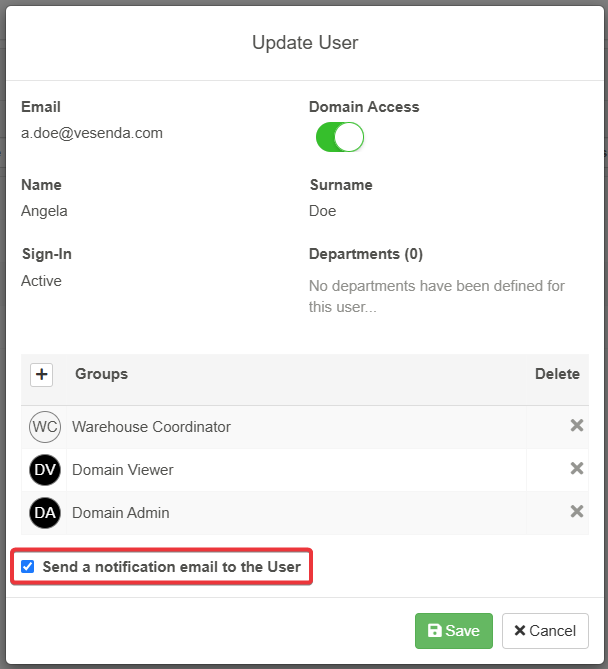
This step is optional. By default, an email warns the user about receiving new permissions and joining new groups. Uncheck the option to not warn the user by email.
-
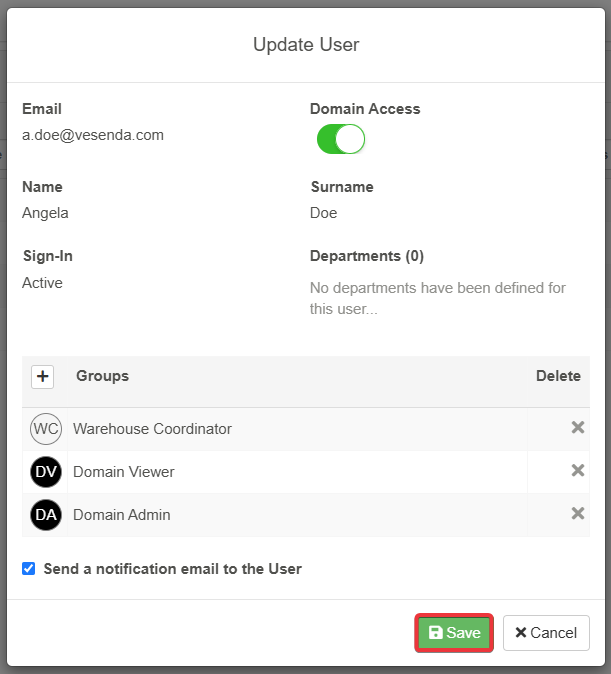
Once done, click on Save or Cancel.
Success
You have edited a user's permissions and Groups in the Workspace Settings.