How do I either edit, remove, or assign a license to a user in my Organization?
Required Delegate Permission
You can perform this operation if and only if you are either an Admin Delegate or a Users & Workspaces Delegate.
Check the Admin Guide's Introduction to learn more about Delegates and the Organization Manager.
Abstract
This section teaches how to edit the information of a user or delete their account within the Organization.
Introduction
A Delegate can edit or remove an eLegere user from the Organization through the Users sub-panel.
A Delegate can edit the following user's information:
- The License assigned. (See What's the difference between Flat, Pay Per Use, Interactive, and Viewer users? for more information about users and licenses.)
- Name and Surname
- Password
- The user's Workspaces' list.
Note
Delegates can't edit the Username after the user account's creation.
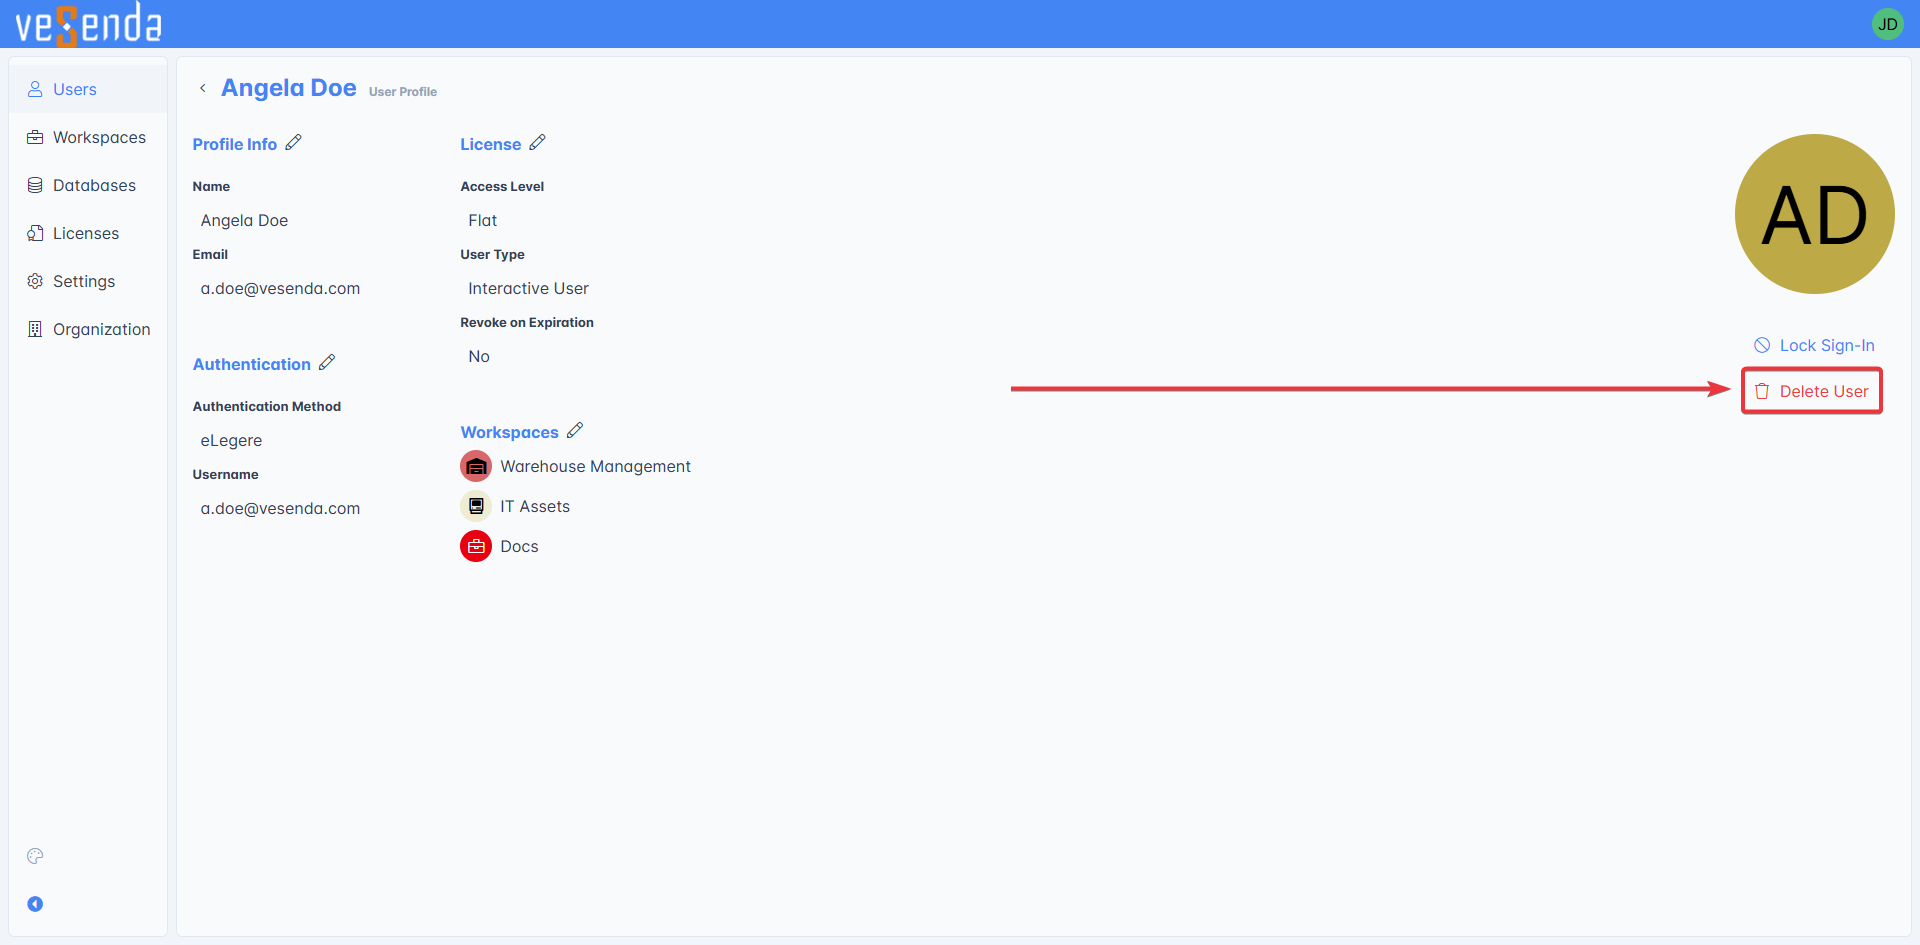
Access the User Profile
Follow the step below to access the sub-panel in Users where you can edit the user's info.
-
In the Organization Manager's Home, click on the Users in the left sidebar. The action leads to the Users sub-panel where you can add, edit or remove the users.

-
In the Users sub-panel, find the user that you want to edit.

-
Click on the button on the corresponding user's row you want to edit and choose View Details. The action leads to the User Profile where you can edit the user's information. (As alternative, click on the Username to perform the same action.)

Edit the User's Info
In the User Profile you can edit the user's information.

Name, Surname, and Email
Click on the icon next to Profile Info
The action opens the Edit Profile Info window. Here you can change the user's Name, Surname or Email address.
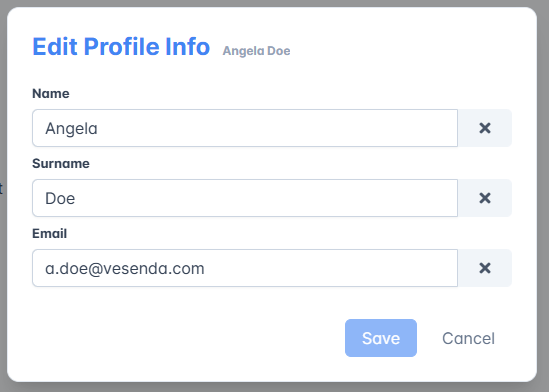
Click on Save to save the changes or Cancel to abort the edits.
Assign or Remove a License from the User
Click on the icon next to License
The action opens the Edit Licenses Info window.

Choose the desired license for the user: No License, Flat or Pay per Use. Click on one of the options opens a sub-menu to choose whether the user should be an Interactive or Viewer user.
Organization
- Flat Licenses are available for every Organization.
- Pay per Use Licenses are only available for Professional Organizations.
Both Flat and Pay per Use licenses have the Viewer User and Interactive User options. The Viewer User option enables to open applications and view data without editing. The Interactive User option includes also data editing.
Check Deploy, License, and Organization Type to learn more about Organization Types.
Warning
If you choose the No License option, the user won't be able to enter any Workspace. eLegere will ask to return to the Login page. If you have Delegate permissions, you can still access the Organization Manager.
If you remove a License from a user who is working on eLegere, they can continue to work with the applications until their login expires.

Decide whether to renew the user's license automatically or not by checking the Revoke License on Expiration option.
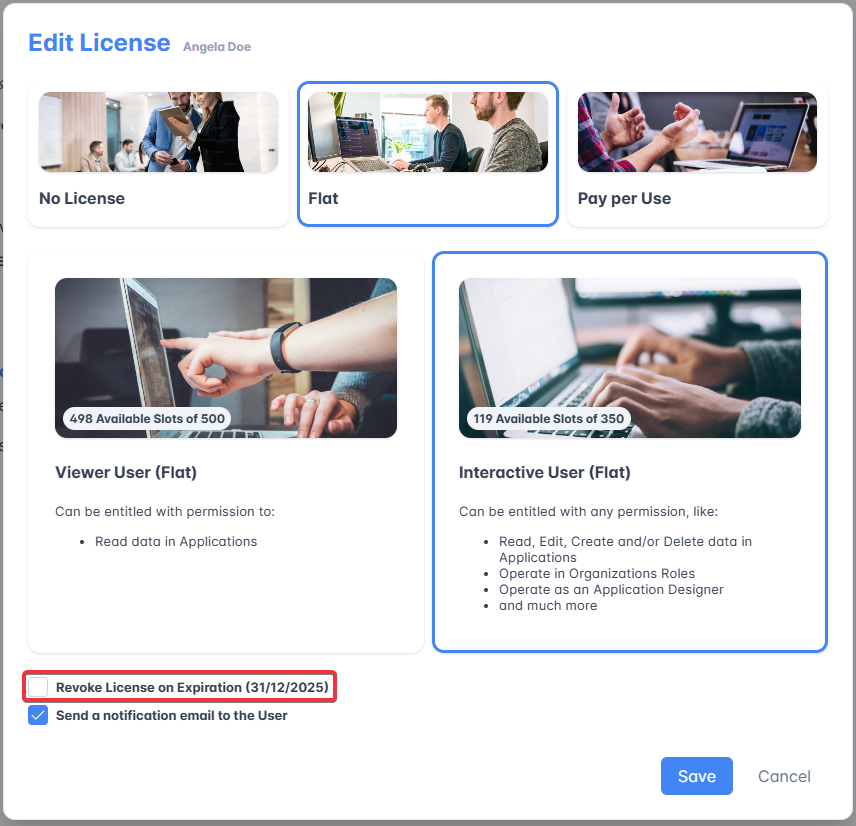
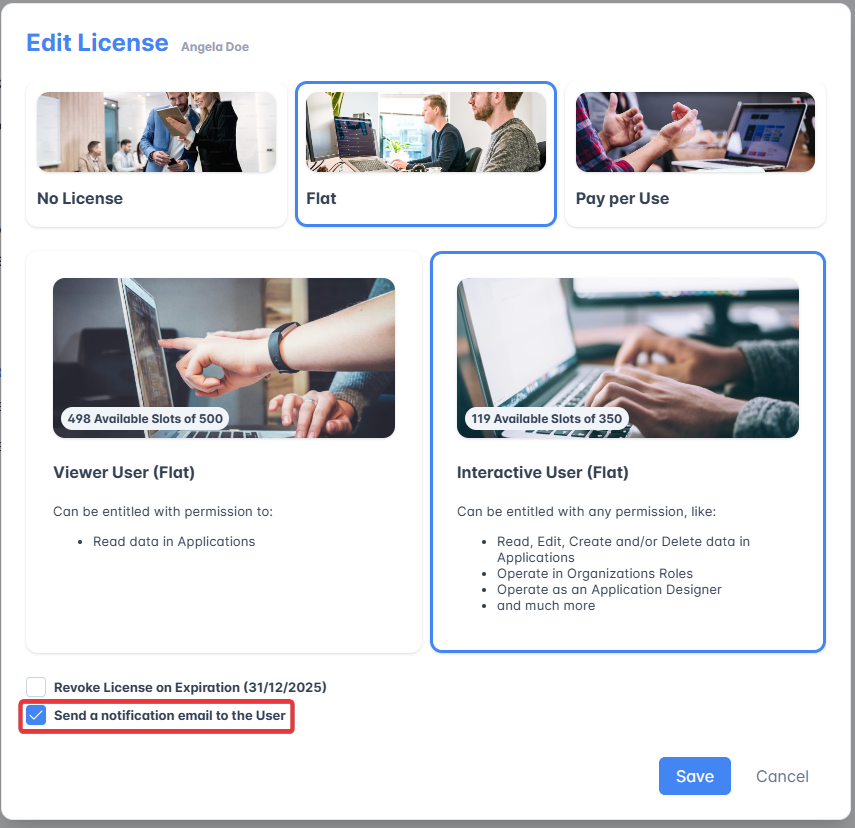
You can decide whether to inform the user or not about the license's change by email. By default, the Send a notification email to the User option is checked. Uncheck it to avoid sending the email.
Click on Save to save the changes or Cancel to abort the edits.
Edit the User's Workspaces
Click on the icon next to Workspaces.
The action opens the Edit Workspaces window.

Adding a New Workspace
In the Edit Workspaces window, click on the Add Workspaces button. Repeat this step for each Workspace where you want to add the user.
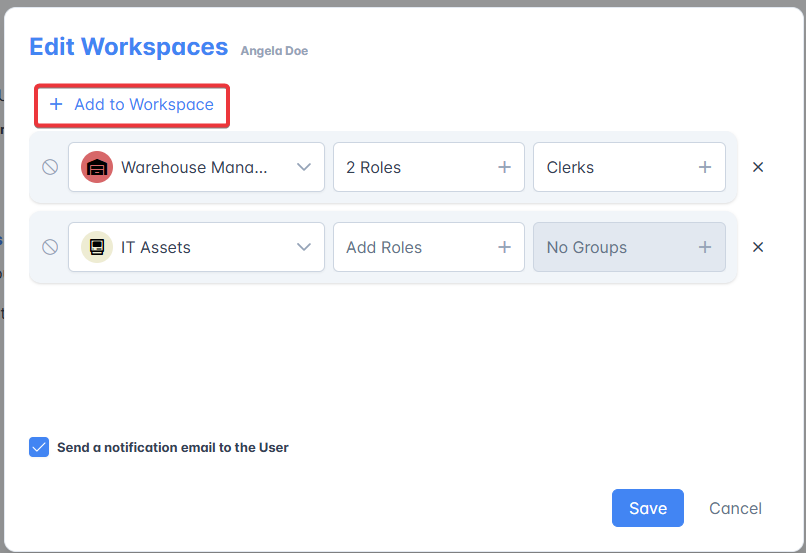
Select from the drop-down list the Workspace in which you want to add the user.
Click on Add Role and select all the Roles (for example, Application Designer, Storage Management or Workspace Admin) you want to assign.
Click on Add Groups and select all the Groups you want to assign. (Groups means the Custom Groups that the Workspace admin has created besides the role.)

Tip
-
Click on the Select\Deselect All to select all the Roles or Groups in the Workspaces for the user.

-
Click on Sort to sort the Workspace's Roles or Groups in either ascending or descending alphabetical order.

You can decide whether to inform the user or not about the Workspace's change by email. By default, the Send a notification email to the User option is checked. Uncheck it to avoid sending the email.
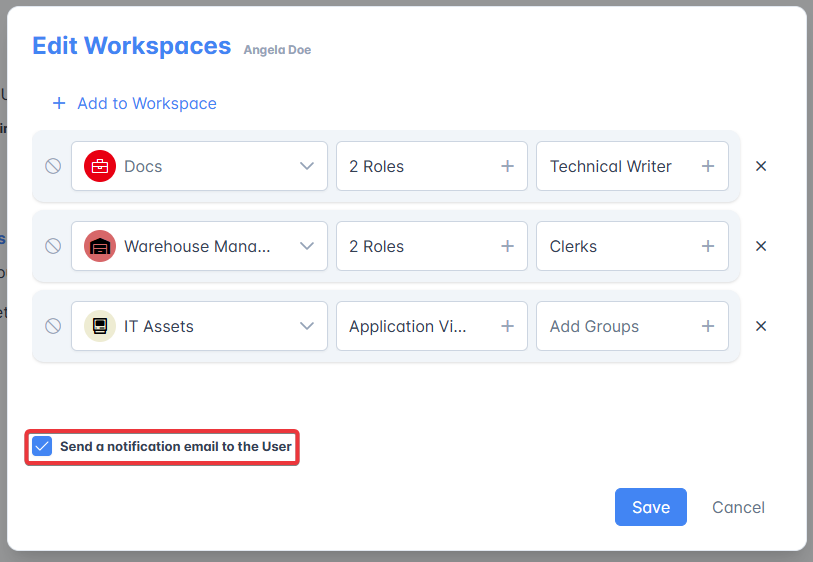
Click on Save to save the changes or Cancel to abort the edits.
Edit the User's Roles and Groups in a Workspace
Click on either the Roles or Groups drop-down menu lists on the Workspace's row to add or remove them from the user.
Click on the icon on a Role or Group tag to remove it.

Click on all the Roles or Groups' tags you want to assign to the user in the drop-down list menu.
Click on Save to save the changes or Cancel to abort the edits.
Remove a Workspace from the User's List
Click on the icon on the Workspace's row in Edit Workspaces window. The action removes the Workspace from the user's list.
Click on Save to save the changes or Cancel to abort the edits.
Block the User from Accessing a Workspace
If you want to block a user from accessing a Workspace without removing them, click on the icon on the Workspace's row in the list. The action blocks the user without removing them.

Click on Save to save the changes or Cancel to abort the edits.
Delete a User from the Organization
Danger
You can't reverse a user's deletion. Please, be sure about your choice.
If you want to remove a user from the Organization, click on Delete User.
A window will ask for confirmation.
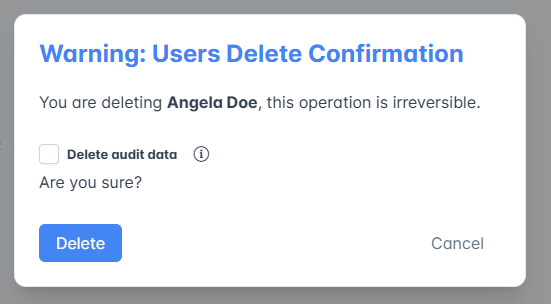
Click on Confirm to delete the user's account from the Organization or Cancel to abort. The action isn't reversible.
Info
By default, when you delete a user, the Delete audit data option is unchecked. Delete audit data means that deleting the user removes any log about the user's activity (for example, the last access or the last application opened).
Success
You have edited or removed a user in your Organization.