How to Assign or Remove an Application Slot in the Workspace
Required Permissions
This section requires either the Application Management or Application Designer permission from your Workspace's administrator.
Check What are the Design Tasks? to learn more about permissions to work with Design Mode and other tools.
Abstract
Learn how to assign application slot to an application in your Workspace.
Introduction to Applications and Application Slots
Designers in the Workspaces can design applications that require one of the following application slots type to work: Basic or Advanced.
Info
Check the What's the difference between Basic and Advanced Applications? section to learn the differences between the application slots types and what happens to them when in Trial or Restricted mode.
When created, the applications are in Trial Mode: only Designers can access them to test and design. Users can access application only with an application slot assigned.
In the following cases, the application switches to Restricted mode:
- The application had an application slot but it has expired.
- The application had an application slot, but the Designer has removed it.
- The application has a Basic application slot, but the Designer has enabled features requiring an Advanced application slot.
Users can't access applications in Restricted mode.
Organization
- Starter Organizations give access to Basic Application slots only.
- Professional Organizations give access to both Basic Application and Advanced Application slots.
Make sure you have the right Organization Type for your needs.
Check Deploy, License, and Organization Type to learn more about Organization Types.
Application Slots Assignment
Follow the steps below to assign an application slot to an application:
-
In the Home, click on a icon on the application's tile in Tile View Mode.
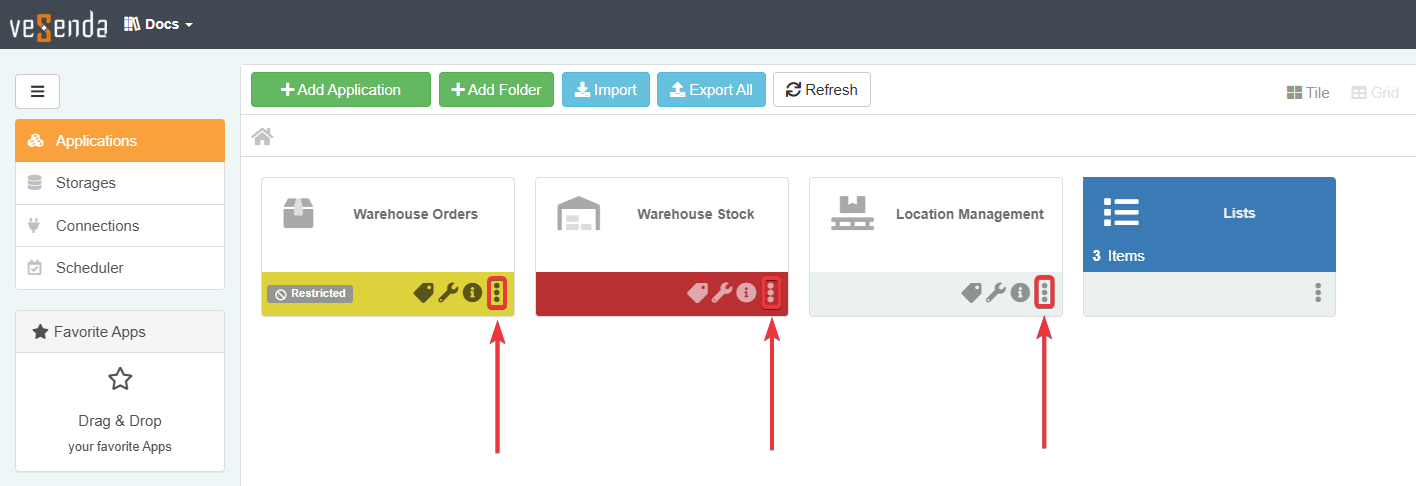
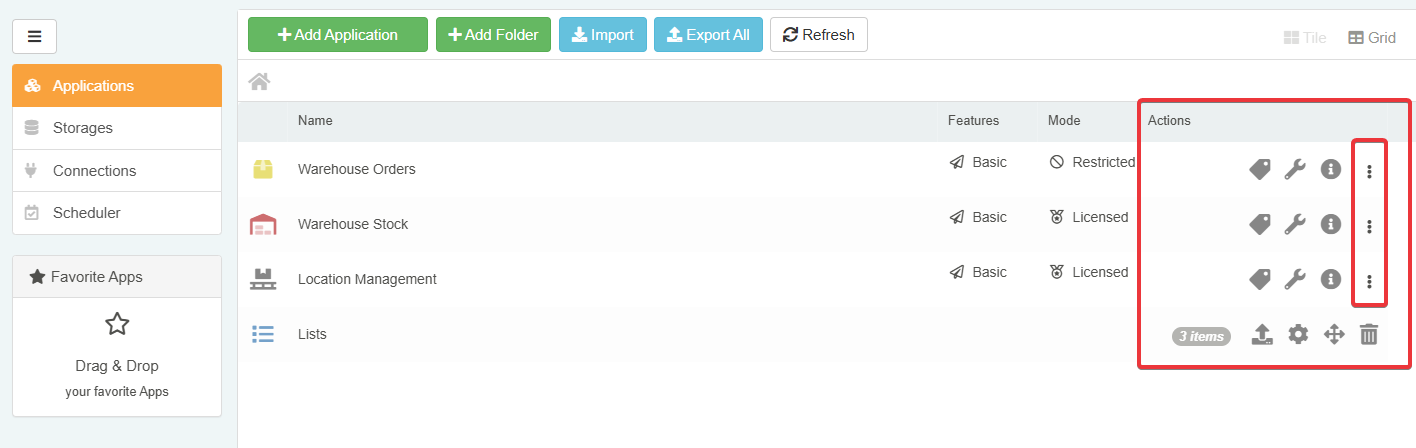
In Grid view, the icon icon appears under the Actions column.
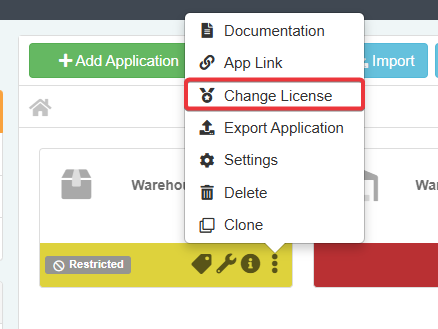
The actions opens a drop-down menu list.
-
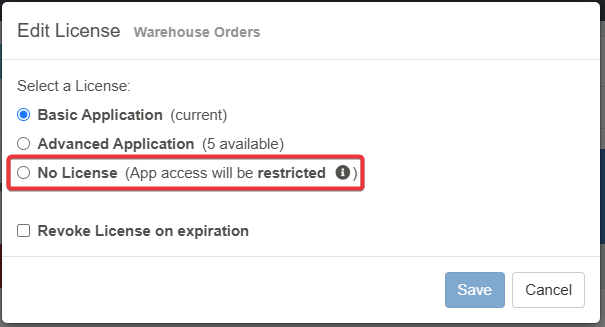
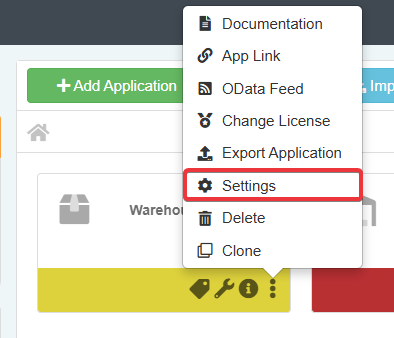
In the drop-down menu list, click on the Change License option. The action will open the Edit License window.
-
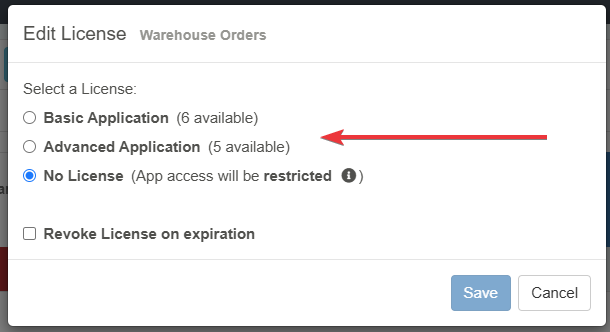
In the Edit License window, check the application slot you want to assign to the application. (If the application was either in Trial or Restricted mode, the No License check is selected by default.)
-
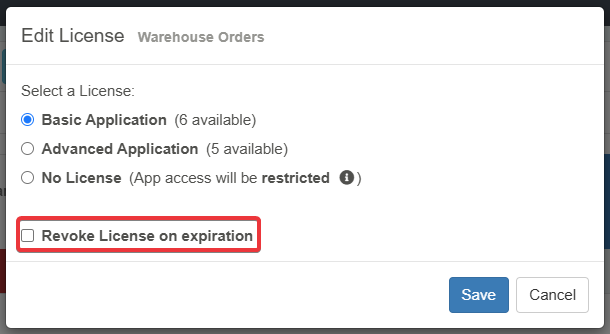
This step is optional. Check the Revoke License on expiration option to remove the application slot automatically when the License expires.
-
Click on the Save button to complete the assignment. (Click instead on Cancel to abort the action.)

Tip
As alternative, you can access the Edit License window from the Application Settings.
You can access the Application Settings by choosing the Settings from the drop-down menu list.
The Application Info tab reports the applications slot assigned.
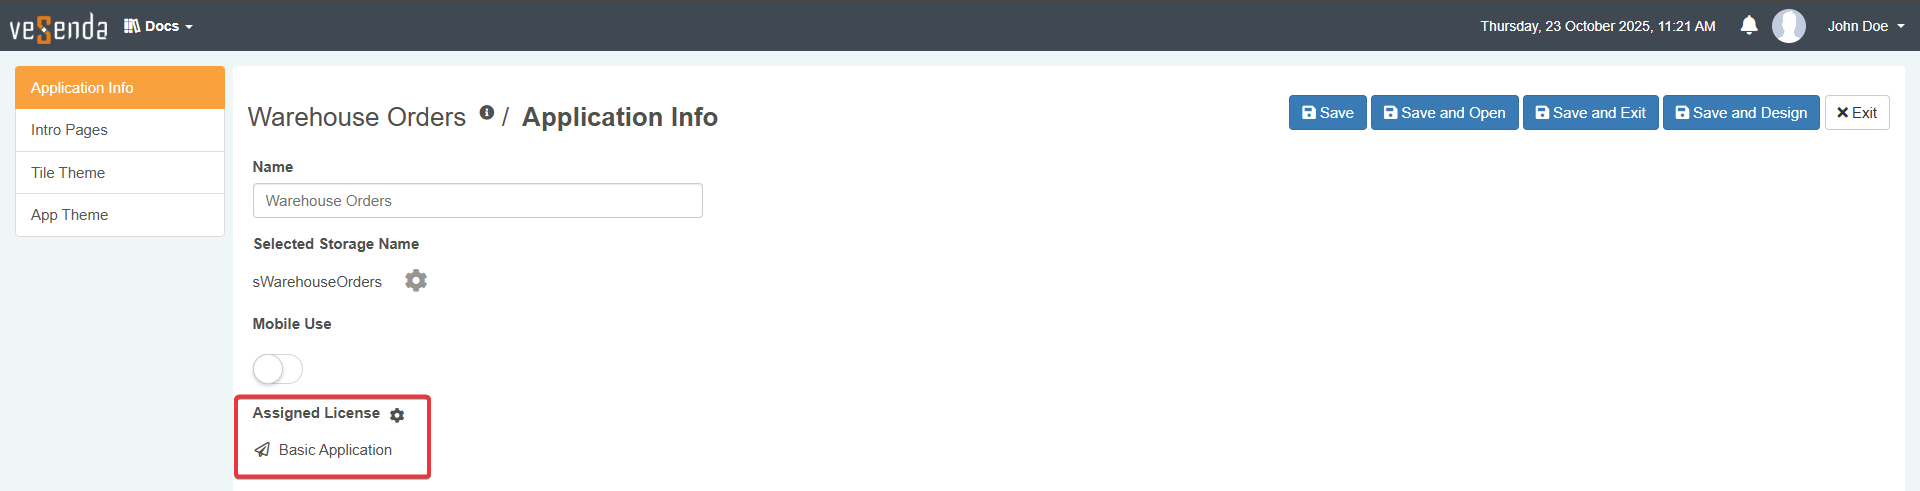
Click on the icon to open the Edit License window.

Success
You have assigned an application slot to an application in the Workspace.
Application Slots Removal
Repeat the same steps from Application Slots Assignment, but choose instead No License. The action will remove any application slot from the application.