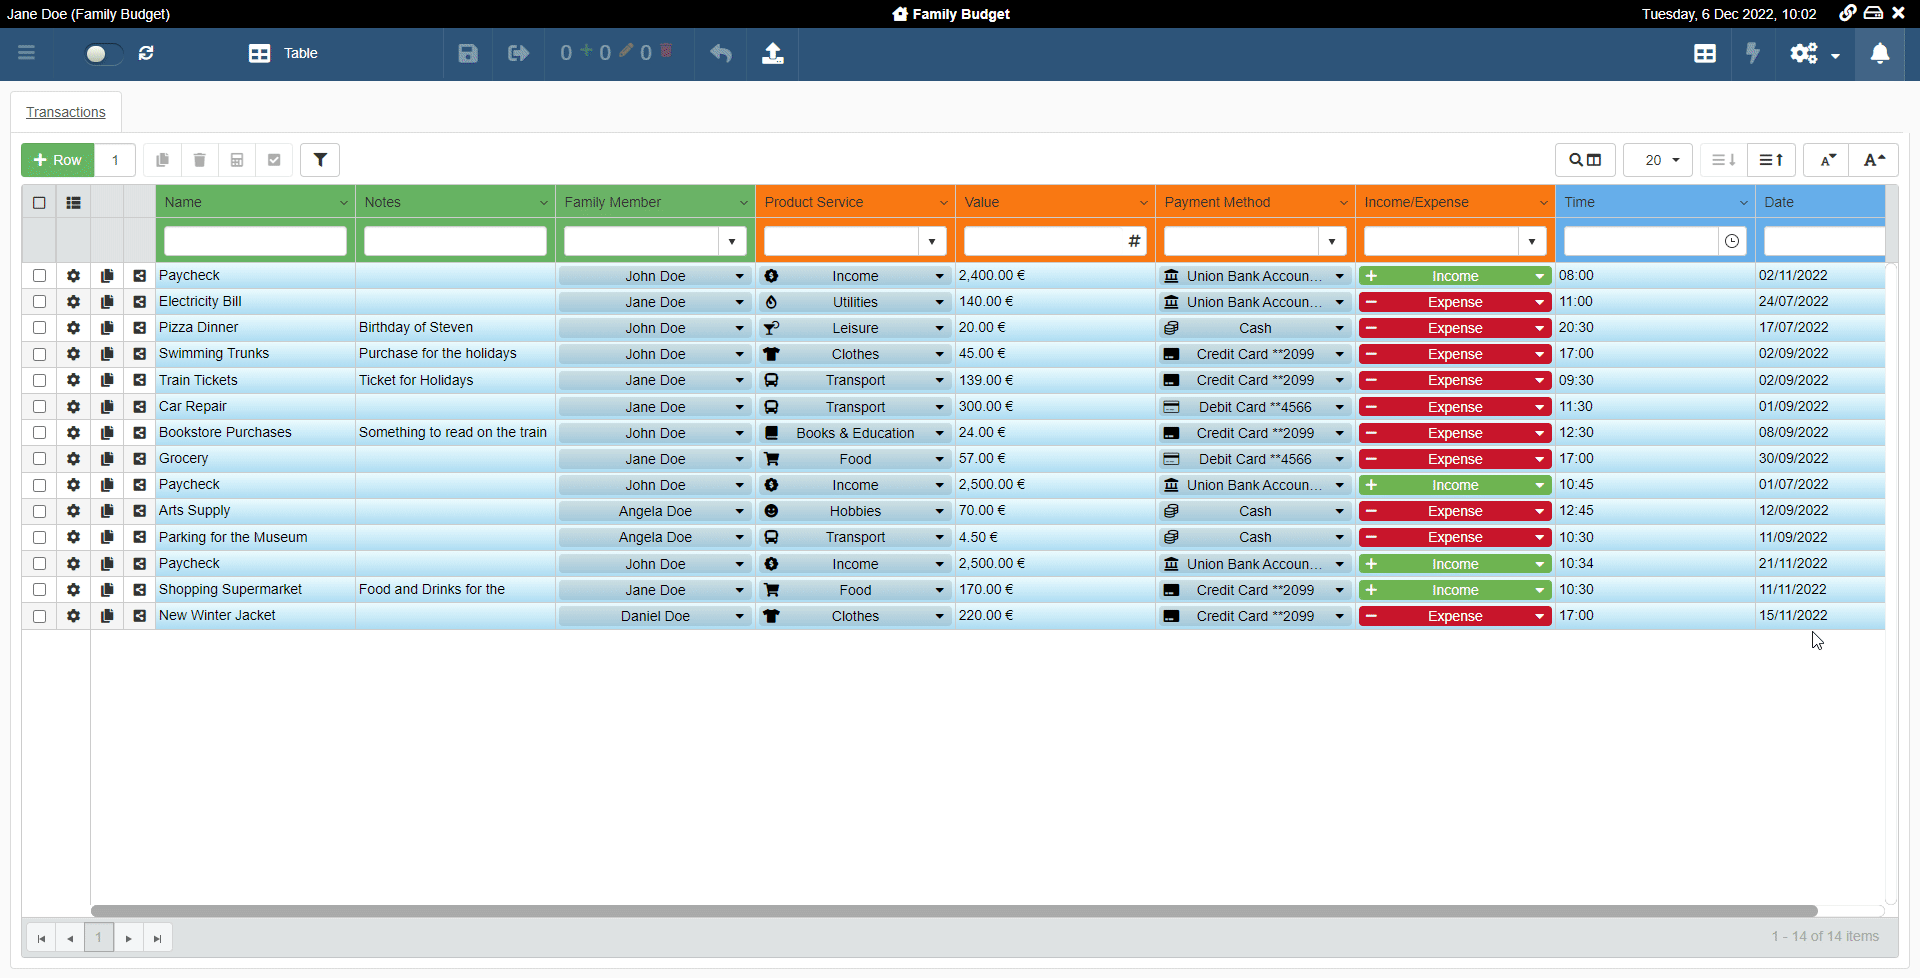
Filtering
The Filtering section discusses how to apply filters and Properties within an application.
Filters shows only the row's data satisfying the criteria you choose (e.g. only null values or rows recorded after a certain Date.)
If the Designer has enabled the Properties, Properties are custom data subsets that the User can create to work with specific sets of values.
Abstract
- Table Filters: filter the columns' values Learn how to filter the columns and display the data you need.
- Check the Active Filters Learn how to check what filters are enabled.
- Filter Rows having Attachments, Comments, and Details: Rows' Attributes Filters Learn how to filter the rows that have attachments, comments or details.
- Create subsets of data from filters: Properties Learn what are Properties and Groups and how to use them to create data subsets.
- Fine-Grained Search Learn how to make detailed searches on the application's table.
- Save Your Properties and Filtering Settings for the next access Learn how to save for the next access all your filtering options.
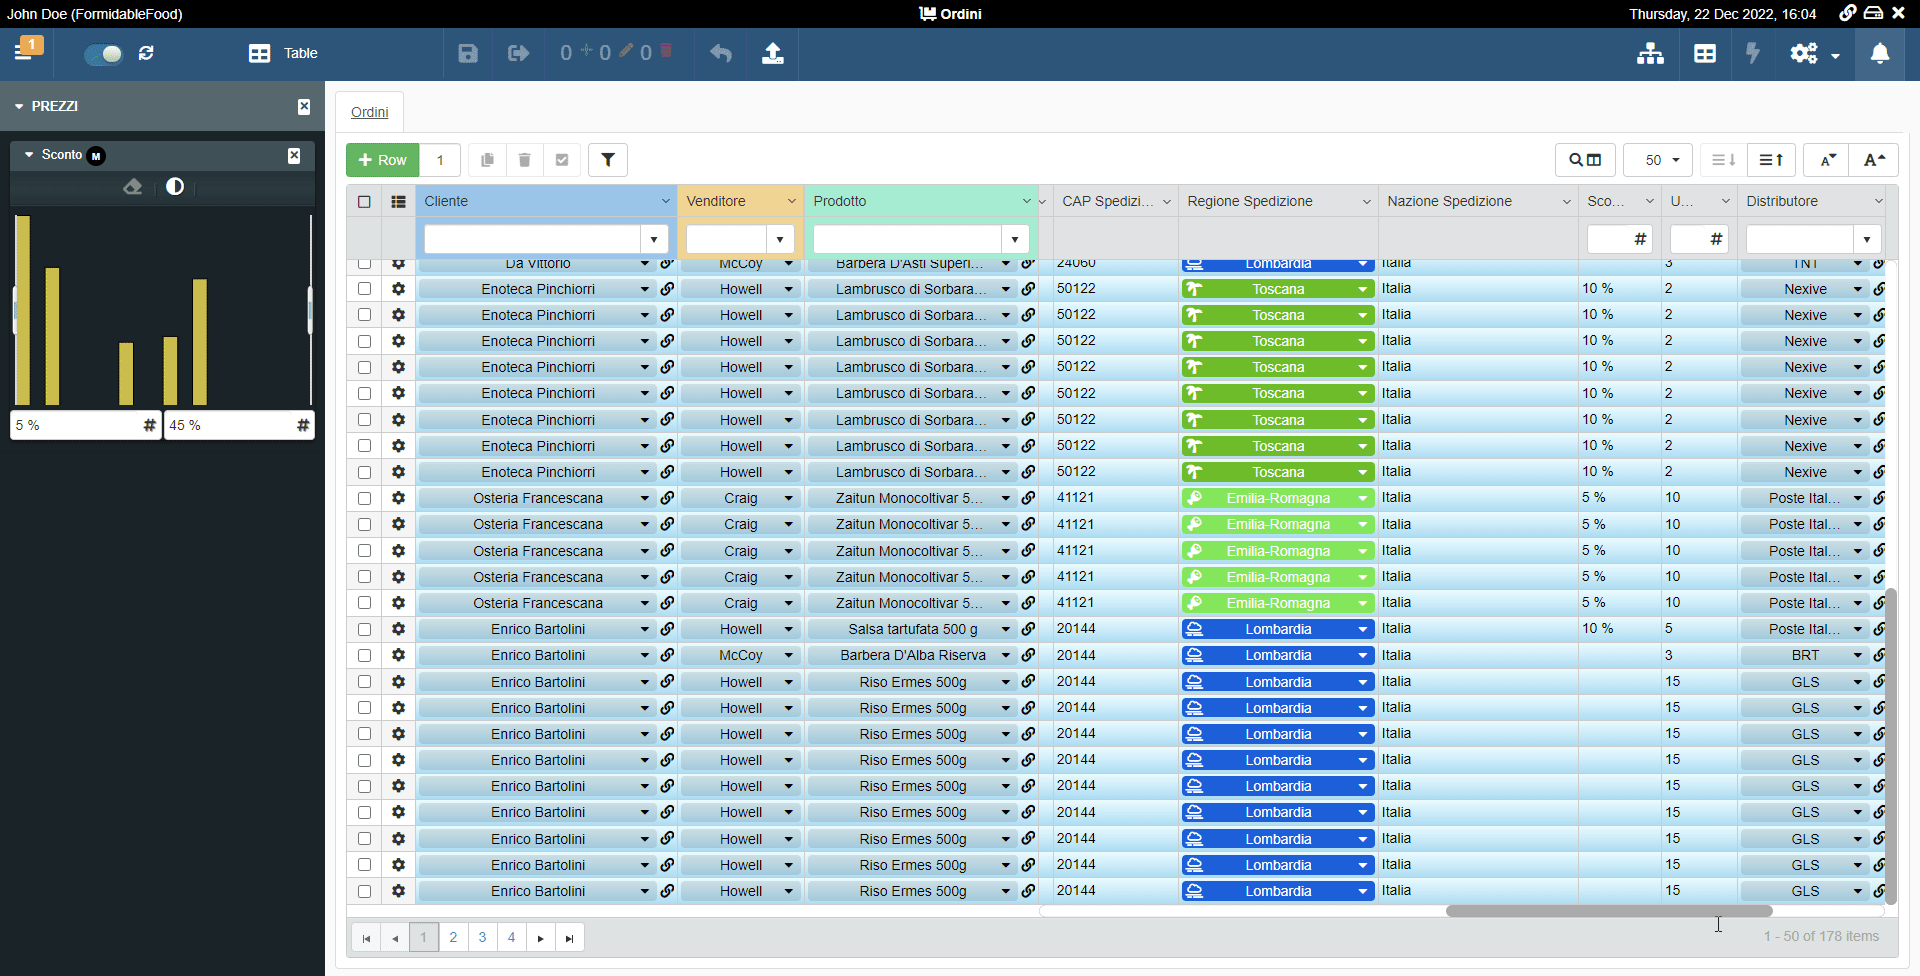
Table Filters: filter the columns' values
Learn how to filter the columns.
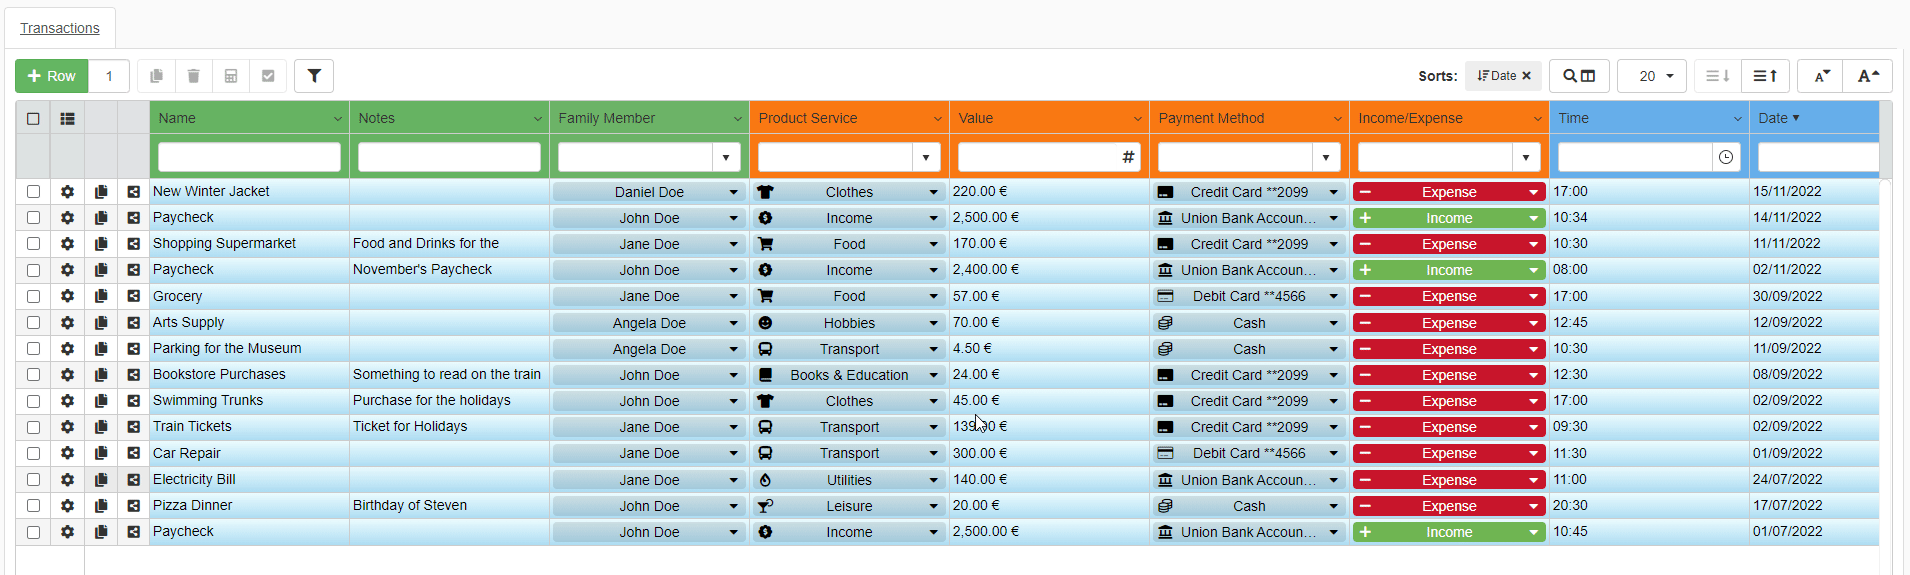
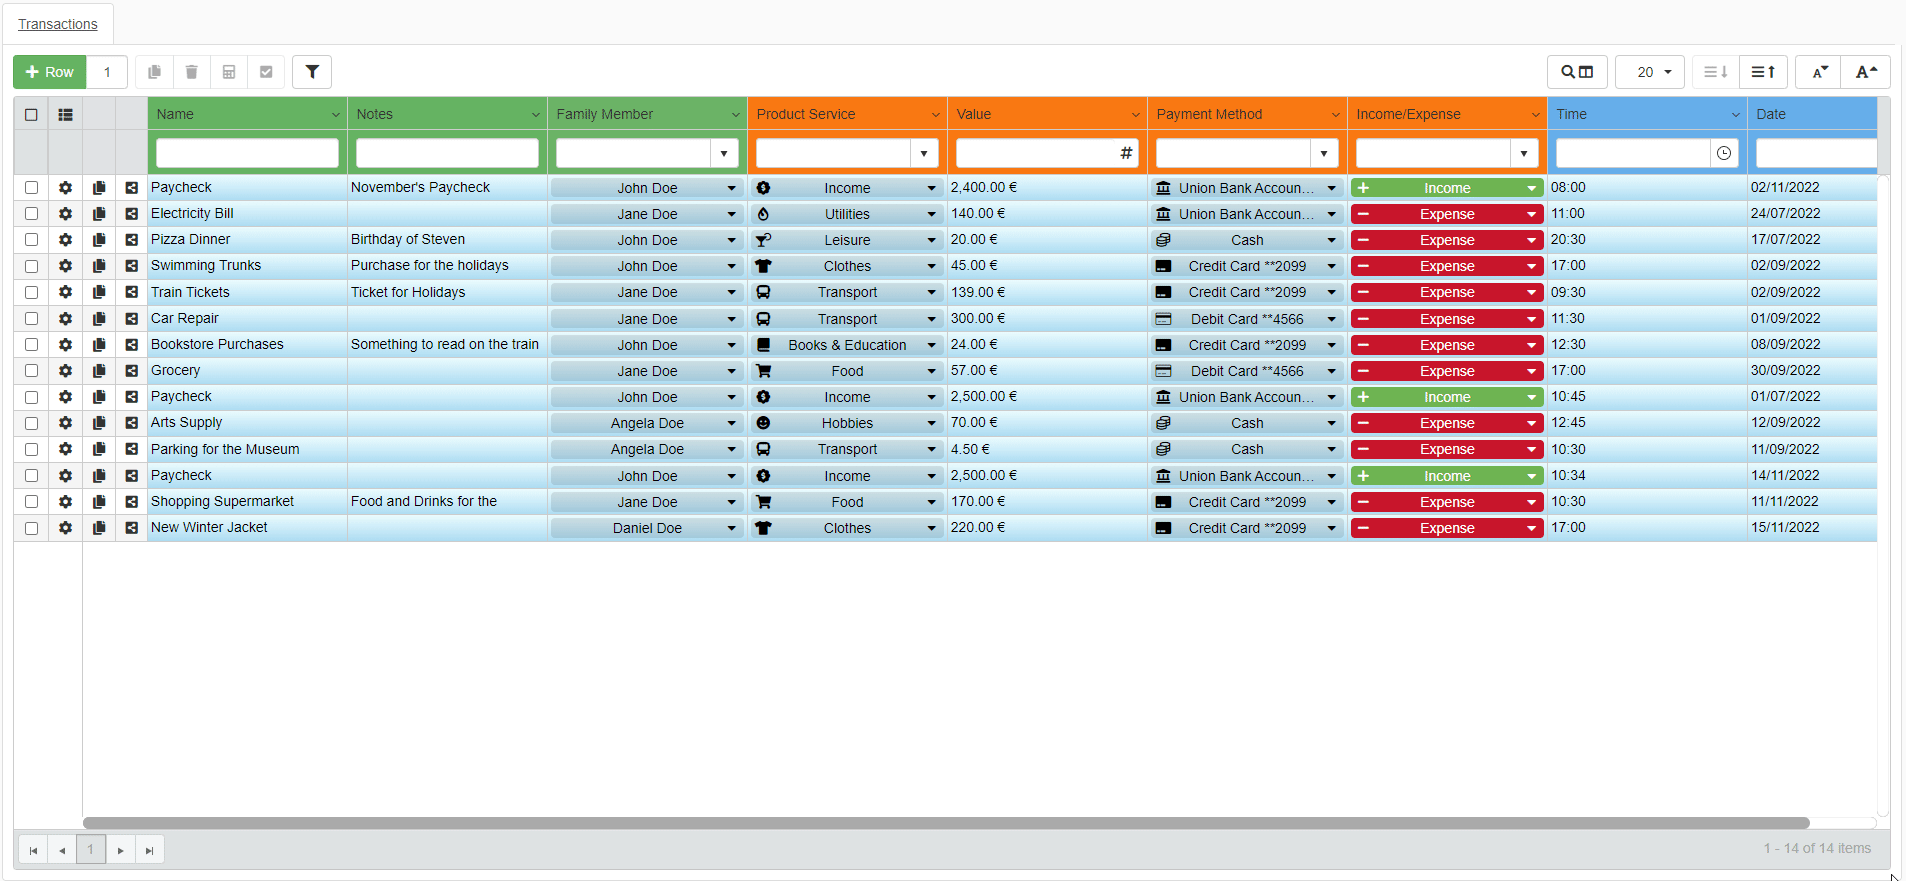
Users can filter the rows of the table according to criteria of their choice. In this way, the User can view only the rows that interest them without navigating the whole table.
Header Filters
Learn how to filter rows by using the table headers' search bar filter.
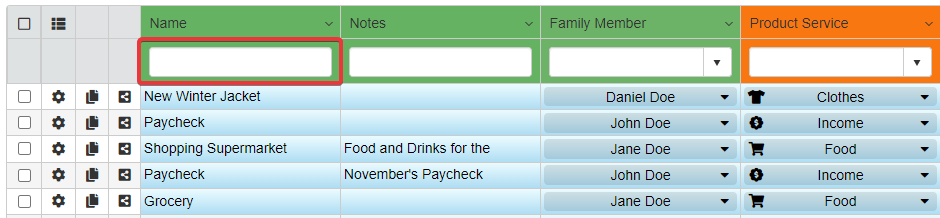
You can filter entries of the table using the table headers' search bar filter.
Note
You can search a row through the Column's header search bar if the Designer has enabled this possibility for that particular column field.
You can search any value within a table field through the Search Bar of a column's header. The action searches any column cell containing a value similar to the search key.
Example
Searching through the header's search bar the word "Pizza" yields any result containing "Pizza".
- Pizza Dinner
- Pizza
- Pizza-pie
- Pepperoni Pizza
-
Click on the search bar below a field's header.
-
Type the value you would like to search.
The Master table will display only the rows satisfying the search.
Cell Filtering
Learn how to search the table cells for an specific value.
If you have to search for a precise value, you can right-click on the table and filter by a cell's value.
The action searches the exact value match on that table column.
Example
The cell filtering of "Pizza" will yield only the column's cell values containing "Pizza". The action excludes values that contain "Pizza" but aren't an exact match; e.g. "Pizza Dinner", "Pizza Delivery", etc.
- Right-click on the cell containing the value you want to filter by.
-
Choose Filter from the options.

The table will filter the rows by the chosen cell's value.

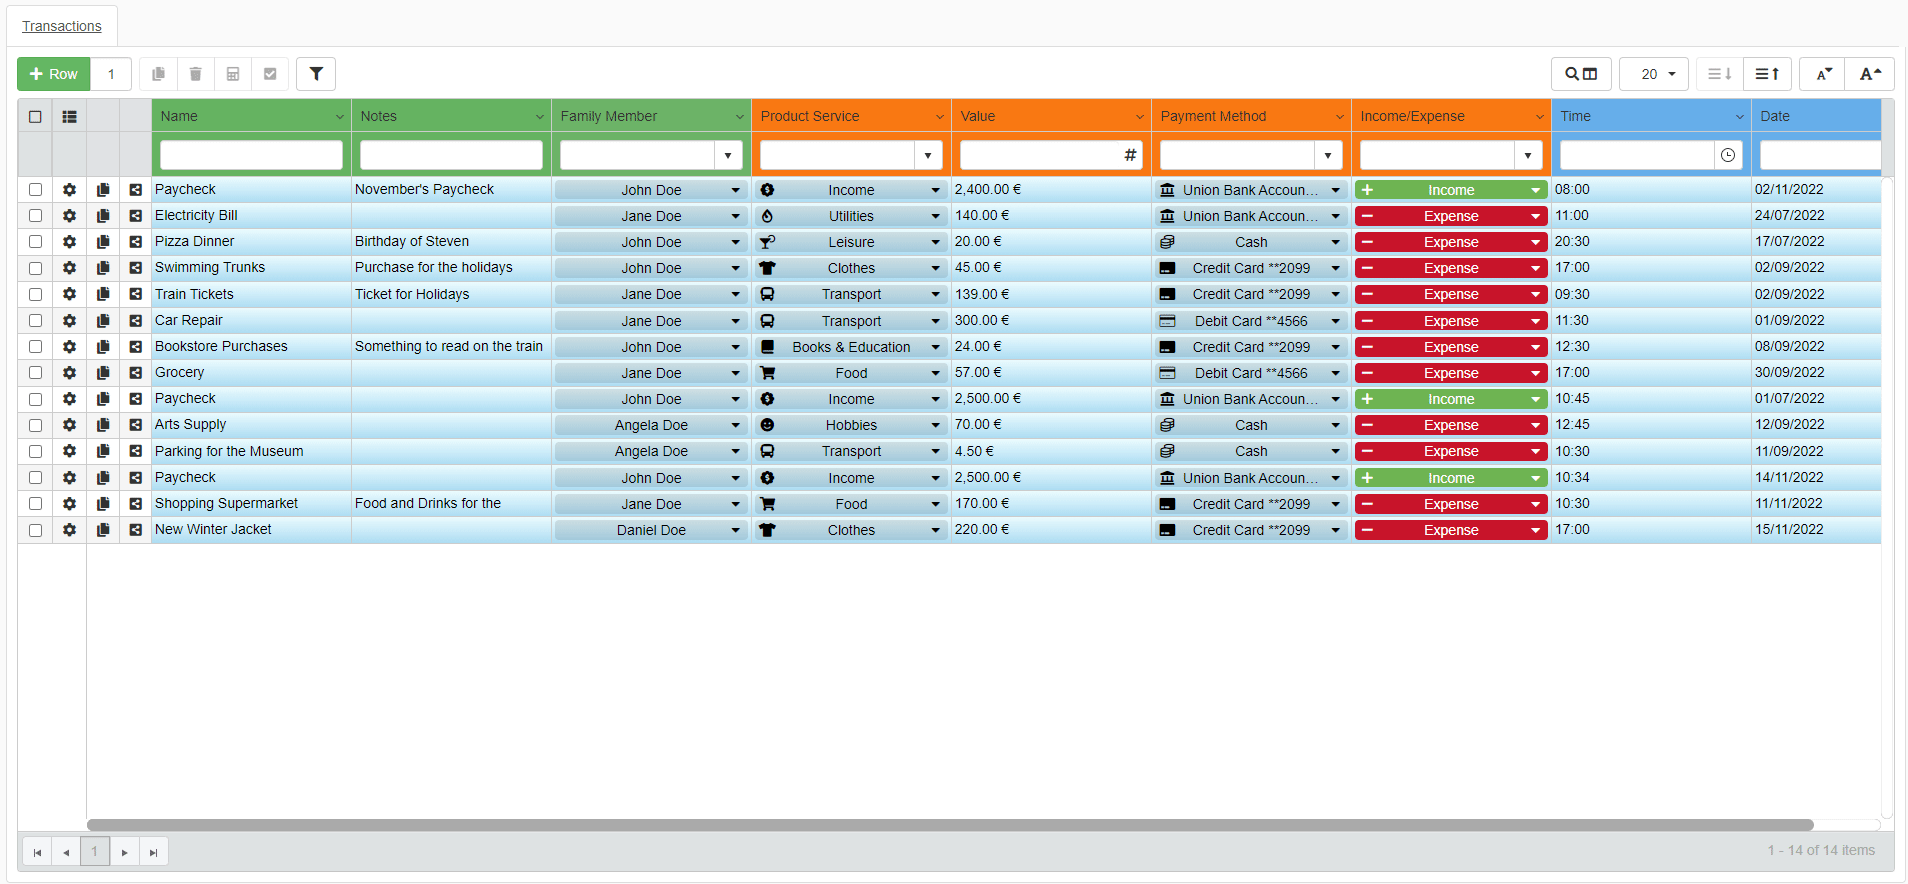
Advanced Column Filtering
Learn how to use the more advanced filtering options from the filtering menu.
The table headers' Filtering Menu offers more options than the headers filters and the cell filtering. (See Header Filters and Cell Filtering for more information about header filters and cell filtering.)
The Filtering Menu enables to add multiple criteria to search the column's values.
Example
Some examples of filtering action you can apply:
- Showing only the expenses in a Income/Expenses column.
- Showing only the entries of the current month for the Date column.
- Showing only the values higher than a certain amount in a Value field.
Here the steps to access the menu and choose the criteria.
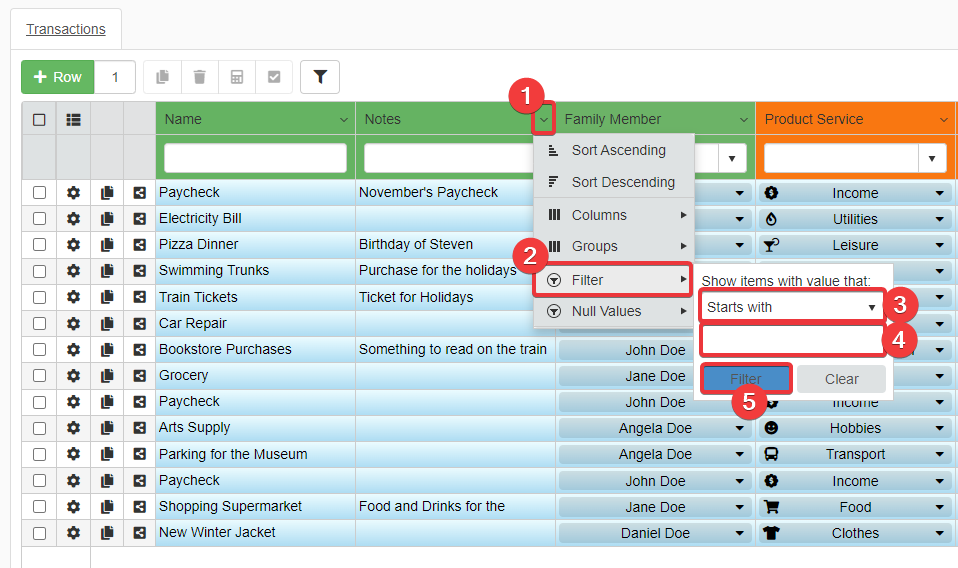
-
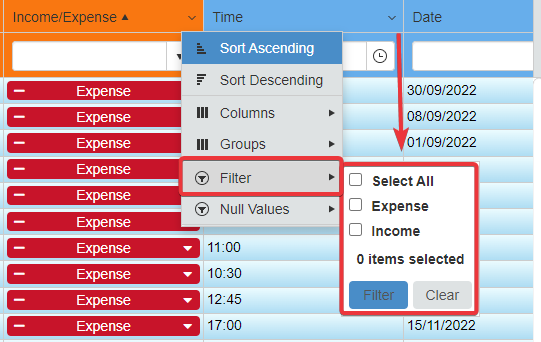
Click on the icon next to the column you want to filter by. A drop-down list of options will appear.
-
Click on Filter from the list. A small menu will appear to choose the filter type and the value to filter by.
-
In the Show items with value that menu, you can choose both the filter type and the value to filter by. Click on the drop-down list to choose one of the available filters type.
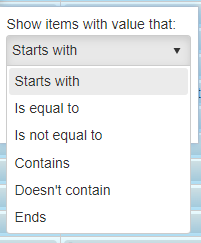
- Starts with Filters the elements that begin with the chosen value.
- Is equal to Filters the elements equal to the chosen value.
- Is not equal to Filters the elements not equal to the chosen value.
- Contains Filters the elements containing the chosen value.
- Doesn't contain Filters the elements not containing the chosen value.
- Ends Filters the elements that end with the chosen value.
-
Type the value to filter the column by.
-
Click on the Filter button to apply the filter on the rows.
Note
In case of Lookups drop-down lists: the Step 3 above will display a list of checkboxes. Each checkbox is a possible value for the cell. Check the values you want to filter by, then click on the Filter button.
Filter by empty values: null values
Learn how to exclude cells without value in your searches.
You can filter the rows considering or excluding from the search cells having no value.
Info
Columns' cells having no value are called null values.
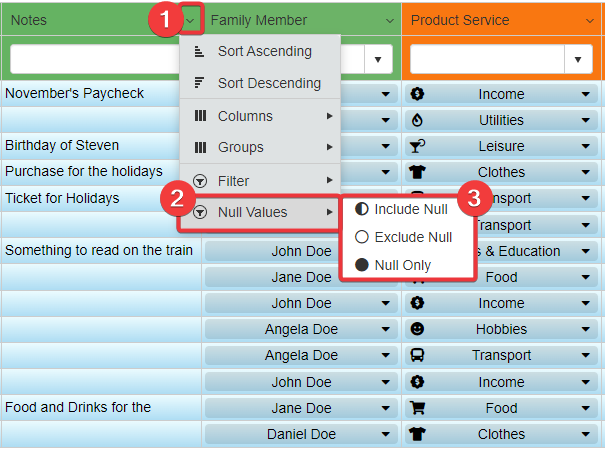
-
Click on the icon next to the column you want to filter by. A drop-down list of options will appear.
-
Click on Null Values from the list. A small menu will appear to choose how to behave with the null values.
-
There are three mutual exclusive options you can enable. Click on one of them to enable the option on the table and filter the values.
- Include Null Includes the null values in the filtering.
- Exclude Null Excludes the null values in the filtering.
- Null Only Show only null values in the filtering.
Note
By default, the Include Null is On.
Hint
You can combine filters by Column value and by null values. E.g. Choosing to Exclude Null and searching values with the Start with filter.
Check the Active Filters
Learn how to verify what filters are active and remove those you don't need anymore.
Active Filters
Users can track what filters are active on the current table.
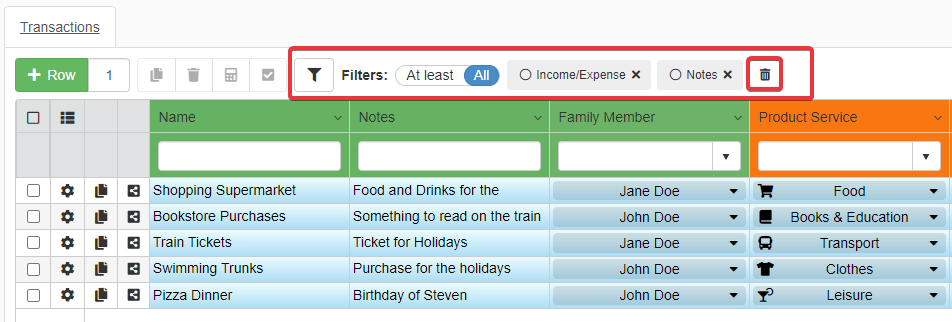
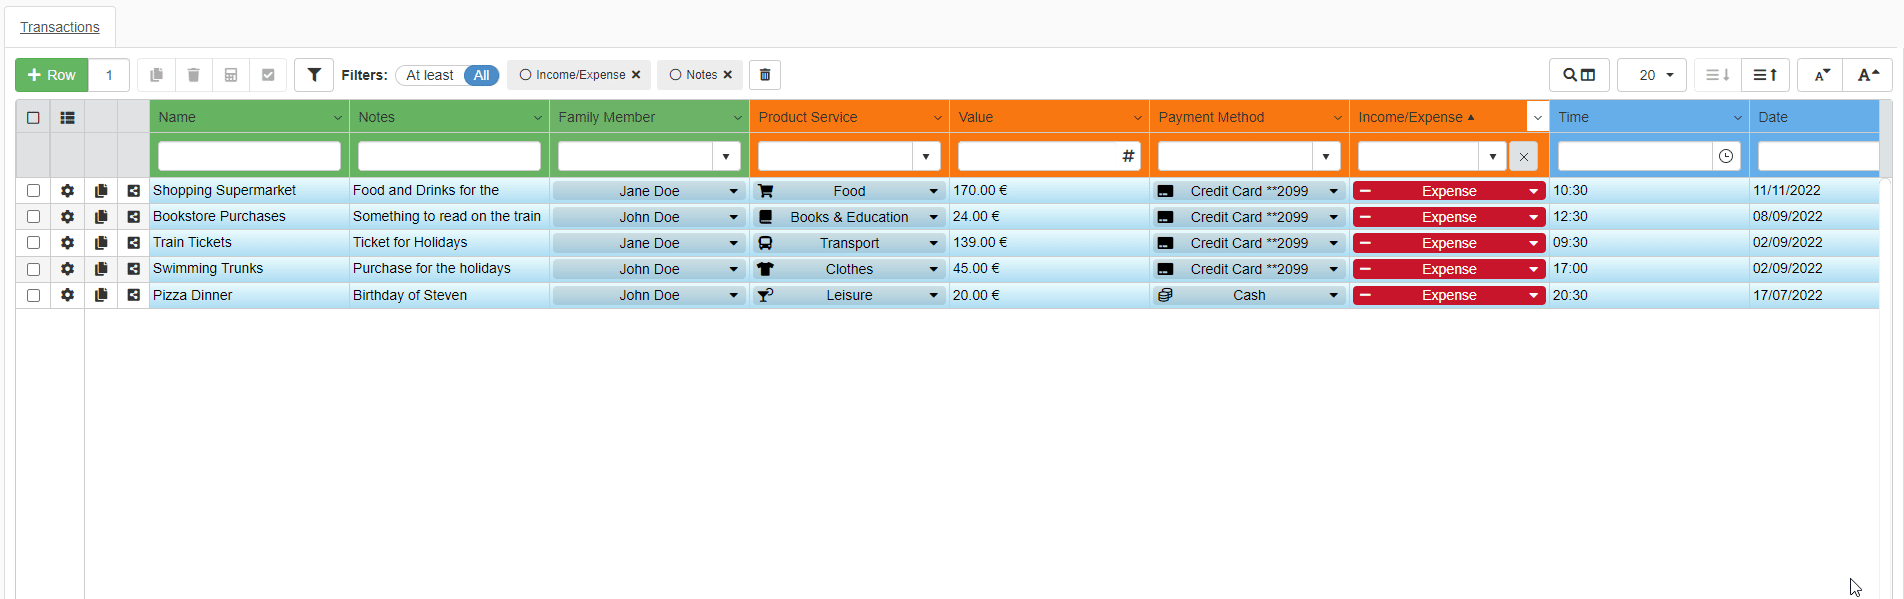
You can check the active filter on the table by looking at the tag of the Filter list.
You can find the Filters tag list on the right corner of the table.
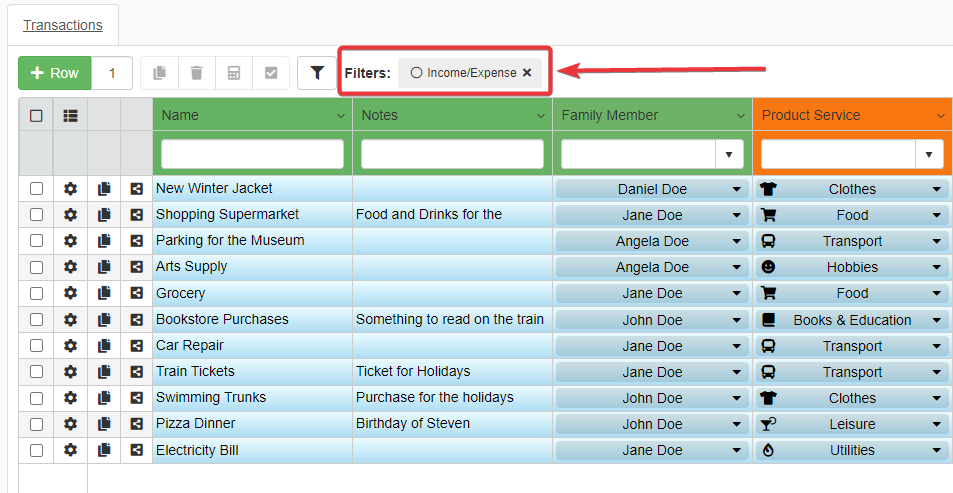
You can apply multiple filters to the same table. Multiple filters enable to view only the rows satisfying the criteria. The Filter list will contain then multiple tags, one for each active filter.
In case of multiple active filters: the priority and sorting will be from the earliest (from the left) to the latest (from the right).
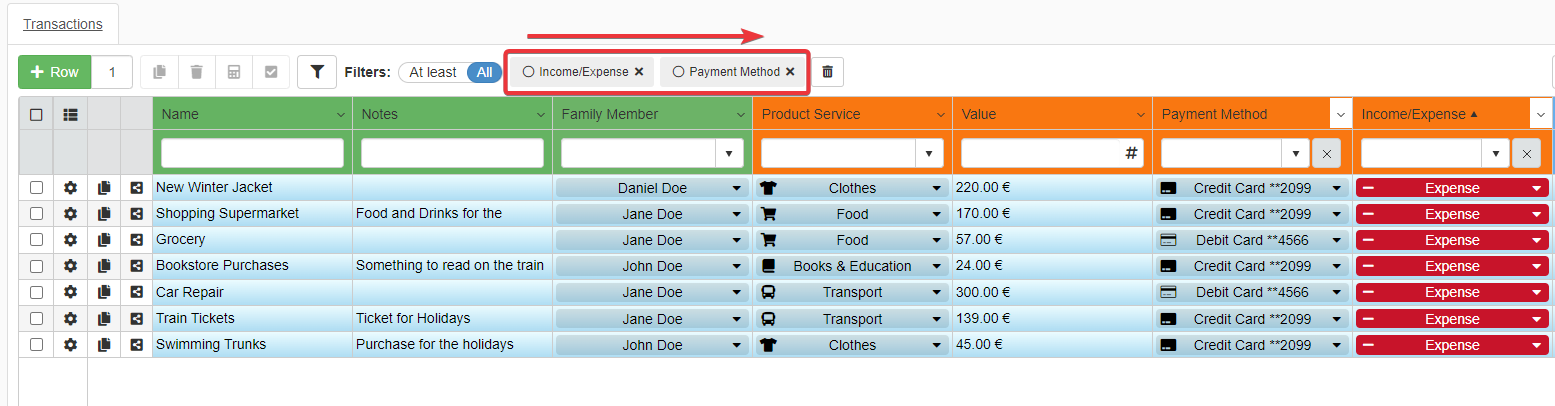
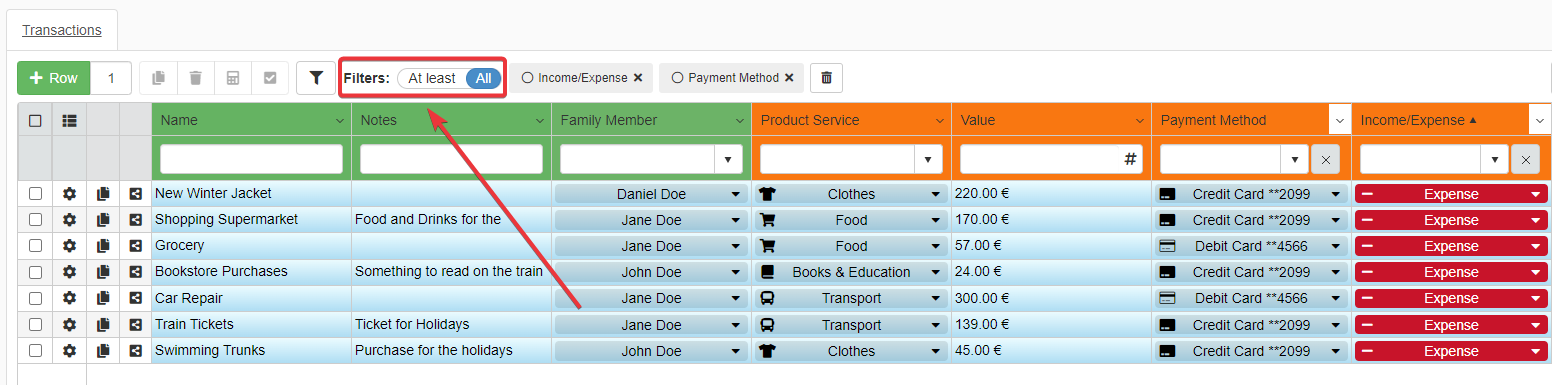
You can decide if the results should satisfy All the criteria or At least one of the active filters. Choose All or At least through the toggle switch on the left of the tag list.
Note
All is enabled by default.
Removing Filters
You can remove a filtering option at any time.
Remove a filtering option by clicking on the Remove filter button () on the tag to be deleted.
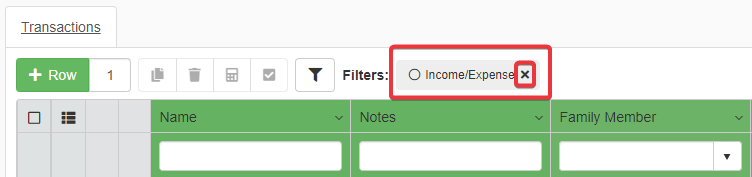
If you want to remove all the filters from a table: click on the Clear Filters button (). As alternative, click icon above the tag to cancel the single filter.
Filter Rows having Attachments, Comments, and Details: Rows' Attributes Filters
Learn how to filter the rows according to their attributes: attachments, comments, and Details.
Besides cells' values, the Users can filter rows by their attribute. A Row's Attribute is one of the following items:
- An Attachment
- A Comment
- A non-empty Detail
You can filter the table to display rows having one, two or all three the attributes above.
-
Click on the icon on the top right-corner of the table.
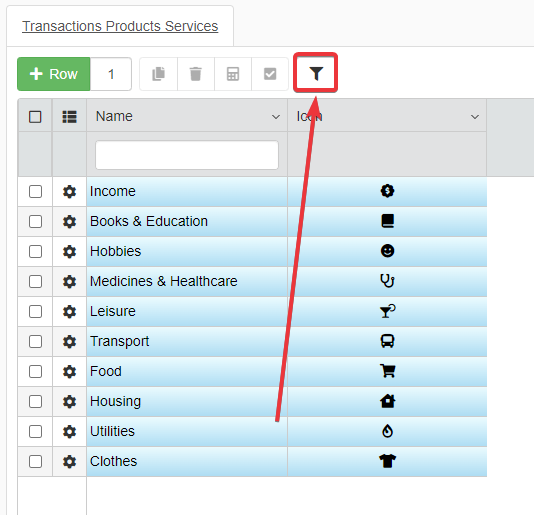
The action will open a small menu to choose for what attributes to filter the table.
-
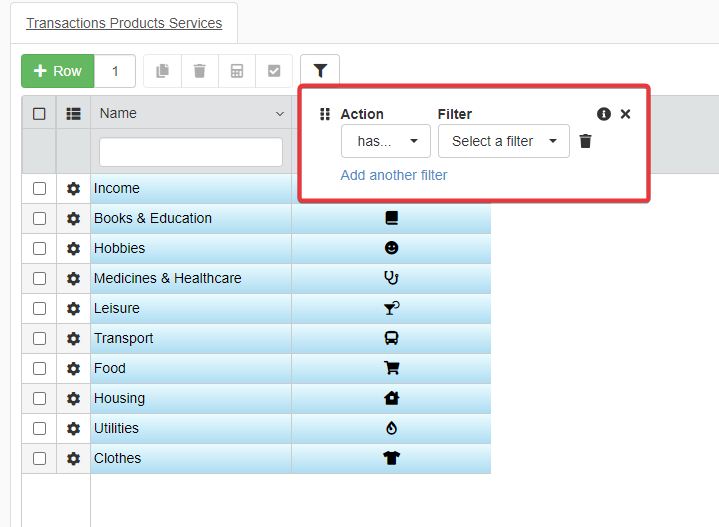
In the menu, choose the attribute options for the filtering.
-
Action The criterion for the filtering.
- has The row must have the item.
- has not The row must not have the item.
-
Filter The type of attribute that must satisfy the Action criterion.
- Attachment
- Comment
- Detail
-
Add another filter Adds a new line for a new criterion for the attribute filtering.
-
Choosing the criteria enables the filter immediately.
The Filter Rows tags will appear in the Filters list as any column filter. You can manage the attribute filters in the same way of cells' value filters.
Create subsets of data from filters: Properties
Learn how to use the Properties: subset of rows that you create starting from filters.
Standard filters explained in Table Filters: filter the columns' values hide the rows not satisfying the criteria. But any action involving the application's table will involve the hidden rows also. Properties are useful if you need to work only with the rows satisfying the filtering criteria.
The Properties enables to narrow the set of rows to work only on a data subset. It is the recommended choice for fine-grained and advanced filtering.
Note
The Designer decides to enable Properties in the application or not. Also, the Designer configures the Properties options available to the User.
- What are Properties and Groups?
- Add, Search, and Remove Properties and Groups
- Using the Properties to search a Table
What are Properties and Groups?
Learn about what Properties and Groups are.
The Properties carve out subsets of data within an application. Properties are criteria that a row must satisfy to be included in the subset. The Designer enables Properties and the available criteria.
Note
You can use the Properties if and only if the application's Designer has enabled and configured the related Module.
Users can choose among the Designer's enabled Properties.
The difference between Properties and common Filters is the following:
| Properties | Filters |
|---|---|
| Properties carve out data subsets from the rows. Export and similar functions will work only on the subset. |
Filters hide the rows not satisfying the criteria. Export and similar functions will work also on rows not included in the filter. |
Groups are sets of Properties: a group collects one or more Properties together.
Add, Remove, and Search Properties and Groups
Learn how to add, remove, and search Properties and Groups.
Users can add, remove, and search Properties from within the application to narrow or enlarge the data subset.
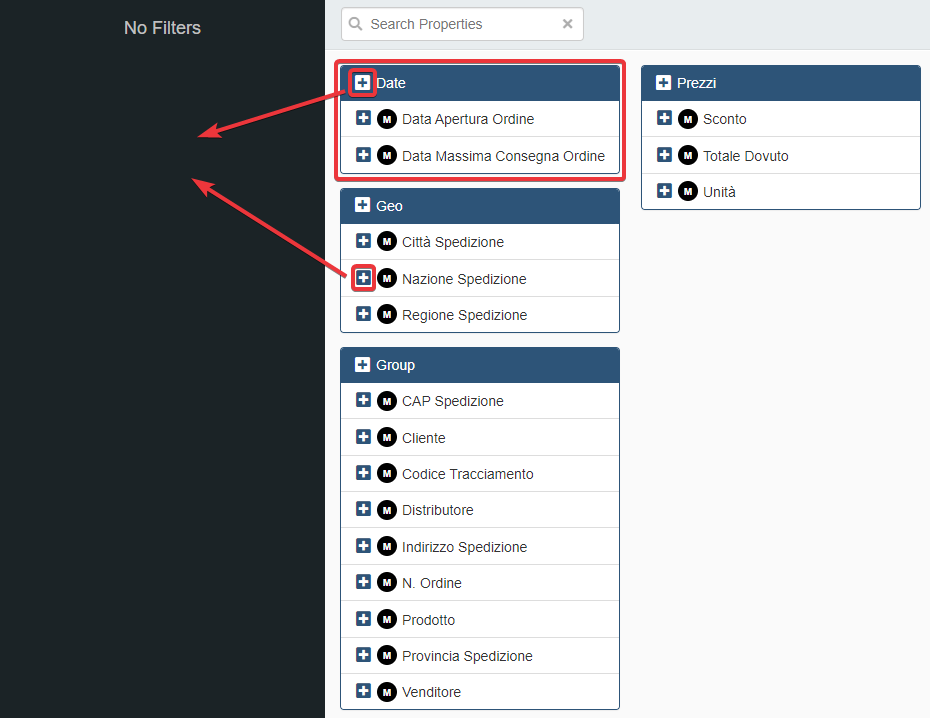
Add Properties and Groups
You can choose what Properties or Groups to add by clicking on the Properties button ().
You can find the Properties button () on the right side of the top bar.
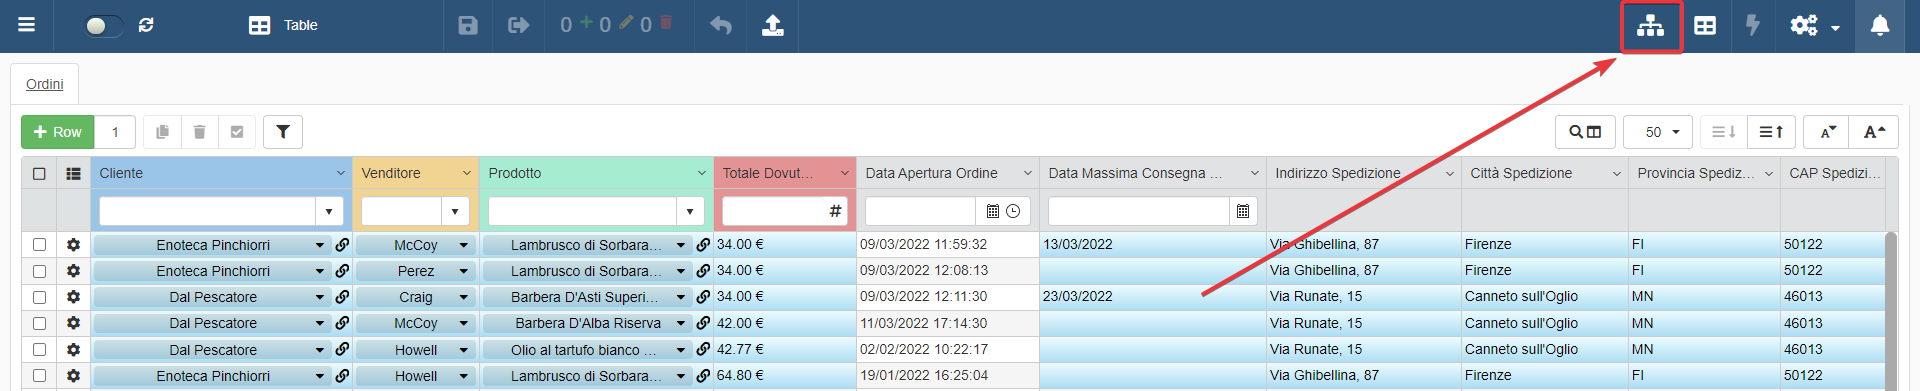
Clicking on the Properties button () brings you to the following panel.
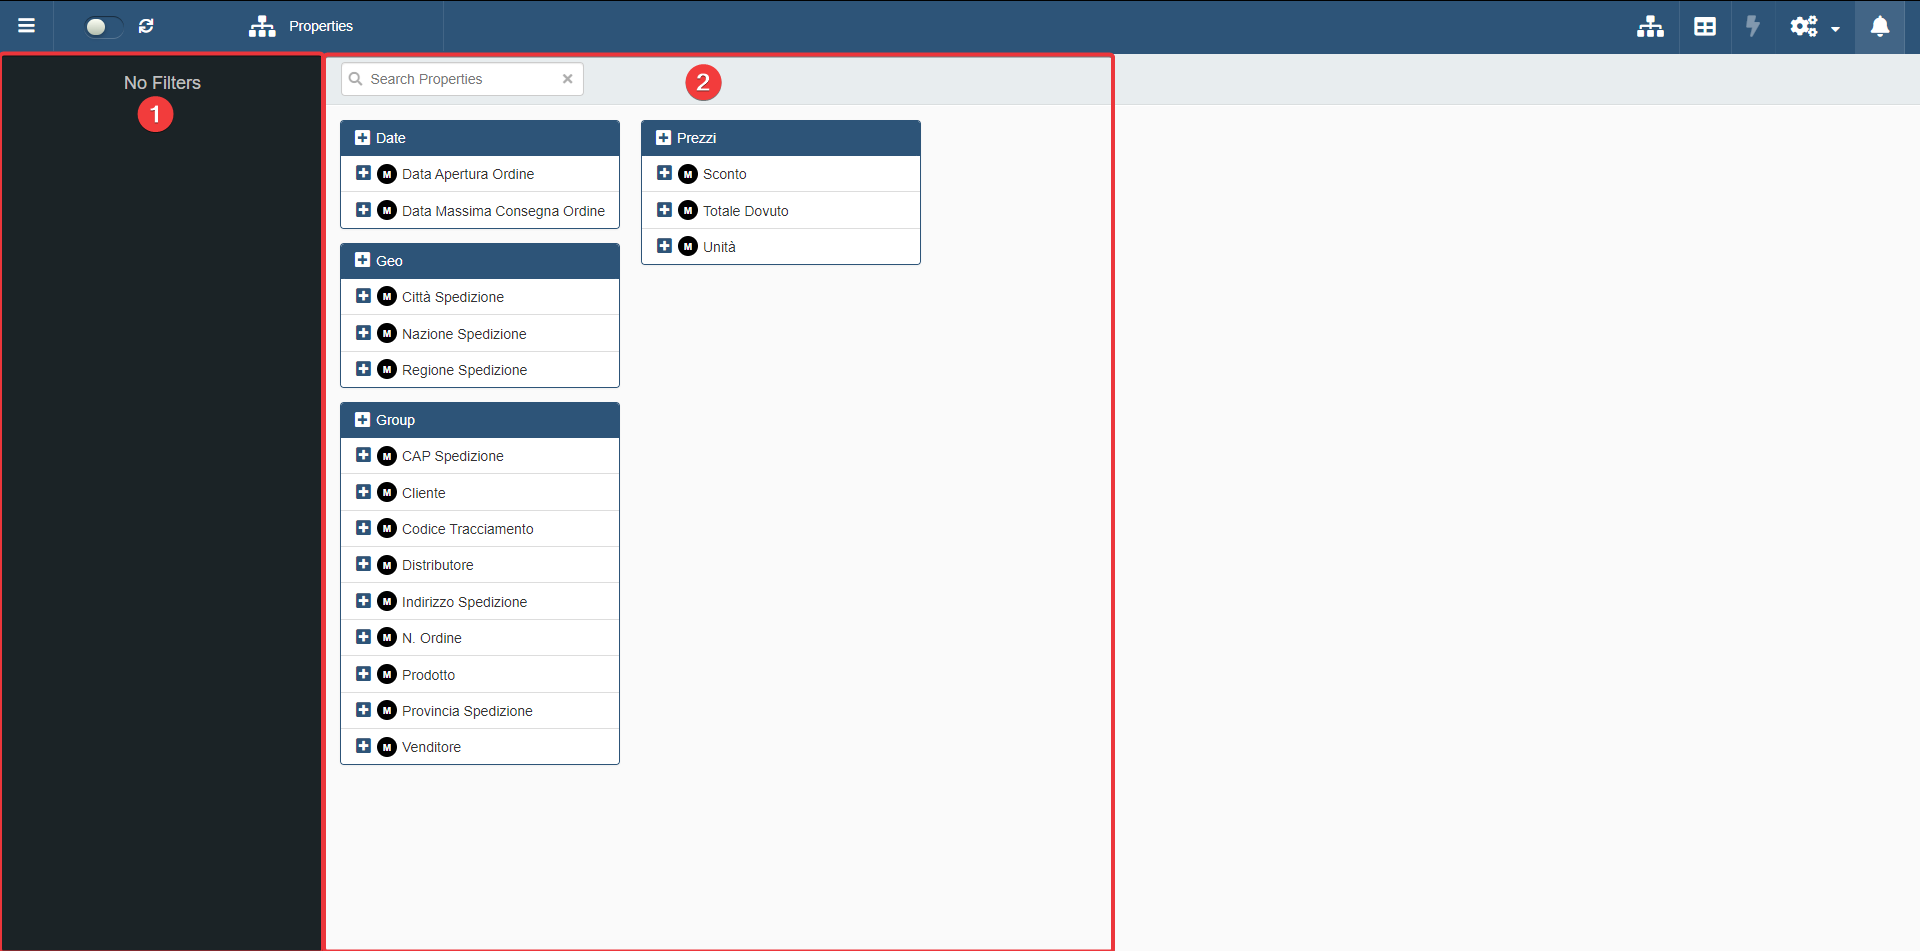
-
The right section lists all the Groups and Properties available.
-
The left section lists all the Groups and Properties activated for the table.
Click on the icon next to either a Property or a Group to add it to section (2). When added to section (2), the Property is active and you can select the values to include.
- Clicking on the Property's icon adds only that Property of the Group.
- Clicking on the Group's icon adds all the Properties of the Group.
Search Properties and Groups
Users can search for one or more Properties.
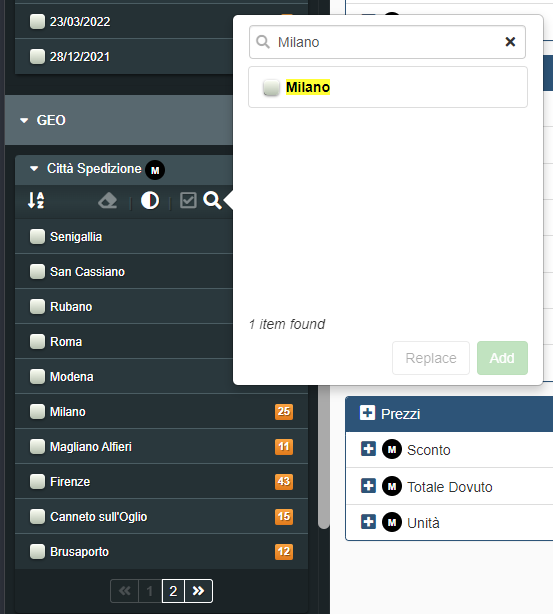
Type the Property's name in the search bar to find it.
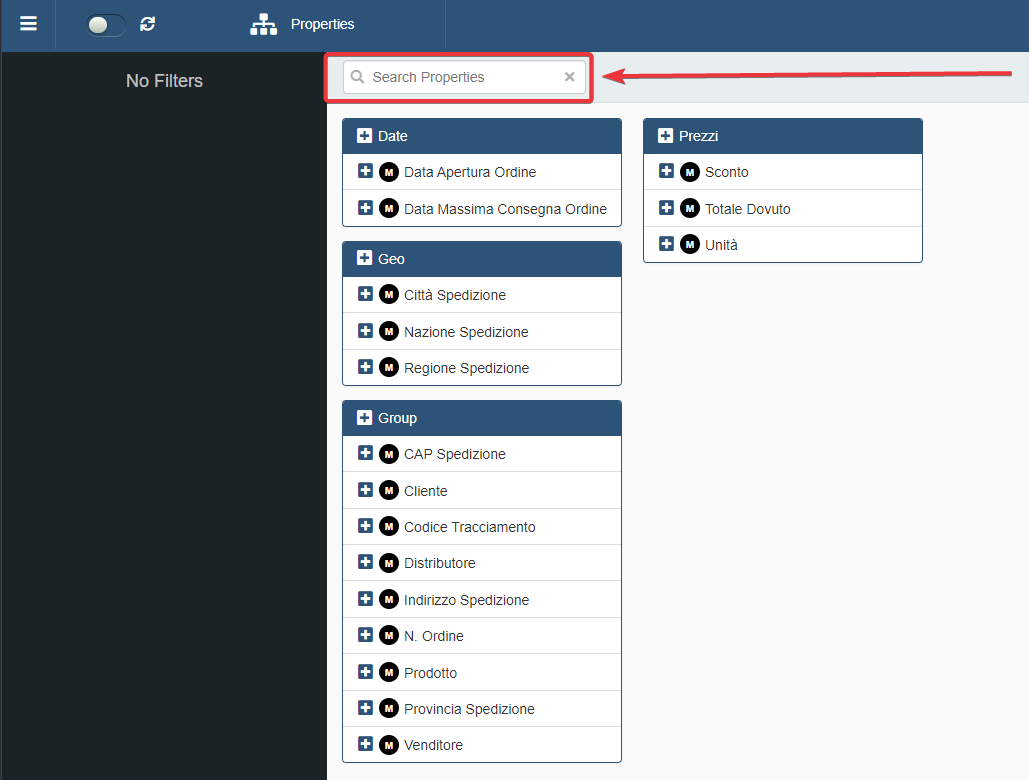
If the Property is a List, you can search the values as well.
Some information about a Property and its settings.
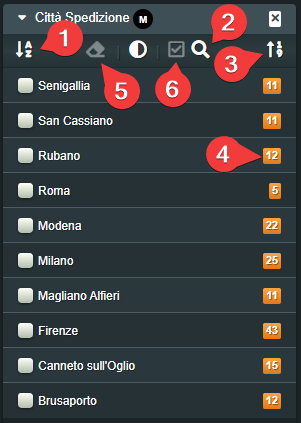
- Sorts in Ascending\Descending order the values.
-
Searches for the value typed in the search bar.
-
Sorts in Ascending\Descending order for the counter of the items having the value.
- Display the number of items having the corresponding value.
- The button resets all the searching options enabled.
-
The button displays a summary of the selected values.

Active Properties on the Table
You can verify at any time what Properties you have activated in your application.
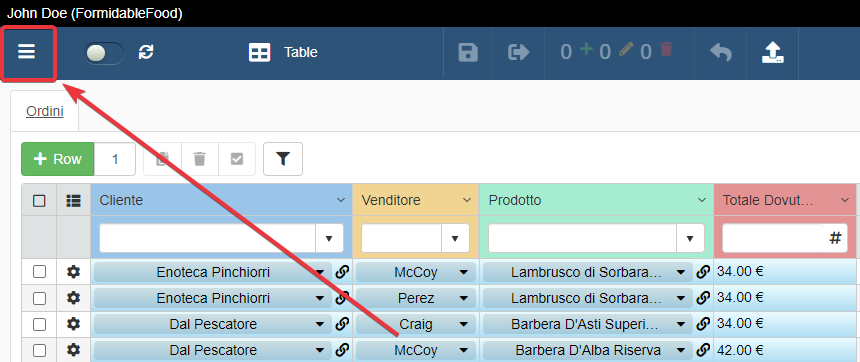
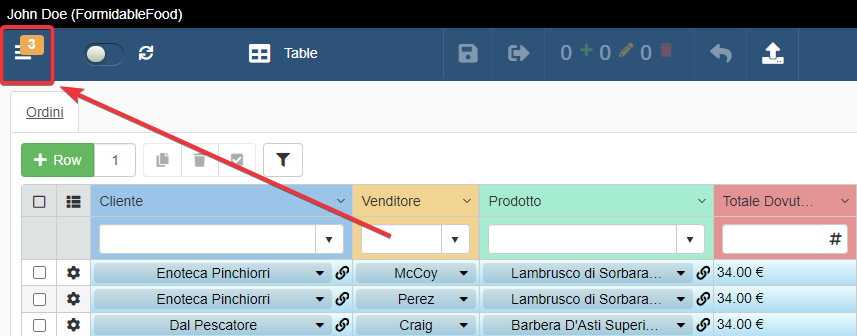
Click on the icon on the top-left corner. The action opens the sidebar with all the selected Properties.
If no Properties are active, there will be no counter and the side bar will be empty.
If you have selected one or more Properties, a counter tracking the total number of active Properties will appear on the icon.
The side bar will display then all the Properties. You can still navigate the table while keeping open the Properties sidebar.

Remove Properties
Learn how to remove a Property from the active Properties.
You can remove a Property at any time.
Click on the icon to remove either a Property or a whole Group.
Using the Properties to search a Table
Learn how to search the table using the selected Properties.
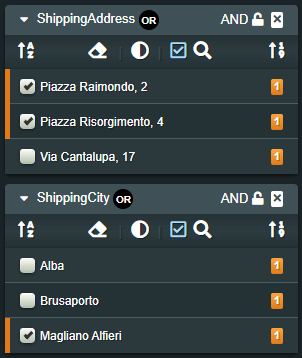
Once selected the Properties, the application will narrow the rows' set only to the rows satisfying the values chosen for the Properties.
After having added the Properties or Groups, you can choose the values or range of values to be included in the data subset.
- Lists allow to choose individual values.
- Ranges allow to define a range of values.
Attention
Any time you change one or more values for a Property, you must refresh the table for the changes to take effect.

To configure the refresh automatically, see Auto-Refresh after Properties Change.
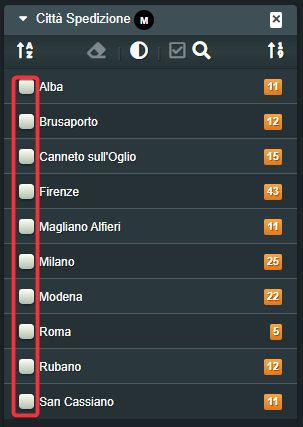
List
If the Property refers to a list of values: click on the values' checkbox to include the value in the search. The Properties will include in the subset all the rows having the chosen value for that field.
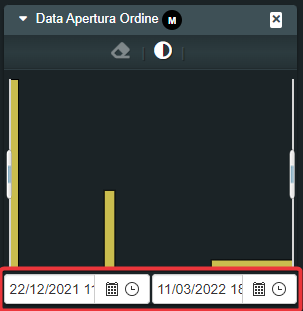
Range
If the Property refers to a range of values: click at the bottom of the result's distribution to alter the lower and upper limit for the values. The Properties will include in the subset all the rows falling in the range.
Auto-Refresh after Properties Change
Learn how to refresh the items from the table satisfying the Properties.
Every time you add a Property/Group or you change the value to be included, you must refresh the table.
As alternative, you can enable Auto-refresh to refresh the table at each change on the Properties.
Click on the toggle switch to enable the Auto-refresh

Click again on the toggle switch to disable the Auto-refresh.
Fine-grained Search
Learn how to add even more granularity and precision in the Properties' results.
Empty values: null values
You can decide whether a Property should include cells having no value or not. The decision involves both Master and Detail tables.
Info
Columns' cells having no value are called null values.
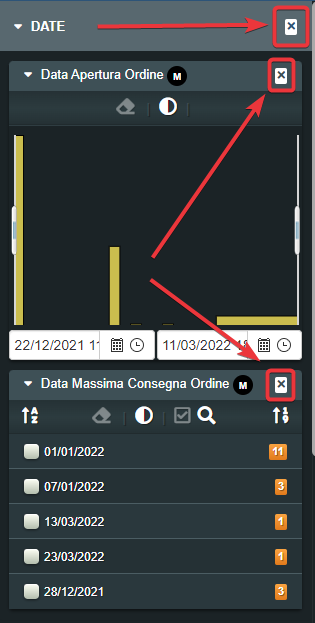
On any Property in the list of active Properties, click on the icon to choose the desired option.
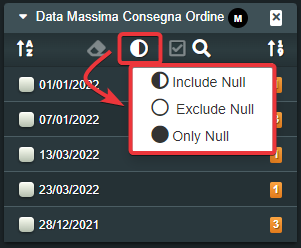
- Include Null Includes the null values in the filtering.
- Exclude Null Excludes the null values in the filtering.
- Null Only Show only null values in the filtering.
Note
By default, the Include Null is option active.
Once selected, the application will update the data subset as consequence.
Find Correspondence on both Master and Detail Tables
Learn how to cross-check data on both Master and Detail tables.
Users can search for Properties across both the Master and the Detail tables.
Type in the Search Bar and the results will involve both the Master and the Detail table.
The Properties search involves also the Groups and it makes no difference between Master and Detail tables.
You can decide if the criteria's results must occur in both the Master and the Detail tables.
Note
This action is available if there are Properties enabled for a Detail.
By default, the item must satisfy at least one value.
You can choose for the items to satisfy all the criteria on both the Master and Detail tables.
Click on the AND button to enable the value for both the Master and Detail table.
Click on AND button again to disable the AND for that Property on the Master and Detail tables.
Attention
There could be only one AND for the Properties. Choosing another Property for the AND removes the previous selected one.
Save Your Properties and Filtering Settings for the next access
Learn how to save all your filtering options and Properties for the next access to the application.
An application doesn't maintain the Properties and filters when leaving the application. But, you can save the chosen Properties and filters for a future access through a Session.
Warning
An application doesn't maintain the Filters and Properties unless you save them through a Session.
eLegere applications can save all your filtering options and Properties besides the sorting and appearance options as Sessions. Users can recall these custom presets of options at any time.
These presets are called Sessions.
You can create a Session with all your settings while working inside the application.
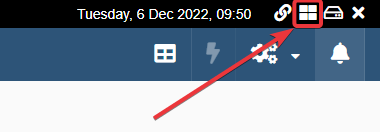
-
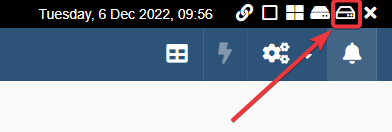
Click on the Save Session As button () on the upper-right corner of the application on the top bar.
-
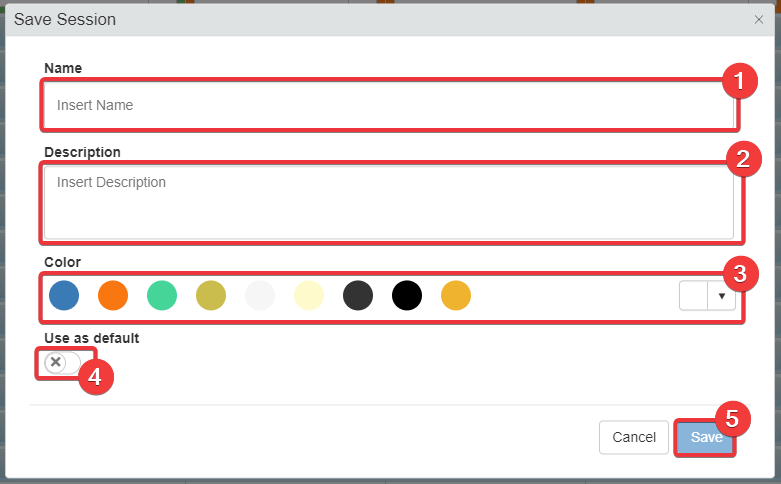
The Save Session window will appear.
-
(1) Type a Name for your Session. The Name identifies your Session among others.
-
(2) Type a Description.
optional -
(3) Choose a Color to identify the preset.
optional -
(4) Enable the Default toggle switch if you want to see this Session every time you enter the application.
optional -
(5) Click on the Save button to save the preset.
-
Hint
You can even choose a Session as the Default one to load it at every access to the application. Click on the Default toggle switch while creating the Session.
You will have saved the Session with all your Properties, filters, sorting, and appearance options.
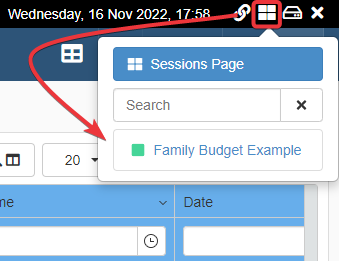
You can load the preferred Session by clicking on the Sessions button ().
-
Click on the the Sessions button () on the upper-right corner of the application on the top bar.
-
A drop-down list of the available Sessions will appear. Choose the preset you want to load in the application.
The application will load the chosen Session with all your view and sorting options.
You can restore your preferred settings at any time by loading a Session .
Note
If you have made the Session the Default one: the application will load it every time you enter.
Question
Check the Work with Sessions section to know more about Sessions.