Work with the Rows
The Work with the Rows section discusses the most common operations in eLegere: adding, editing, removing rows on the tables; saving and undoing changes; sharing and exporting the rows; uploading attachments for the rows; viewing the history of all the changes on the table; refreshing the rows' data in the application.
Summary
- Edit Rows Learn how to create or edit rows.
- Save Rows or Undo Learn how to save the rows created or cancel what done.
- Details Learn how to access and work with Details.
- Sharing Rows Learn how to share rows from the Master and Detail tables.
- Attachments Learn how to attach files to the rows and manage them
- History: Track and Restore Rows Learn how to view the history of all the changes made on the table and revert them if required
- Rows Refresh Learn how to keep your rows updated.
Edit Rows
Most of eLegere applications organizes and display data as rows of a table. Users spend most of their time adding, removing, saving or editing such rows.
This section explains the Table structure of most of the eLegere applications and how to create, delete, and edit rows.
Attention
You must save any action in a eLegere application to take effect. See the section Save Rows or Undo to learn how to save rows.
- Interacting with the Rows
- Inserting One or More Rows
- Editing one or more rows
- Selecting and Deselecting one or more Rows
- Deleting one or more rows
- Cloning one or more rows
- Recalculating the value one or more rows
Interacting with the Rows
Learn how to navigate the table's row.
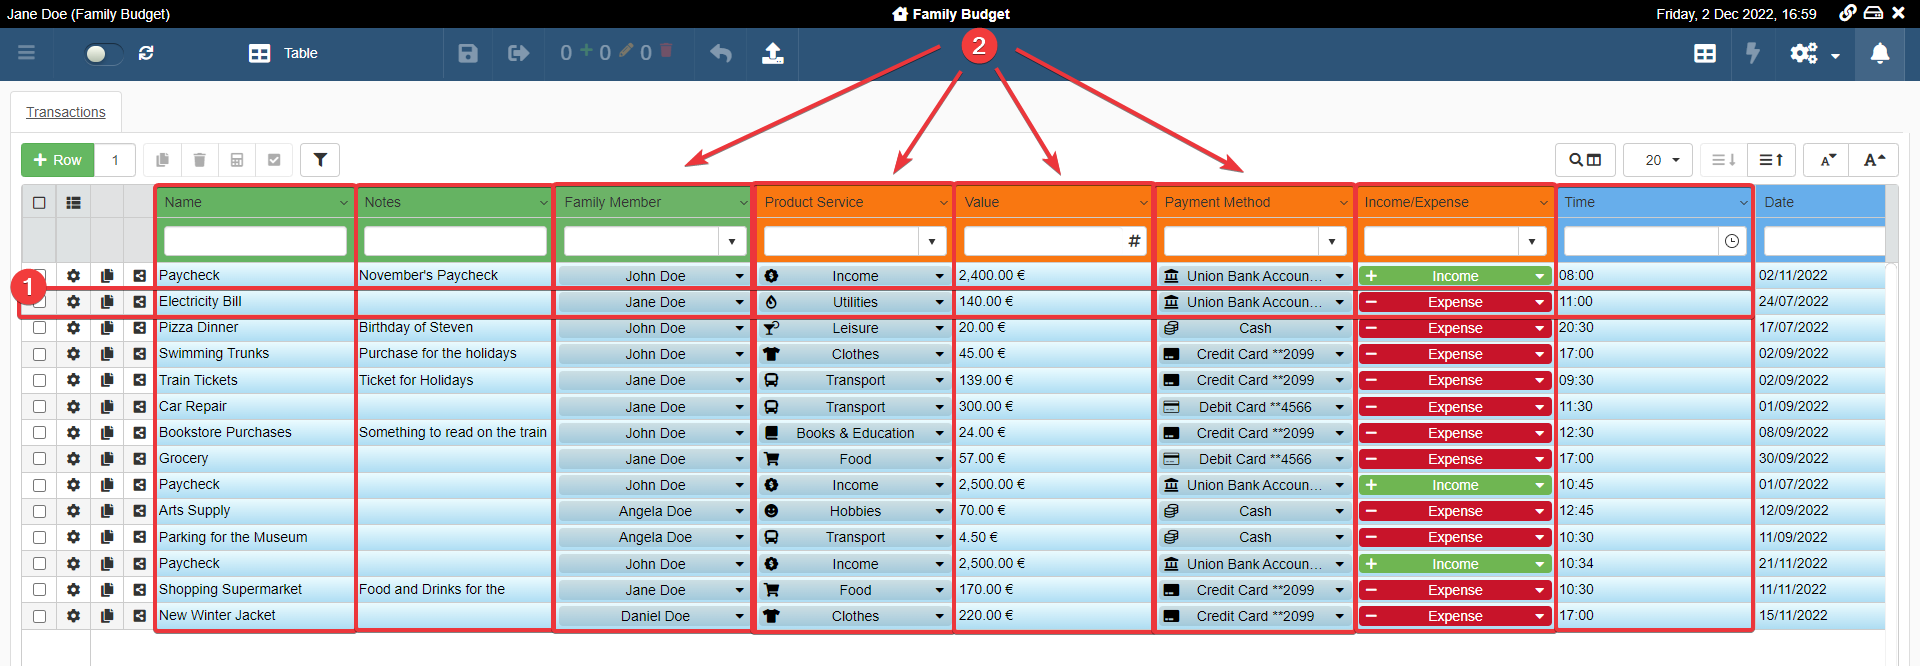
eLegere applications appear as tables containing rows. The users see the Master Table when entering an application: the table containing all the entries of an eLegere application. Users record and manipulate data by using the Master Table.
The applications record data as rows containing multiple fields. Each row represents a record.
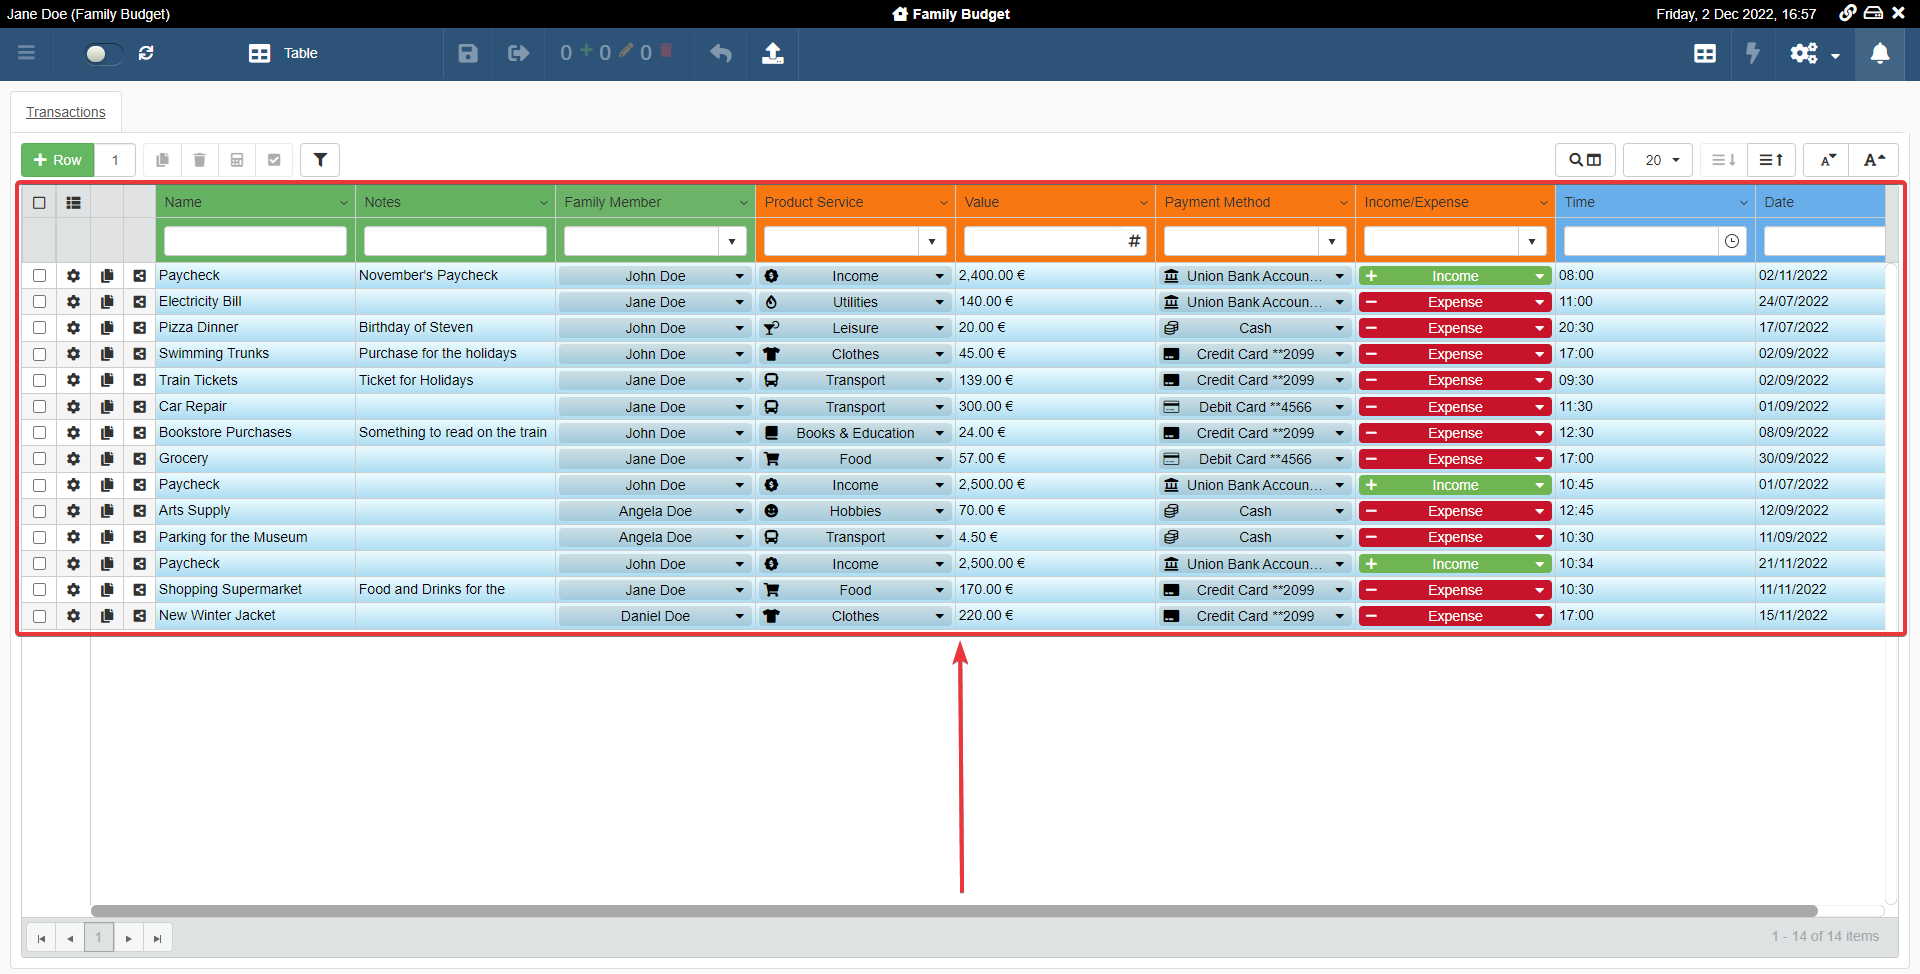
Multiple fields corresponding each one to a column (2) constitute a row (1).
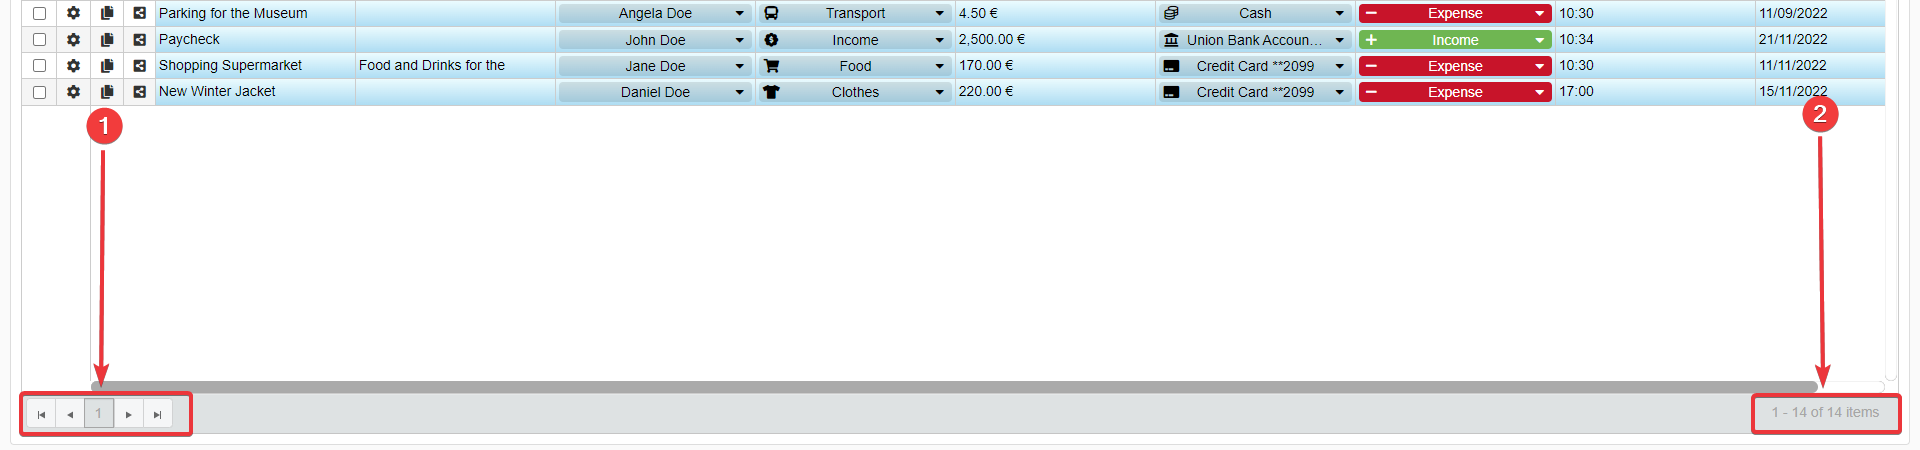
Inside an application, the table arranges the row on multiple pages. The number of elements per page depends on the Designer's choice.
- You can find the buttons to navigate the pages on the bottom-left corner of the table.
- Insert the page number in the textbox to reach the desired page.
- Click on the buttons to navigate back and forth.
- On the bottom-right corner of the table, you find the counter of the pages.
- The format is the following:
Range of Items - Total Number of Items in the Application
- The format is the following:
Users inside eLegere applications create, view, and edit rows.
Inserting One or More Rows
Learn how to add a row to the table.
You can add new rows to an application's table by clicking on the Row button.
The Row is on the top-left corner of the table.
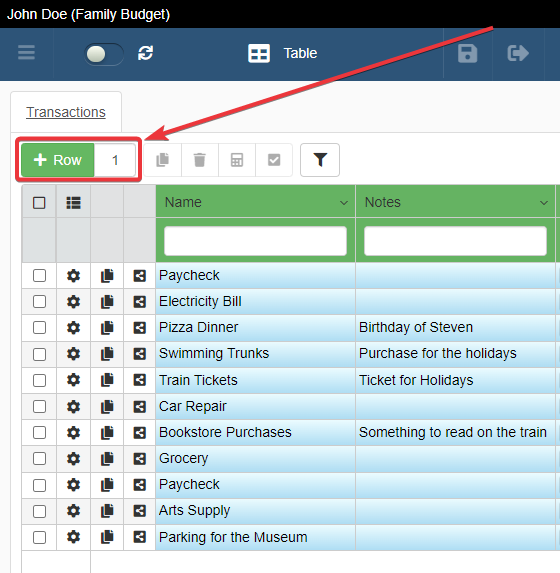
The Row button adds a new row to the table.
Warning
Inserting a row doesn't save any change automatically. You must save the changes to record them. See the section Save Rows or Undo to learn how to save rows.
Hint
The Master Table highlights of green any new entry of the application not saved. See the section Save Rows or Undo to learn how to save rows.
Note
The Designer decides to enable or not the Add Row action. The Designer might have either removed or limited the Add Row action.
Adding Multiple Rows
If you must add more than one row and you want to spare time: you can type the number of new rows to be created in the textbox next to the Row button. The action saves your time instead of clicking the Row repeatedly.
To add multiple rows:
- Click on the textbox next to the Row.
- Type the number of rows you want to add.
- Click on the Row button.
Question
The maximum number of rows you can add by this action is 20.
Warning
Adding one or more rows doesn't save any change automatically. You must save the changes to record them. See the section Save Rows or Undo to learn how to save rows.
Insert Row's data through the Edit Form
The Designer could enable the Edit Form for the rows' insertion. If the Designer has enabled the Edit Form, the Edit Form will appear every time a User adds a row.
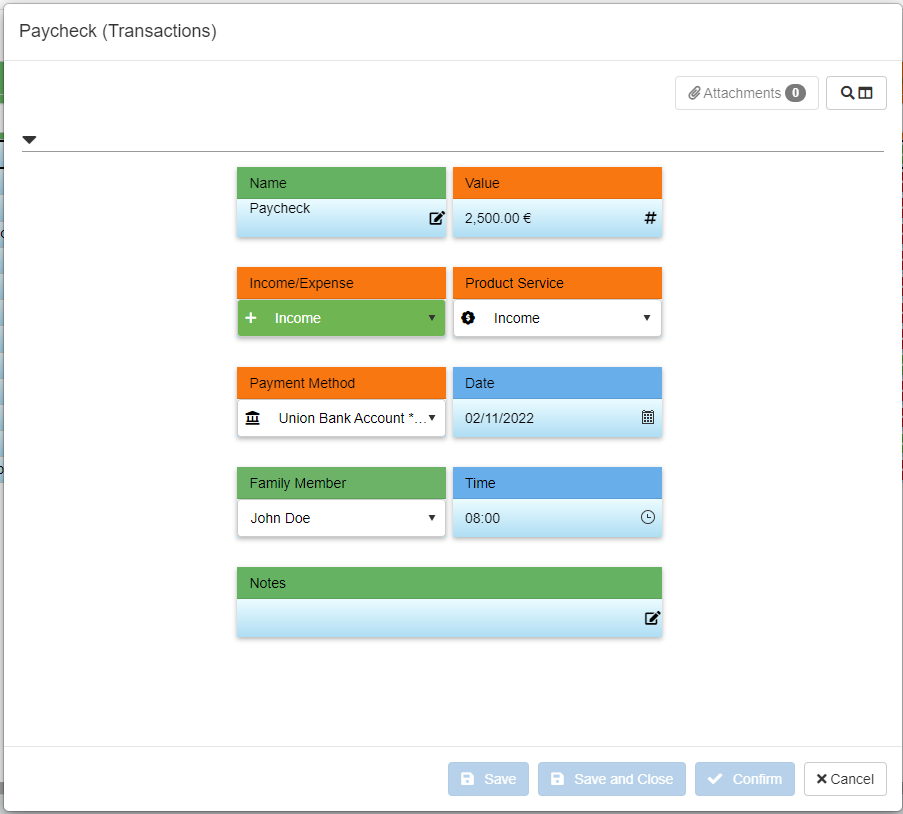
When you add a new row to the table, you can insert the information through the Edit Form.
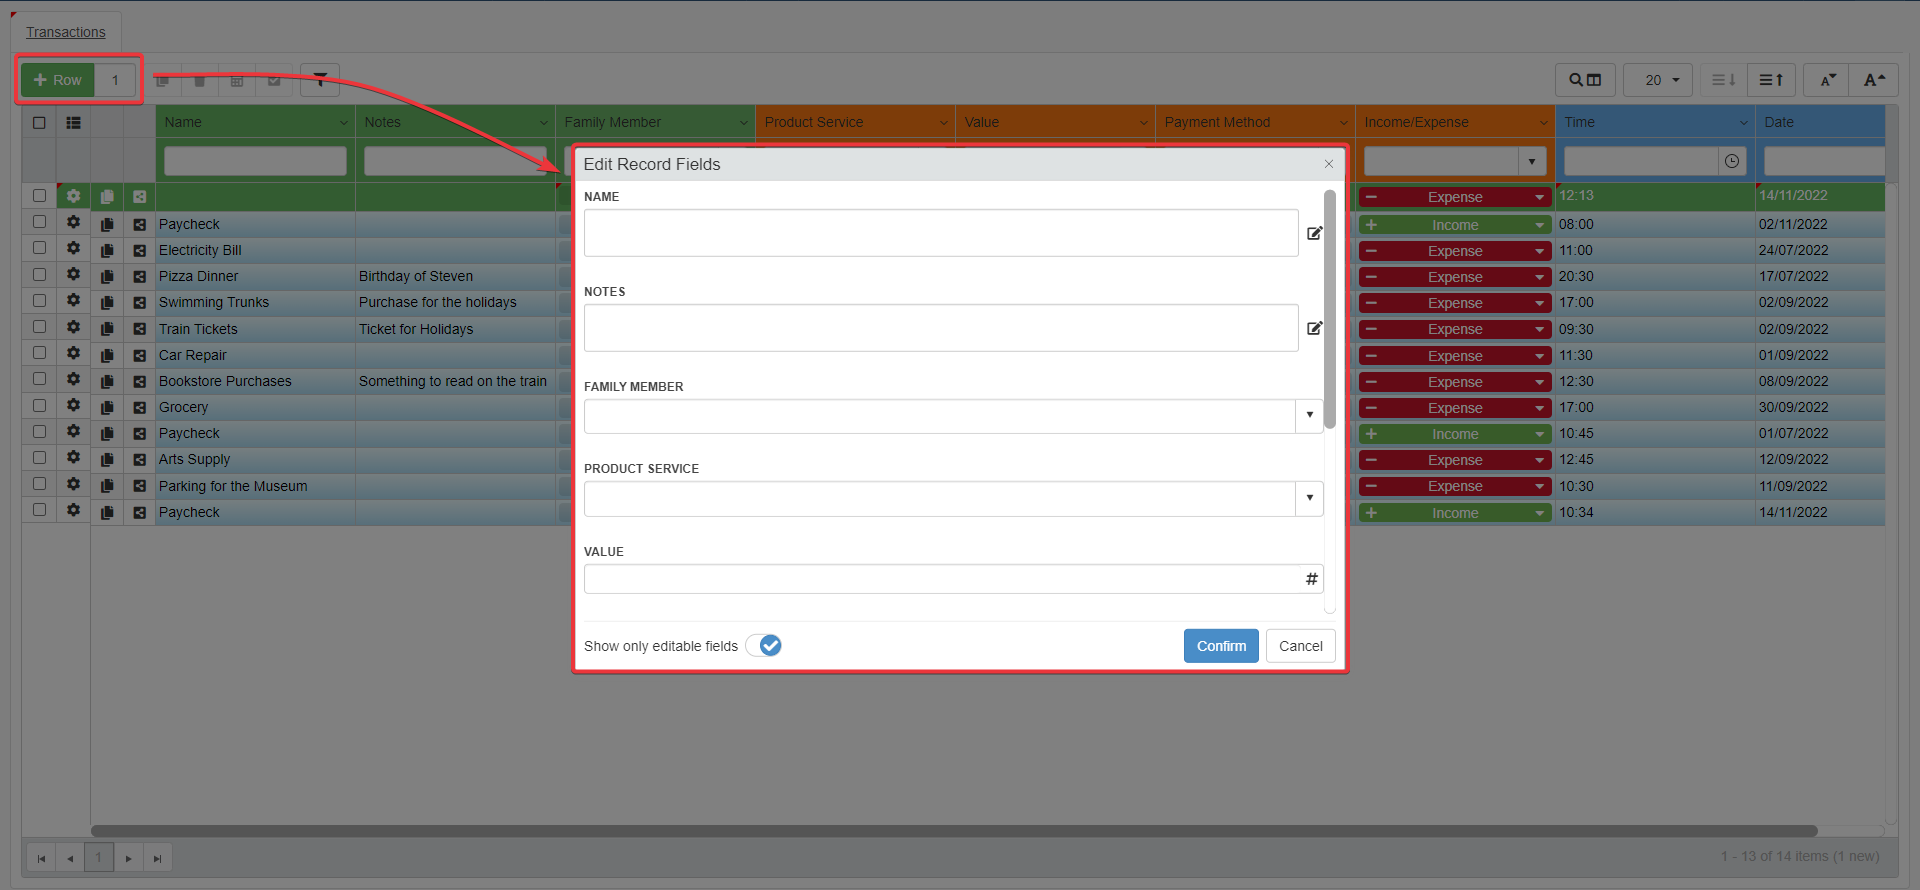
- Click on the Row button to add a row.
- Insert all the required information in the form's fields.
- Click on the Confirm button to end the edit and close the Edit Form.
You have created a new row.
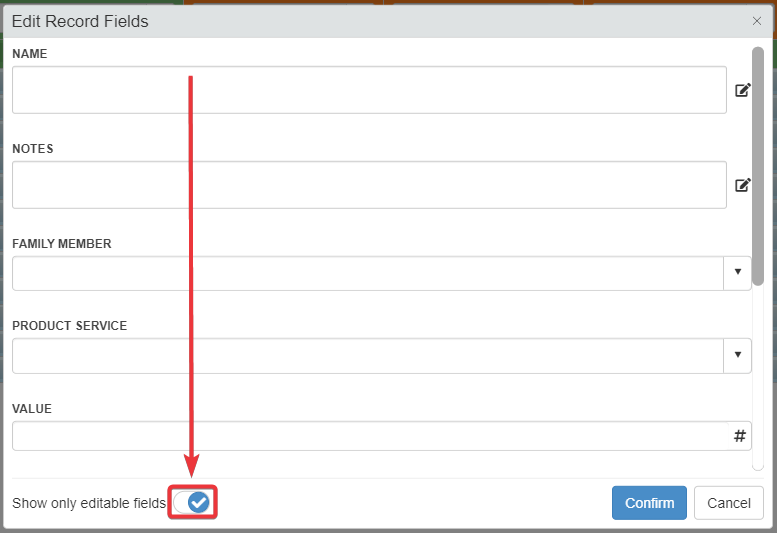
By default, the Edit Form shows only the field you can edit. Click on the toggle switch to disable the option and see all the table's fields in the form.
Note
Applications open the Edit Form if and only if you add only one row. The application won't open the Edit Form if you add multiple rows (see Adding Multiple Rows).
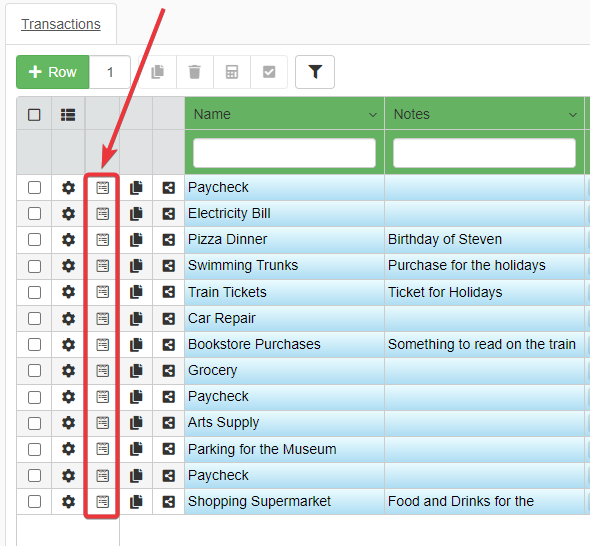
If the Designer has configured the Input Form module: the Input Form and its custom layout replaces the Edit Form. In such case, the form may differ from the standard one. For example:
You can notice that the Designer has enabled the Input Form by the icon next to the rows.
Hint
The Advanced Features section and the Designer's Guide offer more information about theInput Form module.
Warning
Inserting a row through the Edit Form doesn't save any change automatically. You must save the changes to record them. See the section Save Rows or Undo to learn how to save rows.
Editing one or more rows
Learn how to modify a row's data.
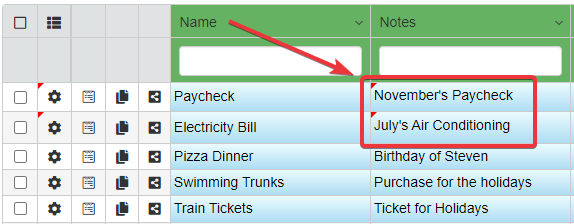
You can modify the data of a row by clicking on the cell that you want to edit.
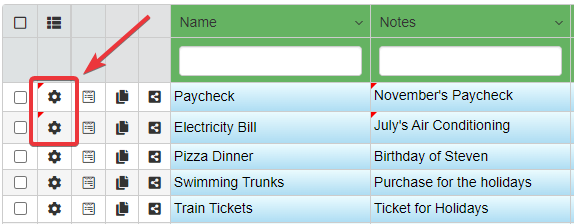
The table highlights the changes on the table through a red triangle.

The red triangle appears:
-
In the upper-left corner of the modified cell
-
In the upper-left corner of the modified row
-
In the upper-left corner of the table's tab as well. (An application can have more than one table besides the Master Table. See the Details section)

Warning
Edit a row doesn't save any change automatically. You must save the changes to record them. See the section Save Rows or Undo to learn how to save rows.
Note
The Designer decides to enable or not the Edit action. The Designer might have either removed or limited the Edit action.
Edit Row's Data through the Edit Form
The Designer could enable the Edit Form for the rows' insertion. If the Designer has enabled the Edit Form, Users can use the Edit Form to edit a row as well.
You can modify the rows through the Edit Form itself.
- Click on the Row Options icon () to edit the row.
- Click on the Edit button.
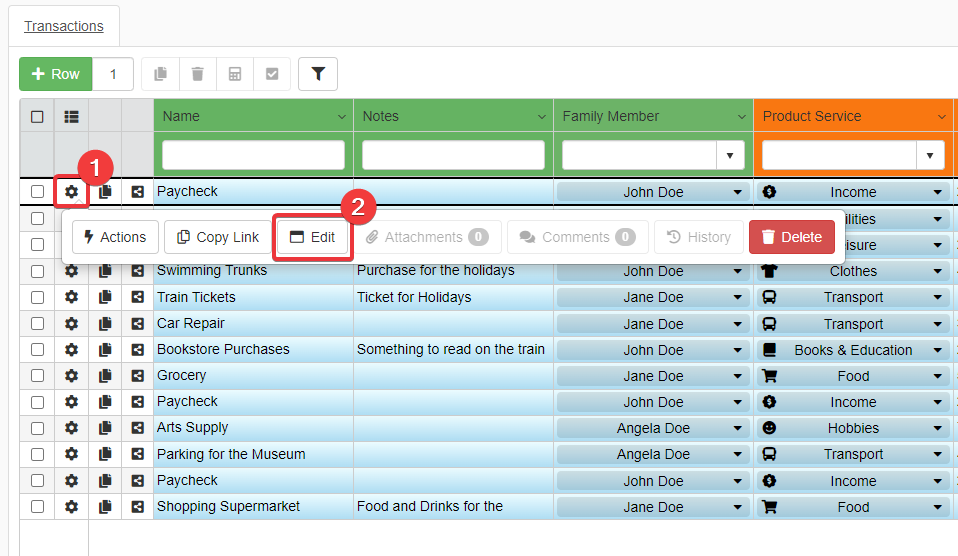
You will open the Edit form. Edit the information you want to change. Once done, click on the Confirm button to record the changes.
Warning
Clicking on the Confirm button doesn't mean that you have saved the change. You must save the changes to record them. See the section Save Rows or Undo to learn how to save rows.
If the Designer has enabled and customized the Input Form: you can click on the Input Form icon () next to each row to open the form and change the information.
Selecting and Deselecting one or more Rows
Learn how to select or deselect one or more rows.
Selecting one or more rows instead of all rows unlocks some operations in an application. E.g. Deleting or cloning only the selected rows.
Note
The Designer decides to enable or not the Selection and Deselection actions. The Designer might have either removed or limited the Selection and Deselection actions.
Users can select one or more rows of the Table.
Click on the checkbox on the left side to select a row.
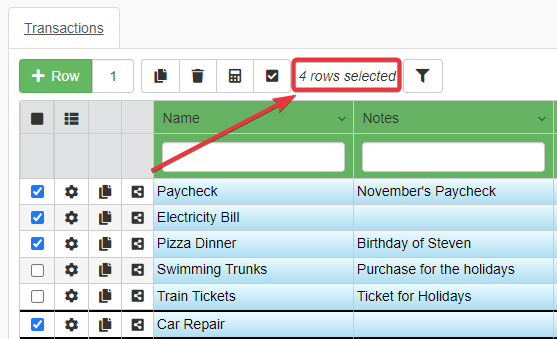
Click on the checkbox at the top of the rows' selection column to select all the rows of the current table page.

If you want to deselect all at once the selected rows: click on the Deselect All button () to deselect all the rows.
If you select one or more rows as explained and you change page, the rows remain selected. The counter next to the Deselect All button tracks the total number of selected row across all the pages.
You have to deselect each row manually or through the Deselect All button ().
Deleting one or more rows
Learn how to delete one or more rows.
At any time, you can choose and delete from a table one or more rows.
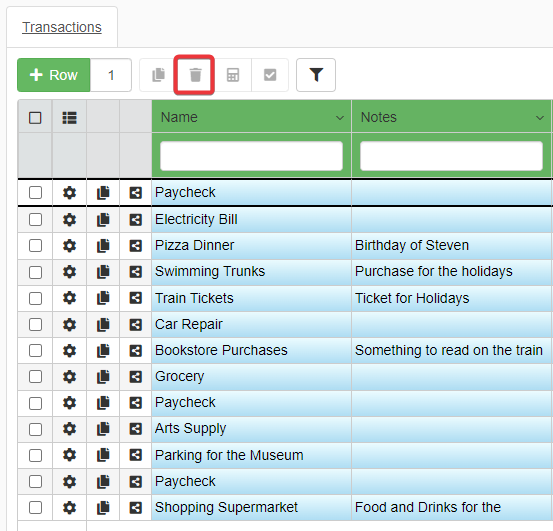
You can click on the Delete button to delete the selected rows.
-
Select the rows you want to delete.
-
Click on the Delete button ().
The action removes the rows.
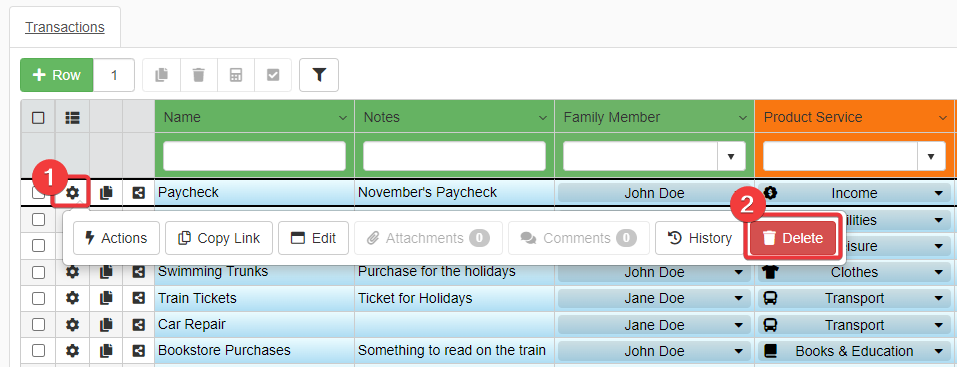
You can delete a row through the Row Options () icon as well.
-
Click on the Row Options icon () of the row you want to delete.
-
Click on the Delete button to delete the individual row.
Warning
Deleting one or more rows doesn't mean that you have saved the change. You must save the changes to make the deletion permanent. See the section Save Rows or Undo to learn how to save the changes or undo them.
Note
The Designer decides to enable or not the Delete action. The Designer might have either removed or limited the Delete action.
Cloning one or more rows
Learn how to clone one or more rows.
In case you need to clone one or more rows, you can use the Clone button ().
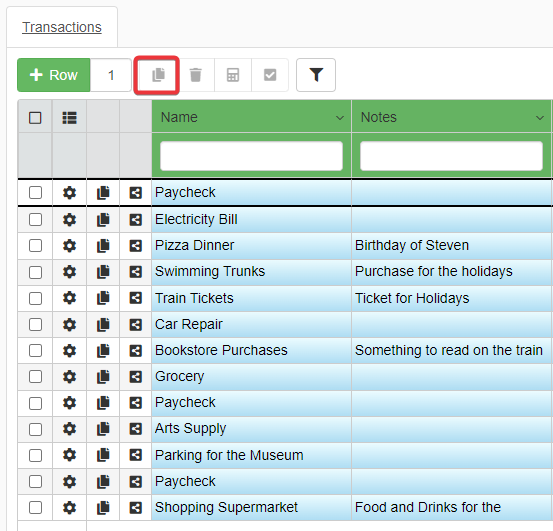
To clone one or more rows:
- Select the rows you want to clone.
- Click on the Clone button () on the upper-left corner of the table.
The action clones the selected rows.
Warning
One or more cells of the cloned row might have values different from the original row. This could happen because the Designer has defined a Default Value. If the Designer has defined a Default Value, the Clone action clones the row inserting the default value, not the current value.
Note
The Designer decides to enable or not the Clone action. The Designer might have either removed or limited the Clone action.
Warning
Cloning one or more rows doesn't mean that you have saved the change. You must save the cloned row. See the section Save Rows or Undo to learn how to save the changes or undo them.
Recalculating the value one or more rows
Learn how to recalculate one or more rows.
The Recalculate button () triggers the recalculation of calculated fields chosen by the Designer and relying on another application's information.
Calculated Fields and Recalculation
Calculated Fields are column fields that obtain their values from a Formula. (See the Formulas section for more info.)
It is not necessary to understand how calculated fields work in detail. You must only know that the Designer can set up rules to calculate the value of one or more fields automatically.
Example
A calculated field calculating the total amount due including the VAT. The field updates automatically the value after a change. You don't need in this case the Recalculate.
In the example above, the application handles the recalculation. No action is required.
In other cases, a calculated field's value depends on values recorded in other applications.
Example
A calculated field calculating the total amount due including the VAT. The total amount depends on a list of services or products with a cost. The list of services and products is recorded through another application.
In the case above, the application doesn't update the field automatically since the values depends on an external source.
Use the Recalculate button () to recalculate the information relying on a different application according to the Designer's rules.
How to Recalculate
You can recalculate a field by clicking on the Recalculate button ().
You can use the Recalculate button () to recalculate the calculated fields.
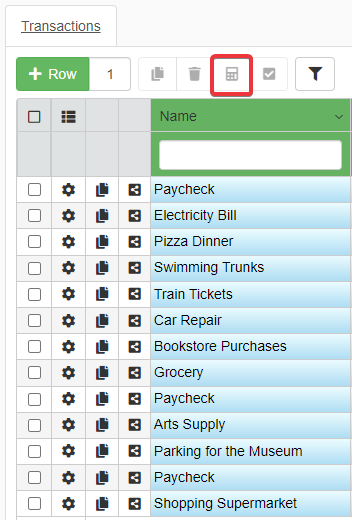
- Select the rows containing the cells you want to recalculate.
- Click on the Recalculate button () in the upper-left corner of the table.
The action recalculates the calculated values of the selected rows.
Note
The Designer configures what calculated cells you can recalculate within the application. So, the Recalculate button updates only certain values.
Note
The Designer decides to enable or disable the Recalculate action. The Designer might have either removed or limited the Recalculate action.
Save Rows or Undo
Learn how to save all the changes made on the application's table. Also, learn to manage the pending changes and local changes not saved when quitting the application.
Save the Created or Edited Rows
Learn how to save either created or modified rows.
After you have either created or modified a row, you must save the changes to make them effective.
Click on the Confirm Changes button () on the top bar to save all the changes in a eLegere application.
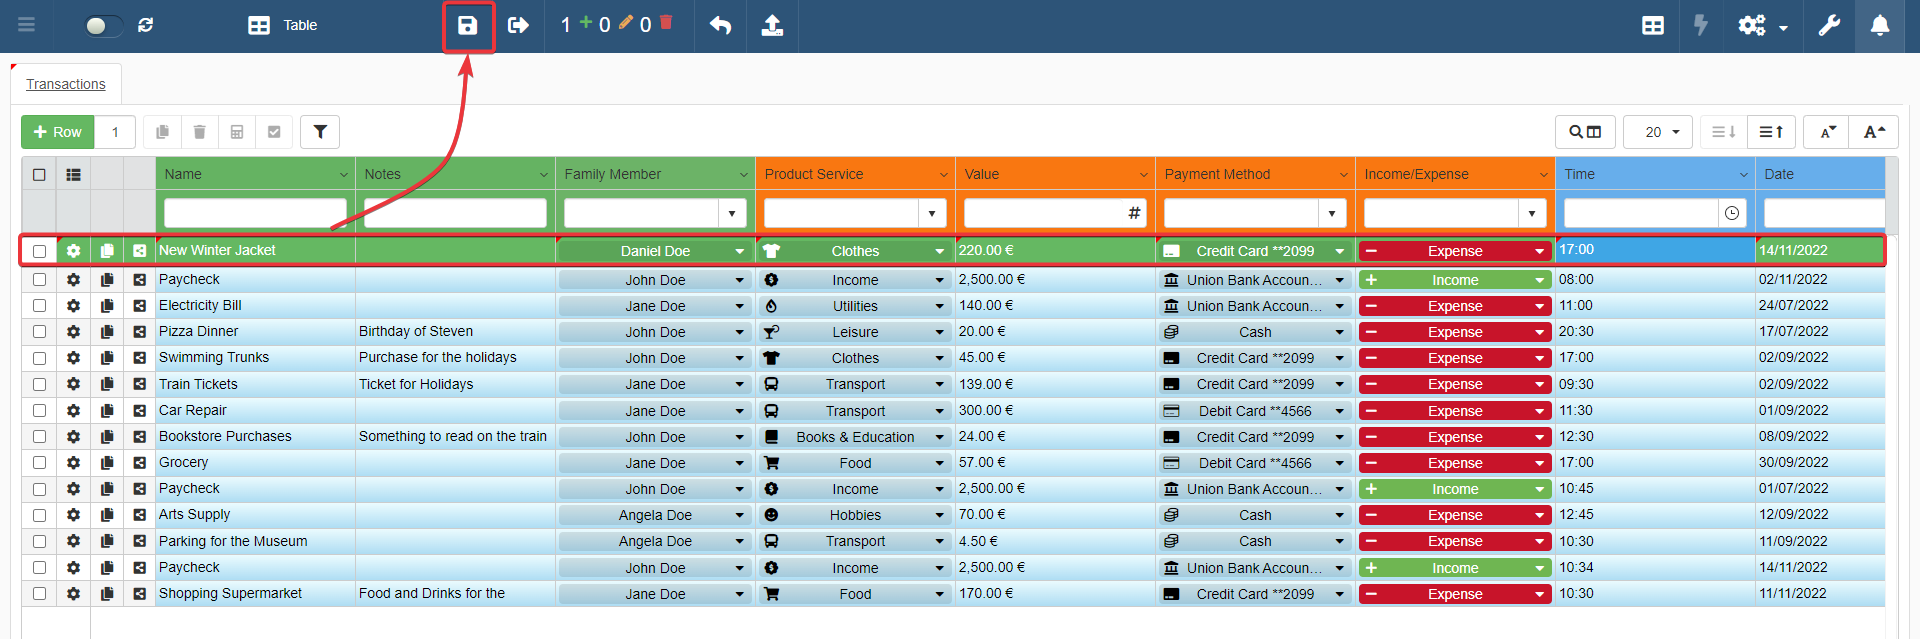
The row switching color from green to the color of the other rows means that the application has saved the row.

Undo
You can undo the changes made on the table at any time.
Learn how to undo and revert either all the changes or an individual change.
Undo All the Changes
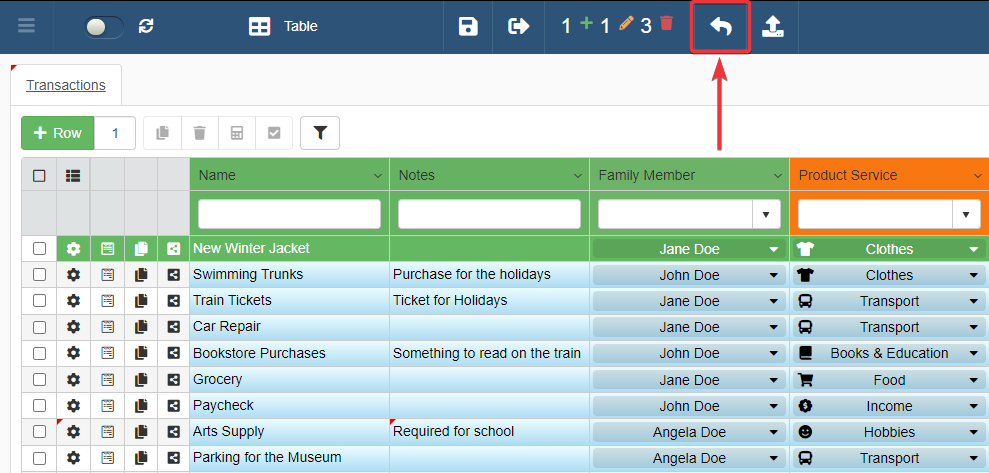
You can revert all the changes at once by clicking on the Cancel button ().
-
Click on the top bar on the Cancel button ().
-
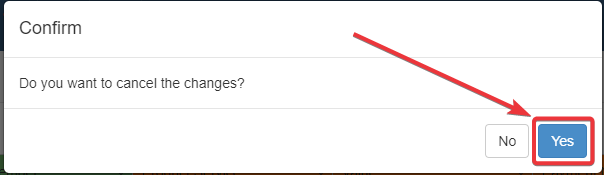
The Confirm window will appear. Click on the Yes button to revert the changes made on the rows. (If you have changed your mind, click on the No button to maintain the changes).
Undo an Individual Change
You can revert an individual change by selecting the rows to revert and clicking on the Cancel button ().
- Selected the row you want to revert to the state previous to the unsaved changes.
-
Click on the top bar on the Cancel button ().
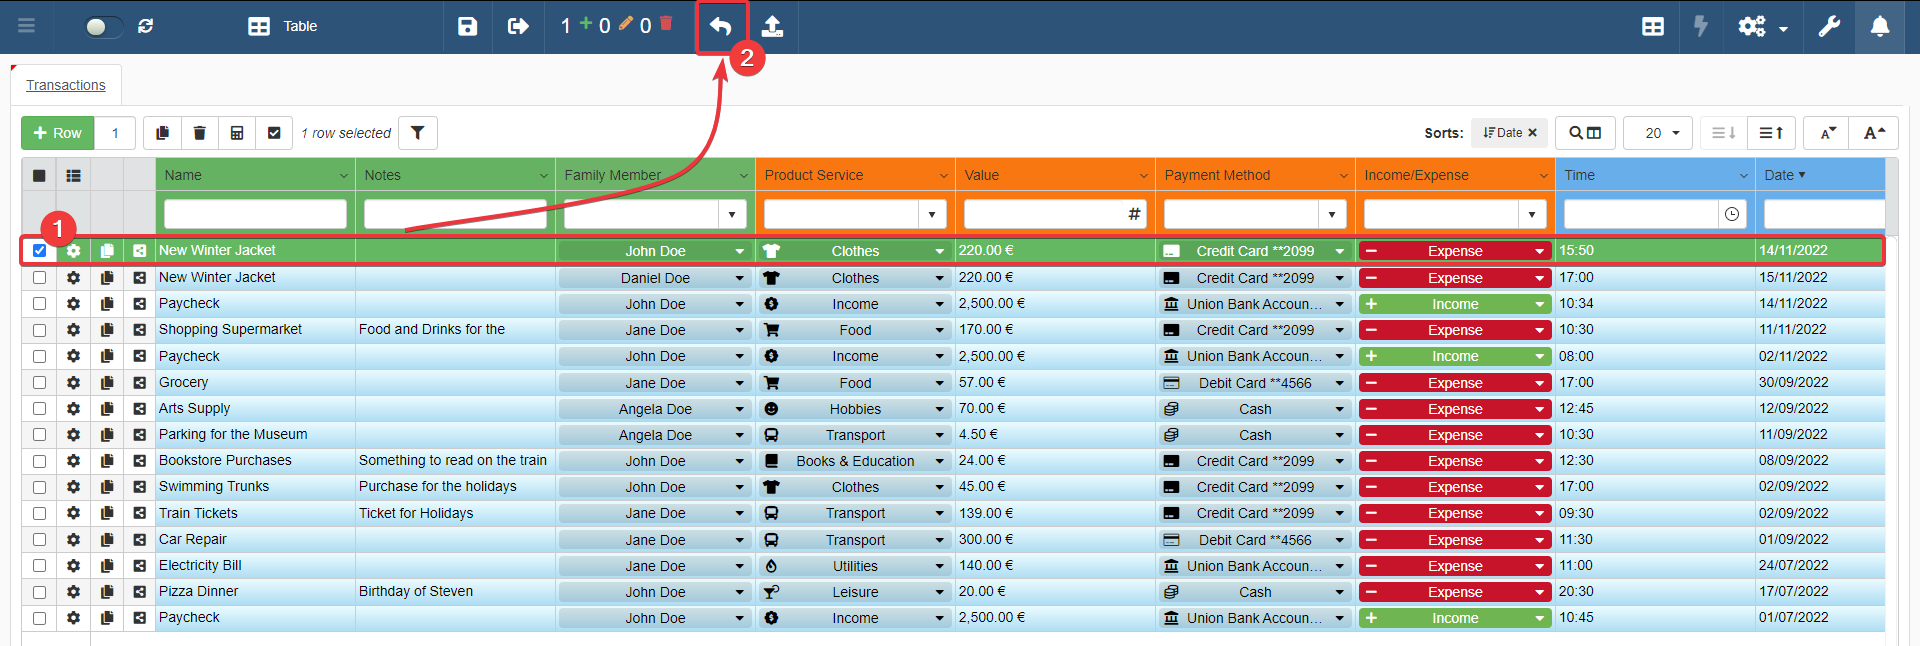
-
The Confirm window will appear. Click on the Yes button to revert the changes made on the row.
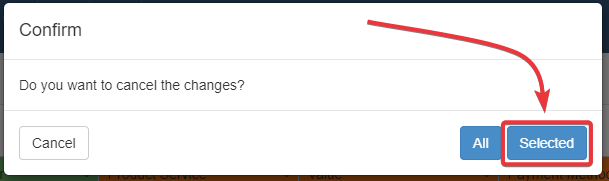
You can still decide to cancel all the changes if you want. In such case, click on the All button instead.
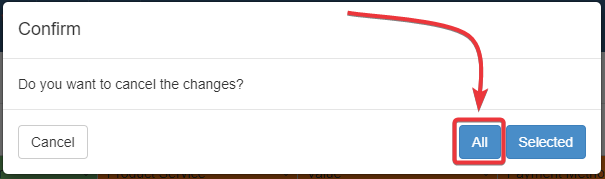
If you have changed your mind, click on the Cancel button on the Confirm window to maintain the changes.
Pending Changes
Learn how to view the summary of all the changes on a table.
Any application supplies an overview of all the changes not saved on a table. This summary is called Pending Changes. You can find the Pending Changes on the top bar of the application.
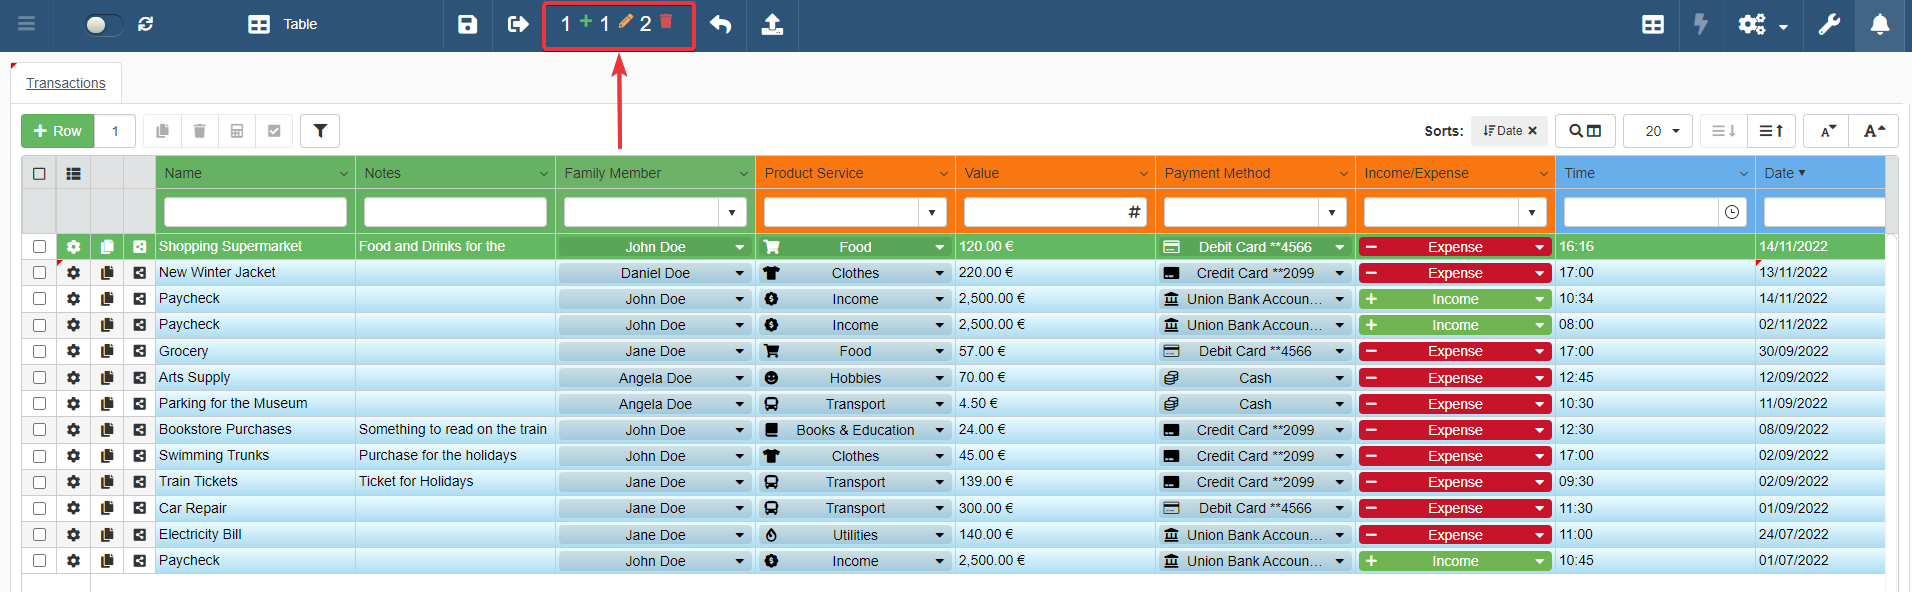
The Pending Changes counts all the changes.

From the left to the right:
- The icon counts the new rows.
- The icon counts the modified rows.
- The icon counts the deleted rows.
You can view the detailed summary of all the changes made by clicking on the Pending Changes button.
Pending Changes in the top bar divides the changes in new rows, modified rows, and deleted rows. The number next to the () icon counters the new entries. The number next to the () icon counters the modified rows. The number next to the () icon counters the deleted rows.
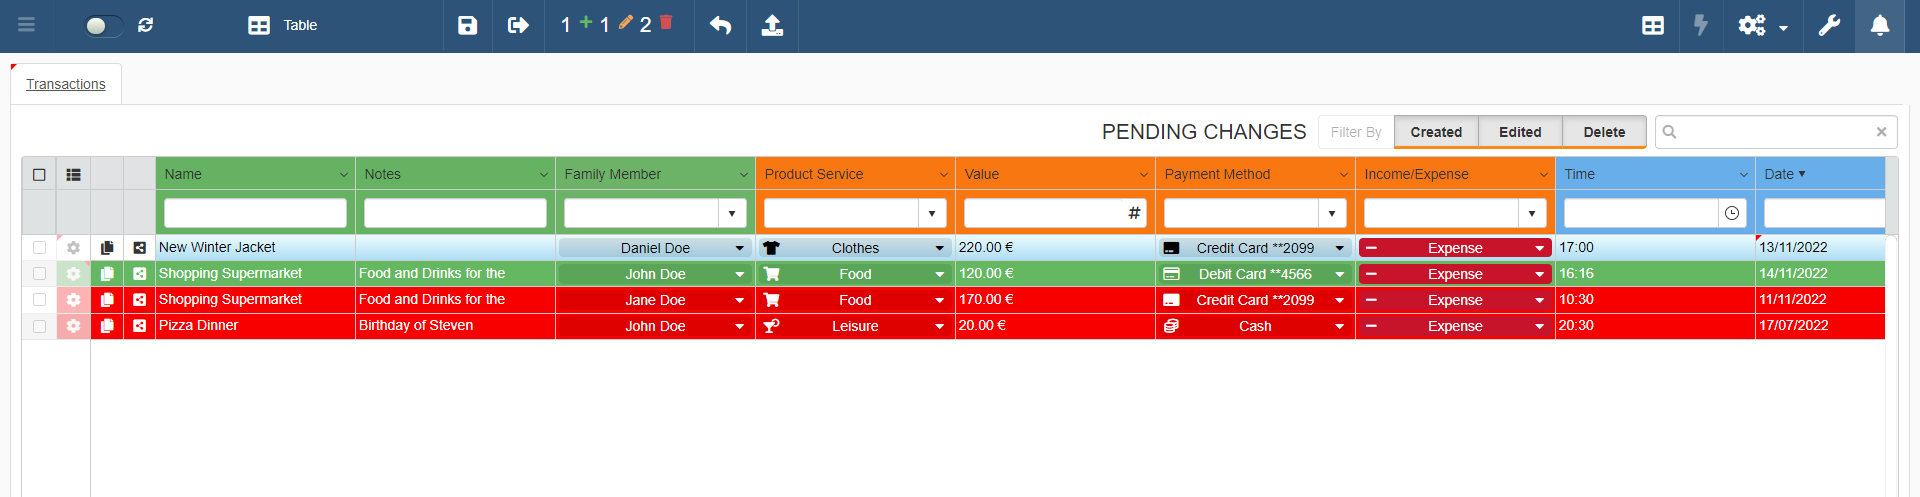
You can filter by type the different changes made in the application by clicking on the filter buttons. You find the filter buttons on the upper-right corner of the Pending Changes' table.
-
Clicking on the Created button displays/hides the new rows.

-
Clicking on the Edited button displays/hides the modified rows.

-
Clicking on the Delete button displays/hide the deleted rows.

By default, all the filter buttons are enabled when you open the Pending Changes table.
Local Changes
Learn how eLegere manages your data when you quit without saving.
eLegere manages your data in case you encounter an unexpected problem and you haven't saved the changes. (For example, your browser crashes.)
eLegere tracks on your machine any modification before saving them on the server. The track is called Local Changes.
Suppose that you quit an application suddenly. The application will remind you about unsaved local changes in the applications when you return. You can decide either to restore or ignore the unsaved changes.
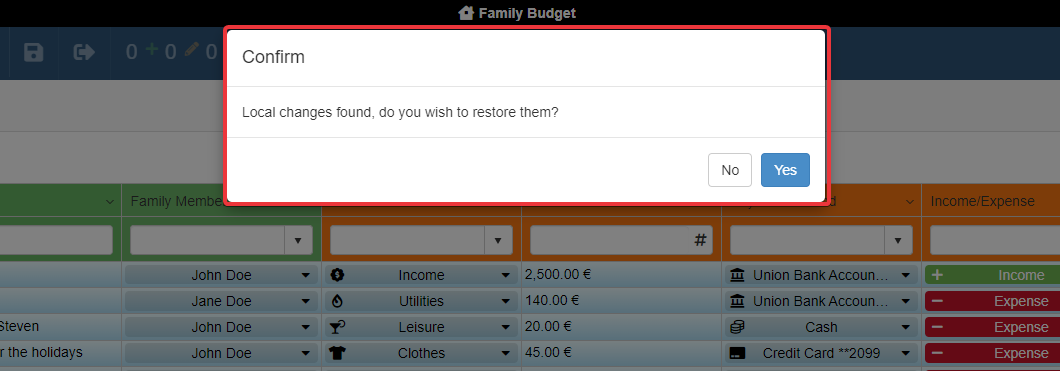
Clicking on the Yes button restores any change.
Applications always ask about unsaved changes when leaving.
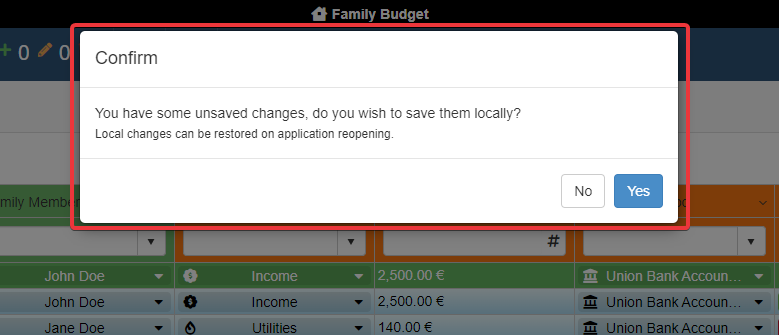
You can decide to save the changes locally or erase them.
- Click on the Yes button to save them. The application will ask to restore them at the next access.
- Click on the No button to leave without saving locally.
Warning
eLegere saves Local Changes on the machine you were using before quitting. Accessing the application from another machine or a different browser does not restore any unsaved changes. The same happens when your browser has the anonymous mode enabled during the navigation.
Details
Learn how to navigate and work with the Details: tables with secondary data attached to rows of the Master table (i.e. the main table of the application that you find at the access).
What are Details?
Learn what are the Details.
Details in eLegere applications are secondary tables associated to the Master Table rows. The Master table is the main table of the application. I.e. The table you find when accessing the application.
Example
Some examples of Details could be:
- In an Address Book, each row of the Master Table will be a person and their info: Name, Surname, Email, Address, and Phone. The Detail could be the log of meetings that you had or will have with that particular person.
- In a Project Management application, each row of the Master Table will be a project. The Details could be two additional info tables:
- The list of the employees assigned.
- The list of all the tasks required towards the completition.
- In an e-Commerce Order Manager application, each row of the Master Table will be the Order Id and the info of customer and shipping address. The Detail would be the table listing the ordered items and the quantity.
If the application has Details, a Master Table could have one or more Details with secondary data.
Access the Details
Learn how to open a Detail of a row.
A brief explanation of how to access the Details and how their interface.
-
Click on the Row Options button () > Details to access the Details.

As alternative, you can double-click the Row Options button () to access the Details.
-
A new tab will open with the Detail of the Master table's row. Click on the tab to open the Detail's table.
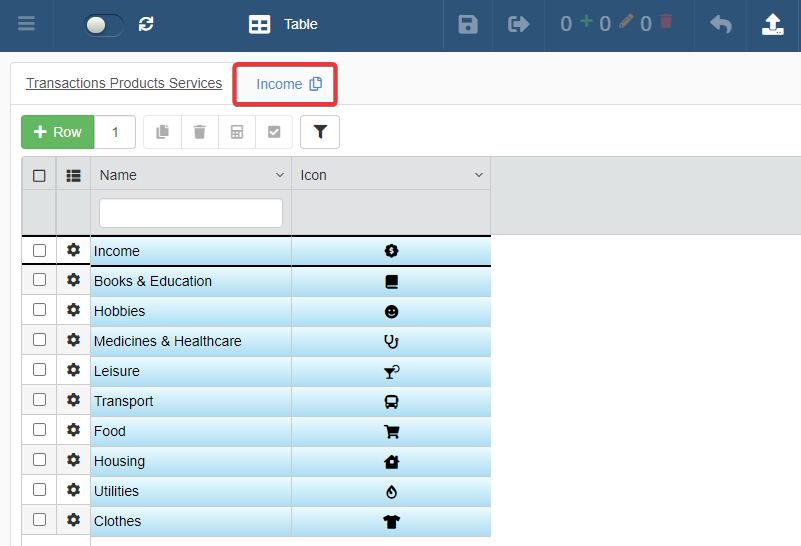
You will land to the Detail table of the chosen row.
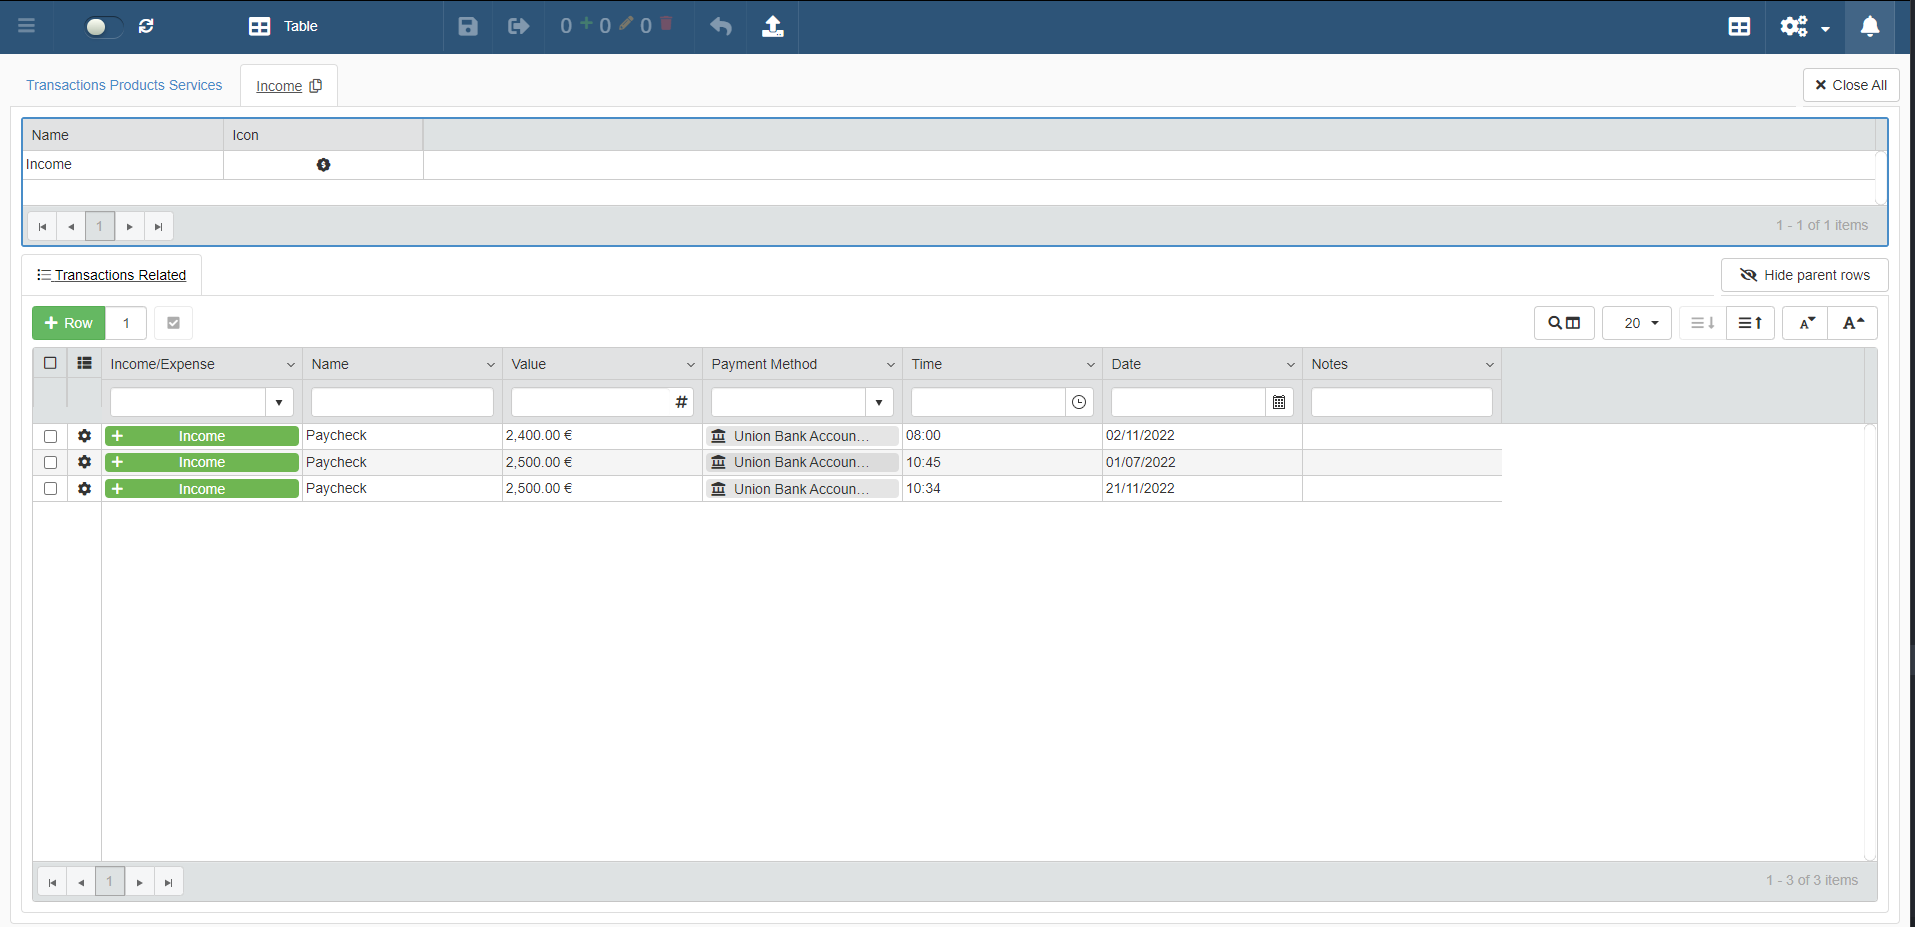
A brief explanation of a Detail's interface
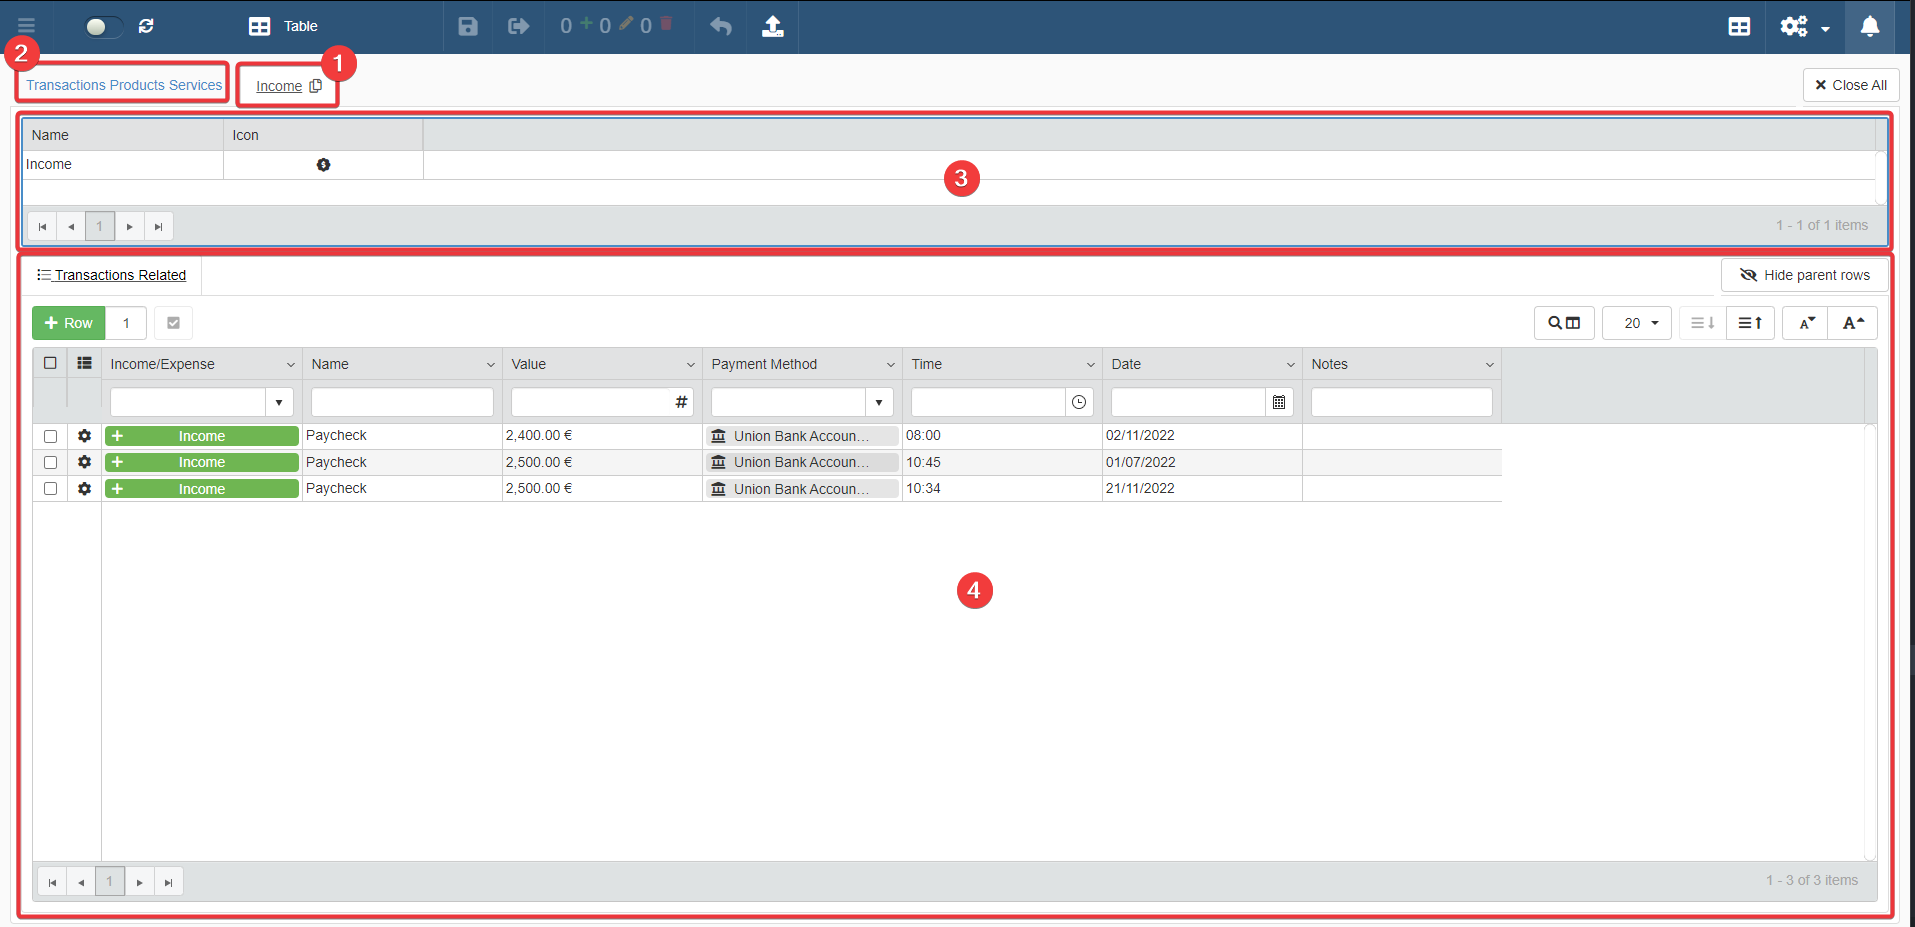
-
The tab of the current Detail's table with the Master row's Row Identifier. A Row Identifier is a brief description, name or code identifying the Master's row to which the Details refer to. The Designer decides what is the Row Identifier: it could be the value of one field or another criteria identifying that Master table's row univocally.
-
The tab leading back to the Master table.
-
The Parent Row: the Master table row related to the current Detail.
-
Detail tables work exactly like the Master table. Each action available on a Master table work on Details as well. See the section Edit Rows to learn how to interact with tables and rows.
If you want to spare space in the window: you can hide the Parent Row section of the Detail table. Click on the Hide Parent Rows button. (Click on the Show Parent Rows if you want to display the Parent Row again.)
Aggregated Details
Learn how to view multiple Details in a single window.
You can view the Details of multiple Master table's rows all at once in a single table.
- Select the Master table's rows you are interested to see the Detail's data.
- Click on the Aggregate Details button on the upper-right corner of the Master table.
You will see a single table with the data of all the selected Master rows' Details.
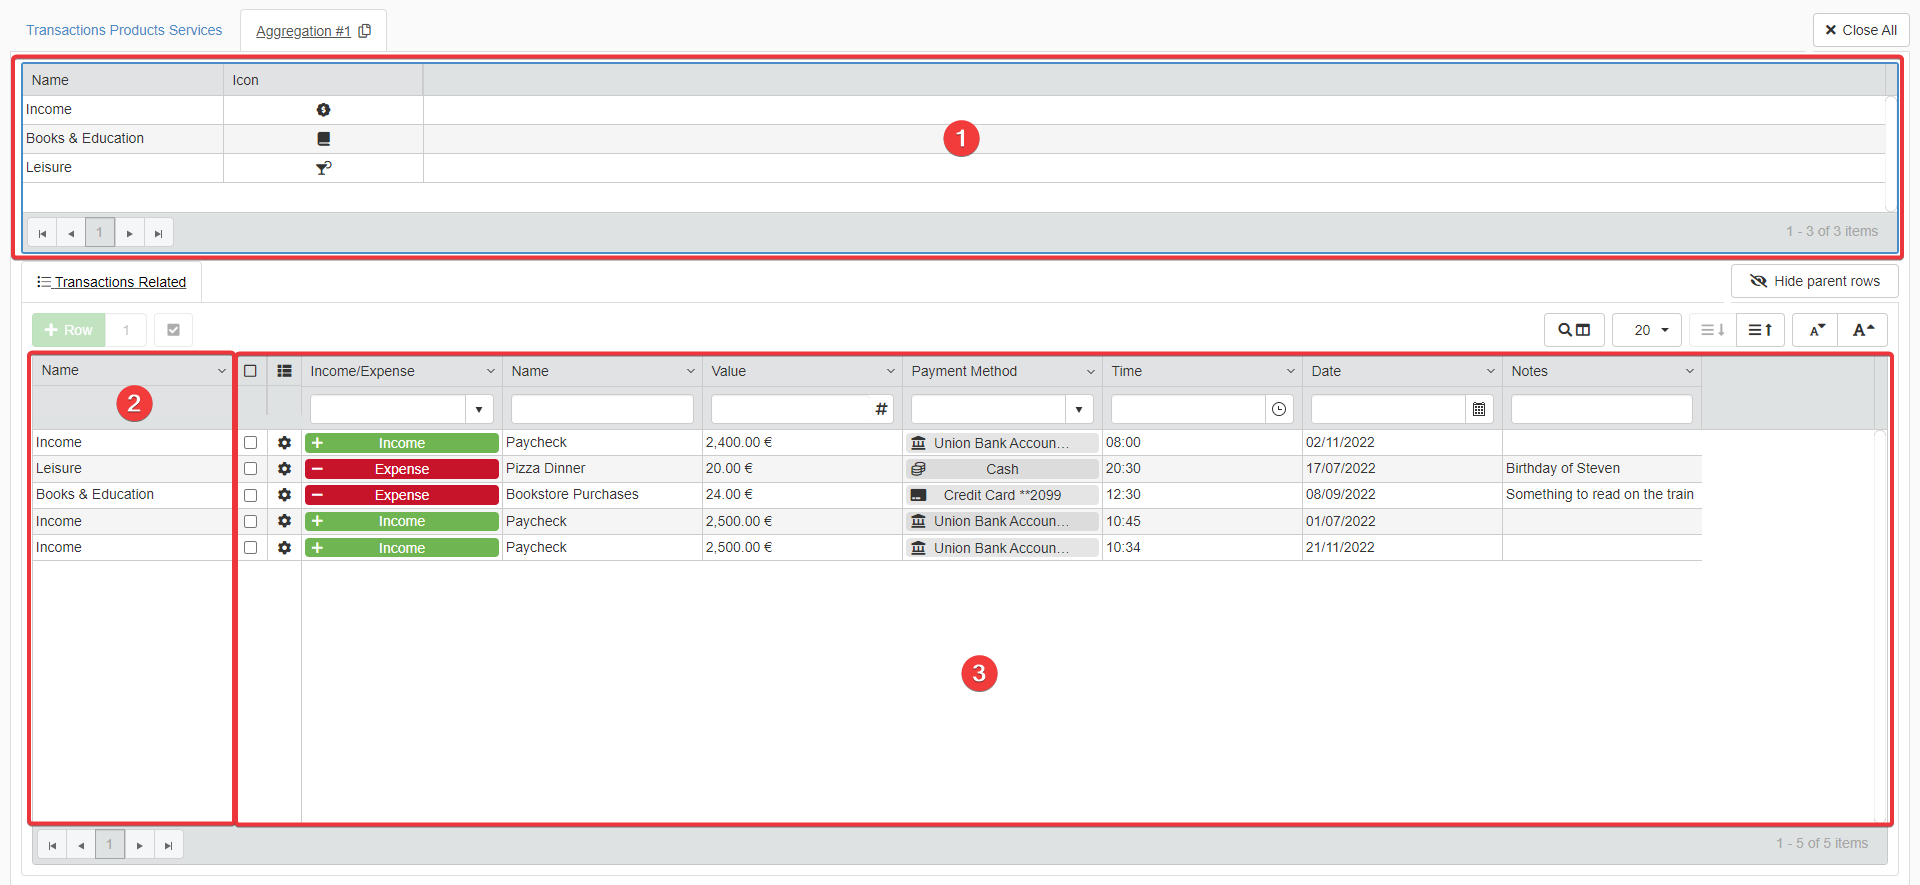
The Aggregate Details works like any other Detail table given four exceptions:
-
You cannot add, modify or delete rows.
-
The Parent Row lists all the Master table's row involved in the aggregation.
-
The column Name on the left specifies to what Master table's row the Detail's row belongs.
-
On the right, there is the standard table containing all the aggregated Details' rows.
Filter Master Rows having Details
Learn how to filter rows having Details.
Inside the Master Table, you can filter the rows having or not having Details.
Note
You can filter by Details if and only if the application has Detail tables.
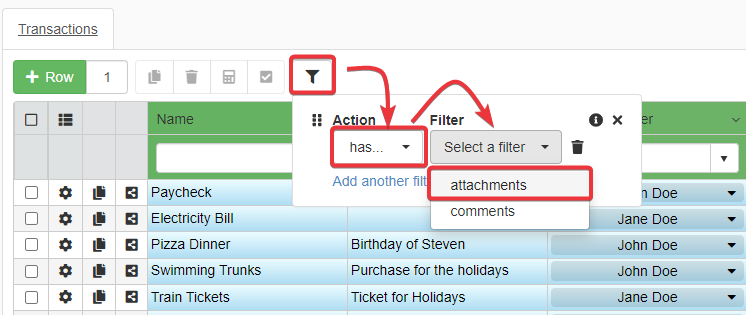
You can filter the rows with Details by clicking on the icon.
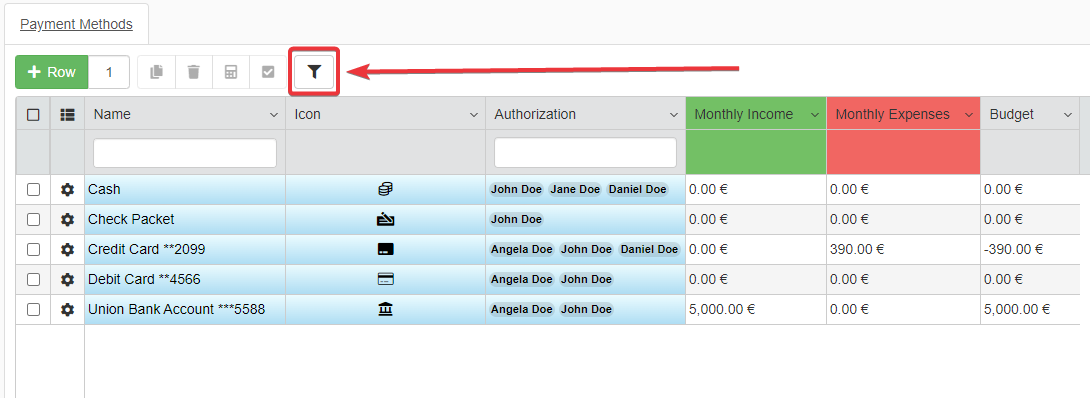
-
Click on the icon on the upper-left corner of the Master Table.
-
A menu with the Action and Filter drop-down lists will appear. Click on the Filter drop-down list .
-
Choose from the Filter list the details option.
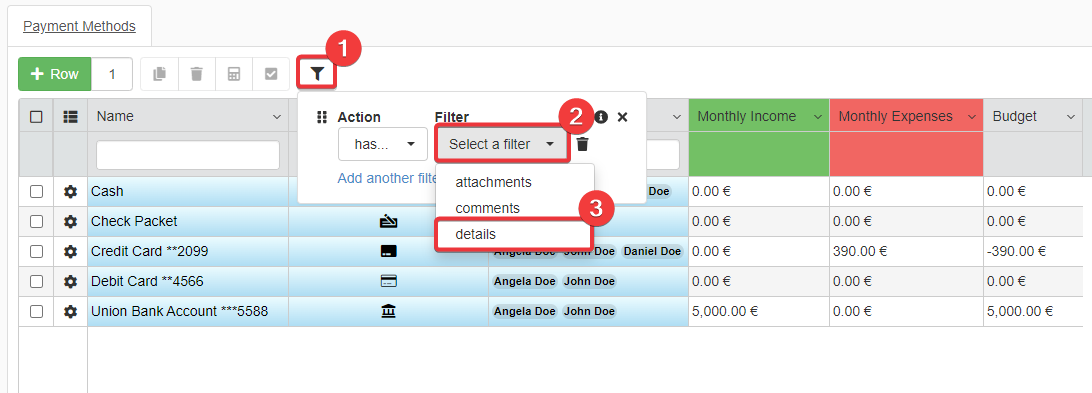
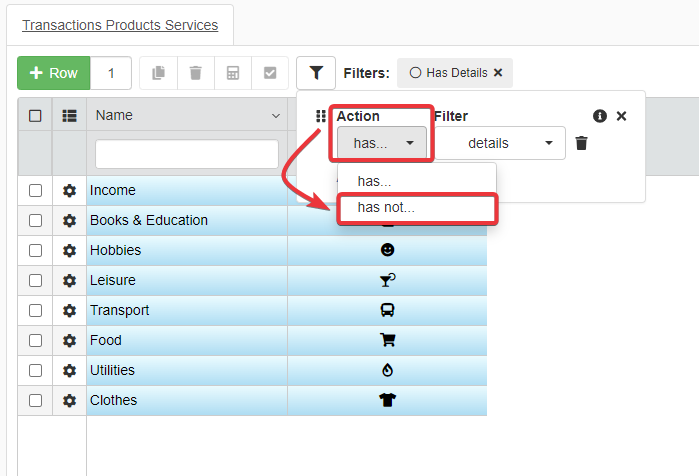
The operation will display only the rows with non-empty Details.
If you want to search rows with empty Details: select from the Action drop-down list the option has not.
Sharing Rows
Users can share table rows and view Details from their applications.
Learn how to share either a Master table row or a Detail's view.
Share a Row from the Master table
Learn how to share a row from the Master table.
You can share a Master table's row with people having access to the same application.
-
Click on the Row Options button () of the row you want to share.
-
Click on the Copy Link button.
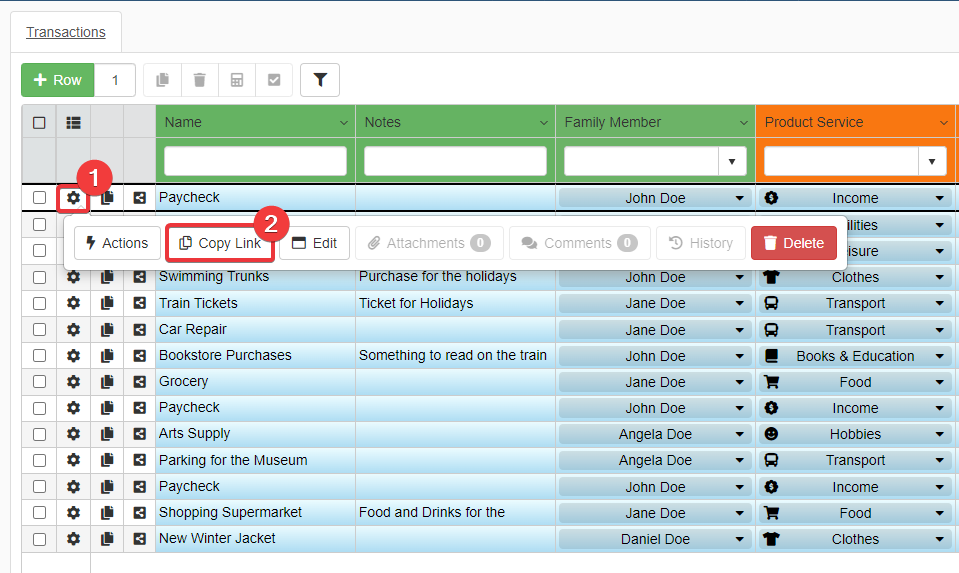
The action will copy a sharable link of the row.
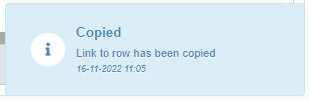
A notification will confirm the success of the Copy Link action.
Share the link to let other eLegere Users to access that specific Master table's row.
Note
Only who has an account for your eLegere installation can access the shared row through the provided link. Also, the user must have the permissions for both the Domain and the application. If the User doesn't have an account with the required permissions, they can't view the shared row.
Share a Detail
Learn how to share the Detail of a row.
You can share a link to a Detail table of a Master table's row.
-
Access the Detail of the row as described in Access the Details.
-
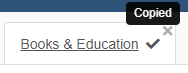
Click on the button on the Detail's tab to copy a link to the Detail.
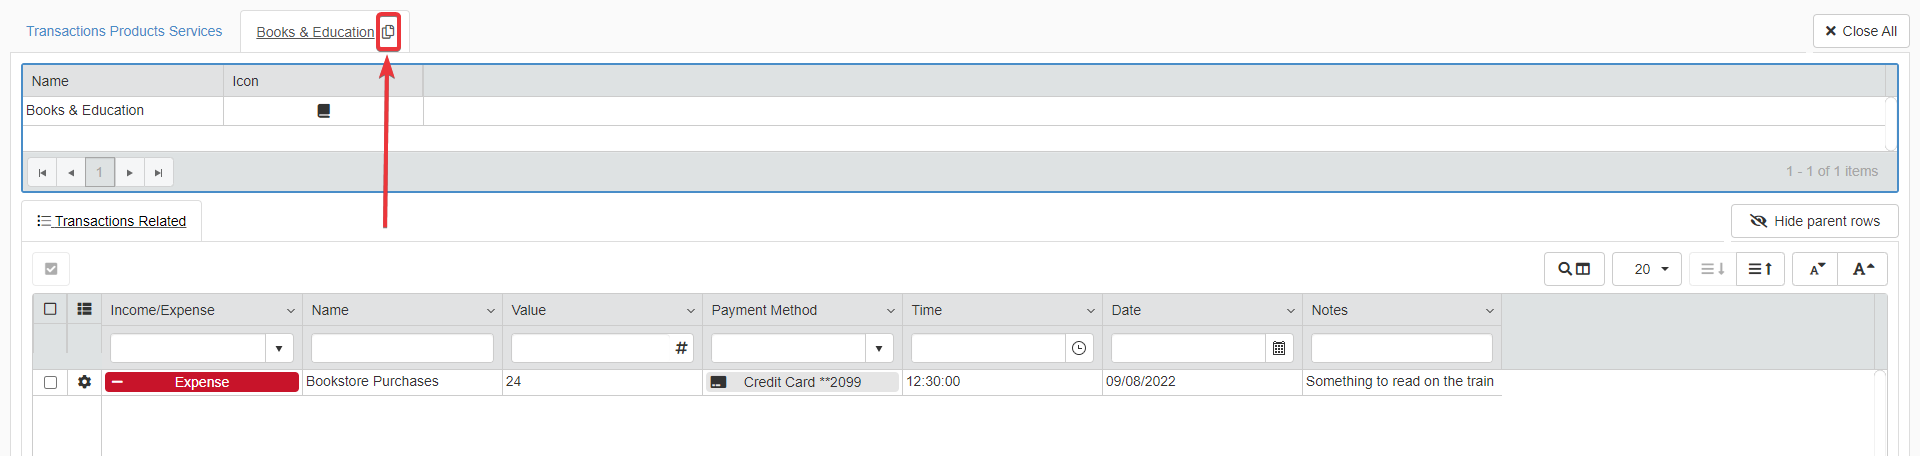
A tooltip and the icon :fa-check: will confirm that the Detail's link has been copied.
You can share the link as you would do with a Master table row's link.
For the rest, the copied link works like Master table's sharable links (see Share a Row from the Master table).
Attachments
Learn how to attach files to the rows and manage them.
If the Designer has enabled the corresponding option, Users can attach one or more files to an application's table's row.
Note
The Designer might have introduced restrictions regarding the employment of the Attachments function.
View Attachments and Files
Learn how to view the attachments.
You can view a row's Attachment by opening the Attachments window and choosing the file to view.
Attachments Window
You must first open the Attachments window to view any attachments of that table row.
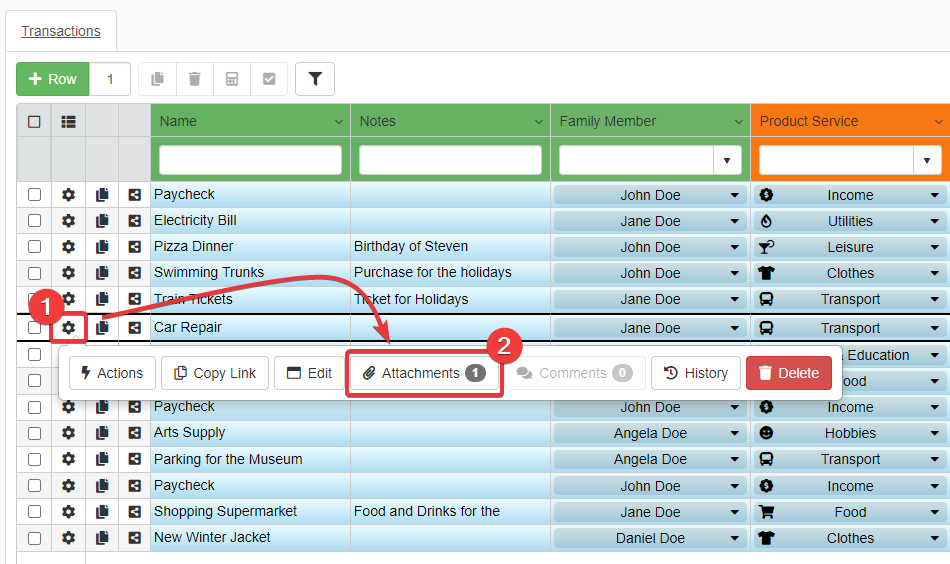
-
Click on the Row Options () button of the row with the attachments you want to view.
-
Click on the Attachments button. The Attachments button has a counter with the number of attachments uploaded.
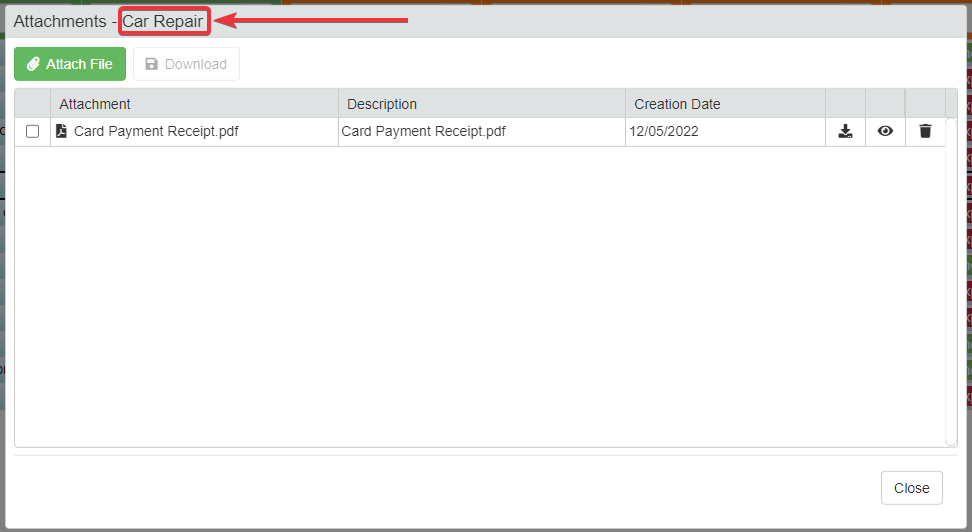
The action opens the Attachments window. Each Attachments window reports the Row Identifier of the row you are checking.
If the Designer has enabled the Attachments Column for the application: the option provides a shortcut to open the Attachments window.
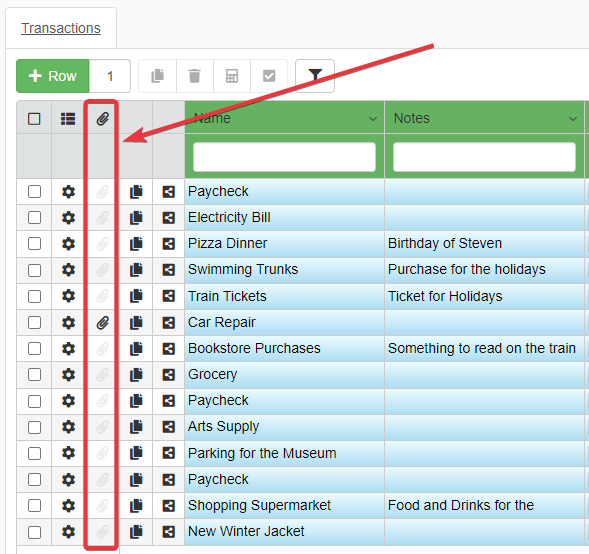
The Attachments Column highlights the () icon next to rows having one or more attachments.

Click on the icon next to the row to open the Attachments window.
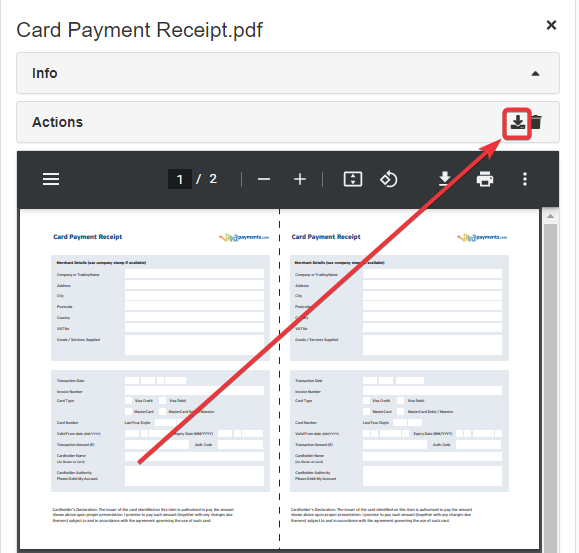
Preview Attachments and Files
You can preview in the Attachments window url, images, PDFs, text files (.txt) without downloading them.
Click on the button next to the attachment you want to preview.
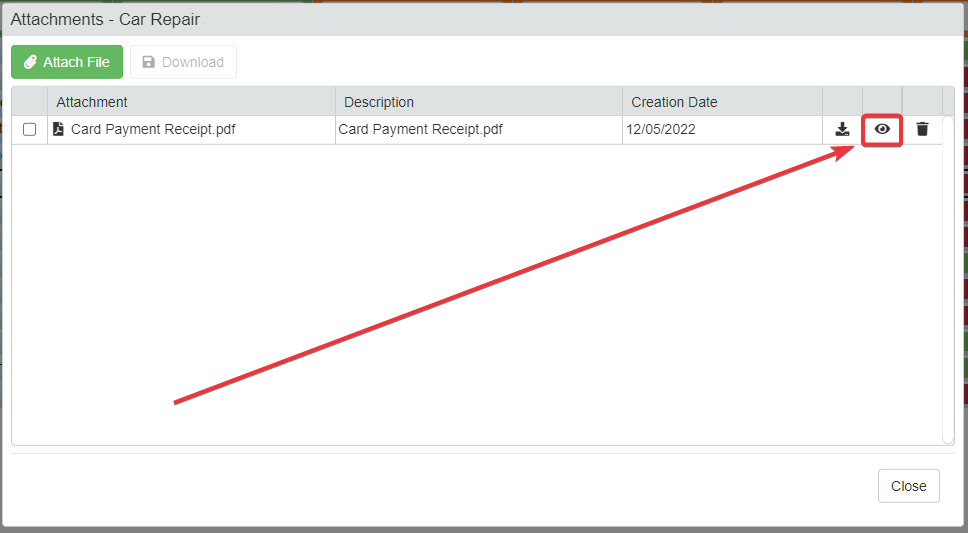
The actions opens the Preview panel on the left side of the application.
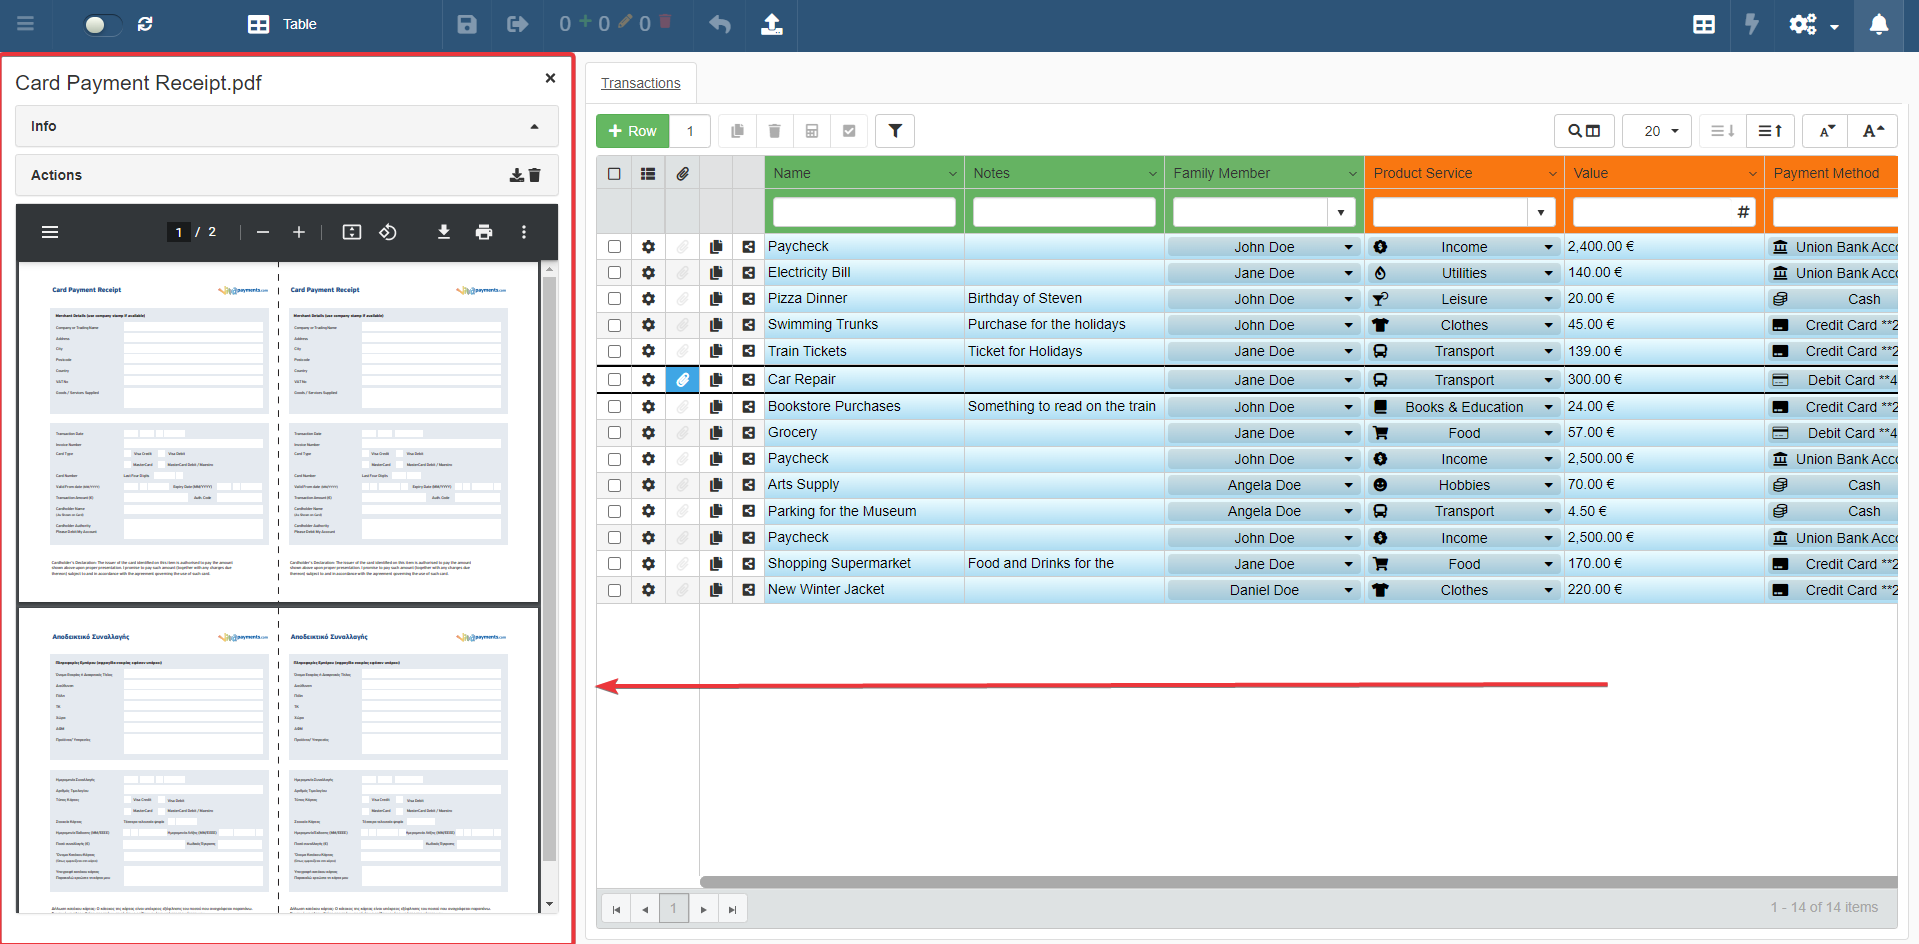
The Preview panel has the following structure:
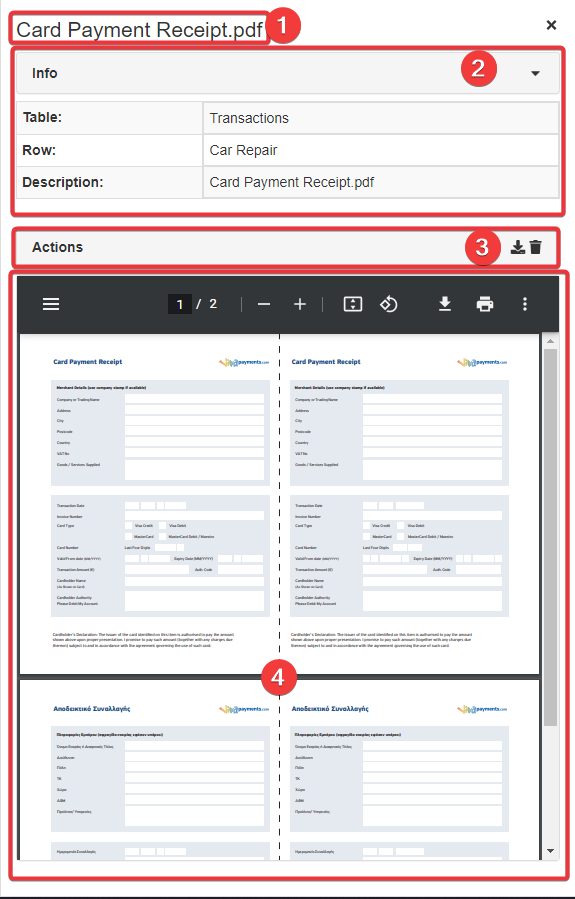
-
Name of the file as title.
-
Info section detailing all the info about the file. When you open the Preview panel, the section is collapsed. Click on the icon to expand it as you see in the screenshot. You will view the following info:
- Name of the Table the attachment's row belongs to.
- Name of the row.
- Description of the item.
Click on the to collapse the section.
-
Actions bar.
- Click on to download the file.
- Click on to delete the file.
-
The section where the file is previewed.
You will be able to preview the attachment.
Download Attachments and Files
Users can download any attachment through the Attachments window.
Users can download a row's attachments in four ways.
-
By clicking directly on the attachment's name in the Attachments window. If the browser can read the file, the browser will open attachment in a tab. Otherwise, the browser will download the file on your machine.
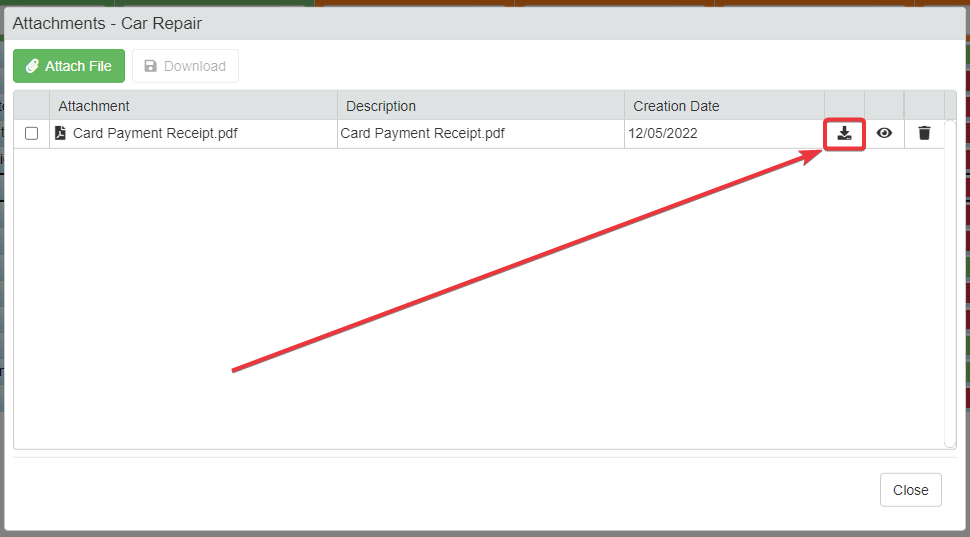
-
By clicking on the icon next to the attachment you want to download in the Attachments window.
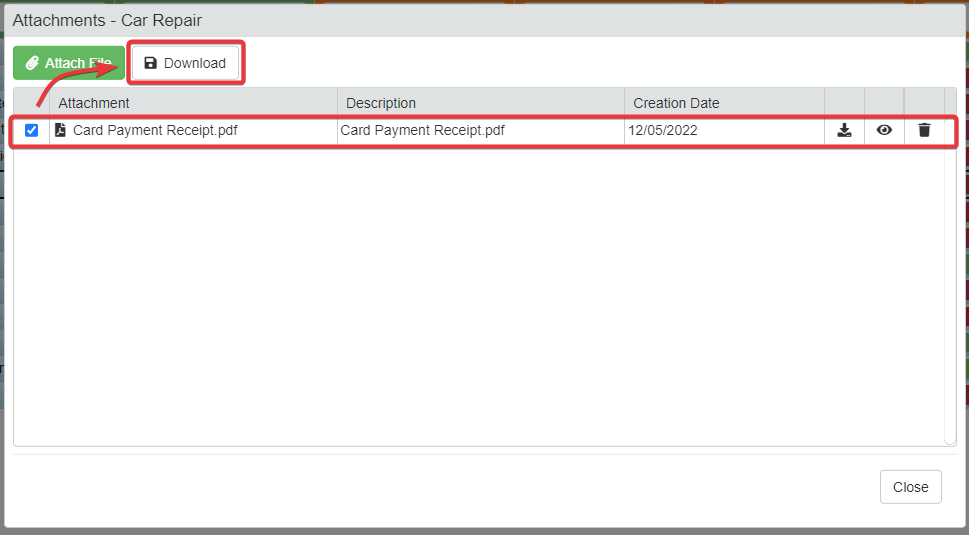
-
By selecting the attachments you want to download then clicking the Download button.
-
By clicking the icon in the Actions bar of the Preview panel of the attachment you want to download. (See Preview Attachments and Files for more info about the Preview panel.)
Any of the methods above will download the attachment.
Manage Attachments
Learn how to add or remove attachments from a table's row.
If the Designer has enabled the corresponding options, Users can either add or remove attachments from a row.
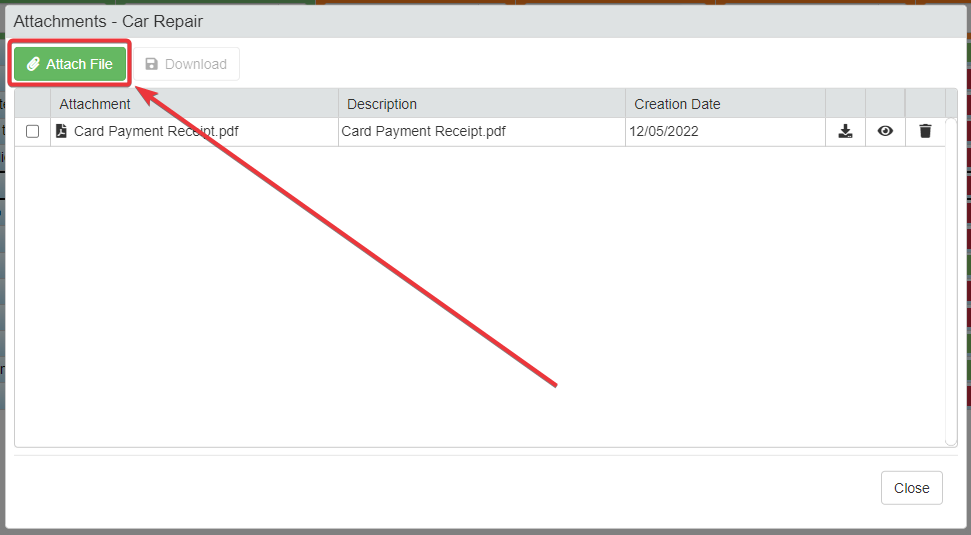
Insert Attachments
Users can upload attachments from the Attachments window. See the section Attachments Window to learn how to open the Attachments window.
-
In the Attachments window, click on the Attach File button.
-
Clicking the Attach File opens a small window to upload your file will above the Attachments window.
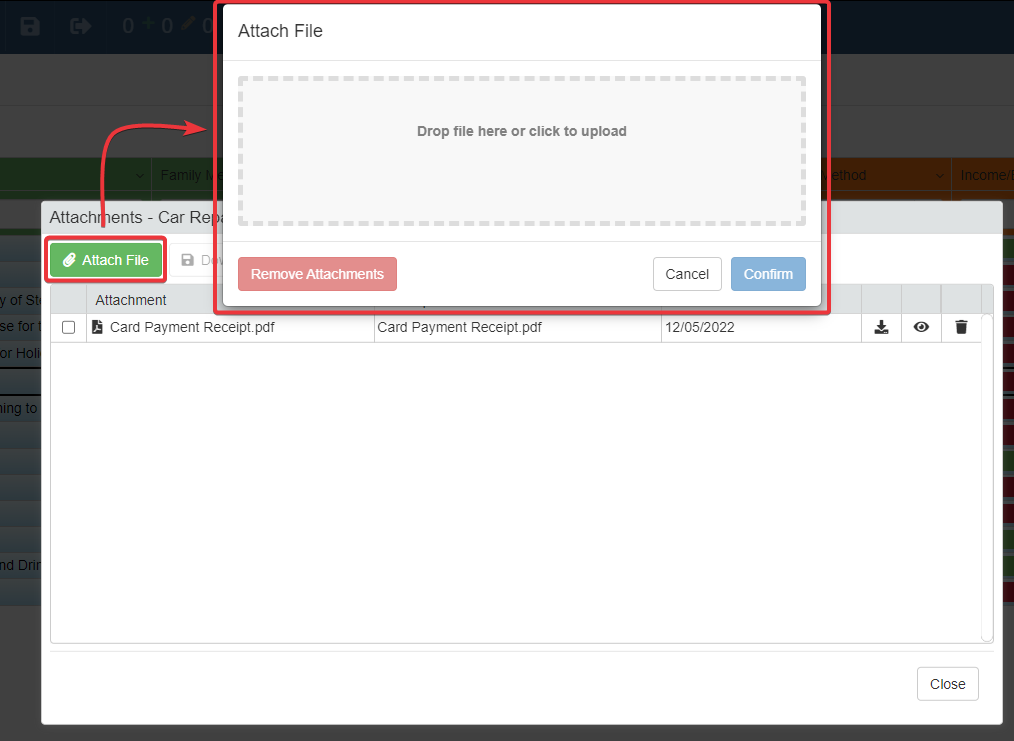
You can either drag & drop or click on the space to choose a file from your machine.
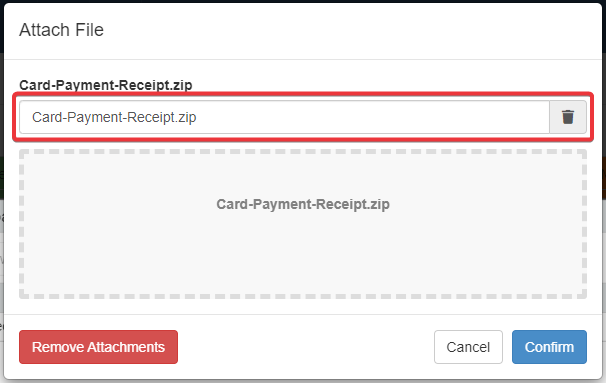
-
After choosing the file, you will be able to type a Description for the file before the upload through the textbox. (By default, the Description is identical to the file's name). If you want to remove the attachment and upload another one, click on the button instead.
-
After having uploaded the file (and renamed, if required):
-
Click on the Confirm button to upload the attachment.
-
If you have changed your mind, click on the Remove Attachments to remove the attachment.
-
Click Cancel to abort the upload.
-
After the passages above, you will have uploaded your file.
Note
Differently from operations with the rows, the action takes effect without the necessity to save the changes.
Delete Attachments
Users can remove attachments from the Attachments window. See the section Attachments Window to learn how to open the Attachments window.
-
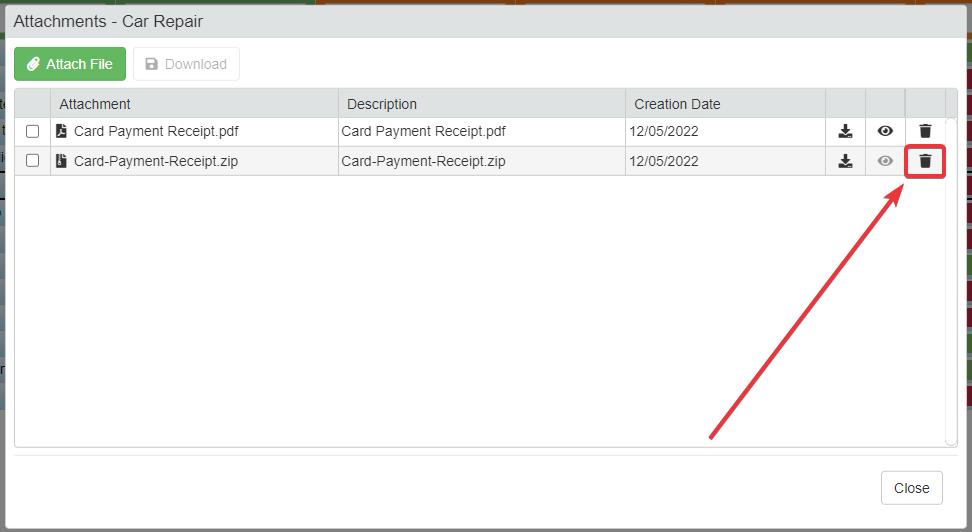
In the Attachments window, click on the icon to remove the file from the row's attachments.
-
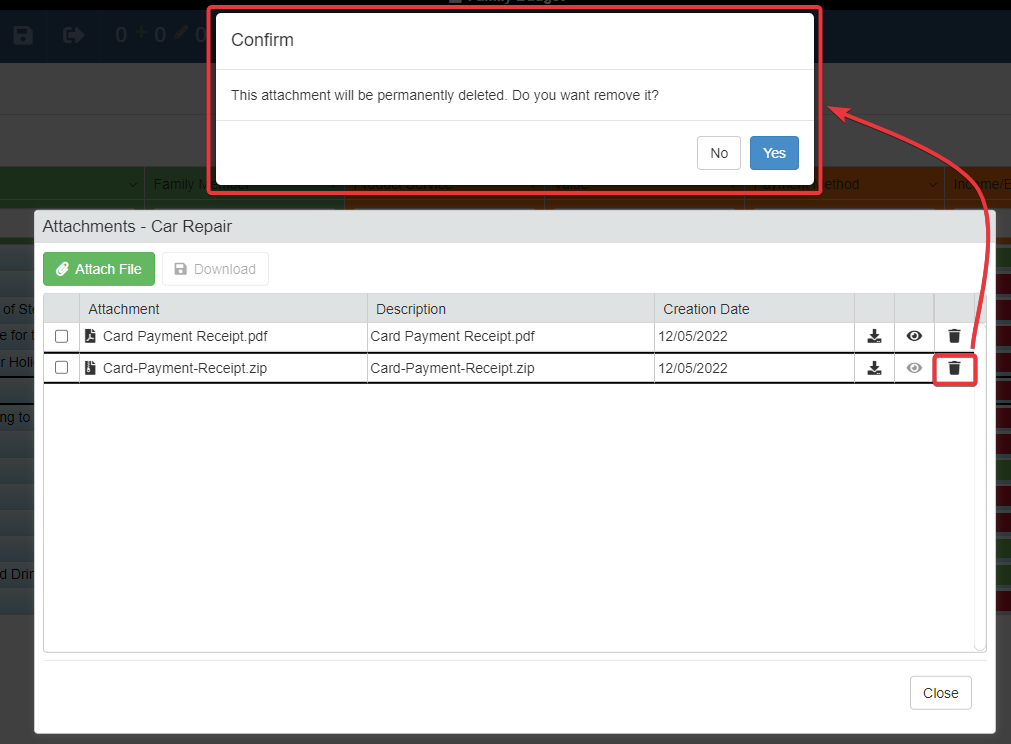
A window asking for confirmation will appear. Click Yes to complete the deletion. Click Cancel to abort the deletion
After the passages above, you will have deleted the attachment.
As alternative, click on the icon in the Actions bar of the Preview panel of the attachment you want to delete. (See Preview Attachments and Files for more info about the Preview panel.)
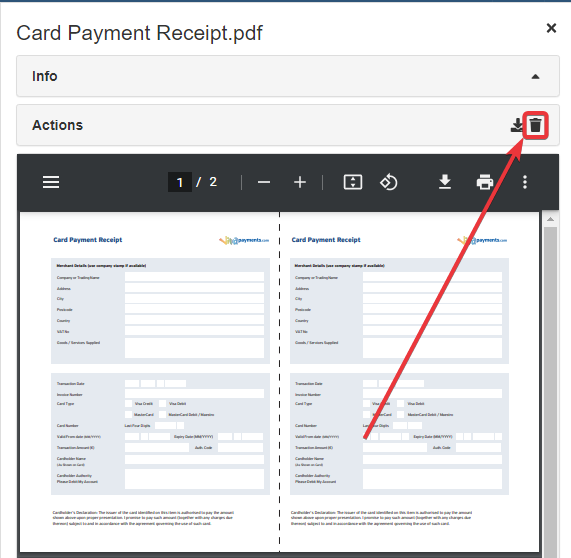
The action will make appear a window to confirm the deletion.

Note
Differently from operations with the rows, the action takes effect without the necessity to save the changes.
Filter Rows with Attachments
You can filter the table's row to display only the rows having attachments.
-
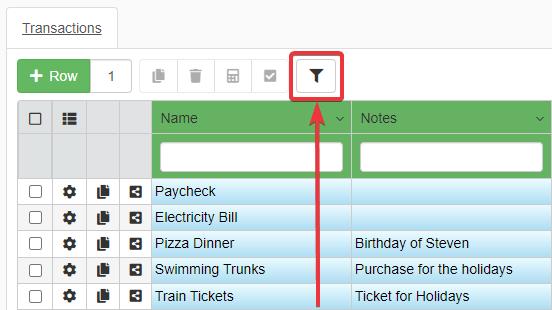
Click on the icon on the upper-left corner of the Master Table.
-
A menu with the Action and Filter drop-down list will appear. Click on the Filter drop-down list.
-
Choose from the Filter drop-down list the attachments option.
The operation will display on the table only the rows having attachments.
History: Changes Tracking and Rows Restoration
The Designer could enable on the application the History.
The History is a functionality that tracks all the changes happened on the Master and Detail tables.
Note
The History tracks the changes on the Master or Detail tables' Storages with Enable History Tracking option activated. It could happen that not all the tables of your application are tracked. The presence of the History depends on the configuration that the Designer has chosen. (This is a topic for Designers and not for Users. Please, check the Designer's Guide for more info.)
View the History of all the Changes
Learn how to view the history of all the changes on the table.
If the Designer has enabled the History, you can view all the changes made on a specific row.
-
Click on the Row Options button on the left side of the row you want to check.
-
Click on the History button

You will access the History of Changes window.
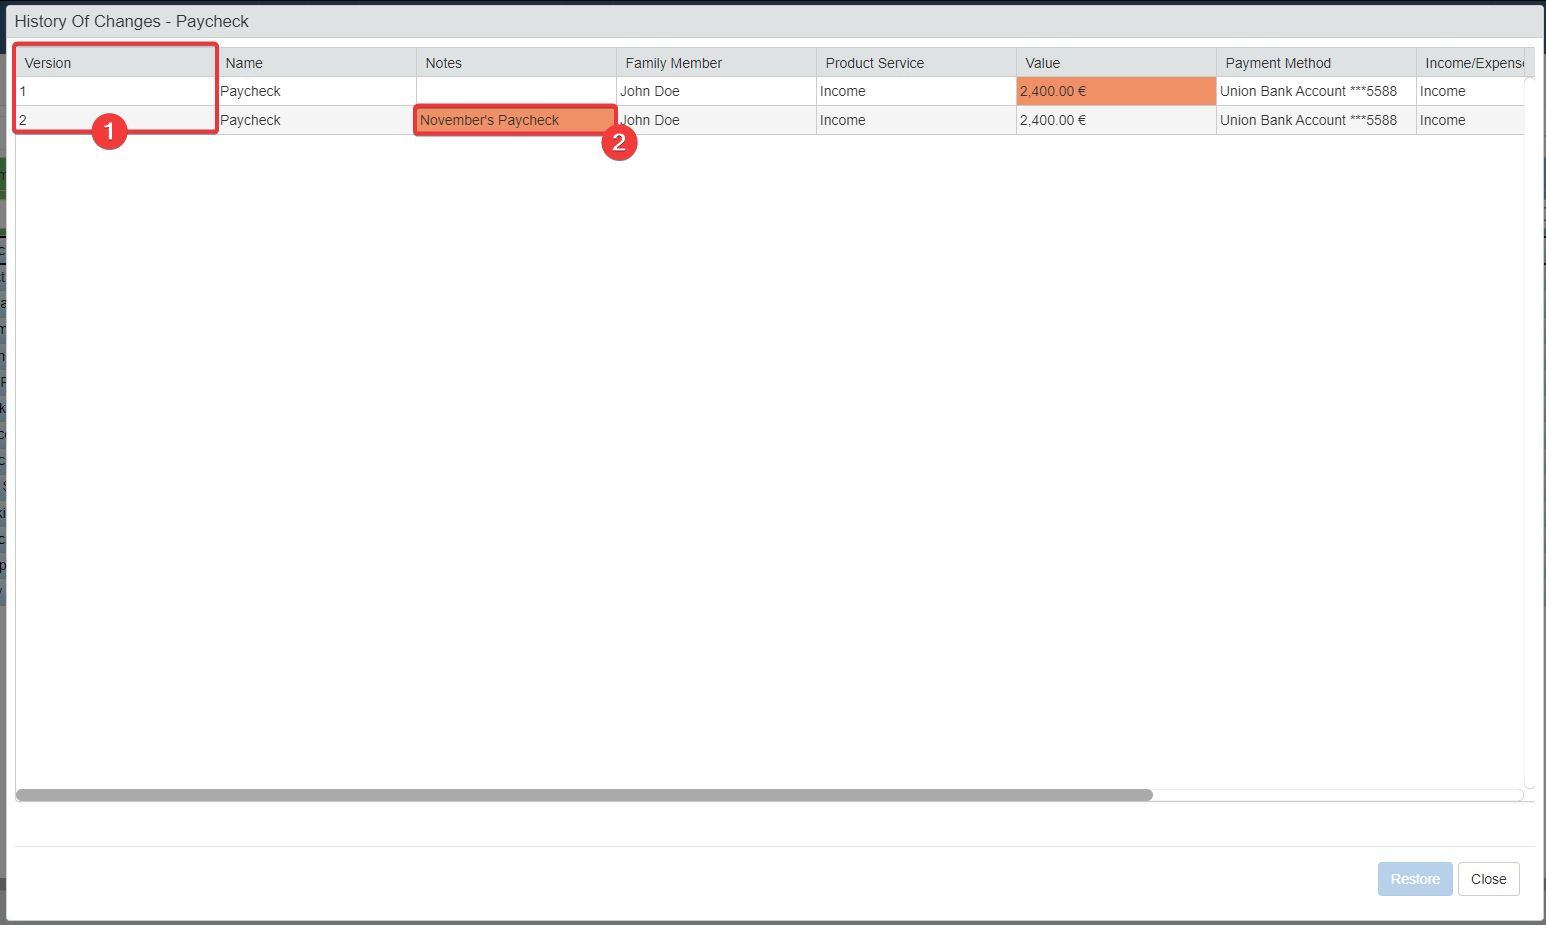
- The Version column lists from the earliest to the latest each version of the row.
- The History of Changes' table highlights the cells modified in the that version.
Note
The Designer chooses to enable or not the History. Also, the Designer chooses what fields to track in the History.
Restore previous Row's state from History
Learn how to restore the previous state of a row from the History.
If the Designer has enabled the Users to restore changes from the History, you can restore the version of the row you prefer.
-
Click on the Row Options button on the left side of the row you want to check.
-
Click on the History button.
You will access the History of Changes window.
In the History of Changes window:
-
Click on the Version you want to restore. The row will be selected.
-
Click on the Restore button on the bottom-right corner of the window.
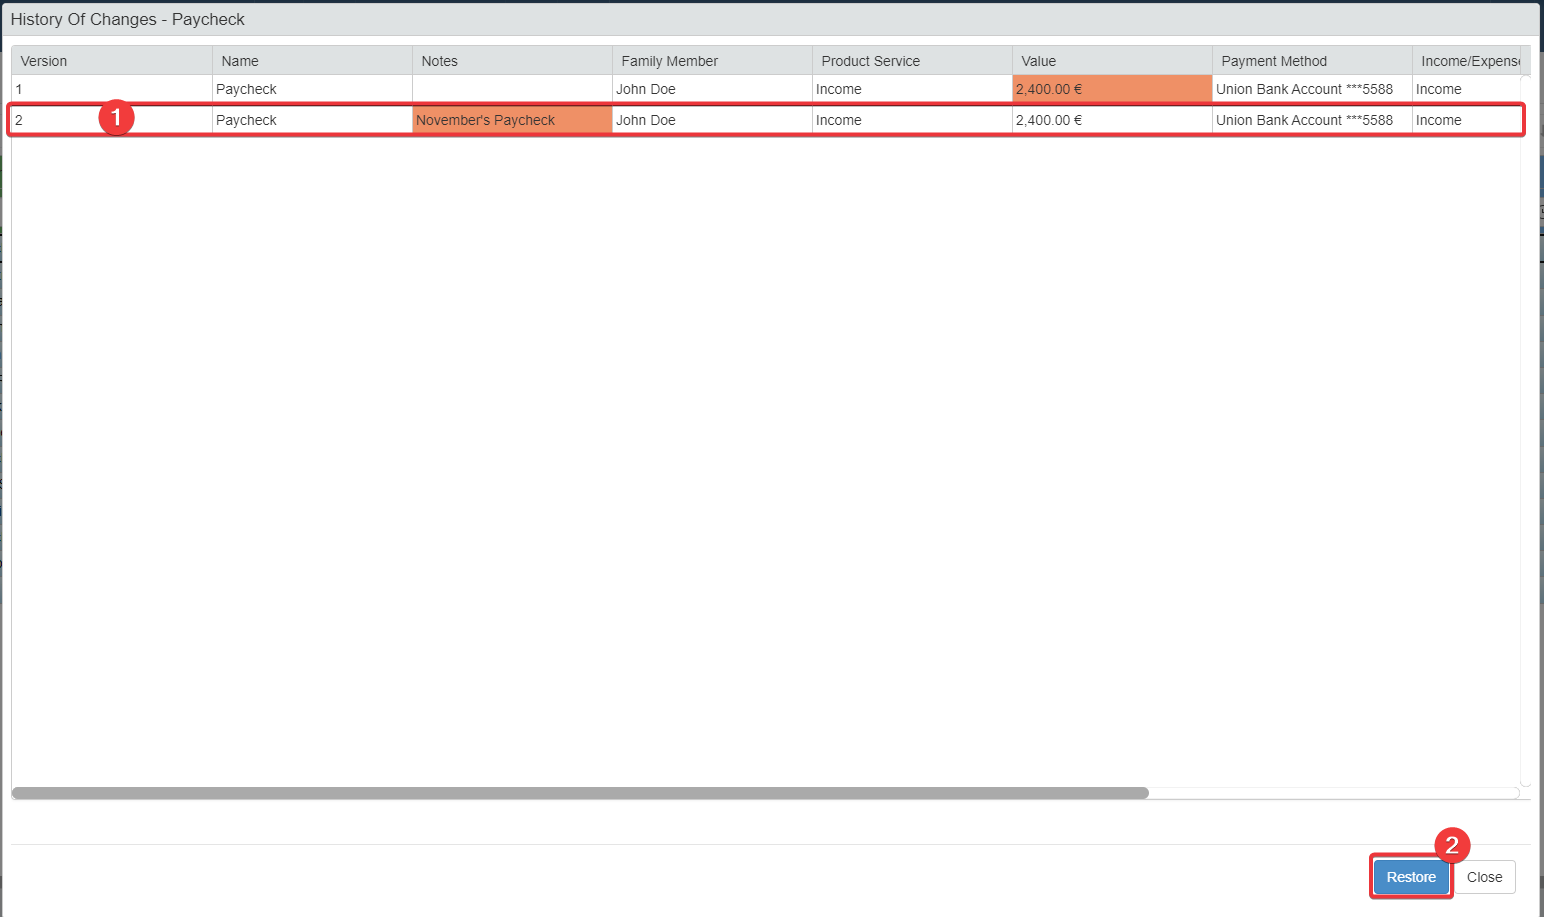
-
A window will ask for confirmation. Click on the Yes button. (If you have changed your mind, click on No.)

The action will restore the row to the preferred version.
Rows Refresh
Users can reload all the data at any time within an application.
Learn how to reload the application's rows with one click.
Refresh Rows' Values
Learn how to reload the table's data.
If you want to reload all the table's data: click on the Refresh button ().

Hint
You won't loose any changes if you click the Refresh button.
The action refreshes all the data, including calculated fields.