Custom Actions
Custom Actions
With Custom Actions module we can setup five different actions:
- Send Email
- Invoke Store Procedure
- Invoke Powershell script
- Share Row
- Generate AppLink
In this guide we will use only the Send Email Custom Action to send a notification from the App. This action saves time, avoiding to write and to send manually an email using another email software.
Custom Actions
If you want to go deeply in all Custom Action available on eLegere, please visit Work on eLegere page.
To enable the module from the Design Mode, click on the relative icon in the Toolbar and Enable Module:


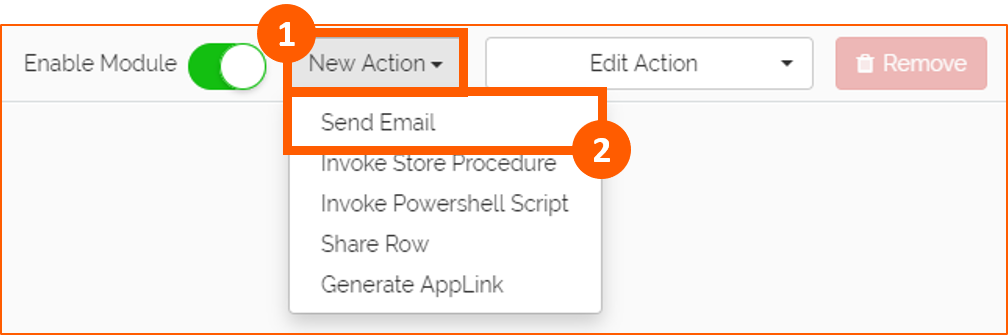
Chose from New Action's' list (1) the Send Email action (2):
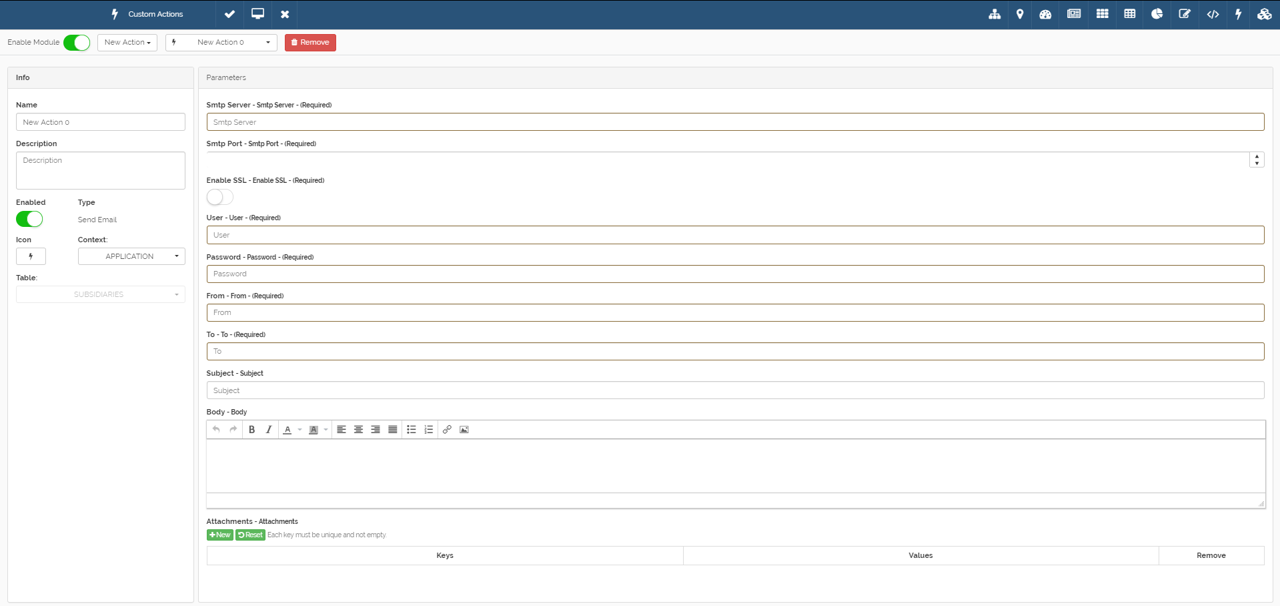
There are two sections to configure:
Info
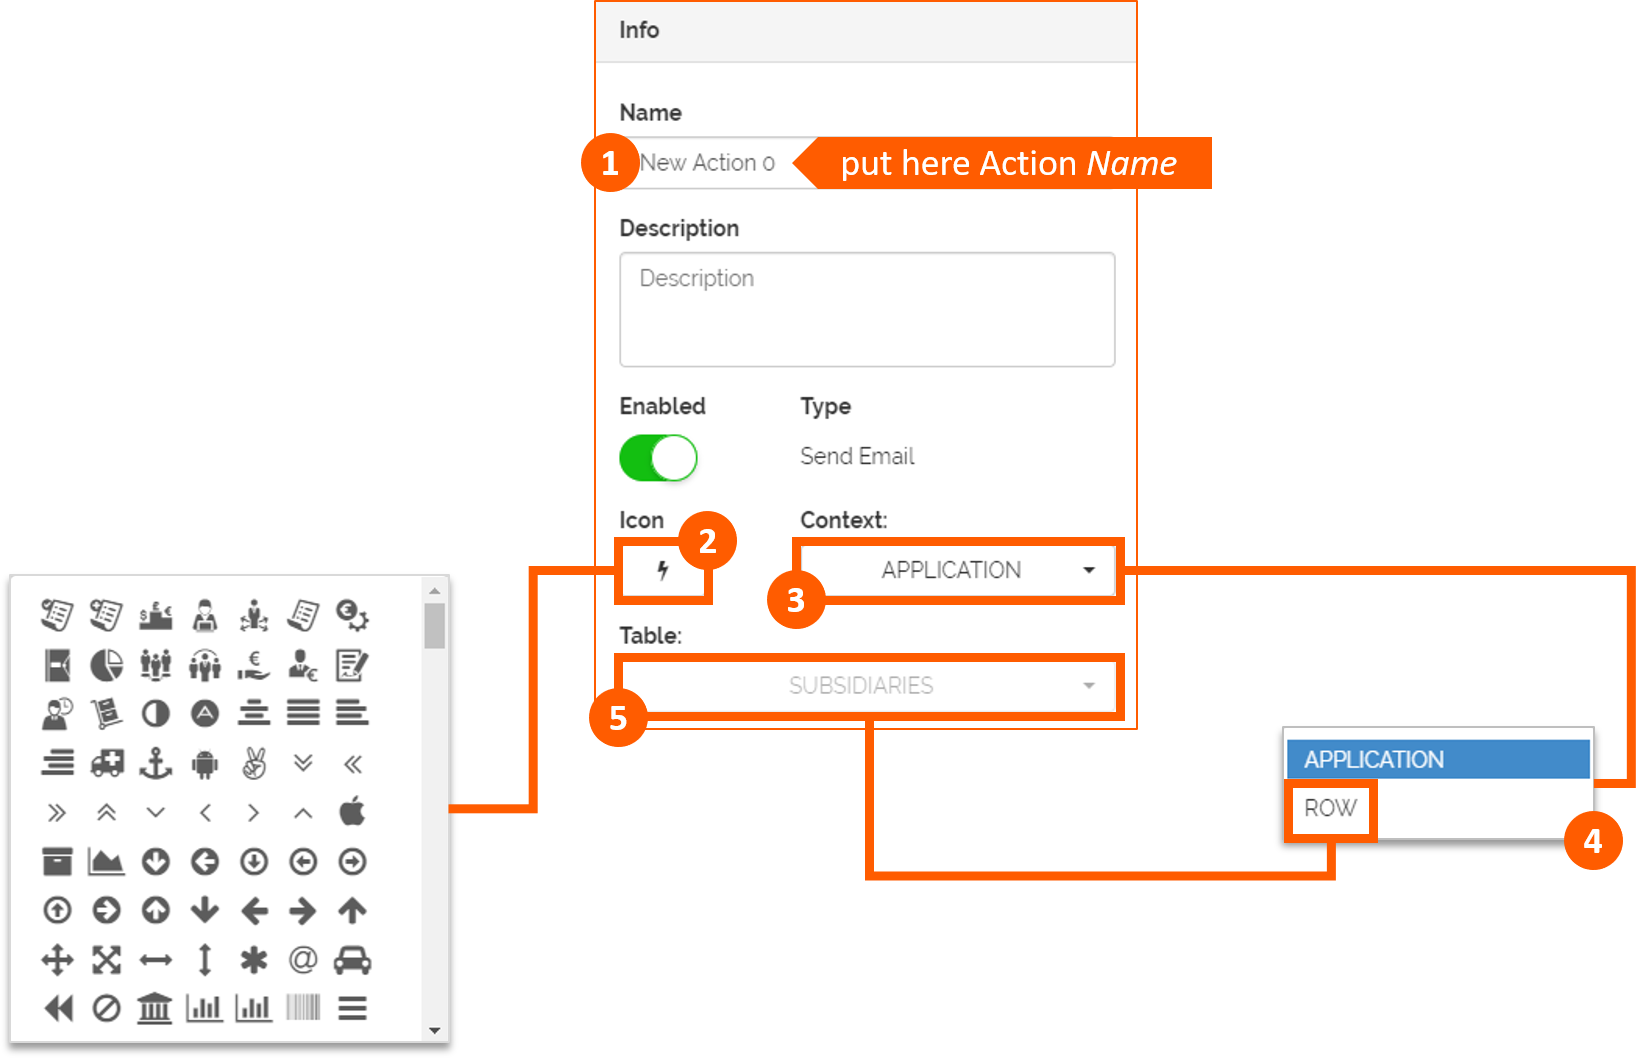
In the Info section we can setup the Custom Action Name (1), Icon (2) and Context (3). The Context can be Application (if the Custom Action is referred to entire App) or Row (4) (if the Custom Action is referred to App rows). If Row context is selected you have to choose also the Table (5).
Use Case
The following is the Custom Action Info of our App: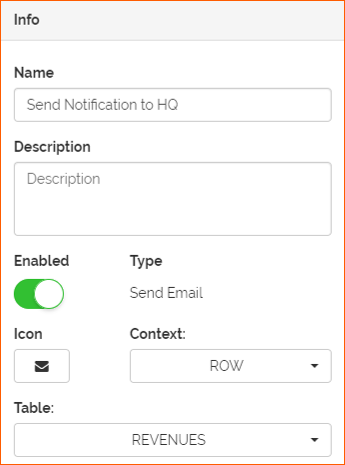
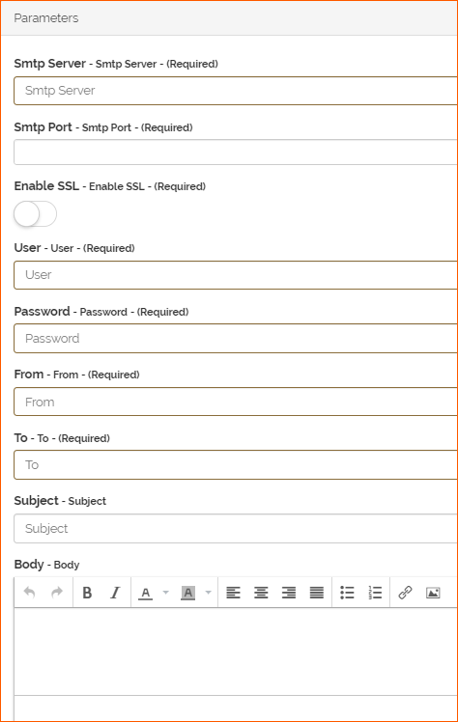
Parameters
In the Parameters section all the configuration are mandatory:
-
Smtp Server
-
Smtp Port
-
Enable SSL (Secure Sockets Layer authentication)
-
User (eLegere Username)
-
Password (eLegere Password)
-
From
-
To
-
Subject of the email
-
Body of the email
Use Case
For Parameters you have to setup your Email Provider Parameters from point (1) to point (7).
For Subject field we used a string with a formula inside:
Meaning: in the Email's Subject we want to write automatically the name of the Subsidiary and the Revenues YEAR of the row for which we want to send email. So the first part write "Subsidiary" and put the relative Code of the row (not visible in the Details table) of the Company, then the LOOKUP formula takes Code of the YEAR inside the Details table of a specific Subsidiary and returns the Value (example: Code "1", Value "2018"). The result is:
"Revenue Subsidiary 1 - 2018 submitted"
For Body field we used a text with a formula inside: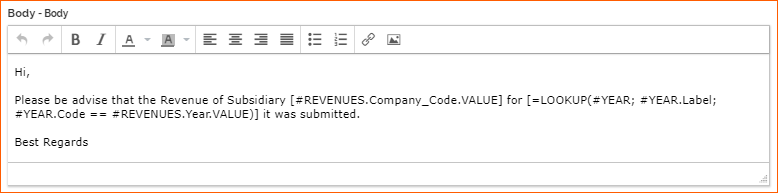
Meaning: in the Email's Body we want to write automatically the name of the Subsidiary and the Revenues YEAR of the row for which we want to send email. So the first part write "Subsidiary" and put the relative Code of the row (not visible in the Details table) of the Company, then the LOOKUP formula takes Code of the YEAR inside the Details table of a specific Subsidiary and returns the Value (example: Code "1", Value "2018"). The result is:
"Hi
Please be advise that the Revenue Subsidiary 1 for 2018 it was submitted.
Best Regards"