User Interface
In this section we will explain the usability of the User Interface of eLegere based on all the Modules and Configurations setup in the previous sections.
Table
In this section we present some features available in the User Interface of Table view.
Add Record
If there aren't Restrictions in the Settings and the Enable Add Record is on, in the Table view, we can Add rows:

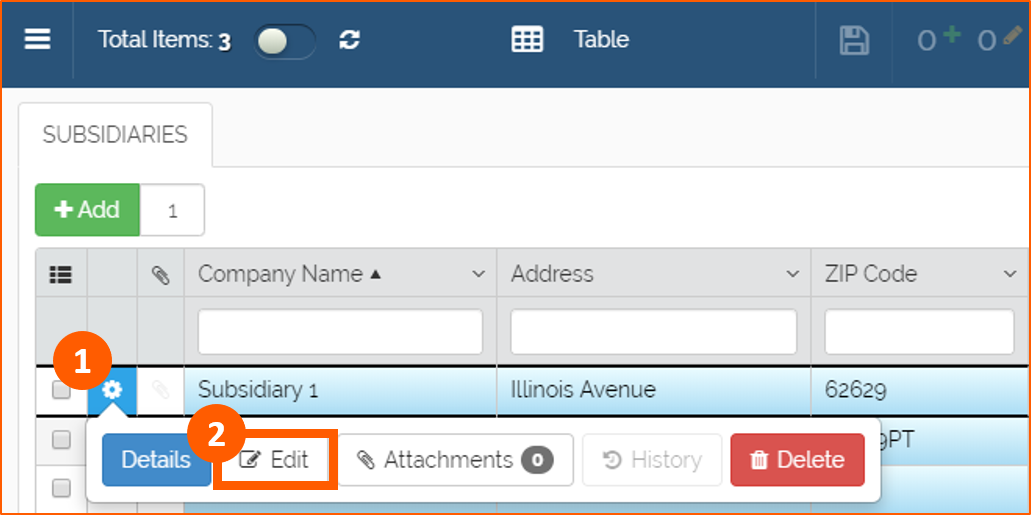
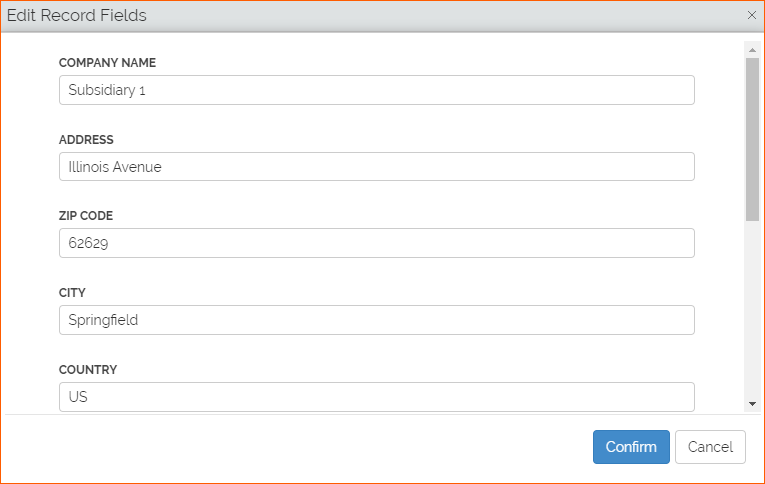
Edit Record
If there aren't Restrictions in the Settings and if Is Editable in Field's Settings is on, in the Table view, we can Edit rows:
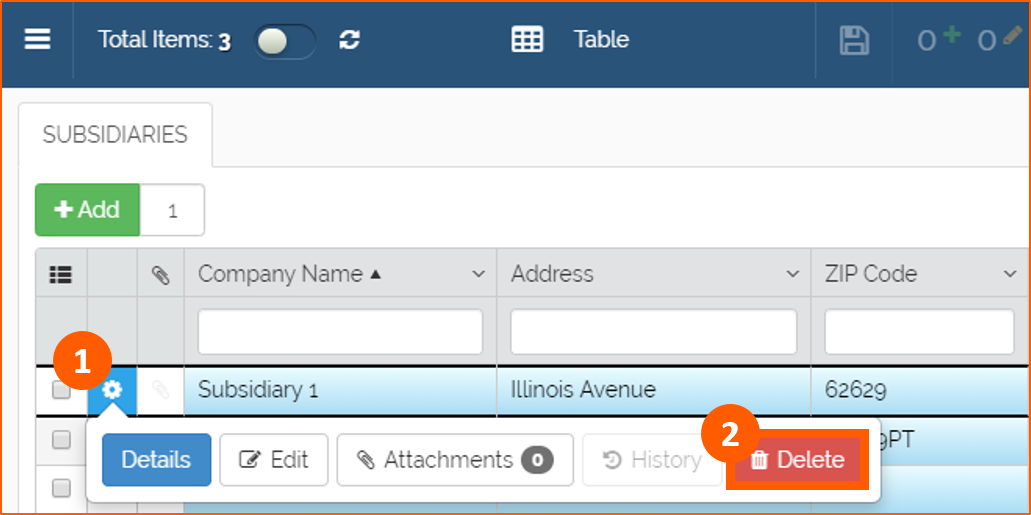
Delete Record
If there aren't Restrictions in the Settings and the Enable Delete Record is on, in the Table view, we can Delete rows:
Pending changes
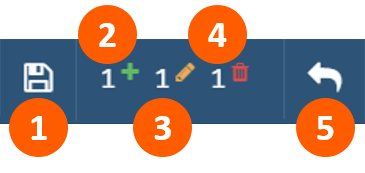
In the Toolbar we can:
- Save the changes
- See which rows we are adding
- See which cells we are editing
- See which rows we are deleting
- Undo changes
History
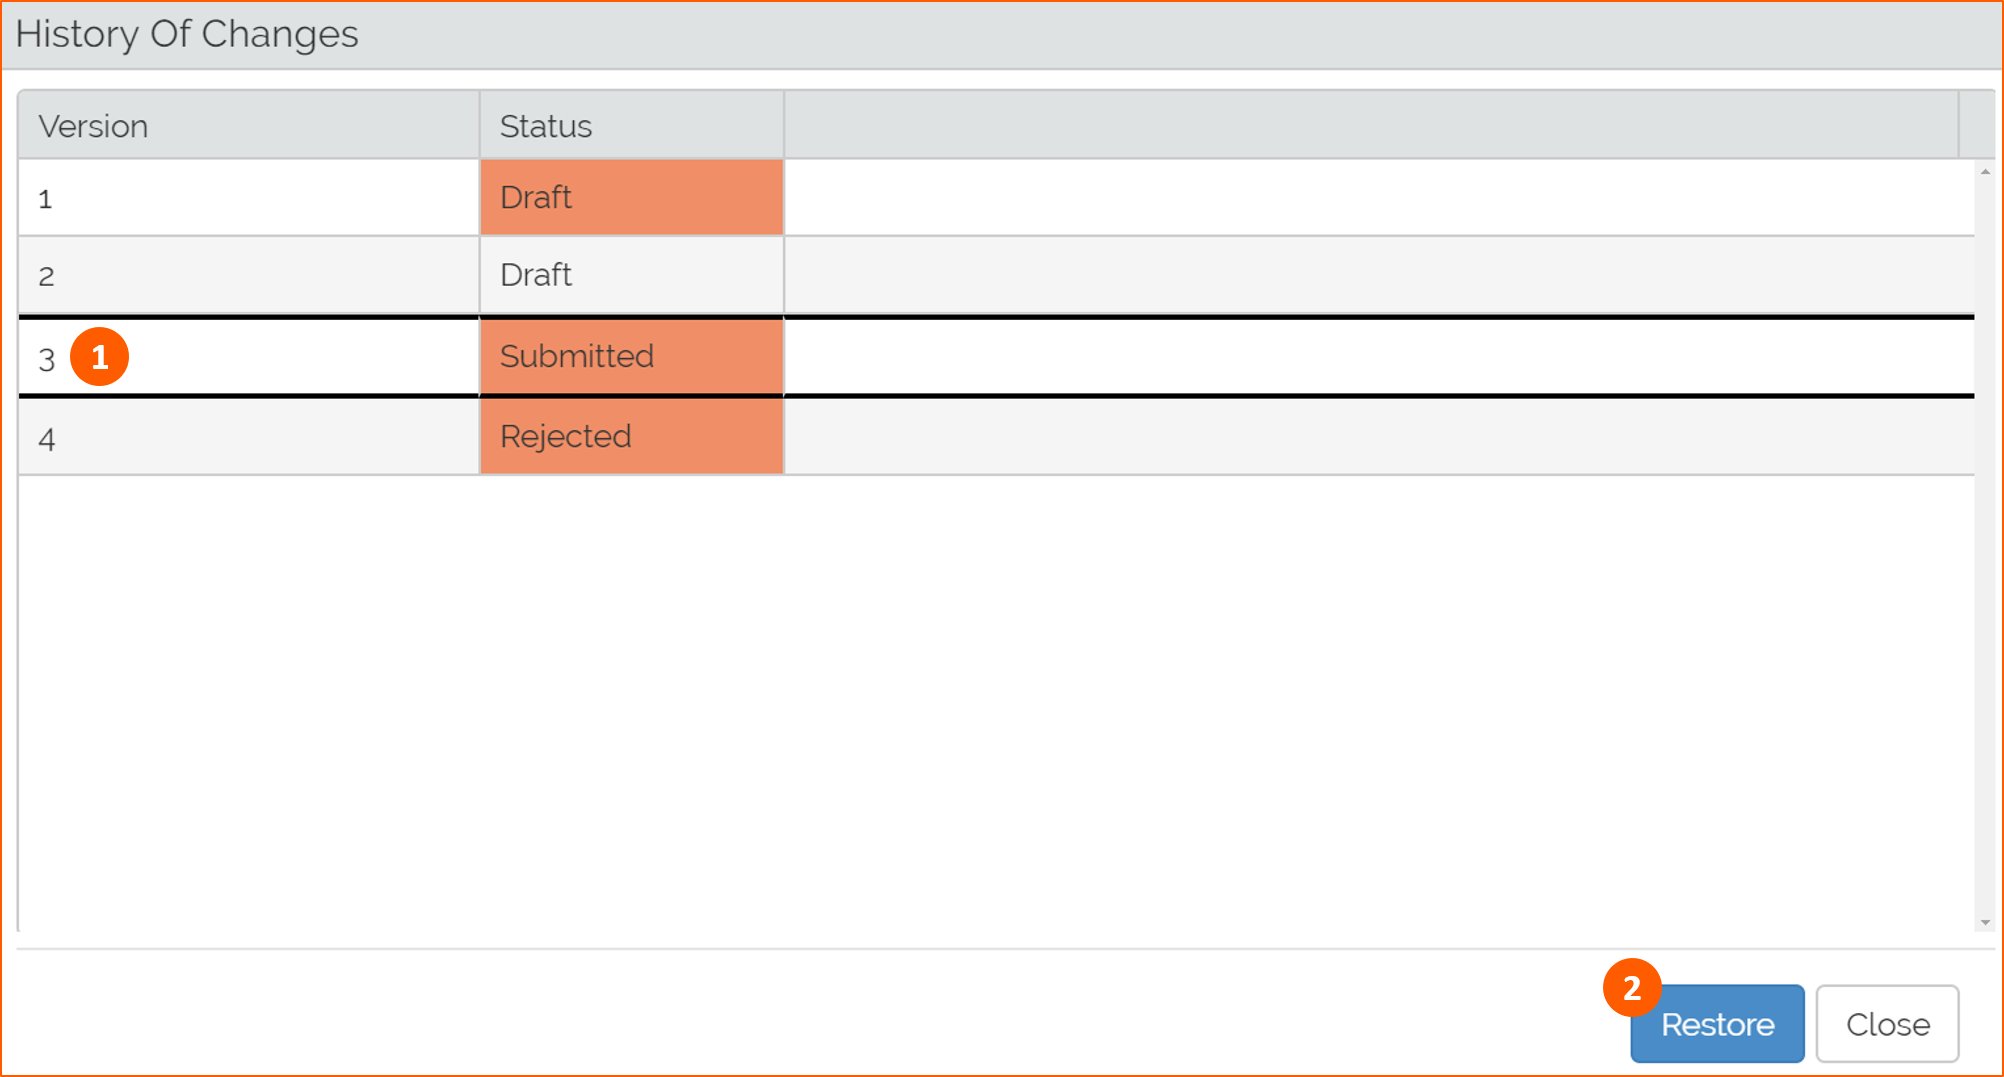
If in the Design Mode the option History is enabled, in the Table view, we can access to the History greed for the fields where the Visible In History Grid configuration in Field's Settings is enabled.

In the popup window we can see all the changes of the fields enabled with History. We can select (1) a version and Restore (2) it (if in the History configuration Enable Row Restore is on):
Attachments
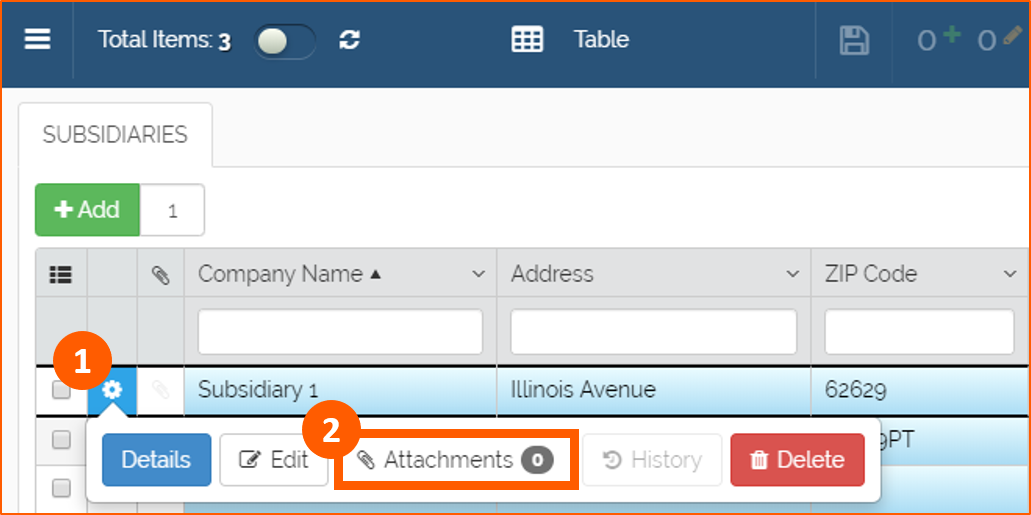
If in the Design Mode the option Attachments is enabled, in the Table view, we can manage the Attachments:
In the next window, if the Add Attachments is enabled, we can Attach File:
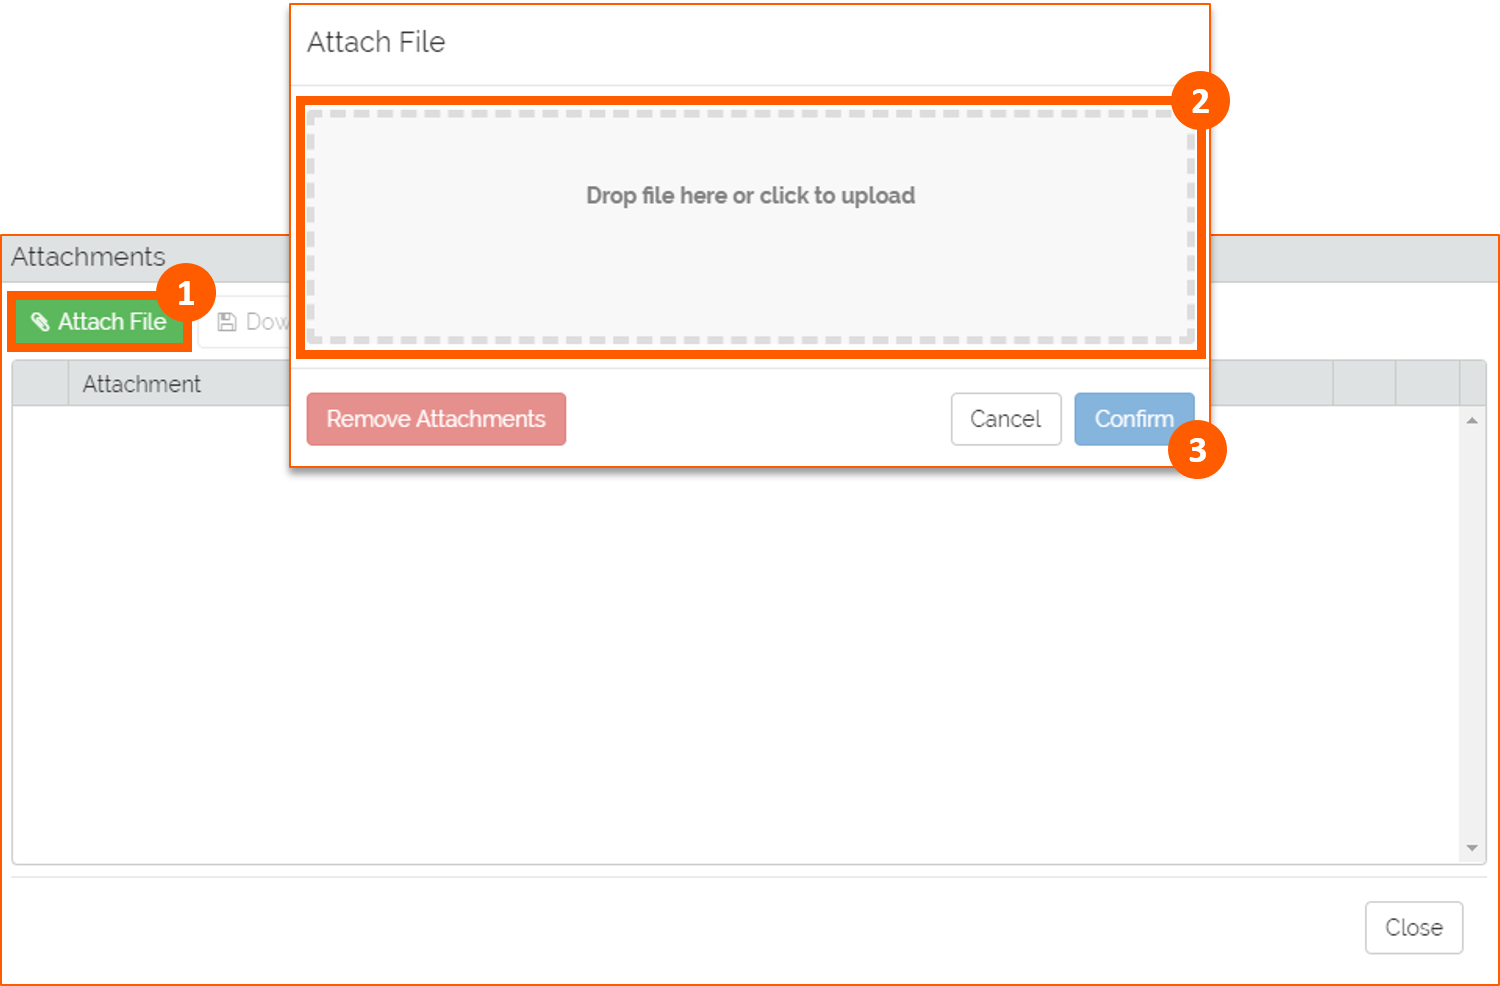
We can remove them, if the Remove Attachments is enabled:

Finally, if we have the Visibility and there aren't Restrictions, we can Download Attachments:

Multiselection Filter
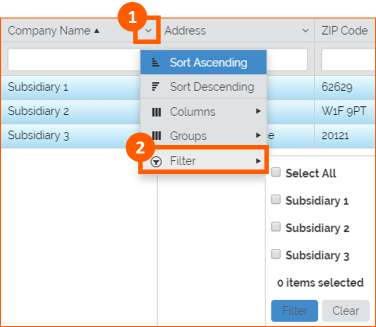
If in Field's Settings the Multiselection Filter is enabled, we have, in the column's filter, a list of all field's values available, with the possibility to select multiples values:
Sort Asc / Desc
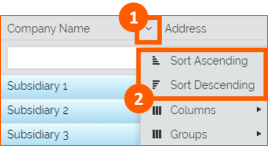
If in Field's Settings the Is Sortable is enabled, we can Sort Ascending or Sort Descending field's values:
Is Searchable
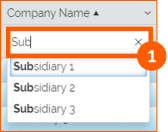
If in Field's Settings the Is Searchable is enabled, we can search values in the search box under the column's label:
Window Editor
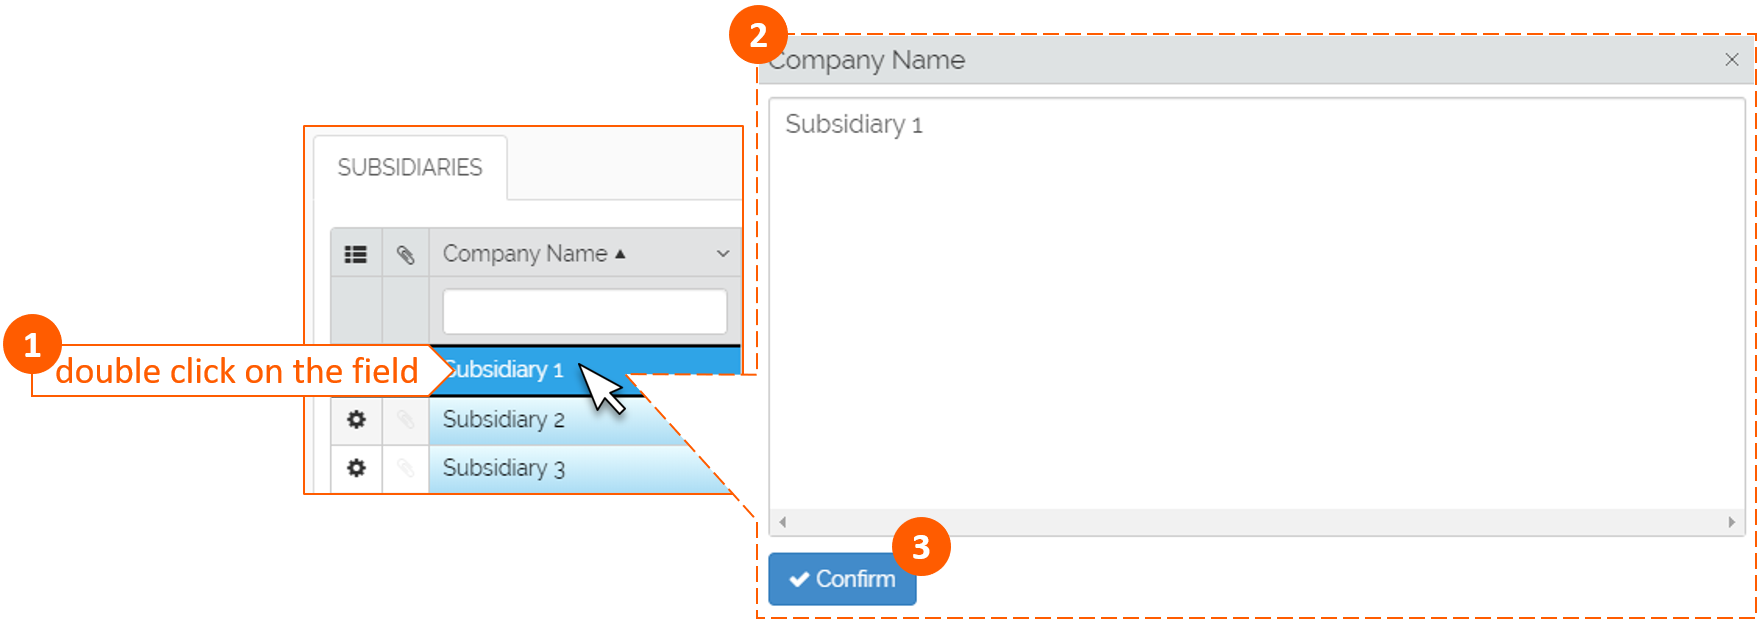
If in the Additional Settings the Enable Window Editor is on, in the Table view, by double clicking on the field we can open a window to edit field's data:
Details table
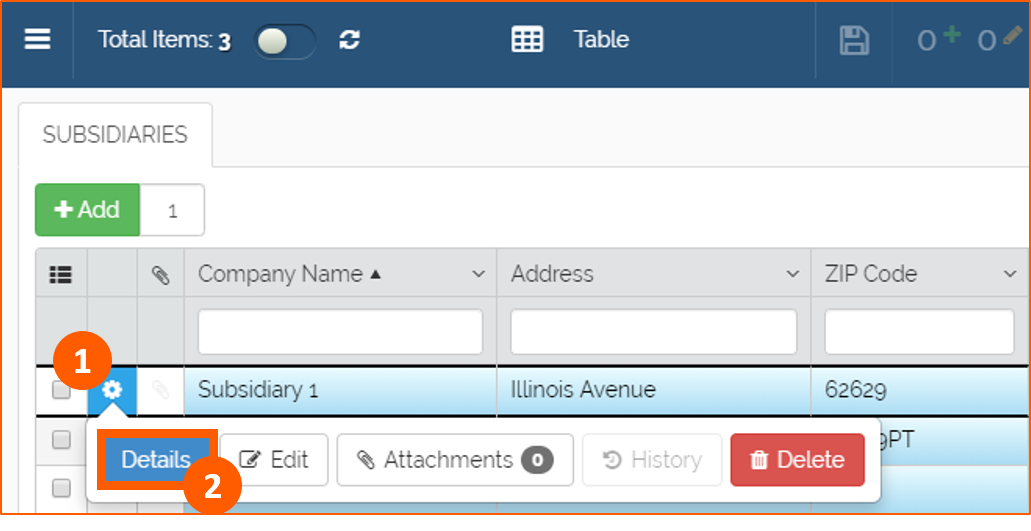
To open Details table, click on Option icon (1) and then Details (2):
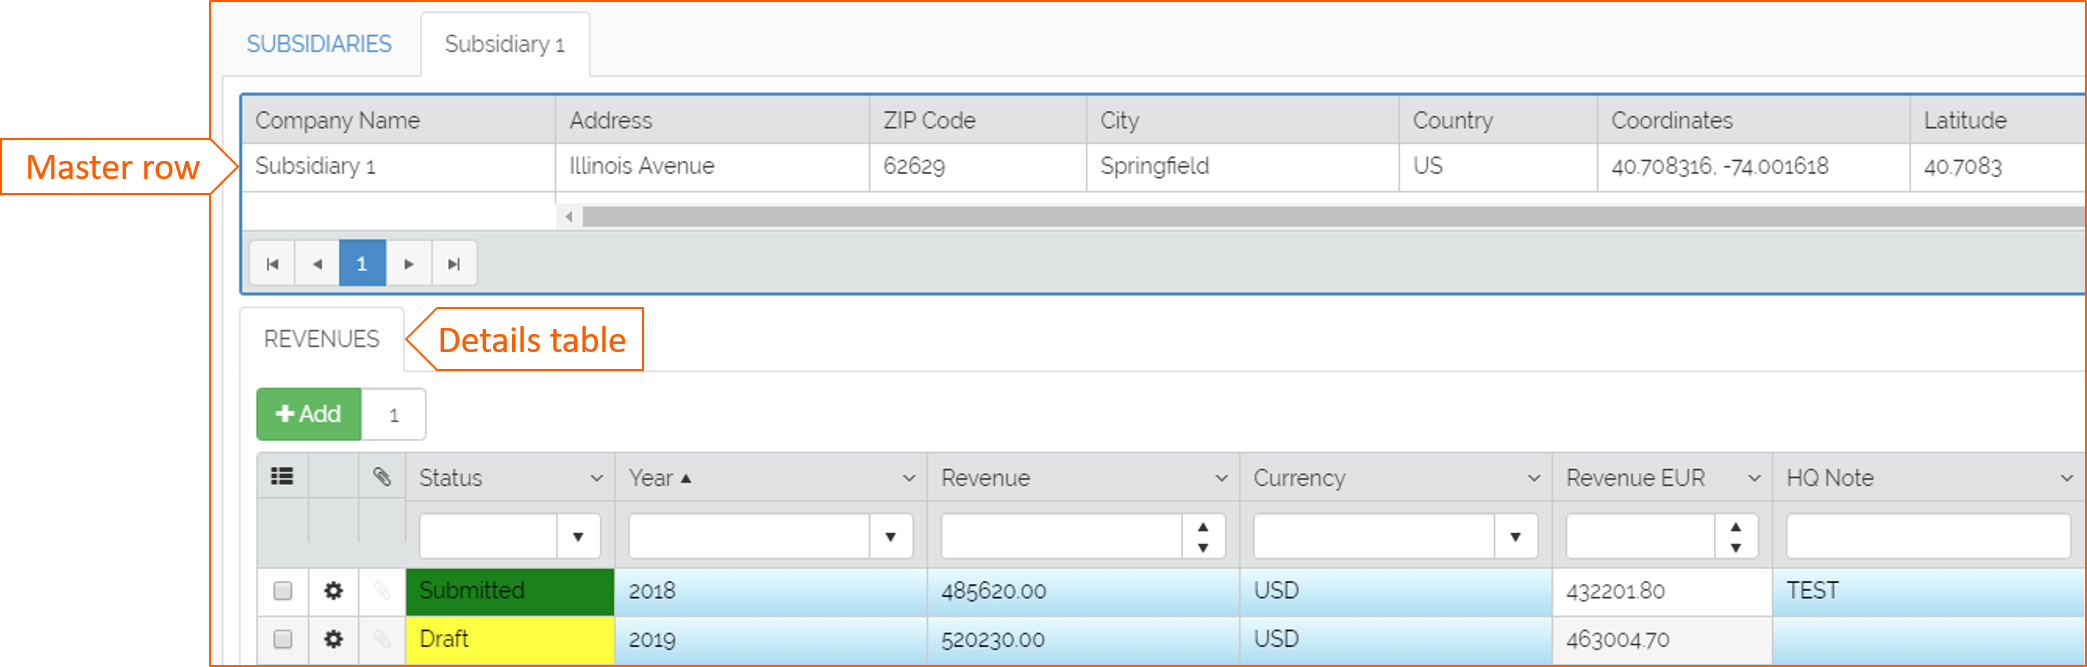
Clicking on the new tab opened (2) we will see Master row Identifier on the top and the relative Details table rows on the bottom:
Tricks & Tips
To enter in Detail table we can also double click on Option icon:
Export
If in the Export Settings all the Enable Export ... configuration are on, in the Toolbar it's visible the relative icon:

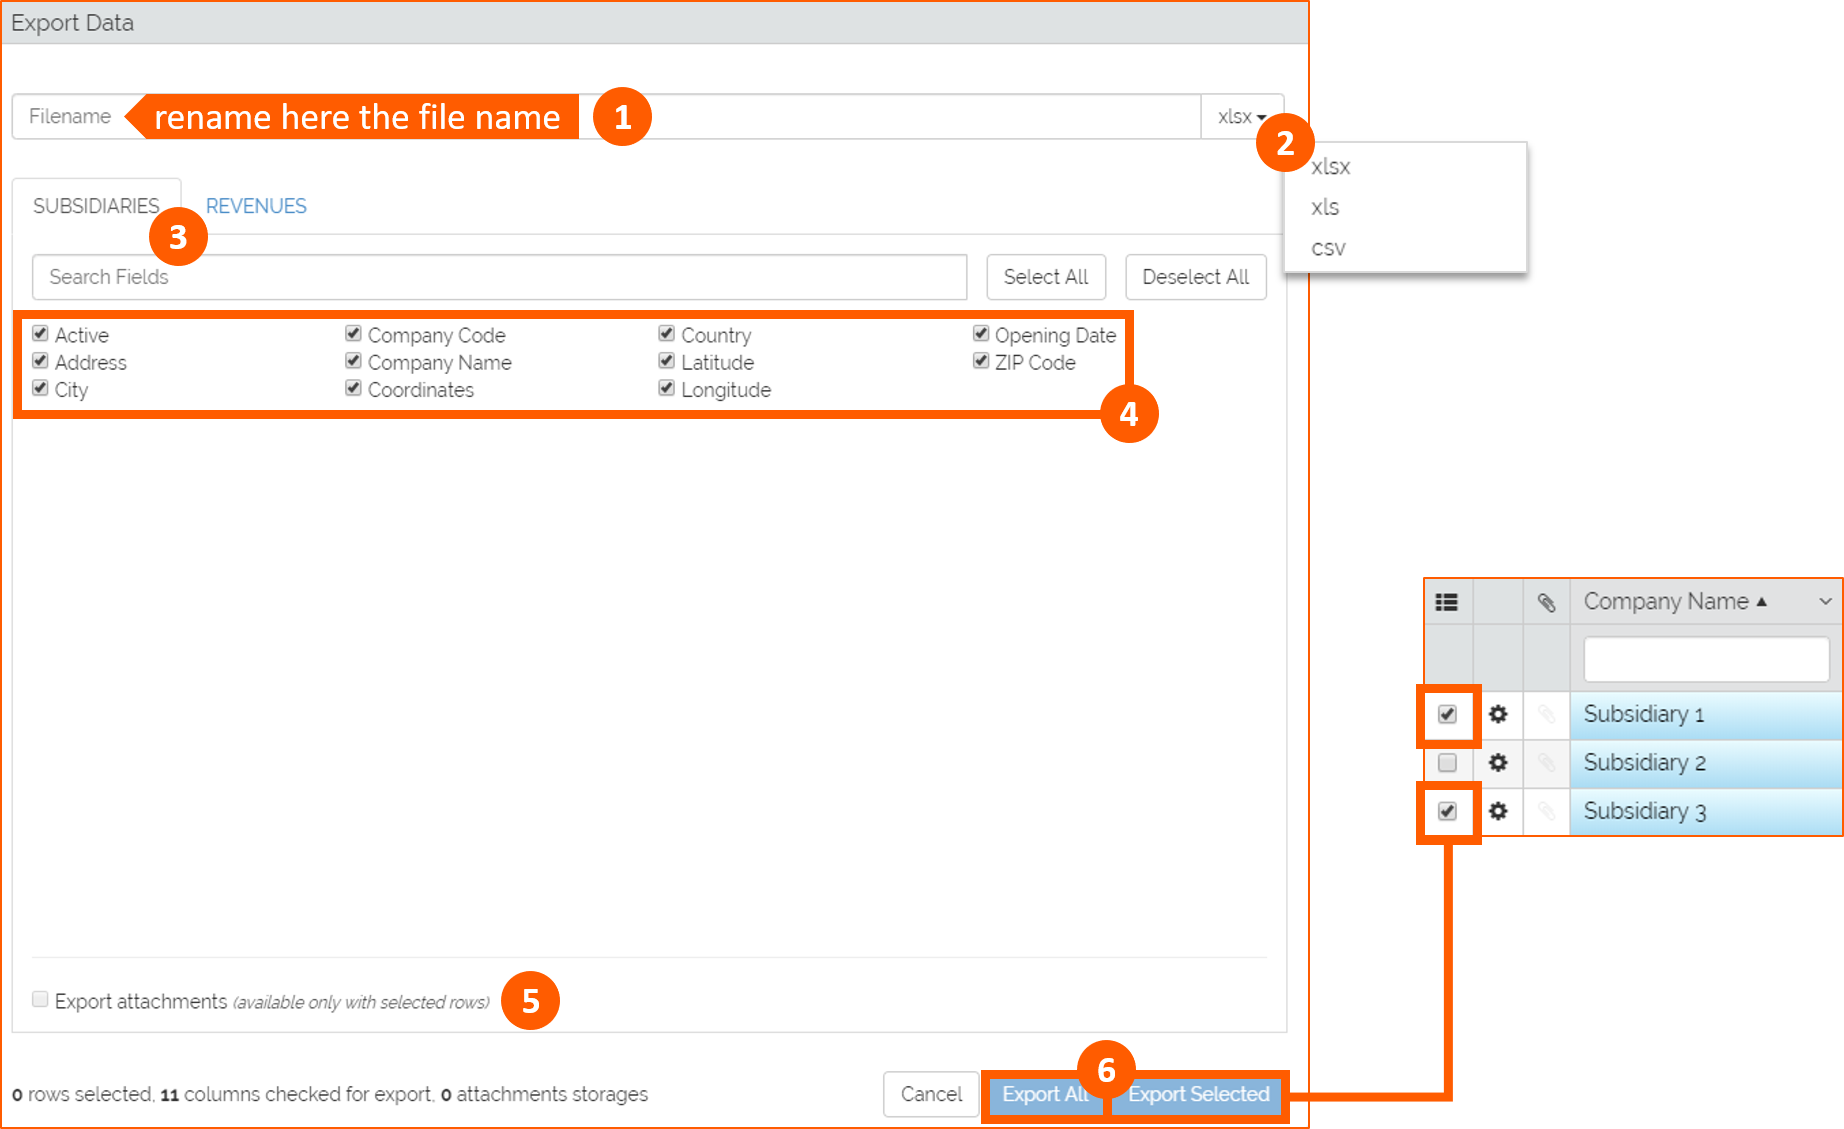
Clicking on the icon, in the popup window you can:
- Rename the Filename that will be exported
- Choose the file format
- Choose Master or Detail table
- Choose columns
- Export attachments (available only with selected rows)
- Export All or Export Selected (available only if you selected rows before in the table)
Note
There's a limit of 20.000 records that User can export
Properties
To use Properties click on the specific icon in the Toolbar:

Then Split Windows and choose Table module, for example. In this way we can see data filtered by Properties in the relative table:

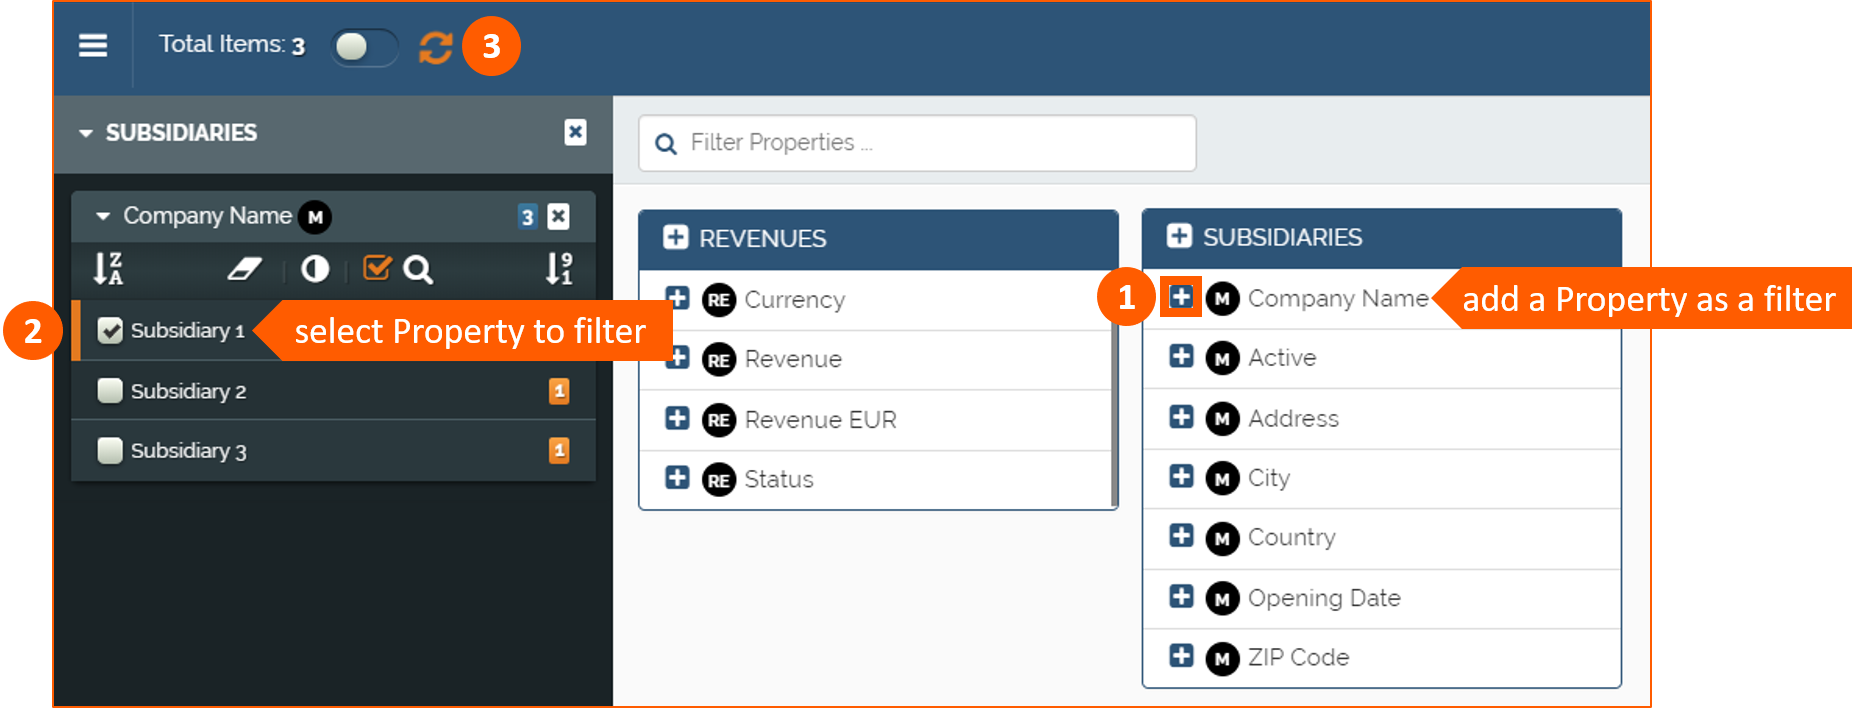
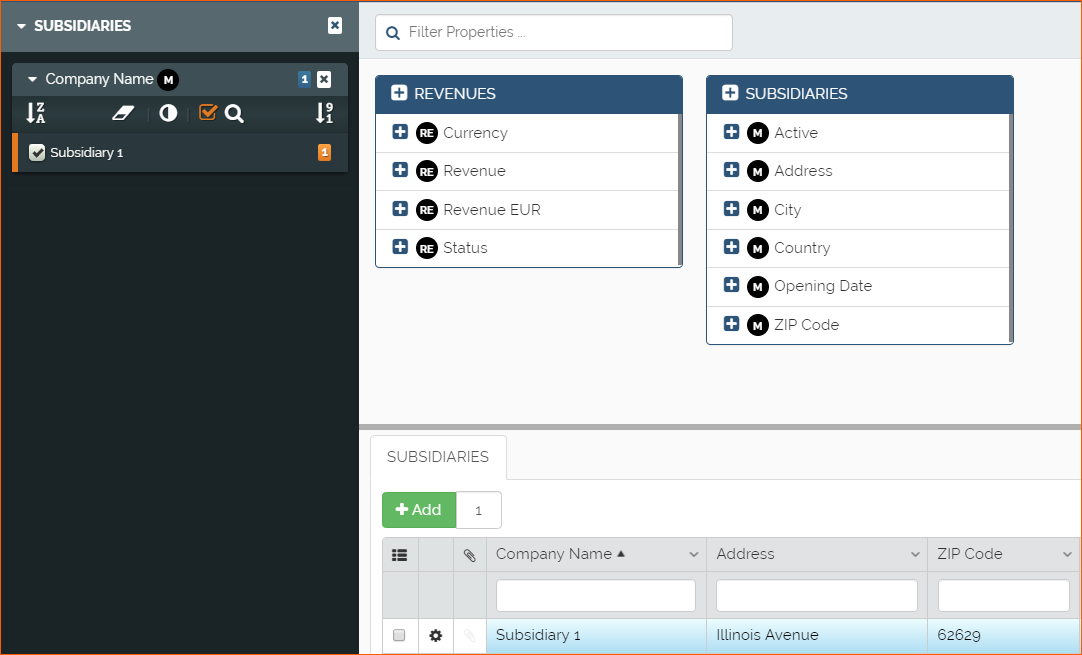
Clicking on plus icon near one property (1), we can add Properties in the left side and select it as a filter (2). Click Refresh (3) to apply filter:
This is the result of a filtering operation using Properties:
Input Form
To use the Input Form click on icon in the Toolbar:

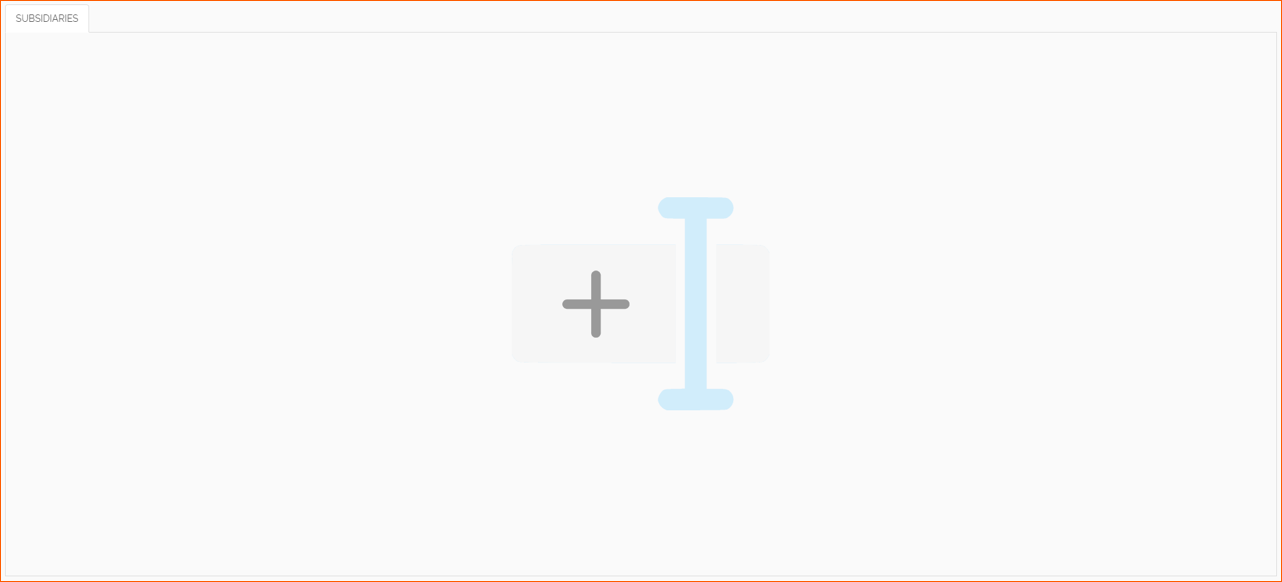
In the next window click on the image to add information:
We can:
-
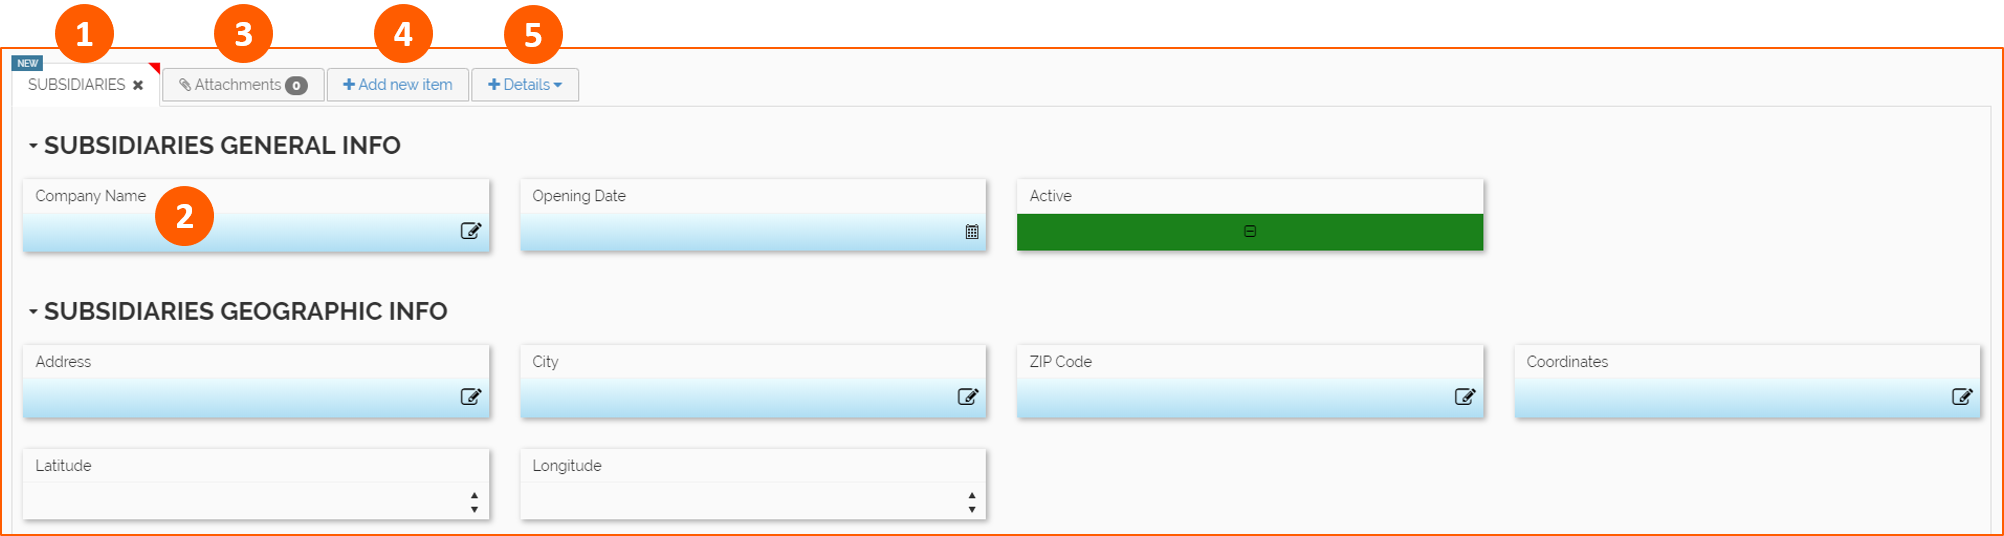
Add information in the Master table (1) for a new row, filling data in the fields (2)
-
Add Attachments (3)
- Add New Item (4) to create new row
- Add Details (5)
Finally click on Save.
Custom Actions
To run a Custom Action follow these steps:
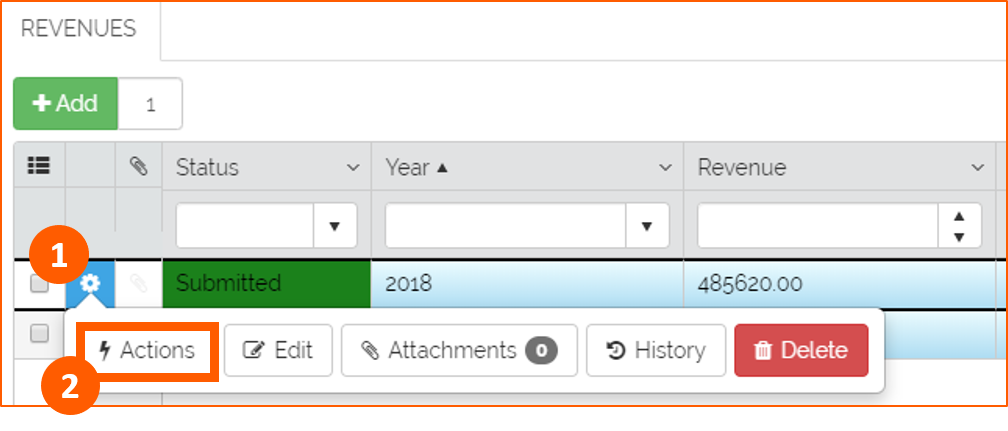
- Open Option panel of the row
- Click on Actions
- In the next popup window select the Action
- Then Confirm
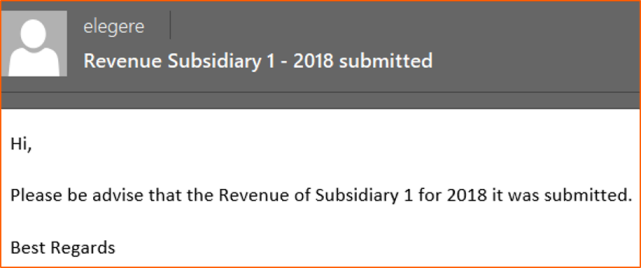
In this case we use Send Email Custom Action and the final result is the following:
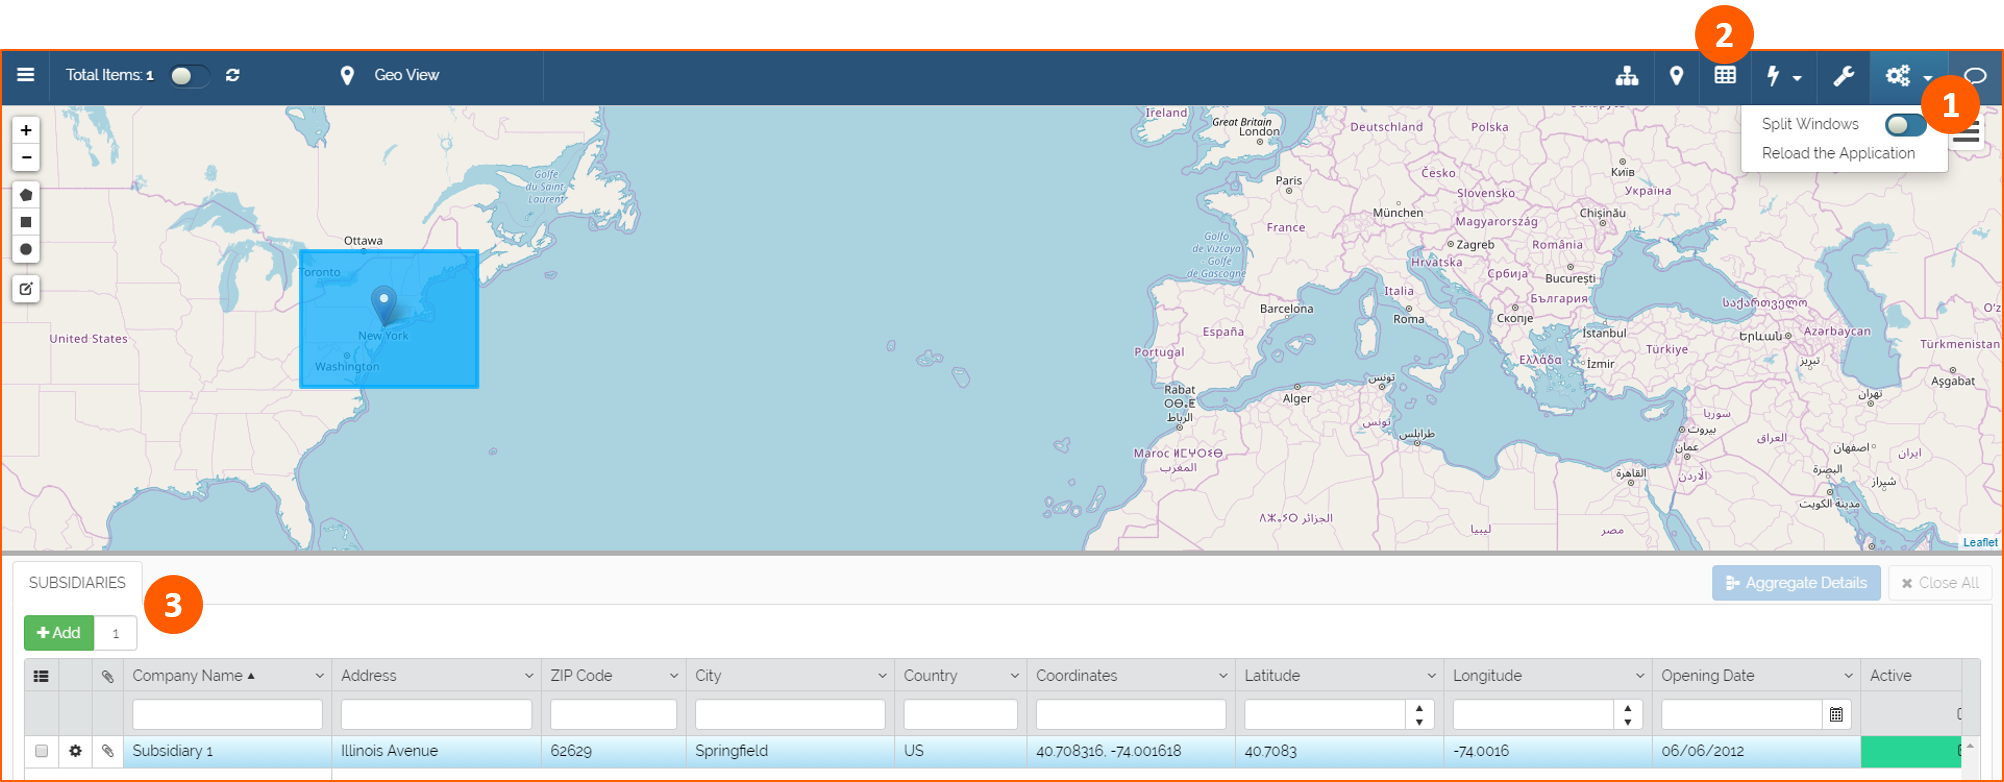
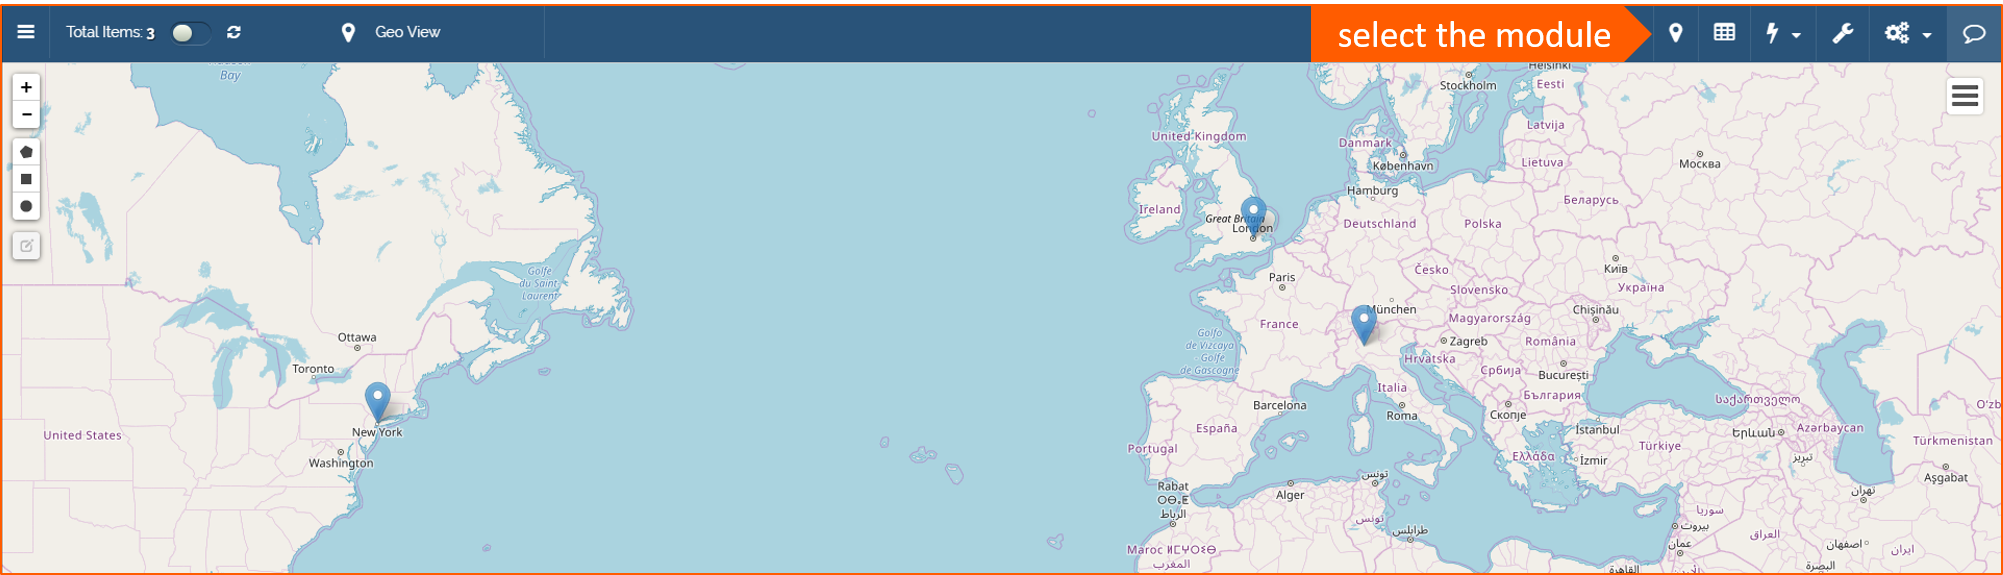
Geo View
To use Geo View click on the Geo View icon in the Toolbar:

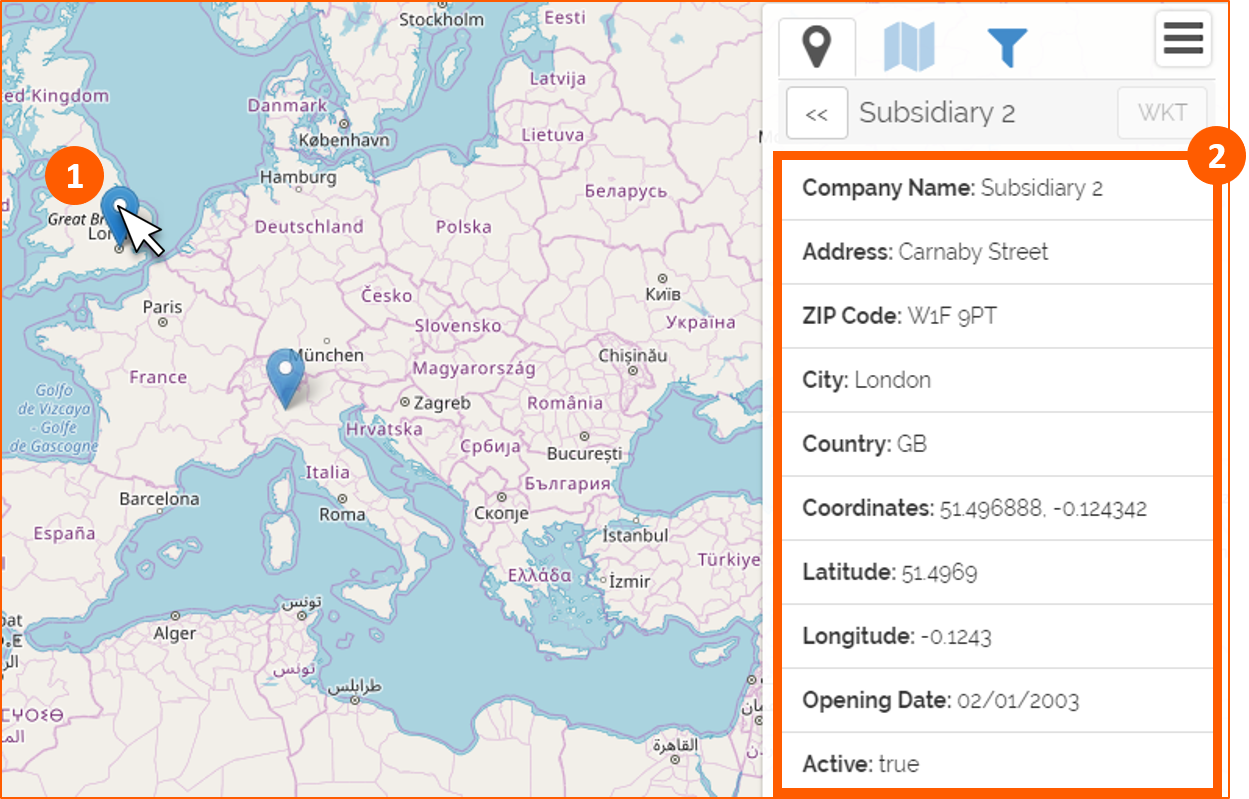
Clicking on a pin (1) Geo View will show its information (2):
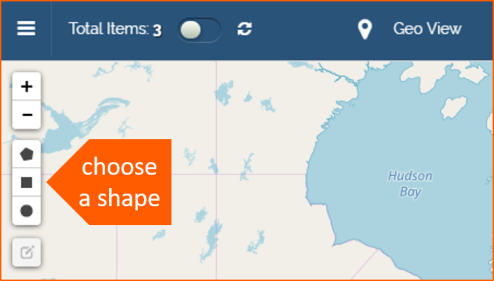
Geo View is also a filter's tool. Start choosing a shape in the left toolbar:
Then draw a shape (1), automatically it will shown Geo Filters option (2) on the right and then refresh data (3):

If you want to see the data result in Table view (for example), you can choose Split Windows (1) and select Table (2) to see the result of data filtered (3) by Geo View: