Send Email via Microsoft Graph Authorization
Abstract
Learn how to register an application in Microsoft Azure to obtain the permissions keys and authenticate a Send Email service through Microsoft Graph.
Create an Azure Active Directory Application with Graph Permissions
If you want to allow eLegere to send e-mails using authorized Microsoft Graph, you need to configure an Azure Active Directory application with the appropriate permissions.
Follow this guide to learn all the required steps.
Note
You can do these steps using Azure PowerShell, the Azure CLI or the Azure Portal.
This guide assumes the use of Azure Portal.
-
Create a new App Registration
-
Head over to Azure Active Directory (Azure Portal > Active Directory > App registrations > New registration).
-
Create a new App Registration with the following parameters:
- Name: Whatever you want.
- Type: Accounts in this organizational directory only (Single tenant)
- Redirect URI: Not required.
You will have created the application that provides the email service for the Send Email in eLegere.
Configure Application
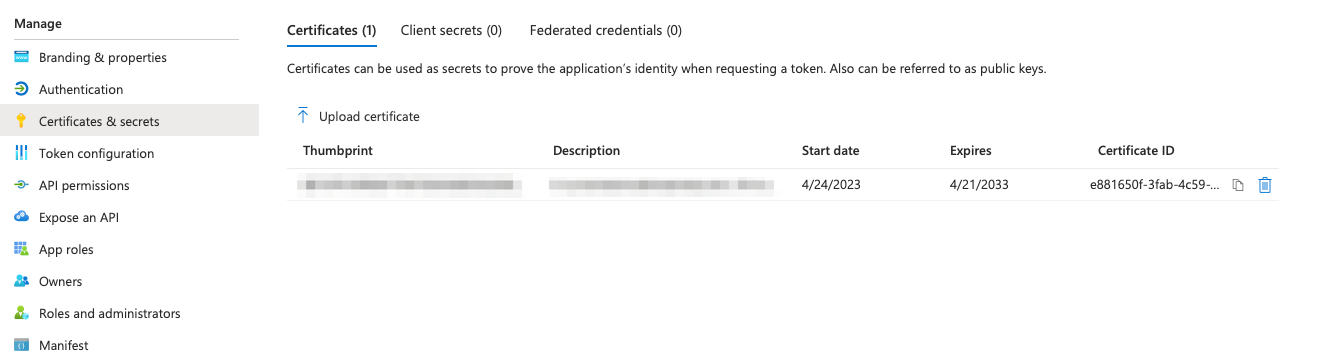
The Send Email application for eLegere must rely on the traditional Client ID / Certificate method. Read the following instructions.
You need to create a new certificate (e.g. self-signed certificate using Open SSL or other type) and store its value together with the Tenant ID and application's Client ID.
In the Application's page:
- Setup Certificates & Secrets > Client Upload Certificate.
-
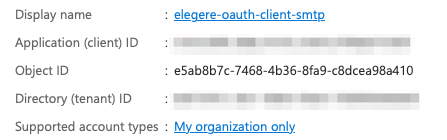
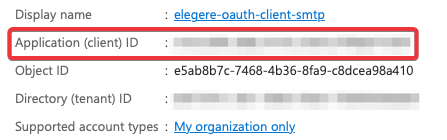
Copy the Application ID (Client ID) and the Tenant ID for your application. (You can find these settings on the Overview page of your application.)
-
Copy the Application ID and the Directory/Tenant ID for your Azure Active Directory Application.
After the steps 1-3, you should have stored these values for later use:
- Directory ID (i.e. Tenant Id in the Domain Settings).
- Application ID (i.e. Client Id in the Domain Settings).
- The value of the certificate you have created for this app.
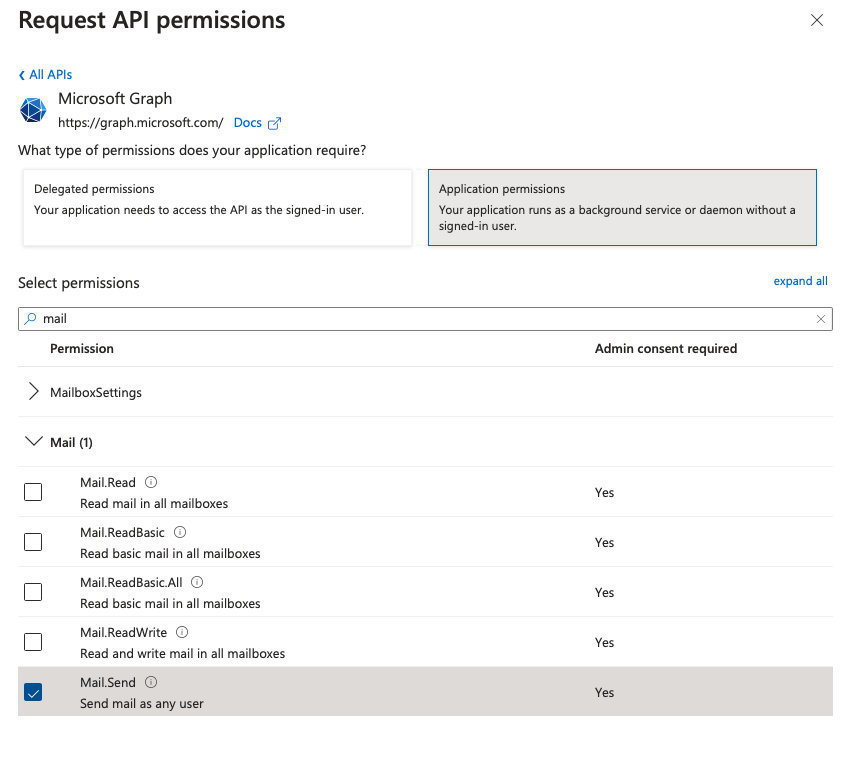
Set Up the Application Permissions
Configure in Azure the sendEmail as listed below:
| Permission Type | Permissions |
|---|---|
| Application | Mail.Send |
From the application page in the Azure Portal:
- API permissions > Add a permission
- Microsoft Graph > Application Permissions > Mail.Send > click Add Permission
- Optionally, remove the default permission for the application.
Assign the appropriate permissions to the Azure Active Directory Application, allowing it to send e-mail using the Microsoft Graph API.
Your configured permissions should look something like this:
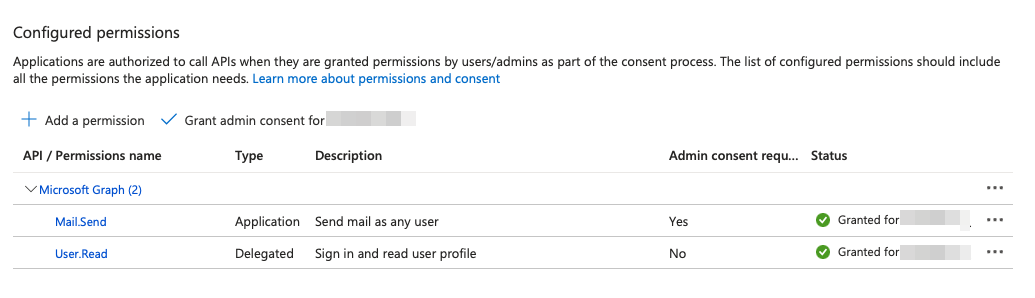
Click "Grant admin consent on behalf of
Warning
After this step, you must restrict the application's permissions to specific mailboxes for security reasons.
Restrict Mailbox Access
After having created the service application for the Send Email, you must restrict the Azure application to certain mailboxes.
You can configure the access to the mailboxes through the Application Access Policy panel.
Follow the steps below:
-
Retrieve the Application ID from the previous steps.
-
In the Exchange Online Portal > Mail-enabled security, create a group for the application. (E.g.
security.group@vesenda.com)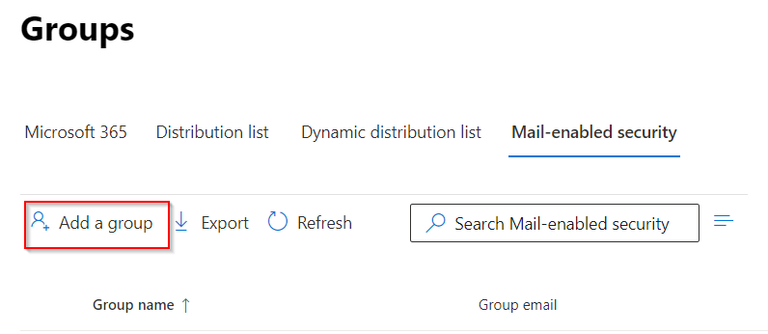
-
Add the preferred mailboxes to the group created in step 2. These mailboxes will be the only ones authorized to use the application for the Send Email.
-
Create the Application Key Policy by using the command
connect-exchangeonline commandletand typing the following in the CLI:1New-ApplicationAccessPolicy -AppId [Insert here your Application ID] -PolicyScopeGroupId [Insert the reference to the security group, e.g. security.group@vesenda.com] -AccessRight RestrictAccess -Description "Restrict this app to members of distribution group mailaccessgroup" -
Test a random user to verify that the permissions are working as expected. Use the following command in the Exchange Online's CLI:
Test-ApplicationAccessPolicy -Identity [insert User's Email here] -AppId [Insert here your Application ID]If the user belongs to the group, you should receive a
AccessCheckResult: Grantedfrom the CLI.If the user doesn't belong to the group, you should receive a
AccessCheckResult: Deniedfrom the CLI.