Custom Data Insertion Forms for Each Table - Input Form
Learn how to insert or edit data in application through the Input Form. The Input Form is a custom form to insert data that the Designer has created for the application.
Note
The Designer decides to enable the Input Form for the application.
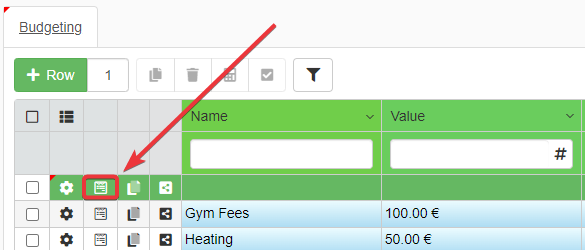
If the Input Form is enabled, a column with the icon appears on the table.
If the Designer decides to enable the Input Form, they decide also how to arrange the table's fields in the form.
Question
Input Form differs from a standard Edit Form (see Insert Row's data through the Edit Form) due to the following features:
- Designers can arrange the fields as they prefer on the Input Form.
- Users can search the columns inside the Input Form.
- Users can open the Attachments window from the Input Form. (See Attachments for more information about the Attachments.)
- Users can manage edits in different ways: choosing to save and close, saving without closing the form, and confirming the changes to save later.
In Edit Form, the Users can only insert or edit data without the features above. The User can either confirm or close the Edit Form without further choices to handle the window.
You can use the Input Form to insert a new row (see Inserting Rows) or you edit a row (see Editing Rows).
-
If you want to insert a new row through the Input Form, click on the icon in the column next to the row after the creation.
Hint
The Designer could have configured the Input Form to open every time you add a new row automatically.
In this case, every time you add a new row, the Input Form will open automatically.
-
If you want to edit a row through the Input Form, click on the icon in the column next to the row.
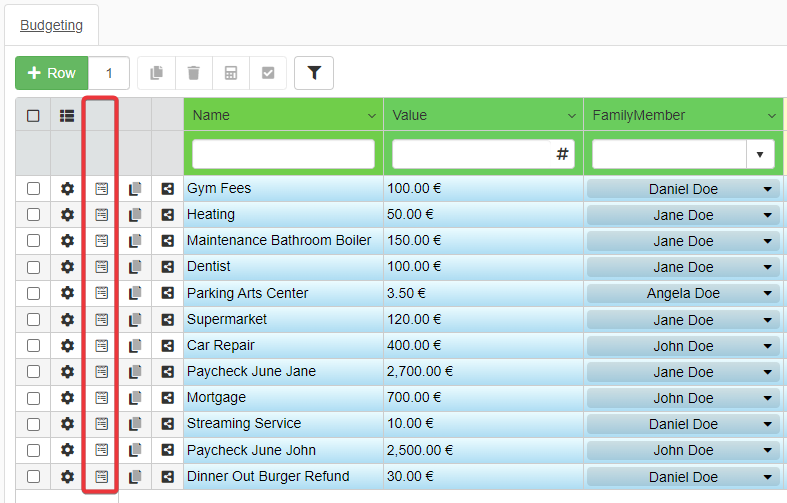
Clicking on opens the Input Form for the chosen row.
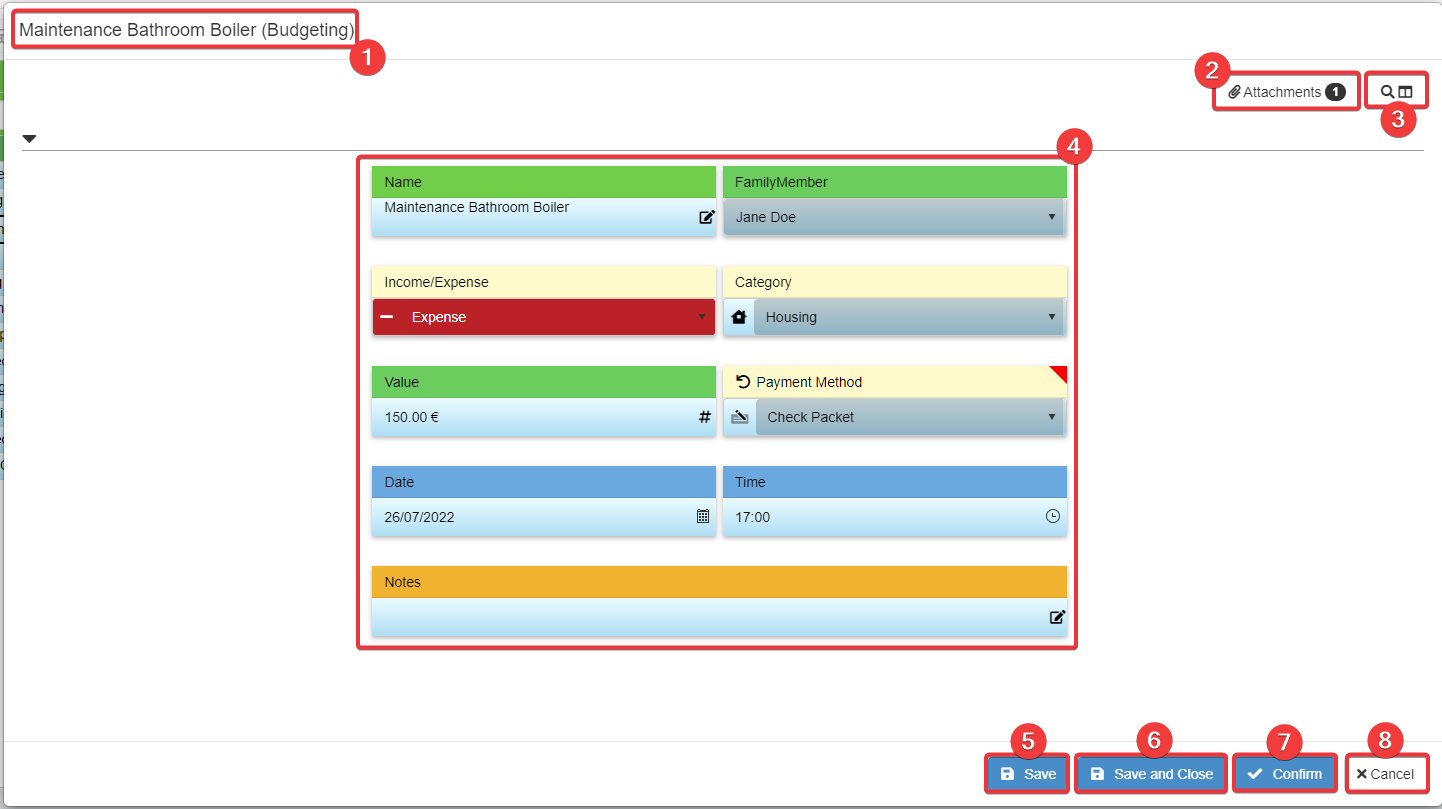
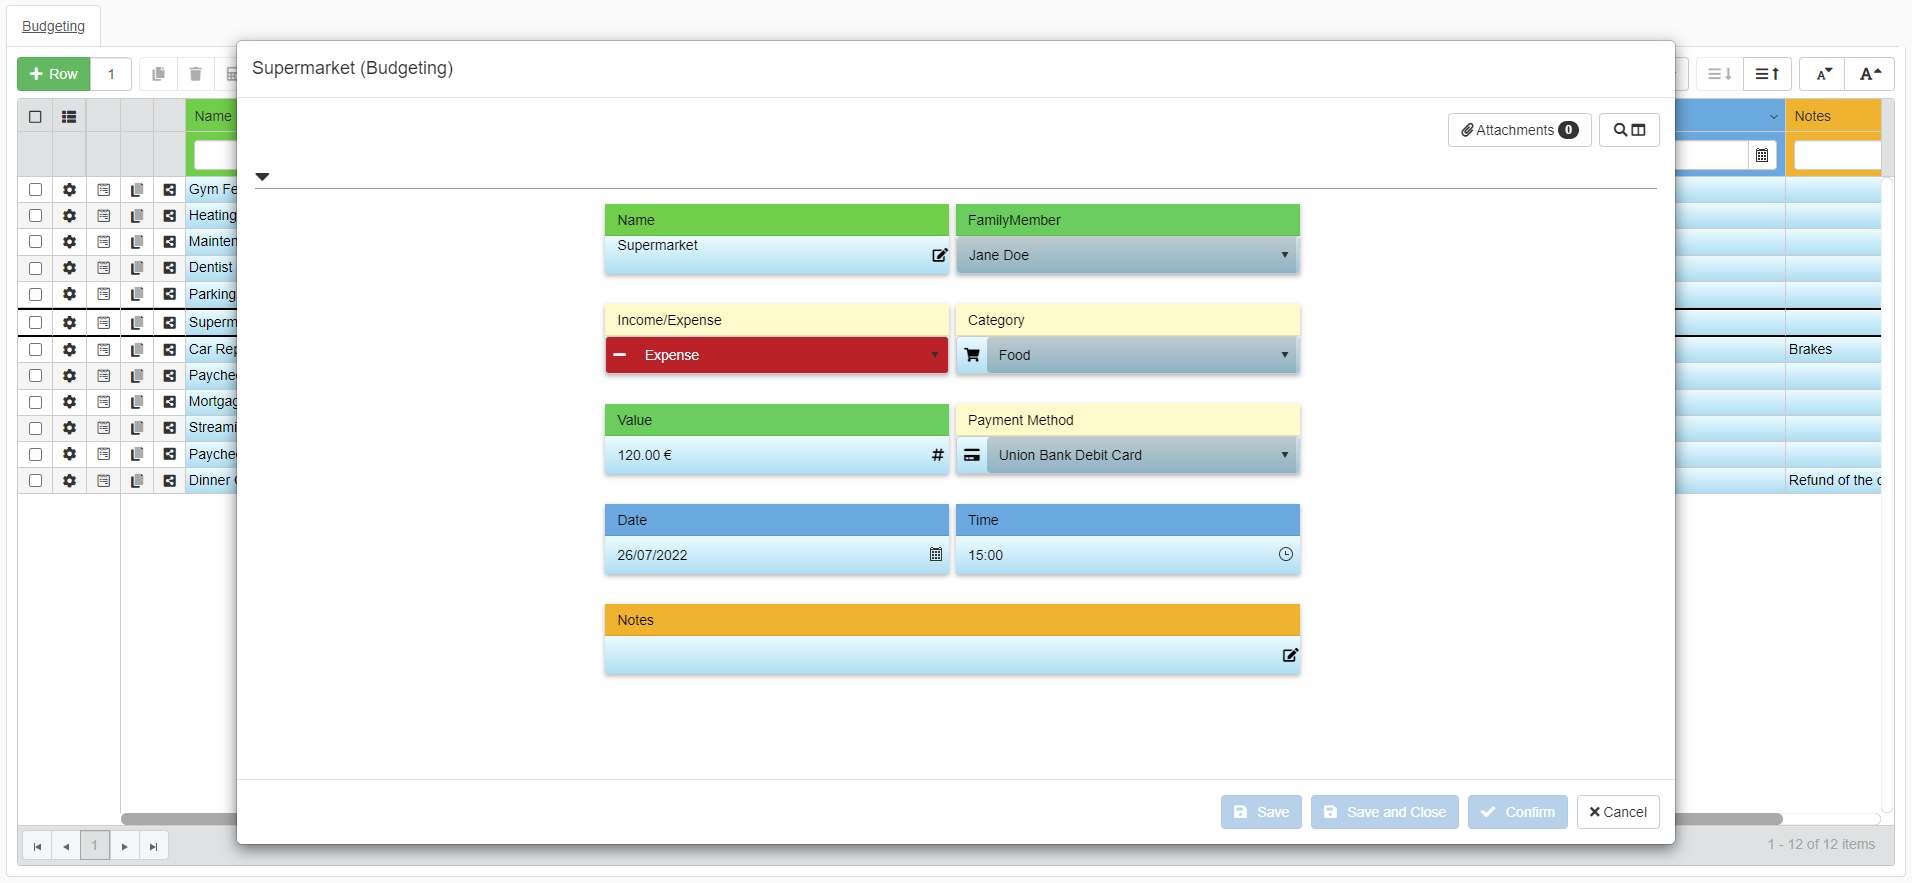
- The Row Identifier that identifies what row you are adding or modifying and its table.
- Click the Attachments button to access the row's Attachments window. (This button is disabled if you have just created the row. See Upload Attachments for more information.)
- Searches the field's rows by name.
- The row's field where you can insert or edit data.
- Saves the changes without closing the Input Form.
- Saves the changes and closes the Input Form.
- Closes the Input Form and maintains the changes. You must click on the Save button on the top toolbar to save the changes in the application.
- Closes the Input Form and aborts the changes.
Add or edit any data you want, then click on (5) Save, (6) Save and Close, or (7) Confirm to complete the operation in the Input Form.
Hint
The Designer could have divided the fields in sub-groups within the Input Form.
- Click on to collapse a sub-group in the Input Form.
- Click on to expand a sub-group in the Input Form.