Design Your Own Custom Actions to Expand eLegere
Required Permissions
This section requires the Application Designer permission from your Domain's administrator.
Check What are the Design Tasks? to learn more about permissions to work with Design Mode and other tools.
Learn how to design your own features through an eLegere Script Custom Action.
Info
See eLegere Script for more information about eLegere's scripting language.
You can create your own features by creating an eLegere Script Custom Action.
-
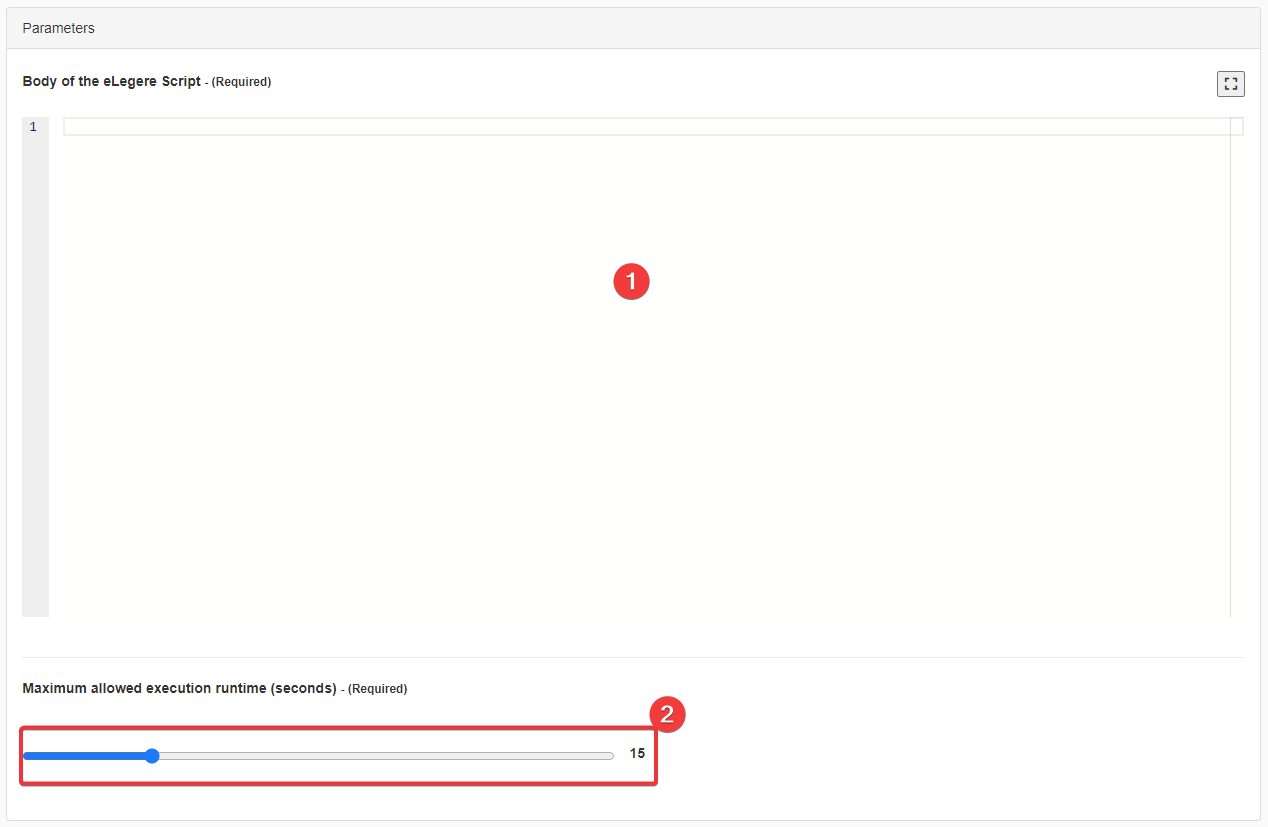
In Design Mode, click on the icon in the upper-right corner of any panel.
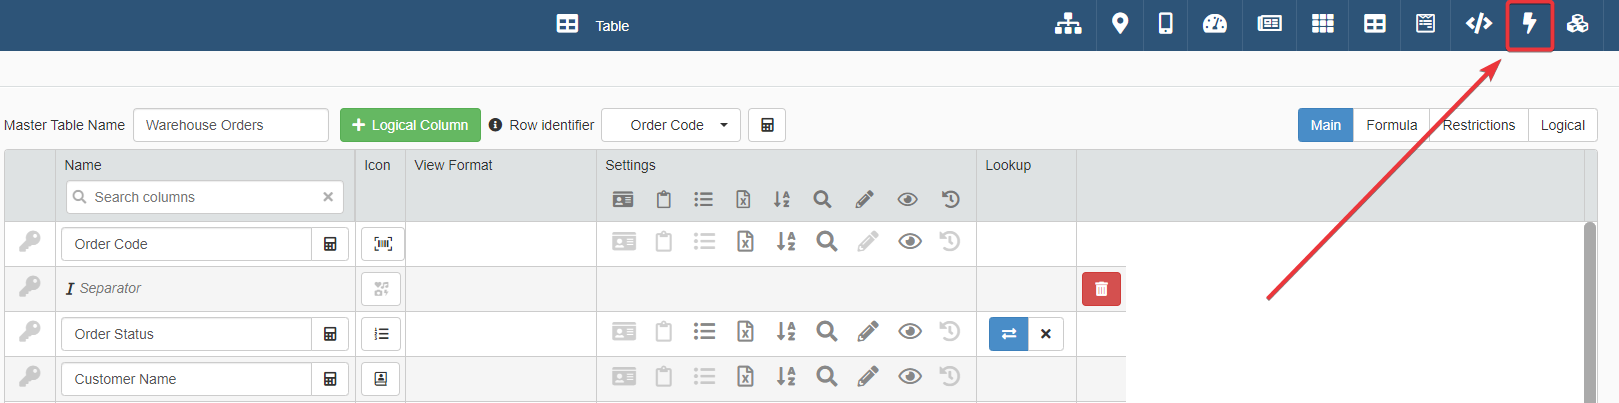
The action leads to the Custom Actions panel.
-
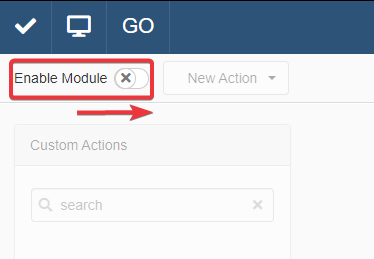
Click on the Enable Module toggle switch to activate the Custom Actions in your application.
-
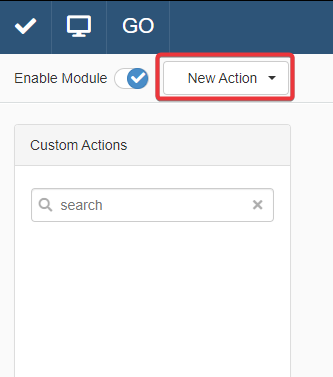
Click on the New Action drop-down menu button.
-
Choose the eLegere Script type from the list of Custom Actions types. This action creates a eLegere Script Custom Action.
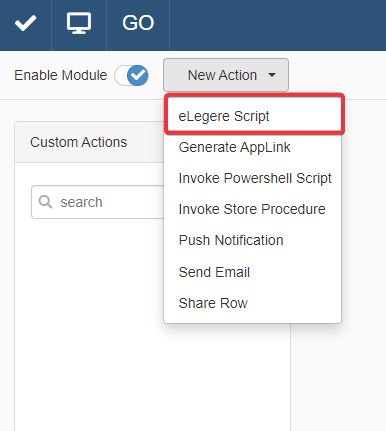
This action creates the eLegere Script Custom Action to be configured.
-
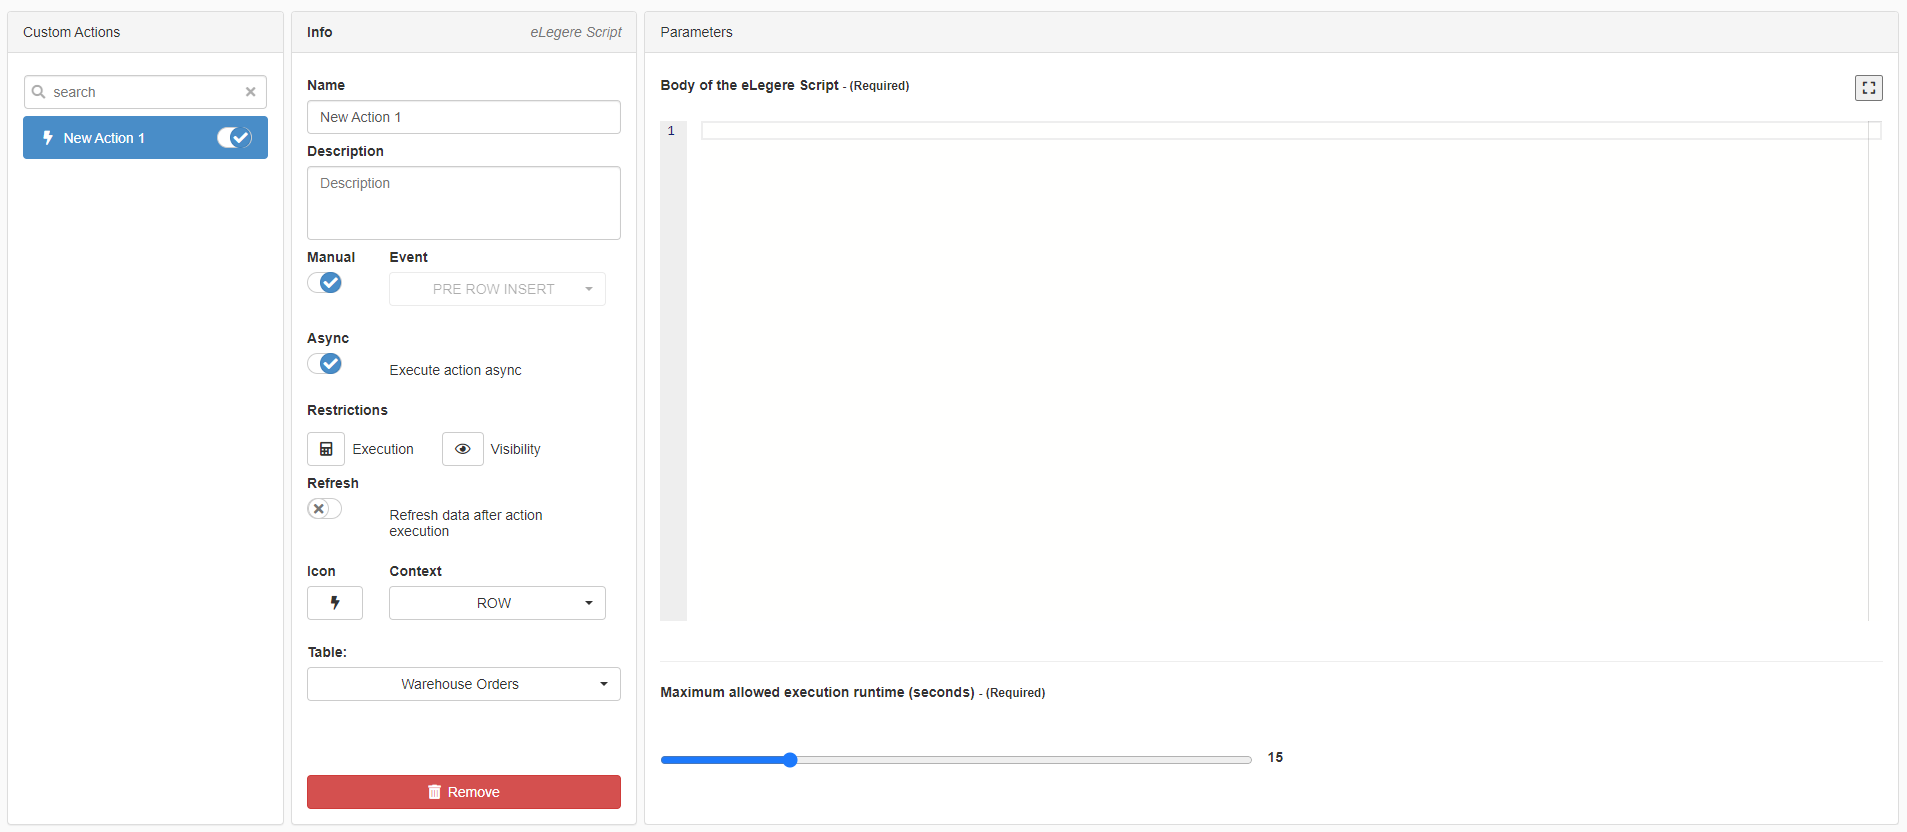
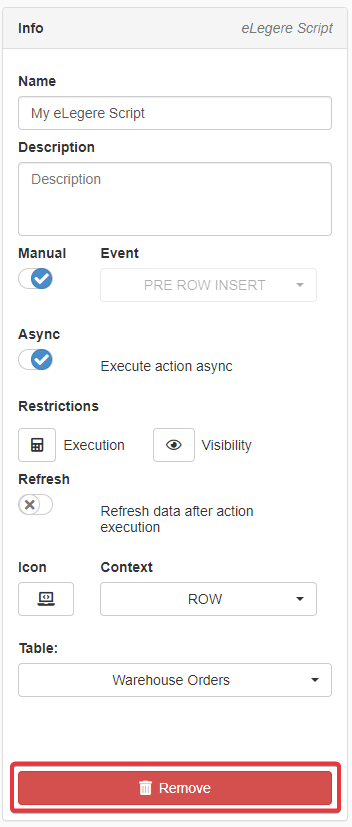
Insert in the Info section the required information.
- (1) Name Insert a name for the eLegere Script Custom Action.
- (2) Description
optionalInsert a description for the eLegere Script Custom Action. - (3) Manual If enabled, the Users launch this Custom Action manually. If disabled, choose at (4) Event a triggering condition to launch the Custom Action. (By default, the toggle switch is enabled.)
- (4) Event If (3) Manual is disabled, choose a trigger condition from the drop-down list.
Event - Triggering Options
For the Event option, when the Manual toggle-switch is disabled, choose a moment when the Custom Action runs.
PRE ROW INSERT Before inserting a row.
POST ROW INSERT After a row's insertion.
PRE ROW UPDATE Before any changes apply to a row.
POST ROW UPDATE After having edited a row.
PRE ROW DELETE Before deleting a row.
POST ROW DELETE After having deleted the row.
PRE ATTACHMENT INSERT Before uploading an attachment to a row.
POST ATTACHMENT INSERT After having uploaded an attachment to a row.
POST MASTER INSERT After having inserted a row on the Master table.
POST MASTER UPDATE After having saved an edited row on the Master table.
POST MASTER DELETE After having deleted a row on the Master table.
- (5) Async Enable to run the Custom Action in the background instead of waiting for its completition to use the application. (By default, the Async toggle-switch is enabled when (3) Manual is enabled. Otherwise, the toggle-switch is disabled.)
- (6) Execution
optionalClick to open the Formula Editor. Insert a Formula to define the conditions for executing the Custom Action. - (7) Visibility
optionalClick to open the Formula Editor. Insert a Formula to define the conditions to display the Custom Action in the application. - (8) Refresh
optionalIf enabled, the application refreshes the data on the table when the Custom Action has finished to run. - (9) Icon
optionalChoose an icon for the Custom Action. - (10) Context Decide if the User launches the Custom Action from the Custom Actions drop-down menu in the application or from the Row's Options (). Disabled if (3) Manual is disabled.
- (11) Table Choose the table where the Custom Action runs.
-
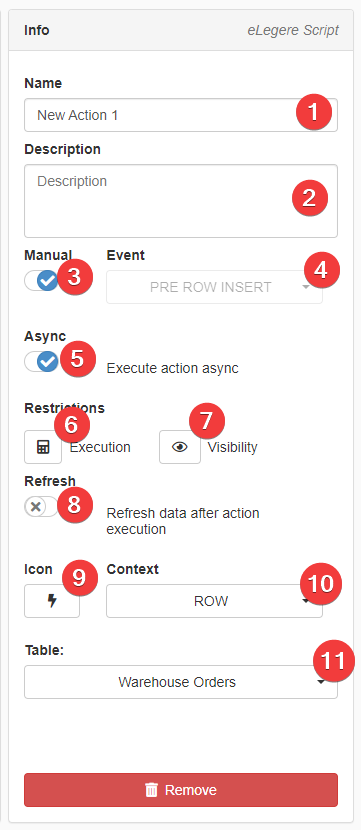
In the Parameters, insert (1) your eLegere Script in the Body of the eLegere Script space. Set (2) a time limit to wait for the script to run in the application (This is optional. By default, the limit is 15 seconds.)
-
When you have completed the configuration, click on the Save button () in the top-left corner to save the eLegere Script Custom Action.
Success
You have designed and configured you own feature as an eLegere Script Custom Action.
Hint
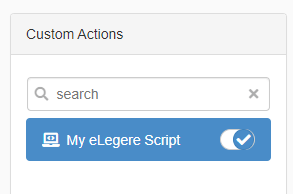
If you want to disable the eLegere Script Custom Action without deleting it from the Application, click on the toggle switch next to the Custom Action's name to hide it from the users.
Hint
If you want to delete a eLegere Script Custom Action, click on the Remove in the Info section.
A window will ask for confirmation. Click Yes to confirm the deletion. (Click No to abort the deletion.)
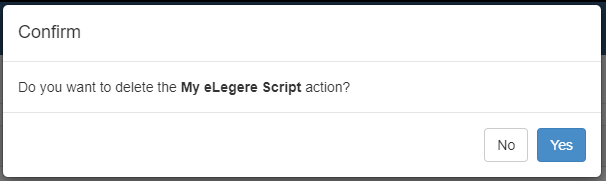
Click on the Save button () in the top-left corner to save the deletion.