How to Enable the User to Add, Edit, View, Remove or Clone Row If the Conditions Are Satisfied
Required Permissions
This section requires the Application Designer permission from your Domain's administrator.
Check What are the Design Tasks? to learn more about permissions to work with Design Mode and other tools.
Summary
Learn how to configure a Formula to enable certain actions on an application's table if its conditions are satisfied.
Users will add, edit, remove, view or clone rows if and only when a restriction Formula is satisfied. Certain action commands from the Settings (Add Record, Remove Record, Clone Rows, and Recalculation) will be available in the application but not clickable until the Formulas' conditions aren't met. (See Enable or Disable Adding, Cloning, Recalculating or Removing Rows for more information about actions you can enable for the users for each application's table.)
Note
The steps are the same for both the Master and Detail tables.
Restrict Adding New Rows
Follow the steps to insert a Formula to add new rows if and only if its conditions are satisfied. These are called Add Restrictions.
-
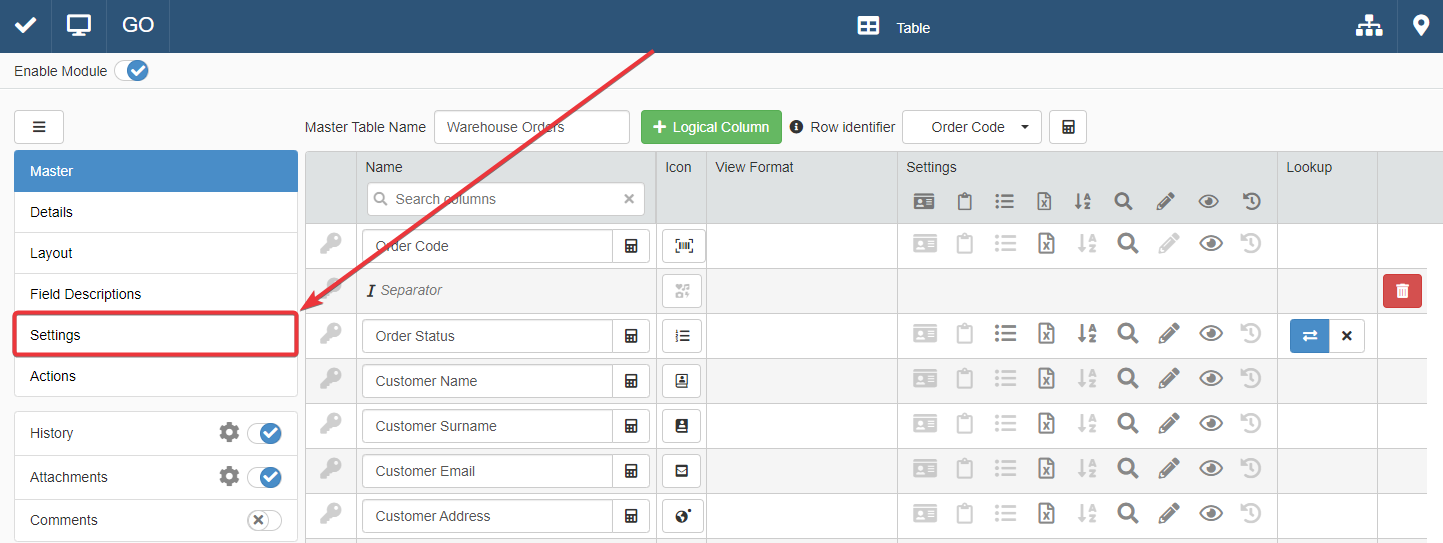
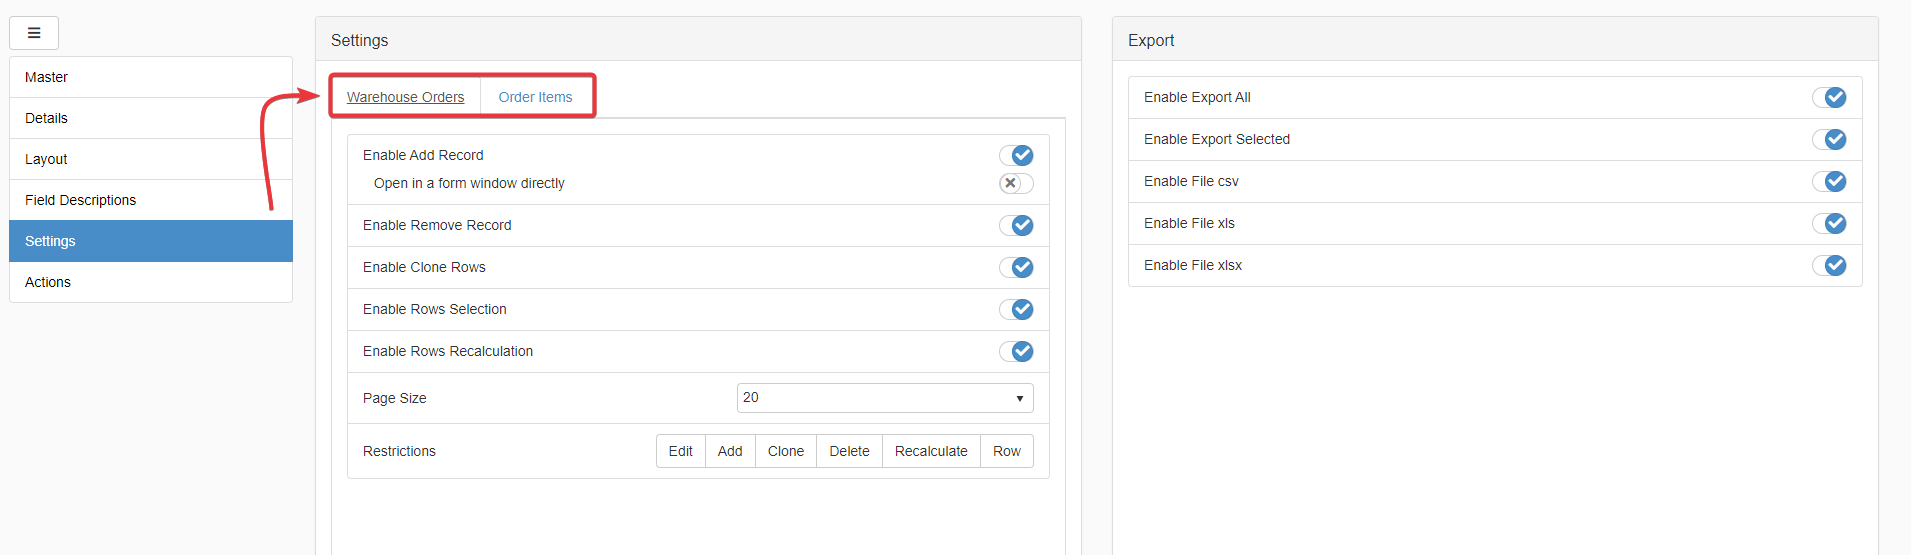
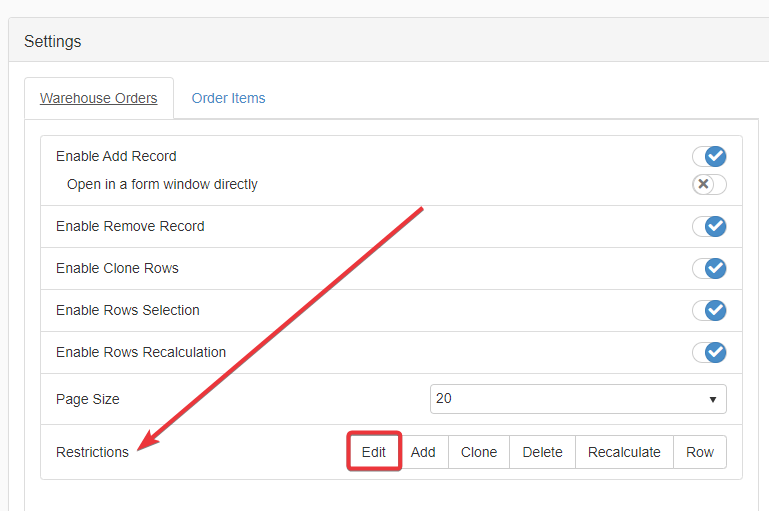
In the Design Mode, click on the Settings in the left taskbar.
-
Click on the table's tab for which you want to insert a Formula to manage adding new rows.
-
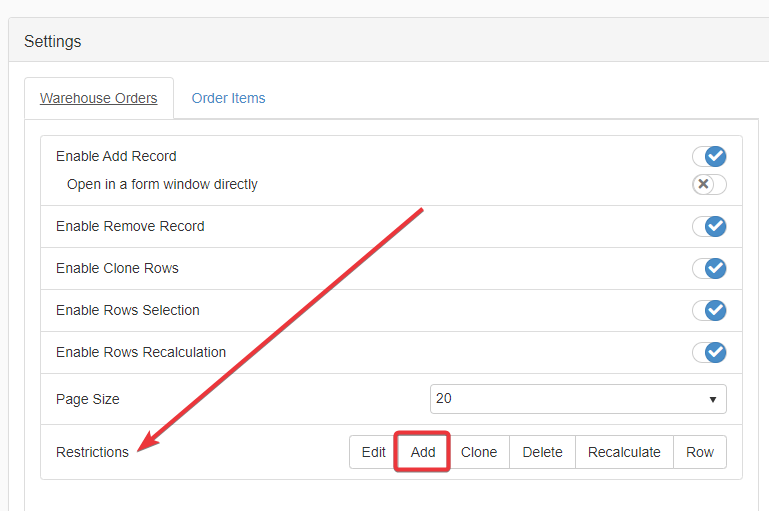
Under the table's Settings' sub-panel, click on Add button under the Restrictions options. The action opens the Formula Editor to insert a Formula.
-
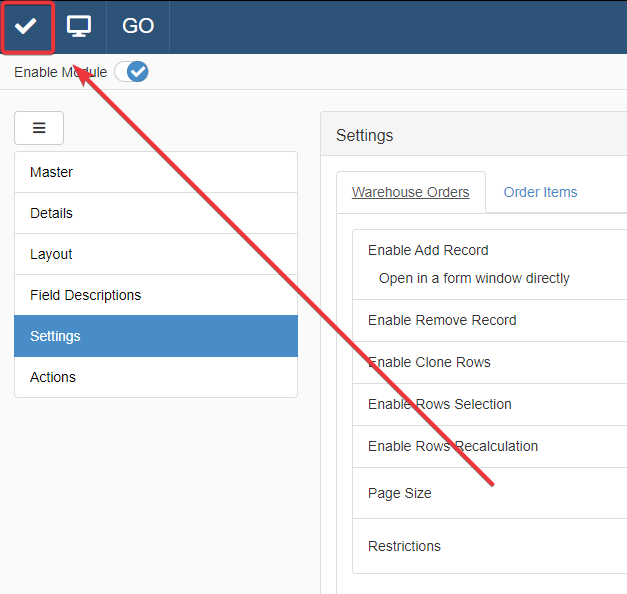
Click on the Save button to save all the changes. You find the Save button in the upper-left corner of the Design Mode.
Success
Users will add new rows to the table if and only if the Formula conditions are satisfied.
Restrict Editing Existing Rows
Follow the steps to insert a Formula to permit rows editing if and only if its conditions are satisfied. These are called Edit Restrictions.
-
In the Design Mode, click on the Settings in the left taskbar.
-
Click on the table's tab for which you want to insert a Formula to manage editing existing rows.
-
Under the table's Settings' sub-panel, click on Edit button under the Restrictions options. The action opens the Formula Editor to insert a Formula.
-
Click on the Save button to save all the changes. You find the Save button in the upper-left corner of the Design Mode.
Success
Users will be able to edit existing rows if and only if the the Formula conditions are satisfied.
Example
The application Warehouse Orders manages the orders from a warehouse.
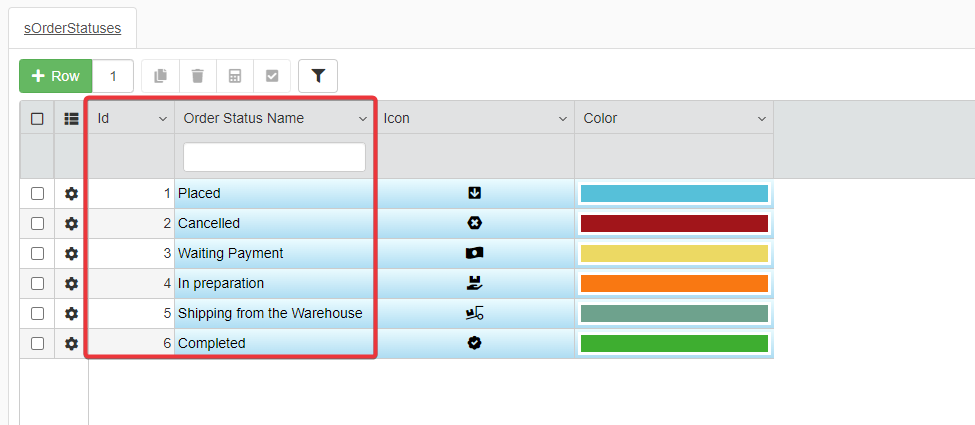
Each Master table's row stands for an order. Each Row has a Lookup drop-down list called Order Status. Order Status records the unique Id for each possible order status. (E.g. The "Placed" status has the Id 1 and the "Cancelled" status has the Id 2.)
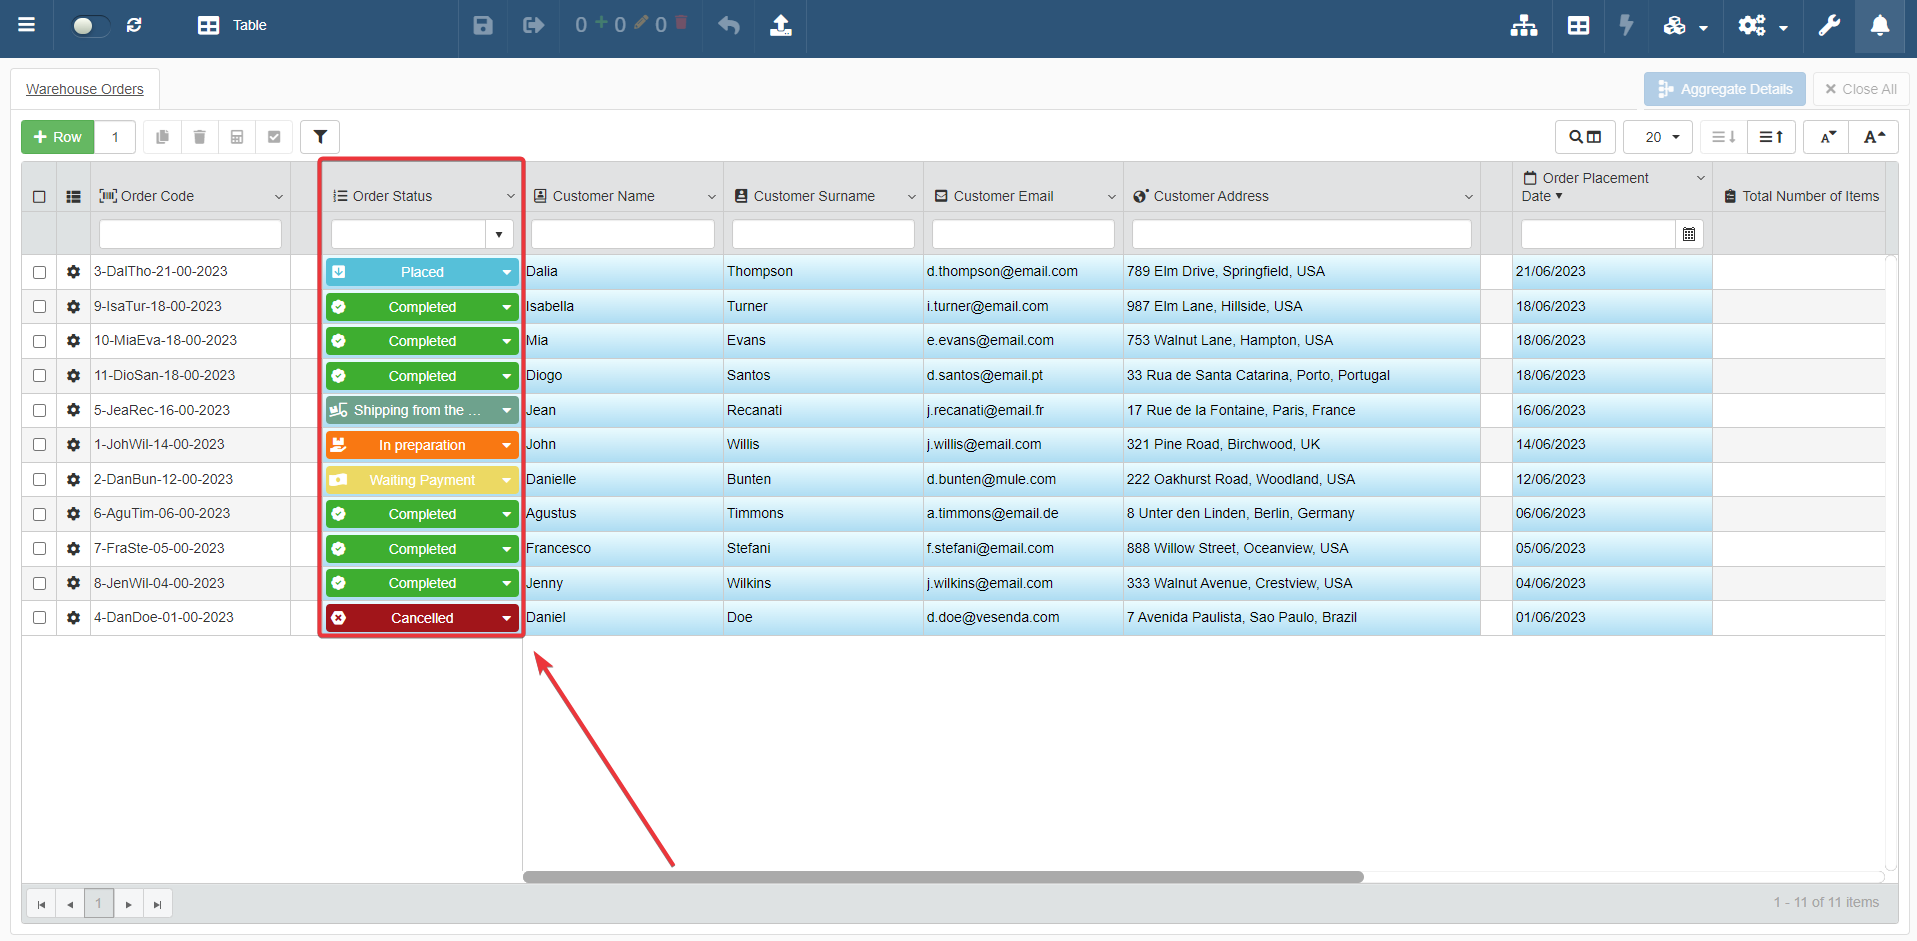
Order Status tracks an order's state by recording the status' Id from a Storage containing the various statuses' names (e.g. "Placed", "Waiting for Payment", "In Preparation", and so on). A specific application enables to record the different statuses of Order Status.
When an order has the state "Cancelled" or "Completed", the users shouldn't be able to make any other changes: the order is already shipped or has been archived.
In this case, it would be useful to block the editing entirely when the Order Status is either in the "Cancelled" or "Completed" states. A Restriction formula for editing is the best solution in this case.
The Designer goes in Design Mode and into the Settings panel. They click on the Edit restrictions to insert the following Formula.
1 2 3 4 5 6 7 8 9 10 11 12 13 14 15 16 17 18 19 20 21 22 23 24 25 26 27 28 29 30 31 32 33 34 | |
The Designer saves the configuration and the changes in Design Mode.
Now, the application won't permit changes to any row having the "Cancelled" or "Completed" status.
Restrict Cloning a Row
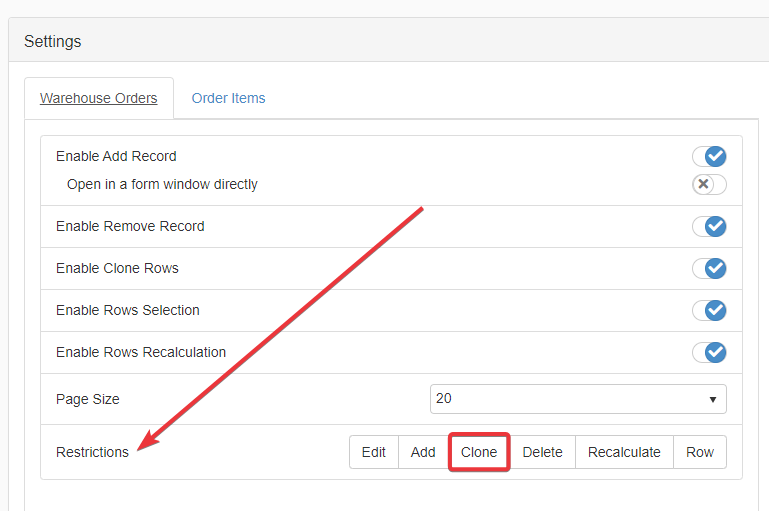
Follow the steps to insert a Formula to permit rows cloning if and only if its conditions are satisfied. These are called Clone Restrictions.
-
In the Design Mode, click on the Settings in the left taskbar.
-
Click on the table's tab for which you want to insert a Formula to manage cloning rows.
-
Under the table's Settings' sub-panel, click on Clone button under the Restrictions options. The action opens the Formula Editor to insert a Formula.
-
Click on the Save button to save all the changes. You find the Save button in the upper-left corner of the Design Mode.
Success
Users will be able to clone existing rows if and only if the the Formula conditions are satisfied.
Restrict Rows' Deletion
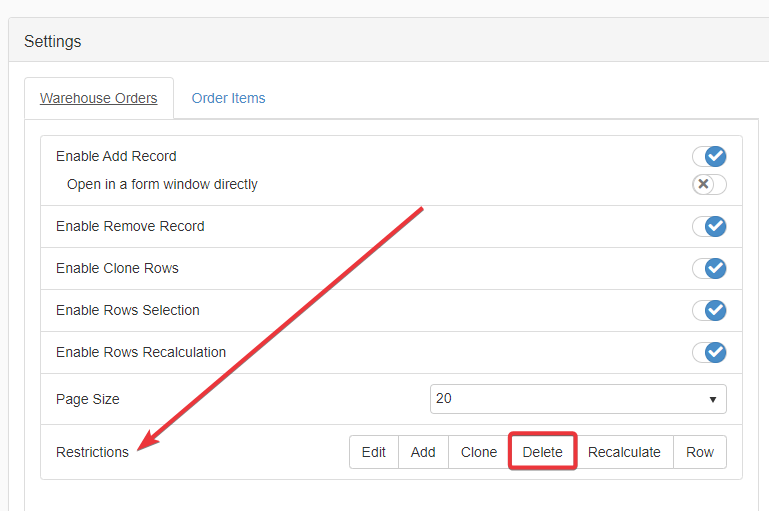
Follow the steps to insert a Formula to permit rows deletion if and only if its conditions are satisfied. These are called Delete Restrictions.
-
In the Design Mode, click on the Settings in the left taskbar.
-
Click on the table's tab for which you want to insert a Formula to manage rows' deletion.
-
Under the table's Settings' sub-panel, click on Delete button under the Restrictions options. The action opens the Formula Editor to insert a Formula.
-
Click on the Save button to save all the changes. You find the Save button in the upper-left corner of the Design Mode.
Success
Users will be able to delete one or more rows if and only if the the Formula conditions are satisfied.
Example
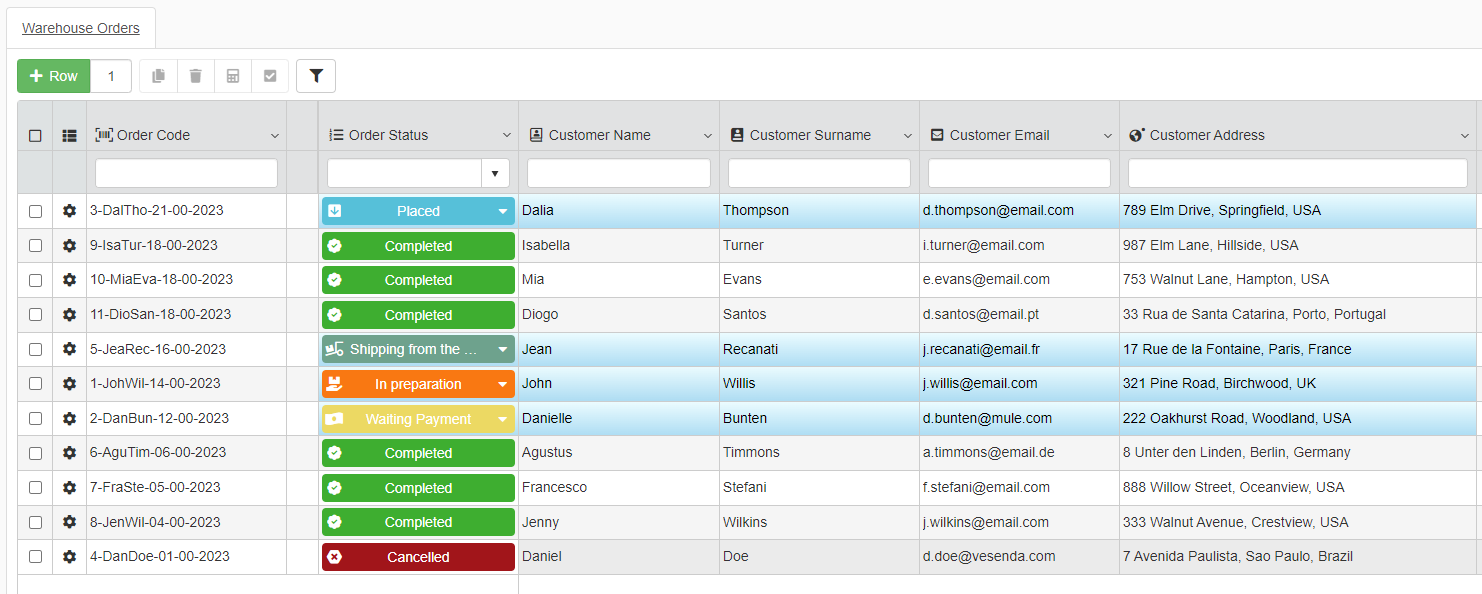
The application Warehouse Orders manages the orders from a warehouse.
Each Master table's row stands for an order. Each Row has a Lookup drop-down list called Order Status. Order Status records the unique Id for each possible order status. (E.g. The "Placed" status has the Id 1 and the "Cancelled" status has the Id 2.)
Order Status tracks an order's state by recording the status' Id from a Storage containing the various statuses' names (e.g. "Placed", "Waiting for Payment", "In Preparation", and so on). A specific application enables to record the different statuses of Order Status.
Each User belongs to one or more User Groups to classify their roles and operations. (E.g. Clerk, Warehouse Coordinator, Stocking Associate, Forklift Operator, and so on.)
Users should be able delete orders' rows only under certain circumstances:
- The order status is "Cancelled".
- The user is either a Clerk or a Warehouse Coordinator. If the management have assigned their role, they know what they are doing: they can delete rows freely.
In any other case, the users should not be able to delete the rows. A Restriction formula for deletion is the best solution in this case.
The Designer goes in Design Mode and into the Settings panel. They click on the Delete restrictions to insert the following Formula.
1 2 3 4 5 6 7 8 9 10 11 12 13 14 15 16 17 18 19 20 21 22 23 24 25 26 27 28 29 30 31 32 33 34 35 36 37 38 39 40 41 42 43 44 45 46 47 48 49 50 51 52 53 | |
The Designer saves the configuration and the changes in Design Mode.
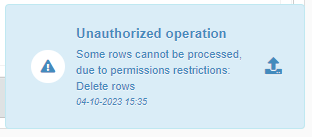
Now, the application won't allow to delete orders if and only if the status is "Cancelled" or the user is a Clerk or a Warehouse Coordinator.
In other circumstances, a notification explains that the operation is not allowed for the row.
Restrict Rows' Recalculation
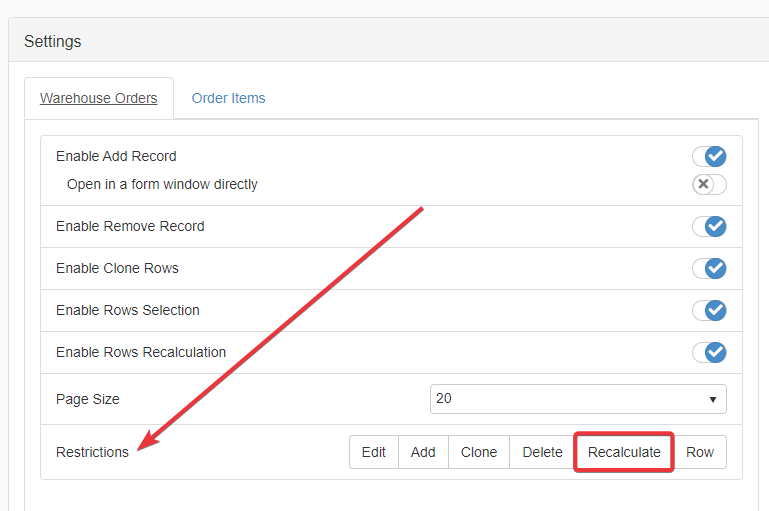
Follow the steps to insert a Formula to permit rows' recalculation if and only if its conditions are satisfied. These are called Recalculate Restrictions
-
In the Design Mode, click on the Settings in the left taskbar.
-
Click on the table's tab for which you want to insert a Formula to manage rows' recalculation.
-
Under the table's Settings' sub-panel, click on Recalculation button under the Restrictions options. The action opens the Formula Editor to insert a Formula.
-
Click on the Save button to save all the changes. You find the Save button in the upper-left corner of the Design Mode.
Success
Users will be able to recalculate the values of existing rows if and only if the the Formula conditions are satisfied.
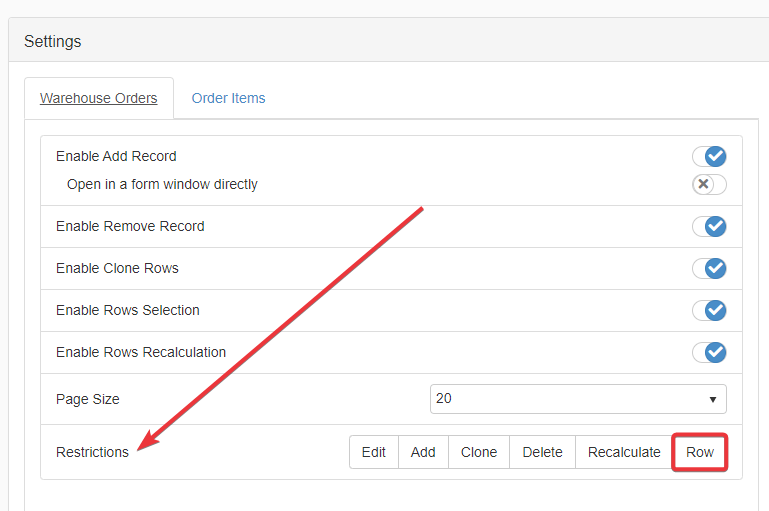
Restrict What Rows to Be Displayed
Follow the steps to insert a Formula to display certain rows on the table if and only if its conditions are satisfied. These are called Row Restrictions.
Attention
Check the exceptions to considered while using Formulas in Row Restrictions at step 4.
-
In the Design Mode, click on the Settings in the left taskbar.
-
Click on the table's tab for which you want to insert a Formula managing which rows to display.
-
Under the table's Settings' sub-panel, click on Row button under the Restrictions options. The action opens the Formula Editor to insert a Formula.
Attention
You cannot employ a Logical Column (i.e.
$$logicalColumnName) in a Row Restriction formula. The Formula Editor won't validate Formulas employing Logical Column references in Row Restrictions.Attention
Row Restrictions work differently from other places where you can insert Formulas (e.g. Calculated Fields, Layout Colors, and so on). The context of filtering and retrieving rows for the table causes such exception. This means that Formula working as usual in Calculated Fields might not work and require some changes. Follow the rules below when writing Row Restrictions formulas:
a. All the Formula's visiblity conditions must refer to rows' fields on the current table and application.
1
2
3
4
5
6
7
  // Here some examples.

  // NO. This won't work because it doesn't refer to values on the current table.
  =EQ($CURRENTUSER.EMAIL; "j.doe@vesenda.com")

  // YES. This works because it refers to values on the current table and application.
  =EQ($CURRENTSTORAGE.taskOwnerEmail; "j.doe@vesenda.com")
b. Functions like
=LOOKUP(),=LOOKUPLIST(), and others functions recovering information from other Storages can't refer to current table's values in the application.=LOOKUP()e=LOOKUPLIST()must refer to either constant values or system variables.1 2 3 4 5 6 7 8 9 10 11 12 13 14 15 16 17 18 19
  // NO. The =EQ() refers to a value on the table, i.e. $CURRENTSTORAGE.Id_Project.
  =CONTAINS(
        =LOOKUPLIST(
              #sProjectManagers;
              #sProjectManagers.Email;
              =EQ(sProjectManagers.Id_Project; $CURRENTSTORAGE.Id_Project)
        );
        $CURRENTUSER.EMAIL
  )

  // YES. =EQ() refers only to costants or system variables like $CURRENTUSER.EMAIL
  =CONTAINS(
        =LOOKUPLIST(
              #sProjectManagers;
              #sProjectManagers.Id_Project;
              =EQ(#sProjectManagers.Email; $CURRENTUSER.EMAIL)
        );
        $CURRENTSTORAGE.Id_Project
  )
c. When you employ
=IF()functions, you must comply to the same requirements of rule (b); i.e. constant values or system variables only.1 2 3 4 5 6 7 8 9 10 11 12 13 14 15
  // Example 1. NO. =EQ($CURRENTSTORAGE.Completed; $TRUE) refers to a field's value on the table.
  =IF(
        =EQ($CURRENTSTORAGE.Completed; $TRUE);
        =EQ($CURRENTSTORAGE.isApproved; $TRUE);
        =EQ($CURRENTSTORAGE.isApproved; $FALSE)
  )

  // Example 2. YES. In the condition of the =IF() there are only system variables
  and costants ("Managers").

  =IF(
        =CONTAINS($CURRENTUSER.GROUPNAMES; "Managers");
        =EQ($CURRENTSTORAGE.isApproved; $TRUE);
        =EQ($CURRENTSTORAGE.isApproved; $FALSE)
  )
d. In a Detail Row Restriction, the system variable
$CURRENTSTORAGE.$MASTER.fieldNamebehaves like a constant value and you can use it.$CURRENTSTORAGE.$MASTER.fieldNamedoesn't vary for the Detail's rows of a Master table.1 2 3 4 5 6 7 8 9 10 11 12 13 14 15 16 17 18 19 20
/* The following Formulas as Row Restrictions for Details are valid. The formulas employ $CURRENTSTORAGE.$MASTER.fieldName to refer to values. */ // First Example =IF( =EQ($CURRENTSTORAGE.$MASTER.isArchived; $TRUE); =NEQ($CURRENTSTORAGE.taskStatusLookupId; 2) ) // Second Example =CONTAINS( =LOOKUPLIST( #sProjectManagers; #sProjectManagers.Id_Project; =EQ(#sProjectManagers.Email; $CURRENTSTORAGE.$MASTER.Email) ); $CURRENTSTORAGE.Id_Project ) -
Click on the Save button to save all the changes. You find the Save button in the upper-left corner of the Design Mode.ù
Success
Users will view only the rows satisfying the Formula's conditions.