How to Restrict Who Can View, Upload, and Delete Attachments
Required Permissions
This section requires the Application Designer permission from your Domain's administrator.
Check What are the Design Tasks? to learn more about permissions to work with Design Mode and other tools.
Summary
Learn how to insert a Formula to restrict when users can view, upload or delete attachments on the rows.
Info
This section assumes that the Designer has enabled the Attachments for the related table.
See Enable or Disable Attachments for the Rows for more information about enabling Attachments for a table's rows.
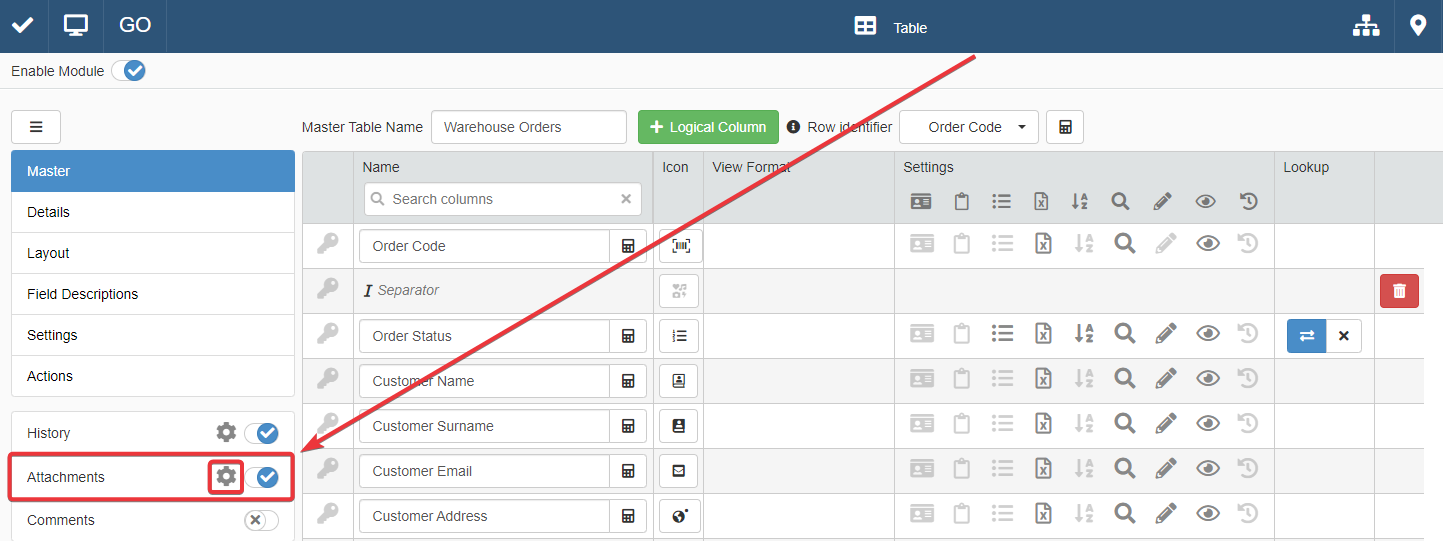
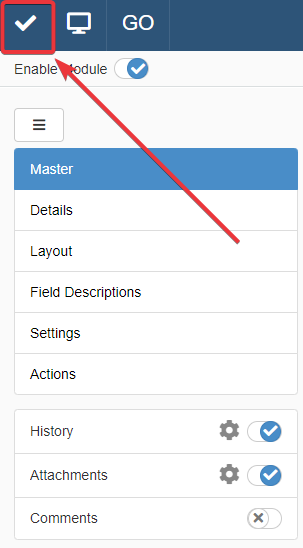
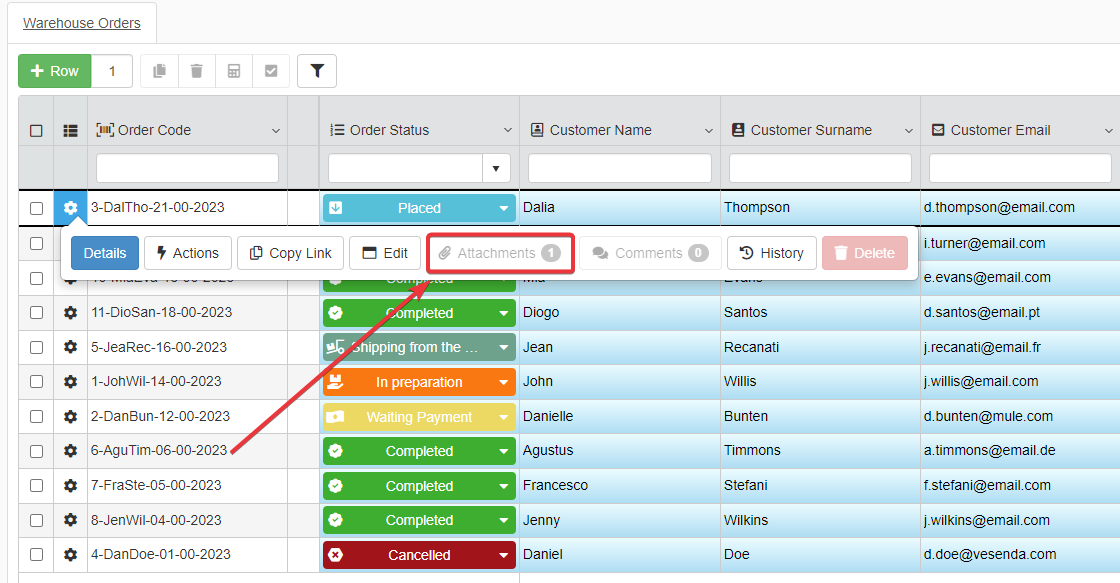
In Design Mode, click on the icon next to the Attachments toggle switch. You find the Attachments toggle switch on the left side of the main panel when you access the Design Mode. The action opens the Attachments Settings for the Master table.
Note
For the Details, you can find the Attachments Settings in a different sub-panel in the Design Mode.
Go into Details > [Desired Detail table] > Configure.
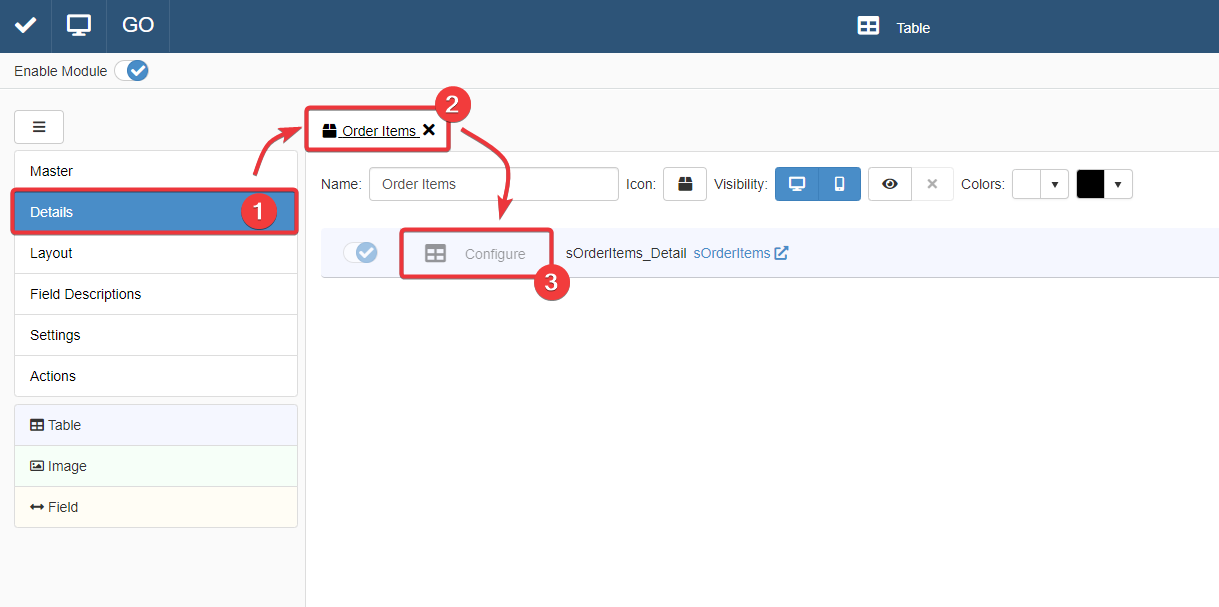
The action leads you to an interface that behaves like that of the Master Table in the Master sub-panel.
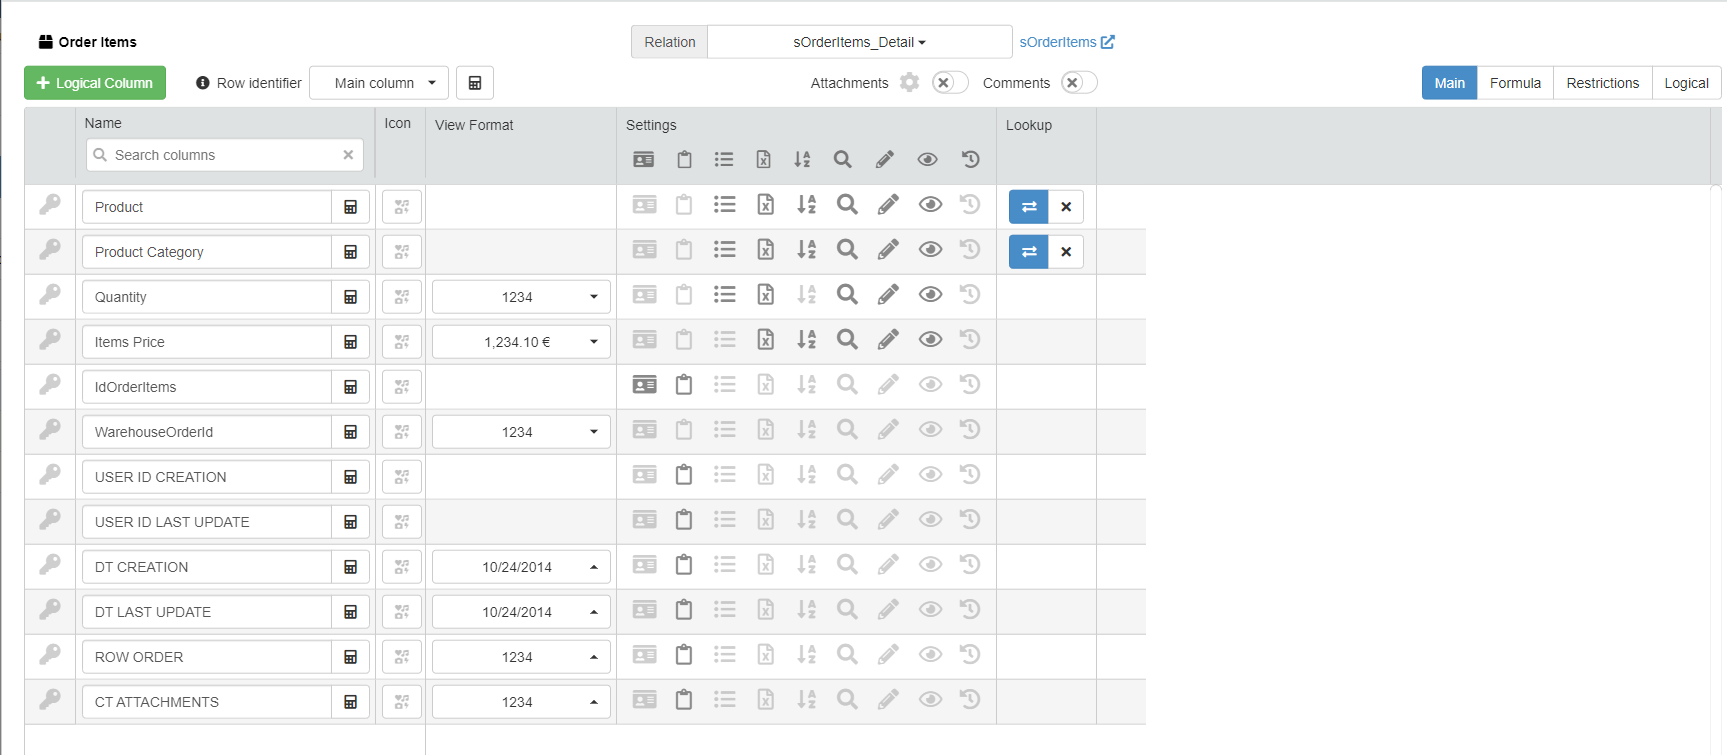
You find the Attachments toggle-switch and the Attachments Settings () above the Detail table's settings.
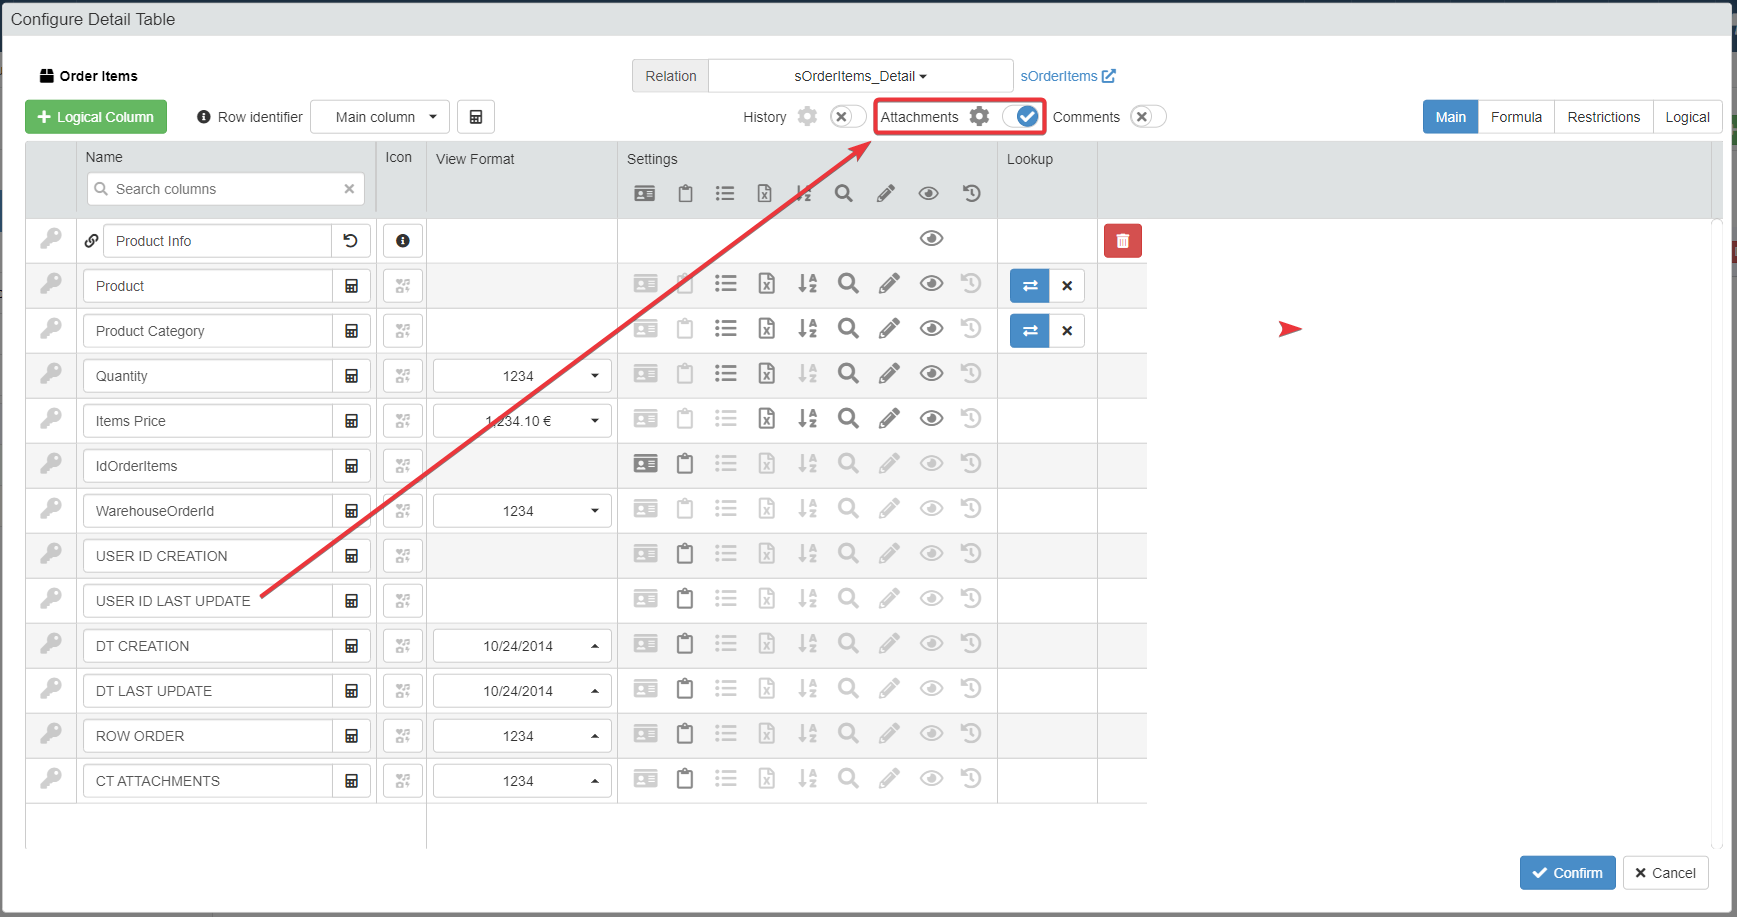
For more information about Details, check How to Attach a Table with Further Information to a Row: Detail Tables.
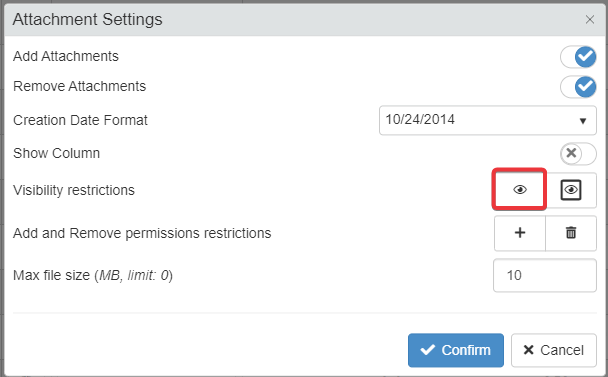
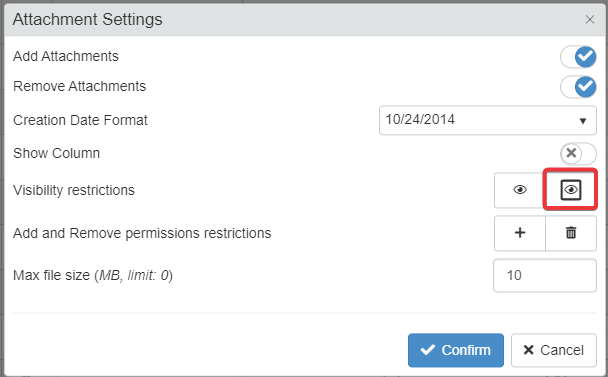
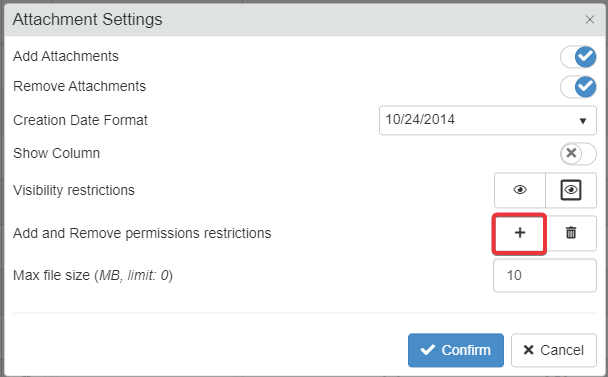
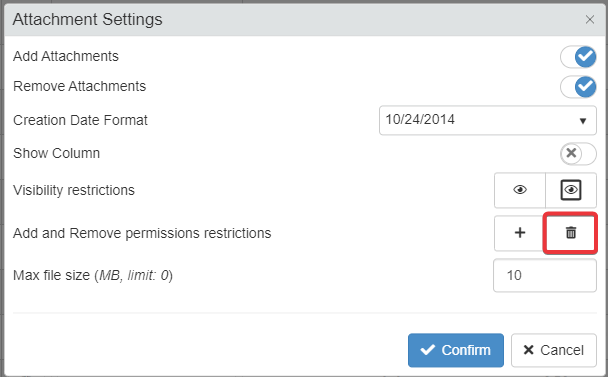
In the Attachments Settings, the button to click to insert a Formula depends on the kind of restriction you want to apply.
Visibility Restrictions for Attachments
Two kinds of visibility restrictions exist for Attachments: Global Visibility Restrictions and Row's Visibility Restrictions.
Global Visibility Restrictions
You can insert a Formula to restrict when to display attachments in the whole application. The Formula will display attachments if and only if its conditions are satisfied.
If you want to restrict who can view the attachments for the whole table, click on Attachments view global formula button. The action opens the Formula Editor to insert the formula.
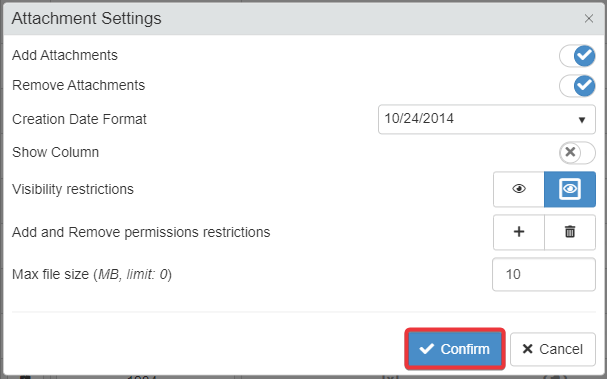
Click on the Confirm button when done. (Alternatively, on the Cancel button to abort the changes.)
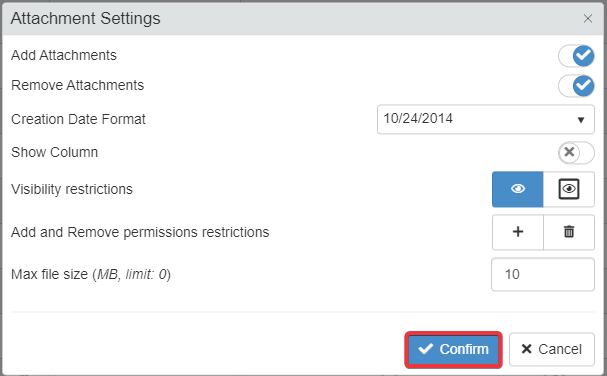
Save the changes by clicking on the Save button in the Design Mode's upper-left corner.
Success
The users won't be able to access attachments in the whole application unless all the formula's conditions are satisfied.
Row's Visibility Restrictions
You can insert a Formula to restrict when users can access to attachments of an individual row. The Formula will enable access to a row's attachments if and only if its conditions are satisfied.
If you want to restrict who can view the attachments for each row, click on Attachments view row formula button. The action opens the Formula Editor to insert the formula.
Click on the Confirm button when done. (Alternatively, on the Cancel button to abort the changes.)
Save the changes by clicking on the Save button in the Design Mode's upper-left corner.
Success
The users won't be able to view the rows' attachments unless all the formula's conditions are satisfied.
Example
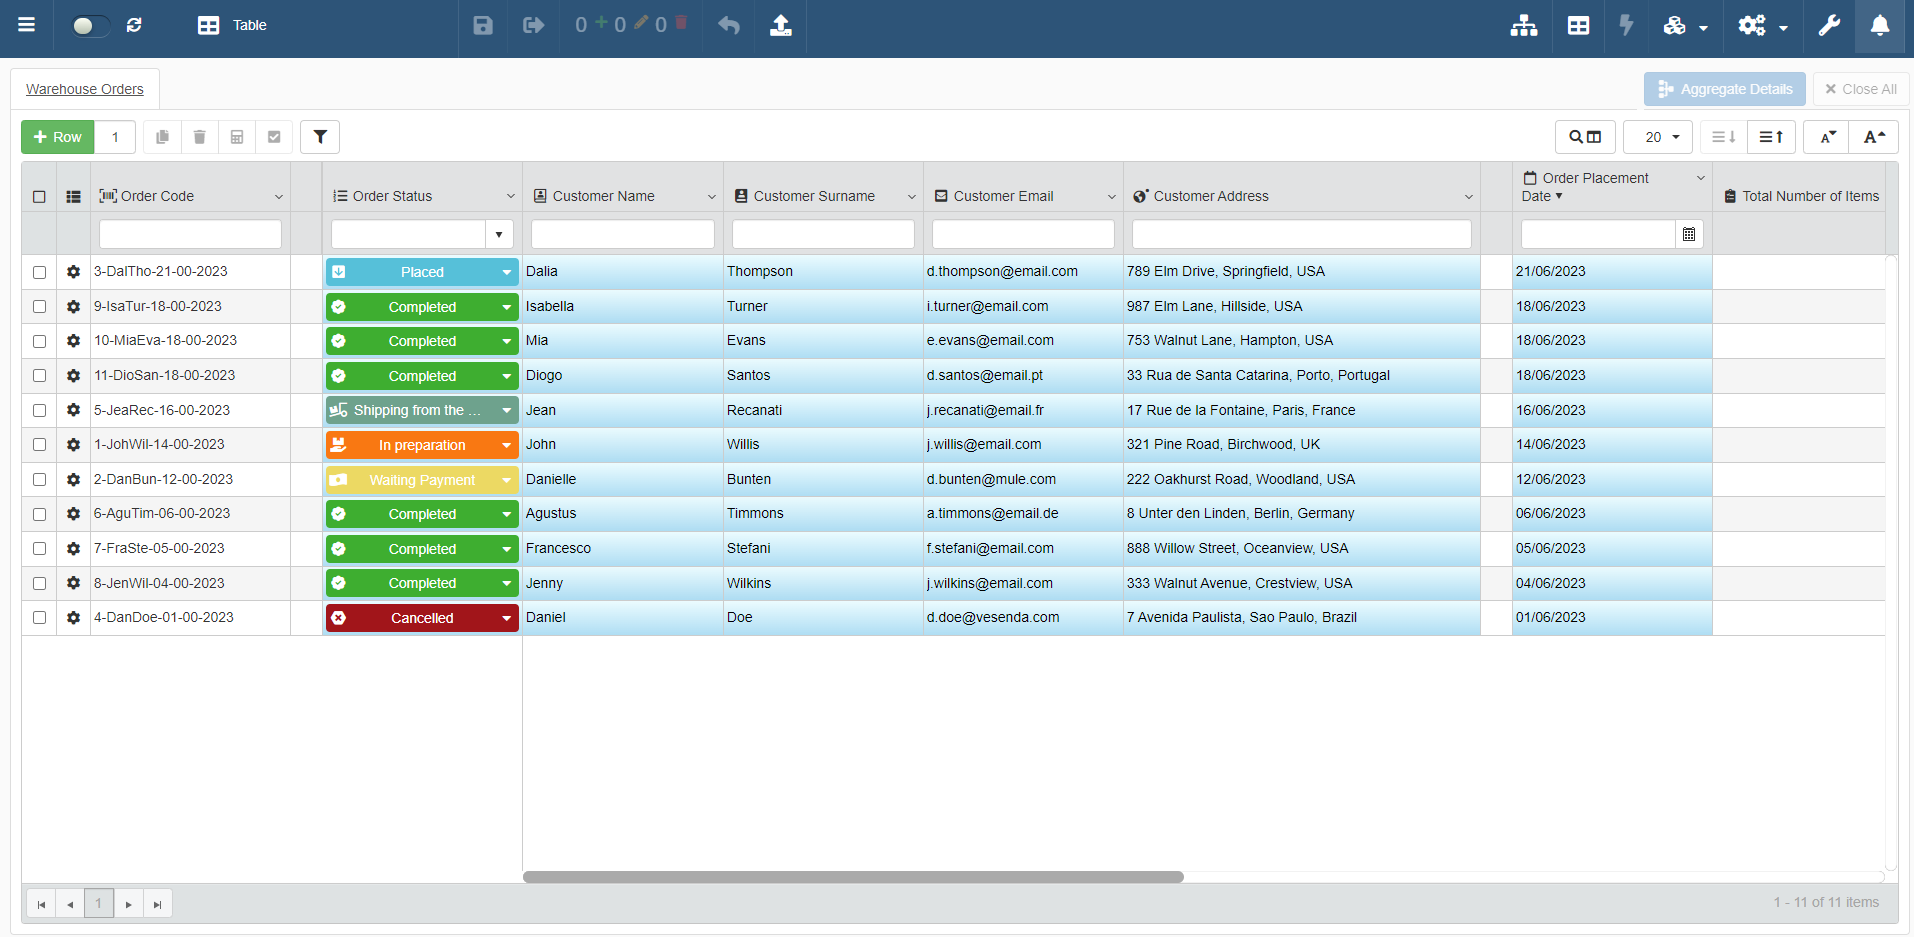
Warehouse Orders is an application managing orders from a warehouse. Each Master table's row stands for an order.
The administrators have organized the users in User Groups.
Sometimes, the users belonging to the Clerks group should attach pictures and other files in case of damaged or returned items. Only the Clerks should access the row's Attachments and no other role in the warehouse's team. Also, Clerks should access the attachments only when the Shipment Date is officially recorded.
The Designer accesses the Design Mode and goes to the Attachments Settings. They click on the Attachments view row formula to add the following Formula*:
1 2 3 4 5 6 7 8 9 10 11 12 13 14 15 16 17 18 19 20 21 22 23 24 25 26 27 28 29 30 31 32 33 | |
Only Users belonging to the Clerks User Group can open a row's attachment once the parcel is shipped. Other users won't be able to click and open the attachments.
Restrictions to Upload Attachments
You can insert a Formula to restrict when users can upload to attachments to table's rows. The application will upload an attachment only when the Formula's conditions are satisfied.
Click on the Add Attachments Restriction button. The action opens the Formula Editor to insert the formula.
Click on the Confirm button when done. (Alternatively, on the Cancel button to abort the changes.)

Save the changes by clicking on the Save button in the Design Mode's upper-left corner.
Success
The users won't be able to upload new attachments unless all the formula's conditions are satisfied.
Example
The application Warehouse Orders manages the orders from a warehouse.
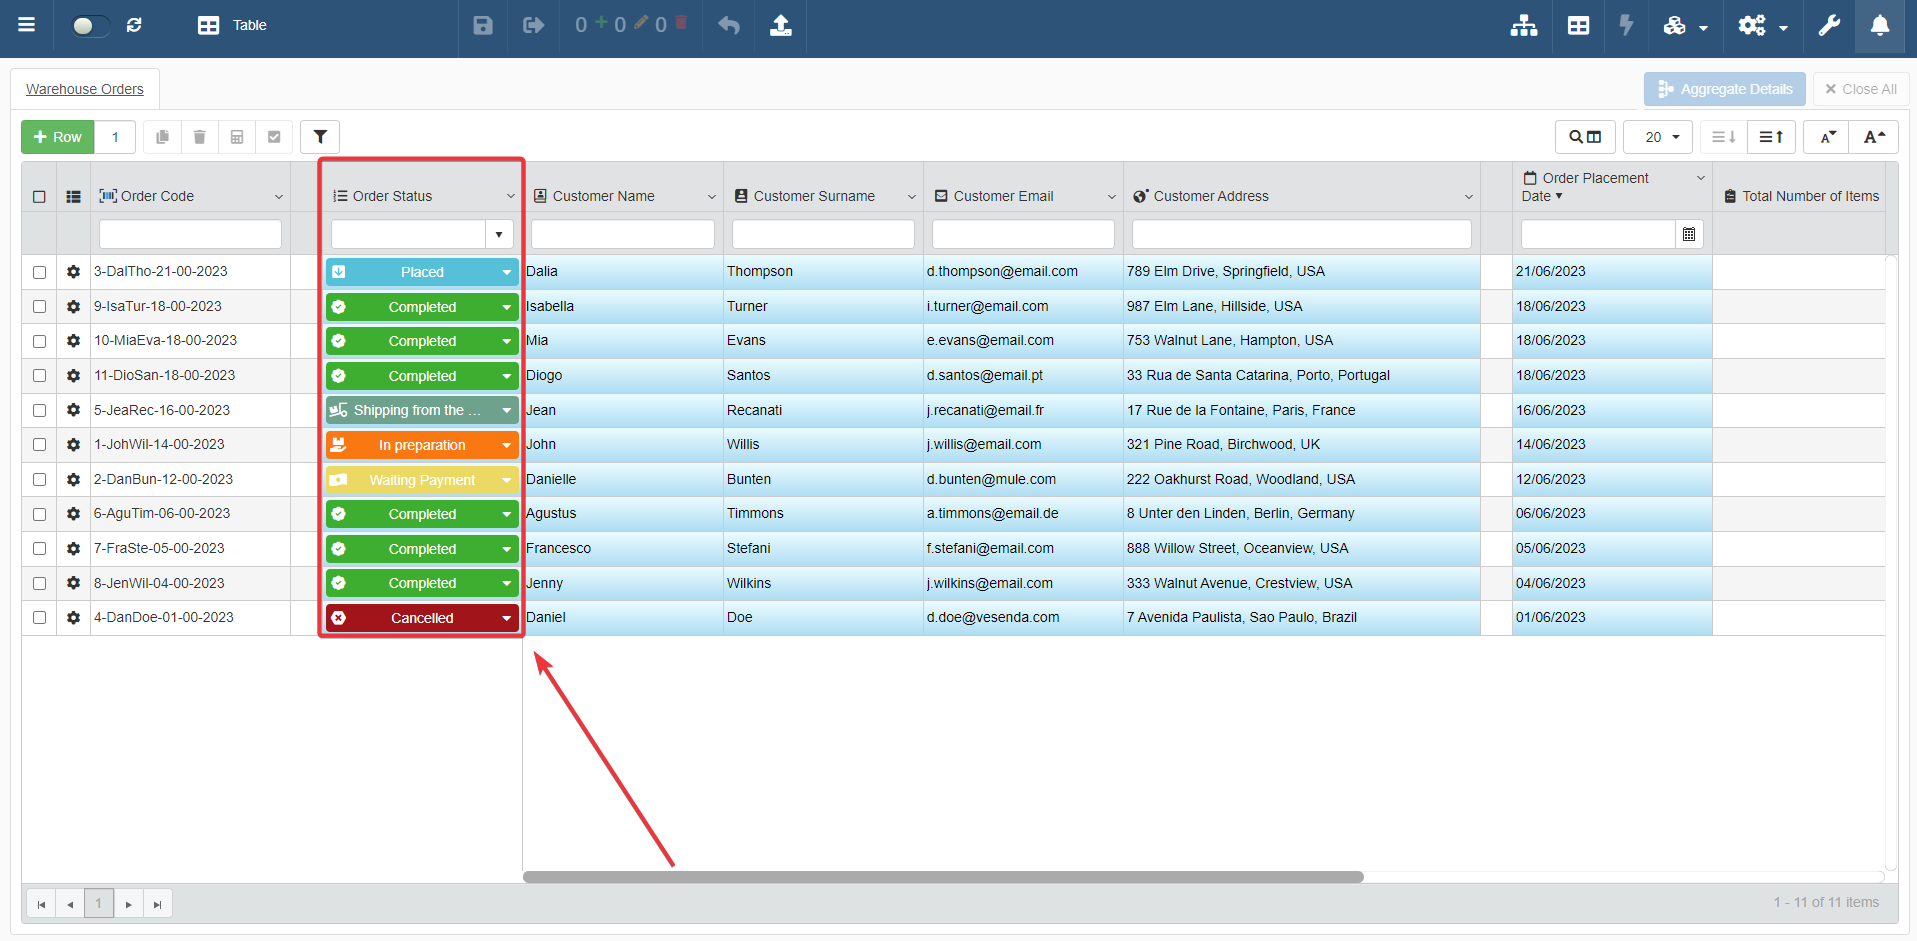
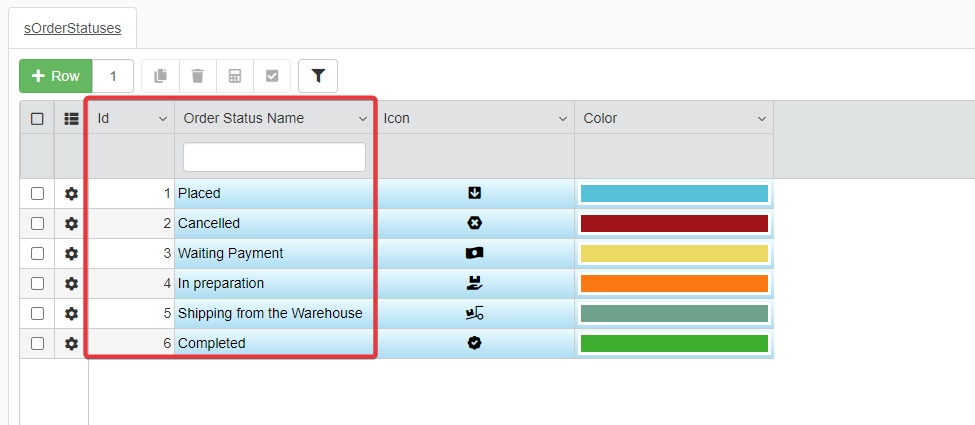
Each Master table's row stands for an order. Each Row has a Lookup drop-down list called Order Status. Order Status records the unique Id for each possible order status. (E.g. The "Placed" status has the Id 1 and the "Cancelled" status has the Id 2.)
Order Status tracks an order's state by recording the status' Id from a Storage containing the various statuses' names (e.g. "Placed", "Waiting for Payment", "In Preparation", and so on). A specific application enables to record the different statuses of Order Status.
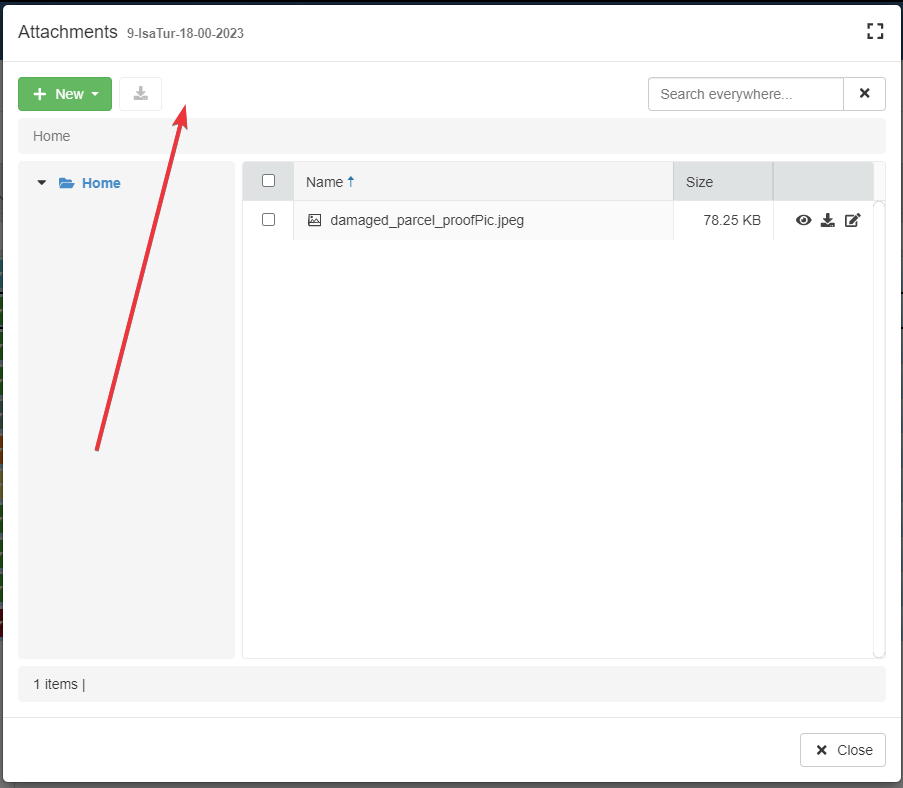
Sometimes, the users must attach pictures and other files in case of damaged or returned items to file what happened. Of course, this happens only when the order has the status "Completed".
The Designer accesses the Design Mode and goes to the Attachments Settings. They click on the Add Attachments Restriction to add the following Formula:
1 2 3 4 5 6 7 8 9 10 11 12 13 14 15 16 17 18 | |
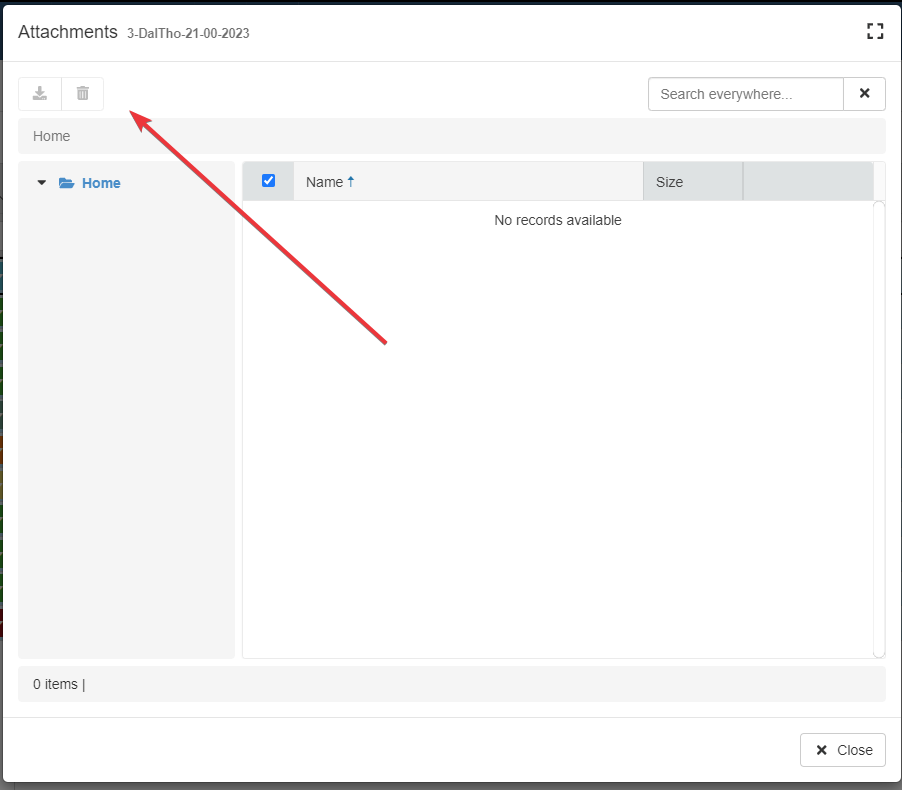
In other cases, the New button won't appear in the Attachments Manager.
Restrictions to Delete Attachments
You can insert a Formula to restrict when users can delete attachments from the table's rows. The application will delete an attachment only when the Formula's conditions are satisfied.
Click on the Remove Attachment Restriction button. The action opens the Formula Editor to insert the formula.
Click on the Confirm button when done. (Alternatively, on the Cancel button to abort the changes.)
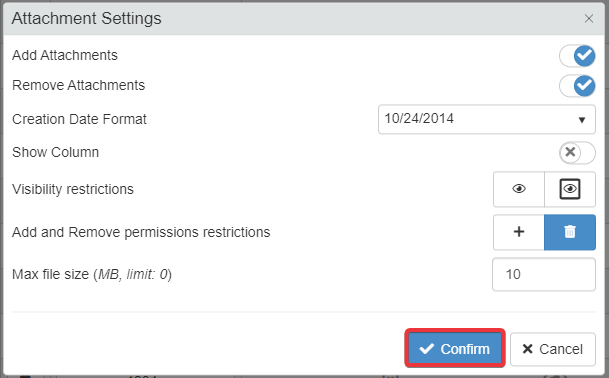
Save the changes by clicking on the Save button in the Design Mode's upper-left corner.
Success
The users won't be able to delete the rows' attachments unless all the formula's conditions are satisfied.
Example
Warehouse Orders is an application manages orders from a warehouse. Each Master table's row stands for an order.
Sometimes, the users must attach pictures and other files in case of damaged or returned items to document what happened.
Only members of the User Groups Clerks or Warehouse Coordinators should be able to delete attachments from the rows.
The Designer accesses the Design Mode and goes to the Attachments Settings. They click on the Remove Attachment Restriction to add the following Formula:
1 2 3 4 5 6 7 8 9 10 11 12 13 14 15 16 17 18 19 20 21 22 23 24 25 26 | |
If a User is neither a Clerk nor a Warehouse Coordinator, the Delete button () won't appear in the Attachments Manager window.