Create an Empty Storage to Be Filled
Required Permissions
This section requires the Storage Management permission from your Domain's administrator.
Check What are the Design Tasks? to learn more about permissions to work with Design Mode and other tools.
Summary
Learn how to create an empty Storage in eLegere from scratch to be filled in a later time. Also, the section teaches how to establish Relations between Storages' fields to create Lookup drop-down lists and Detail tables.
Creating a Blank Storage
Follow the steps below to create a Blank Storage in eLegere.
Info
Blank Storages are empty Storages that you create from scratch and add their fields manually. (See Storages Types in What Are the Storages? for more information about Blank Storages.)
Attention
This section assumes that you have only the Storage Management permission besides the basic permissions to access your Domain (i.e. Domain Viewer).
This implies that you will see only the Storages tab and the Applications tab.
![]()
In case you have been assigned other permissions, you could see other tabs in the sidebar besides Storages and Applications.
-
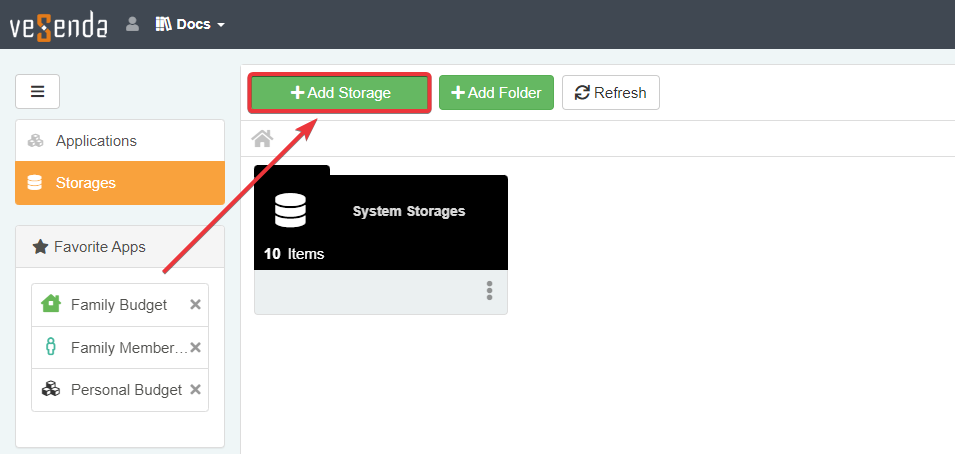
In the Home, click on the Storages tab in the side bar.

-
Click on the Add Storage button above the Storages panel.
-
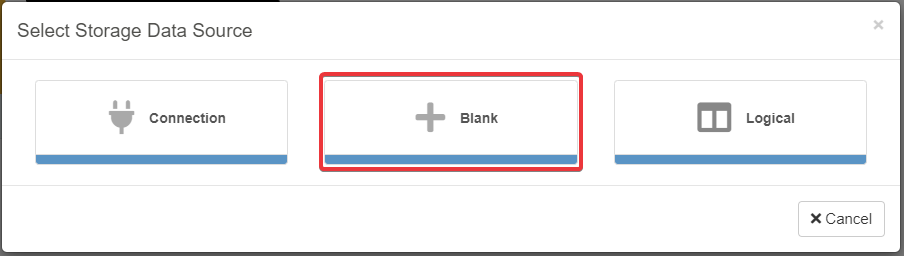
Choose Blank from the window's options. The action leads to the Storage Editor.
-
In the Storage Info sub-panel of the Storage Editor, fill the following information.
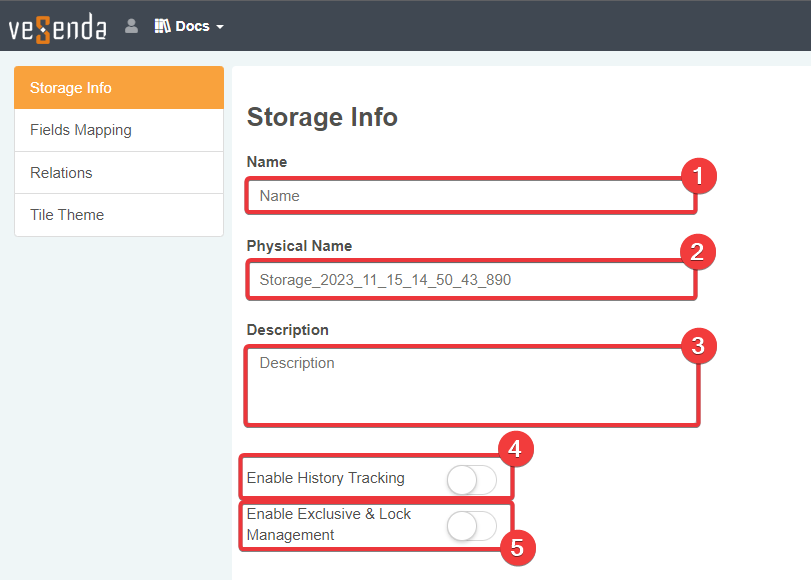
- (1) Name: The Storage's name displayed to the users.
- (2) Physical Name The Storage name on the database. Administrators and users working with the eLegere database identify the Storage through this name. By Default, eLegere assigns a name with the following format based on the creation date:
Storage_year_month_day_hour_minute_seconds_milliseconds. Choosing a name likeTBL_STORAGE_NAMEhelps to identify the Storage when you must work directly with the eLegere database. (See the Stored Procedures in the Developer Guide for more information.) - (3)
optionalDescription: Add a brief description to explain what the Storage contains. - (4)
optionalEnable History Tracking: Turn on the toggle-switch to record every change made on this Storage by users and applications. - (5)
optionalEnable Exclusive & Lock Management: Turn on the toggle-switch to enable the Lock function for the rows within applications. If the Lock function is enabled, the user can lock rows and block edits from other users until unlocked.
-
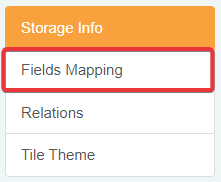
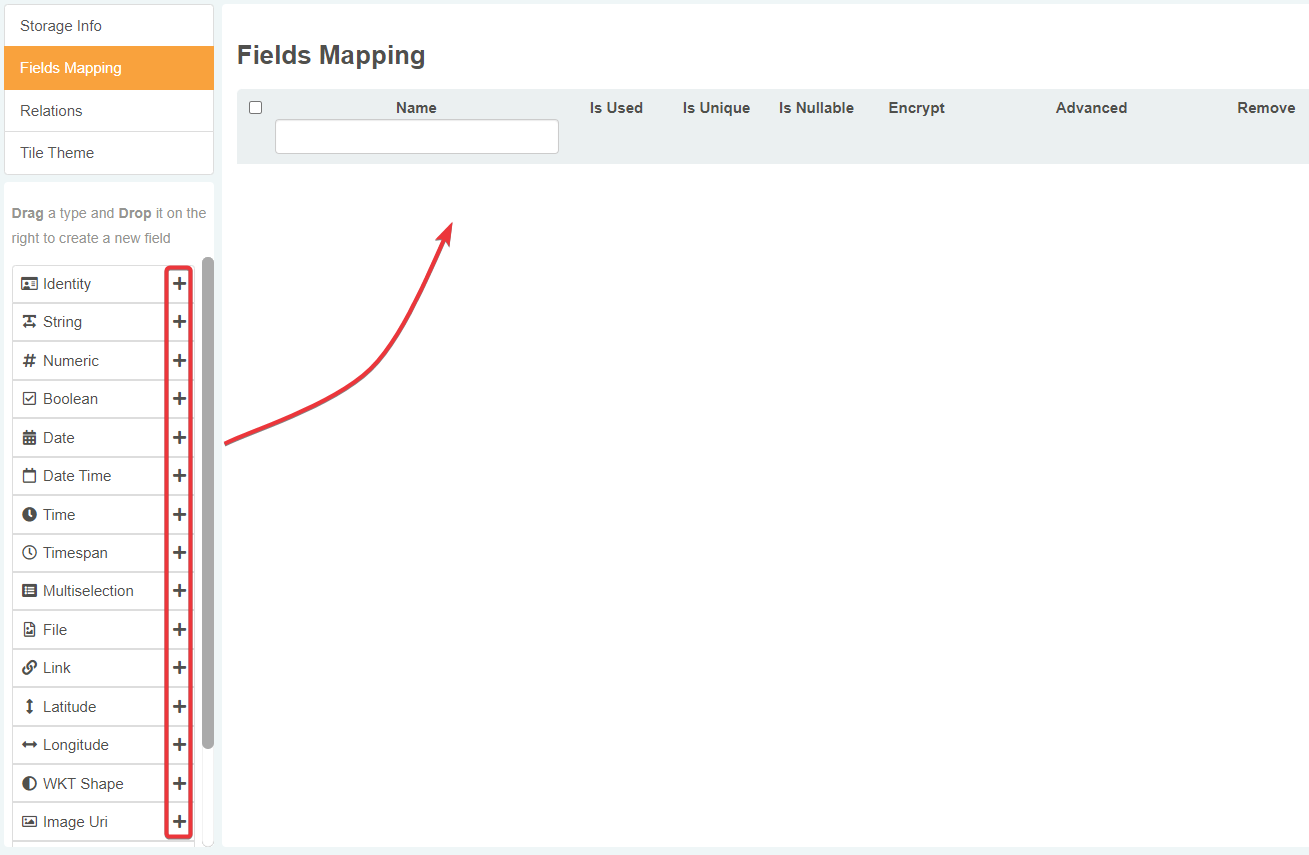
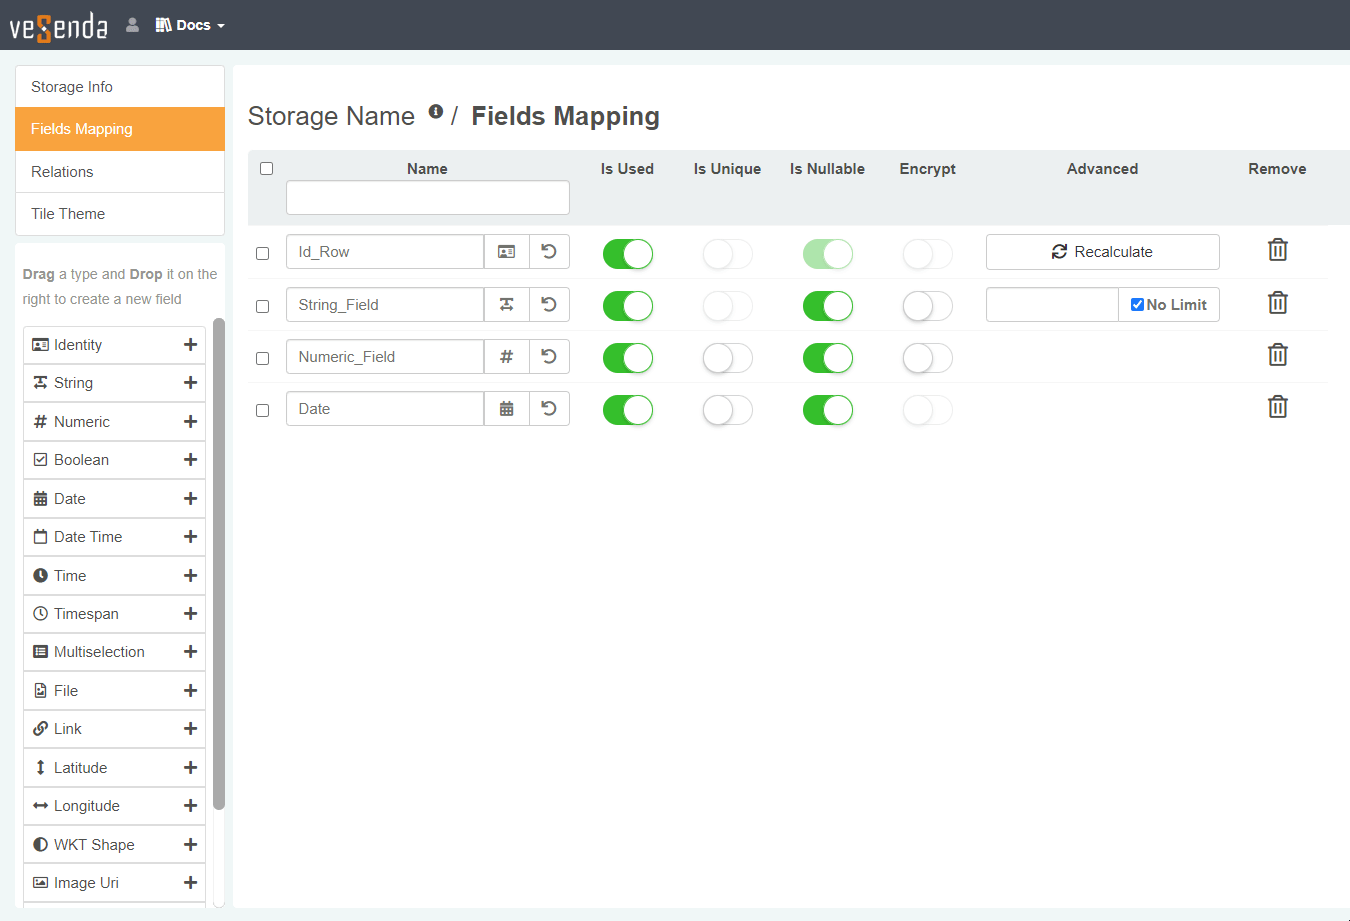
Click on the Fields Mapping tab in the left sidebar. The action leads to the panel where you can add fields to the storage.
-
You will land in the Fields Mapping sub-panel. The Fields Mapping sub-panel enables you to add fields to the Storage.

In the left panel you will find the list of available field types. (See What Are Storages and Why Do You Need Them? for more information about the available field types.)
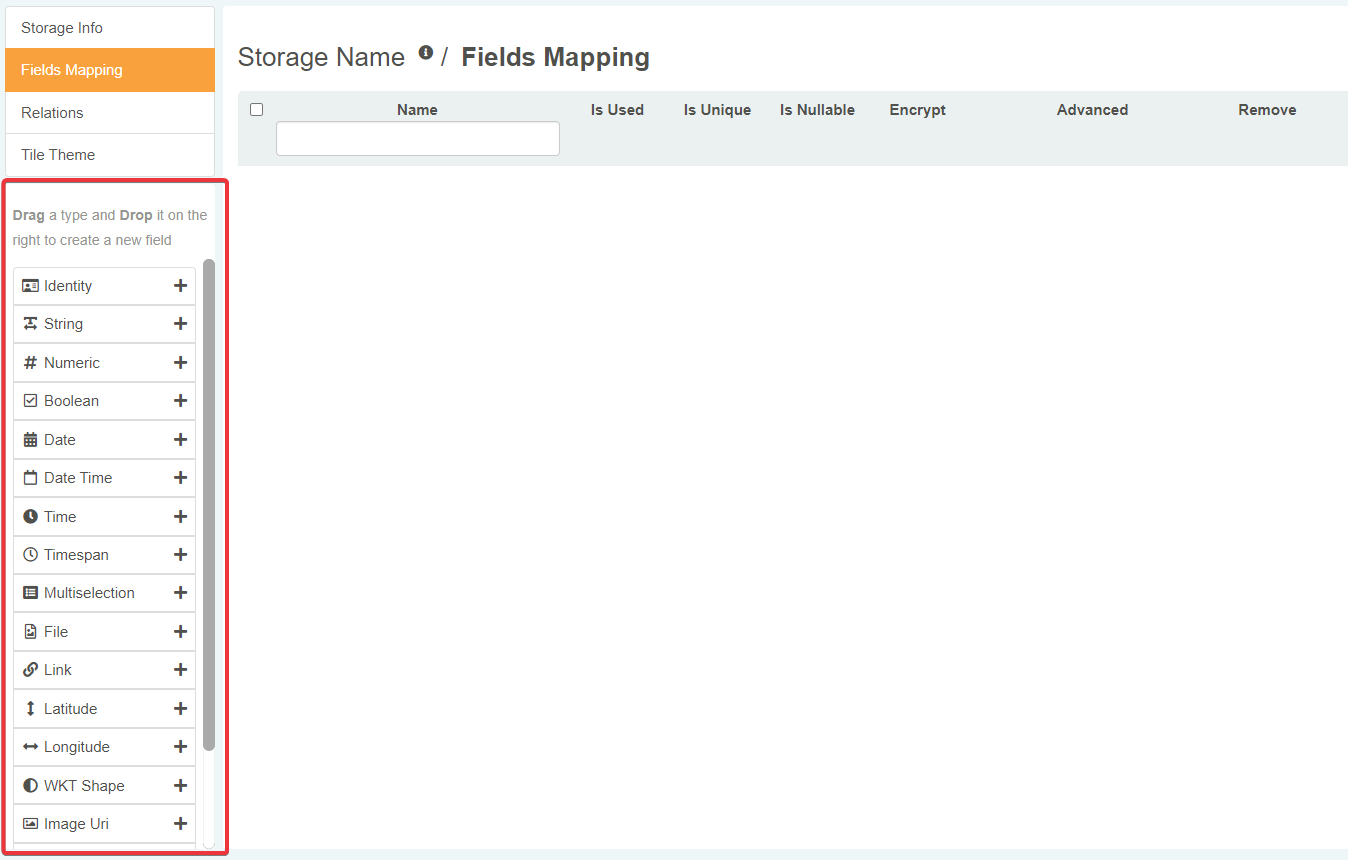
On the field type you want to add to your Storage, click on the icon. The action adds the field of the chosen type to the Storage.
Hint
As alternative, drag & drop the chosen field type at the center of the panel to add it.
Hint
You can change at any time a field's type. Click on the field's icon.
The action opens a drop-down list to choose a new field type.
-
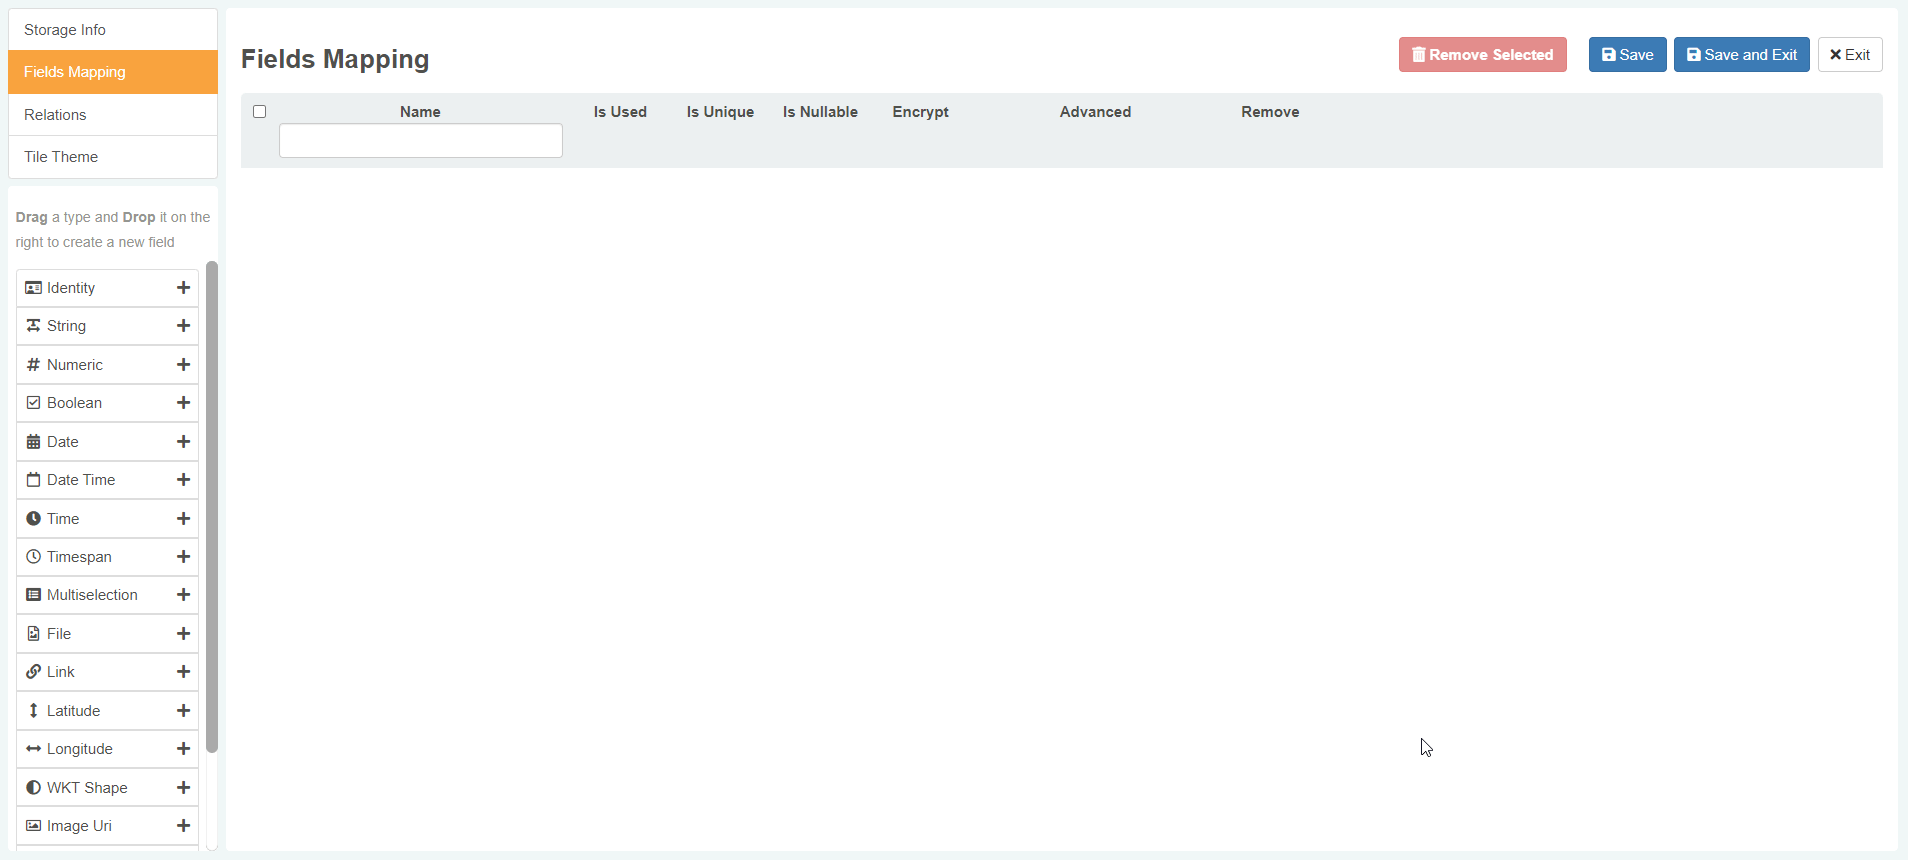
Configure each field's setting according to your needs. Follows an explanation of each column setting:

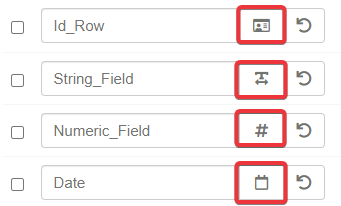
- Name Choose a name for the field. (Click on the icon to revert the label to the previous name if changed before.)
- Is Used: Turn ON the toggle-switch to use the field in the application. If turned OFF, the applications won't employ the field. By default the option is ON when you add the field.
- Is Unique: Turn ON the toggle-switch to make this field's values unique. If enabled, two or more field's cells can't have the same value on the table. By Default, the option is turned OFF.
- Is Nullable: Turn ON to make a field nullable; i.e. the field can remain empty. Turn OFF this option to make the field mandatory to be filled.
- Encrypt: Turn ON this option to encrypt the field's data. By default, the option is turned OFF.
- Advanced: The option changes according to the field type.
- If the field is an Identity field, Advanced displays the Recalculate button. Recalculate button triggers the recalculation of the values of all the rows' unique Ids.
- If the field is a String, Advanced displays a textbox to type an upper limit for the character's numbers (e.g. strings up to 50 or 100 characters). Settings helps saving space on the database.
- If the No Limit option is flagged, you won't be able to search the field's content within applications. You can search within applications only String fields having a character limit.
- If the field is a Multiselection, the Advanced displays a drop-down list from which you can select another Storage. Users will be able to choose and record a list of values from the selected Storage.
Hint
Click on the icon to delete the corresponding field from the Storage.
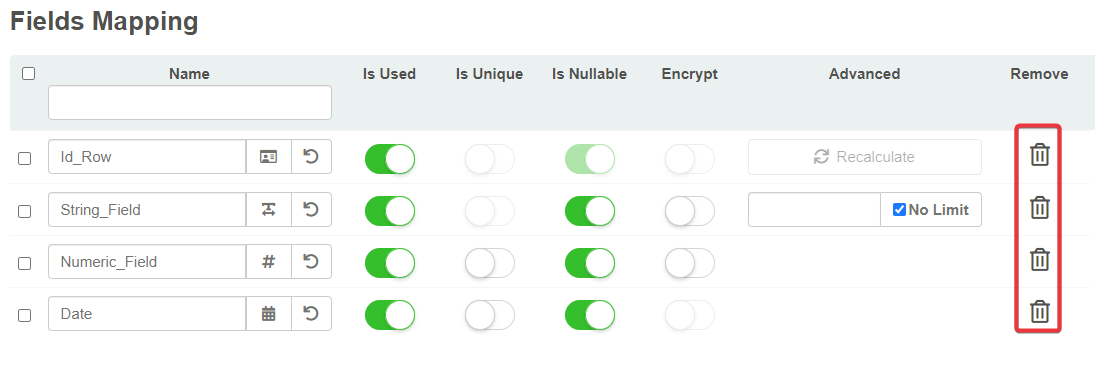
As alternative:
- Select the fields to delete.
- Click on the Remove Selected in the upper-right corner of the sub-panel.
The action removes the selected fields.
Danger
This guide assumes that you are adding or editing fields during the creation. There might be the case where your are editing an existing Storage. Be careful about deleting fields. Your choice might affect how the applications built on the Storage work.
Deleting a field in an existing Storage can cause data loss since the action also removes all the field's data.
-
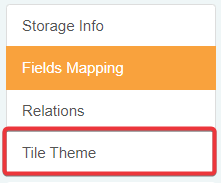
Click on the Tile Theme tab in the Storage Editor's sidebar. The action leads to the sub-panel where you can customize the Storage's appearance in the Home.
-
This step is optional. In Tile Theme, customize the appearance option you prefer.
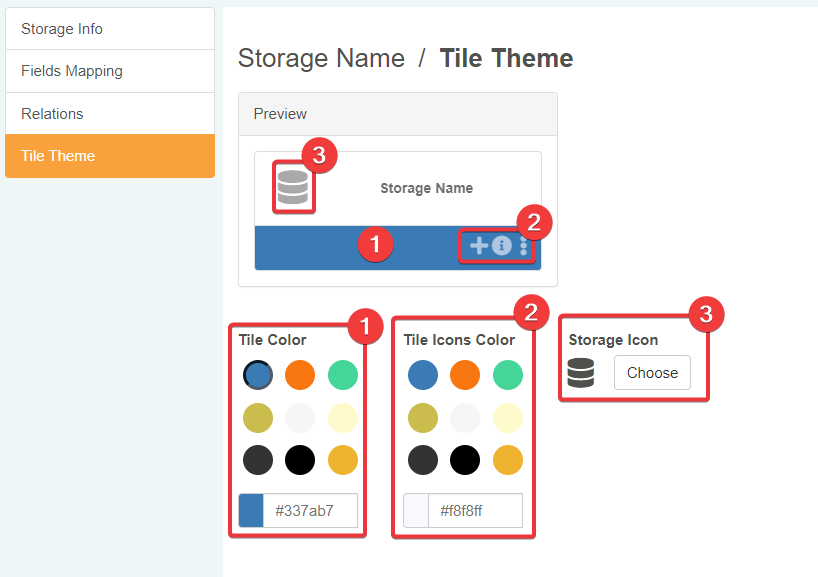
- (1) Tile Color Changes the color of the bottom of the tile.
- (2) Tile Icons Color Changes the colors of the actions' icons.
- (3) Storage Icon Opens a menu to choose a icon for the Storage.
Attention
The editor enables the customization only when you have chosen a Storage name.
-
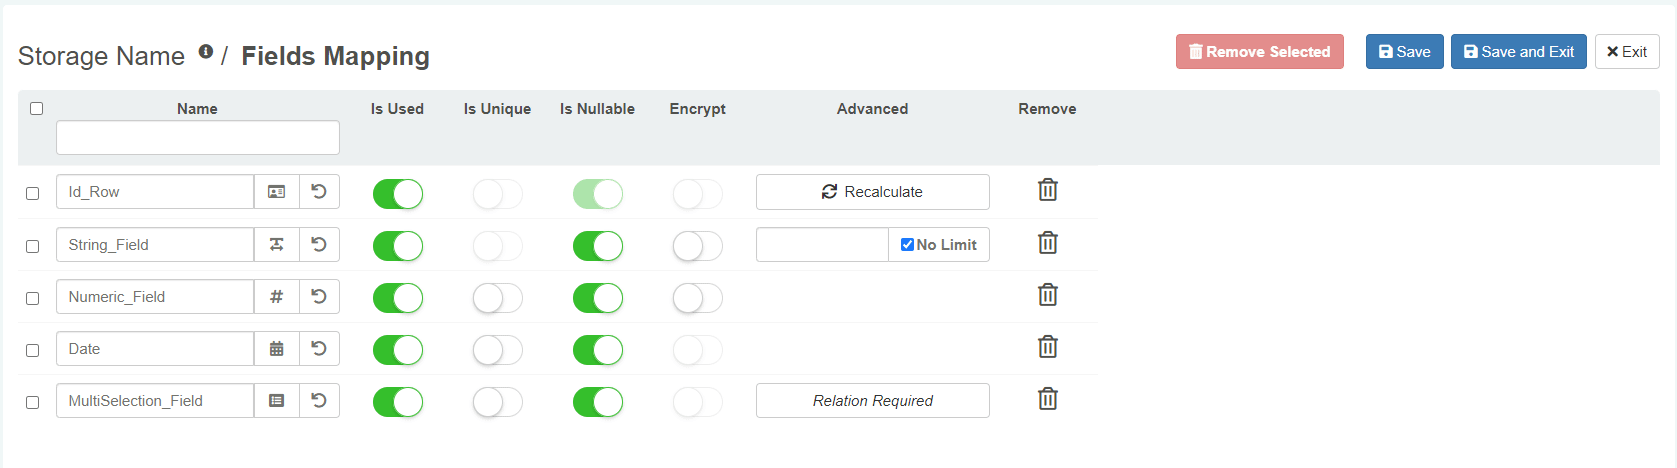
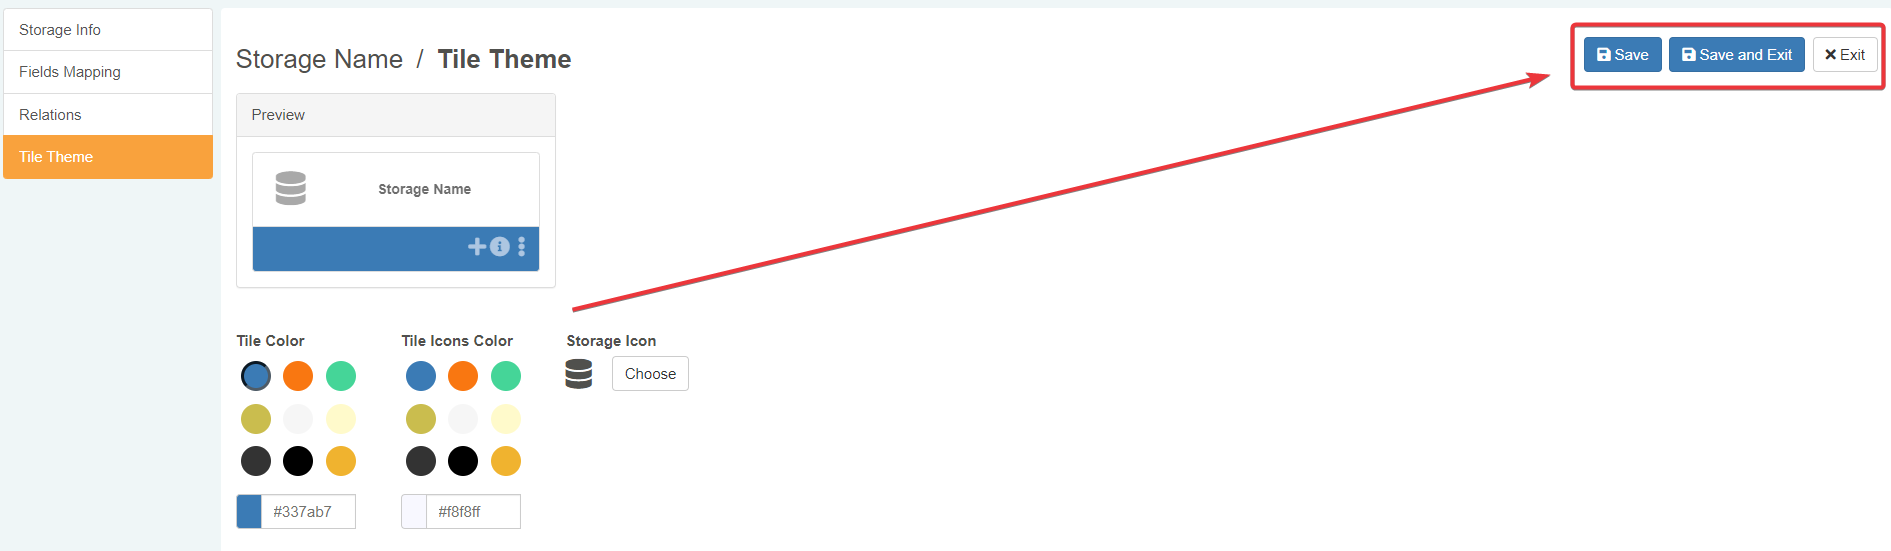
In the upper right corner of the Storage Editor:
- click on Save to save the changes without leaving the Storage Editor.
- click on Save and Exit to save the changes and leave the Storage Editor
- click on Exit to abort any change.
The Storage will appear in the Home in the Storages panel.
Note
If you want to edit an existing Storage, click again on the Storage in the Storages panel in Home to open the Storage Editor and make changes.
Success
You have created an empty Storage from scratch.
How to Build Relations between Storages
Learn how to create a Relation between two Storages's data.
If you want to create a Multiselection, a Lookup drop-down lists or Details, establish a Relation between the Storage you are working and the data in another Storage.
Note
Multiselection fields require a Relation. But configuring a Multiselection field in Fields Mapping creates automatically a Relation without further action. Multiselection field's Relation appear automatically in the Relations sub-panel.
You must establish a Relation manually for Lookup drop-down lists and Details before you can configure them in Design Mode. (See How to Configure a Table Cell as a Drop-Down List and How to Create a Detail and Attach It to a Row for more information about Lookups and Details creation.)
Adding a Relation
Follow the steps below to establish a Relation between a current Storage's field and a field on another Storage.
-
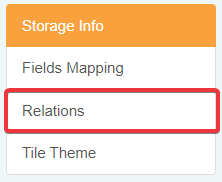
In the Storage Editor, click on the Relations tab in the left sidebar.
The action leads to the Relations sub-panel.
-
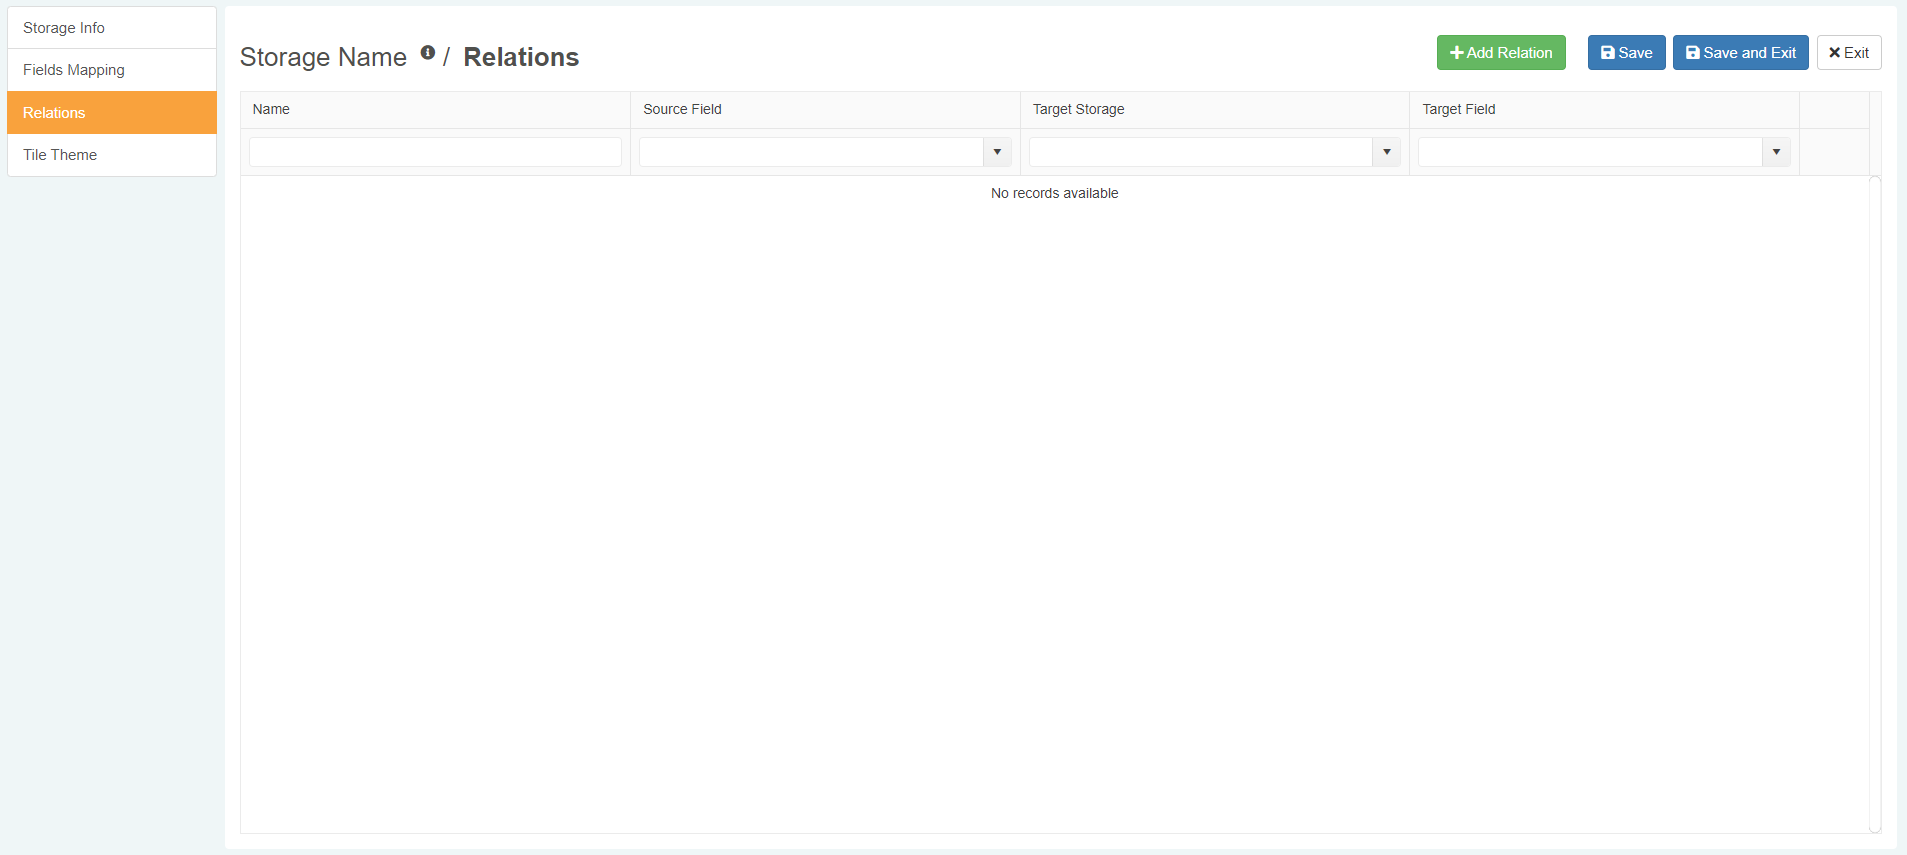
Click on Add Relation in the Relation sub-panel to add a new Relation.

-
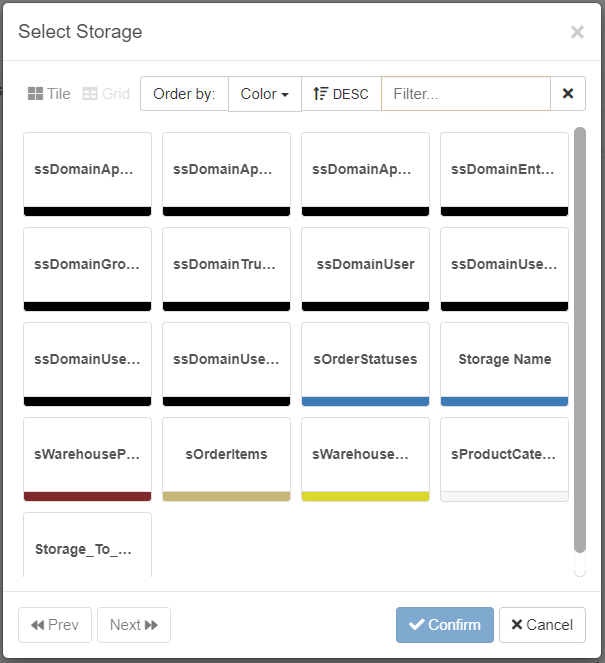
Choose the Storage that you want to relate to the current Storage from the list.
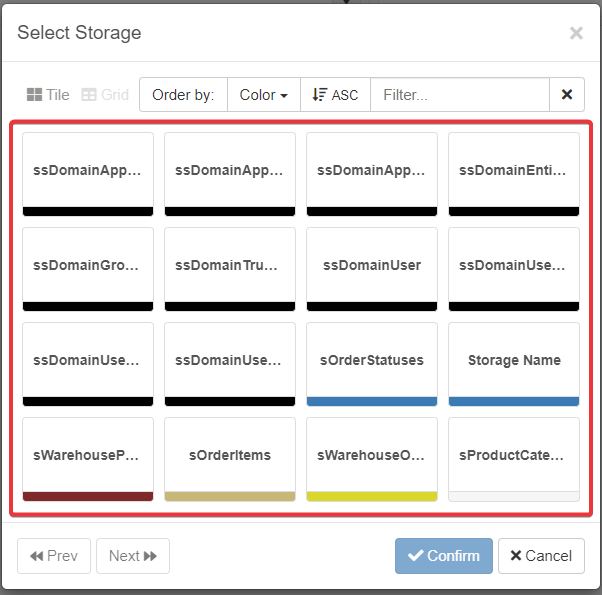
You can view the list both as Tile and as Grid. Also, you can sort the results in Ascending or Descending order according to the preferred criteria.
-
After having chosen the Storage, you must choose the fields to relate.
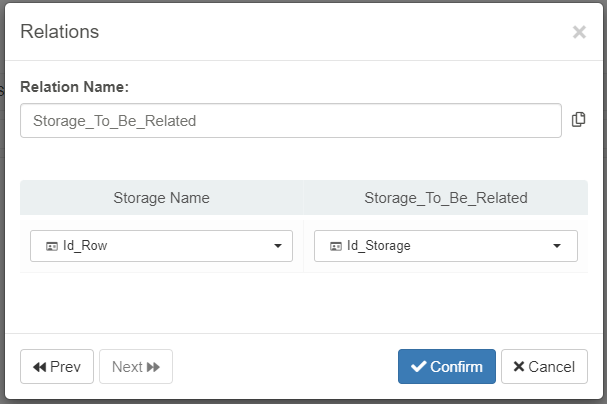
The window displays the current Storage's field lists on the left. You find the other Storage to be related field list on the right.
A Relation has two components:
- A source field that points to entries of the other storage.
- A target field that contains the values that the source field points to.
Choose the a name (1), the (2) source field on the left, and (3) the target field on the right.
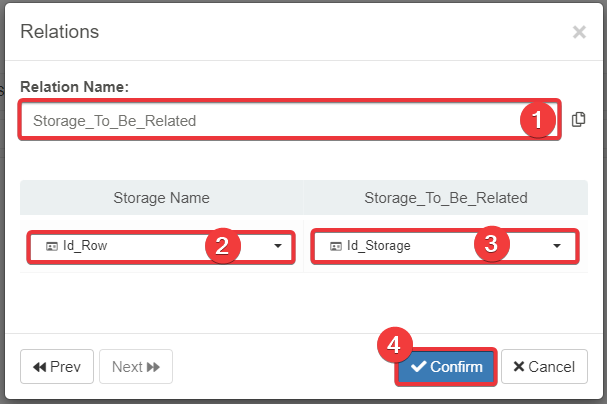
Note
By default, the Relation has the target source's Storage name as label. You can change it at any time.
Hint
You could have a large number of Relations in a Storage. Add to the Name a suffix like
..._Detailor..._Lookupaccording to the role the Relation covers helps to distinguish them. This avoids you opening a Relation to understand what it is. -
Click on the Confirm button to complete the configuration (or Cancel to abort).
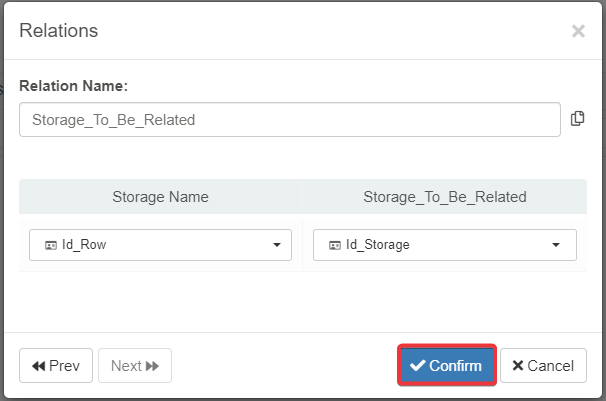
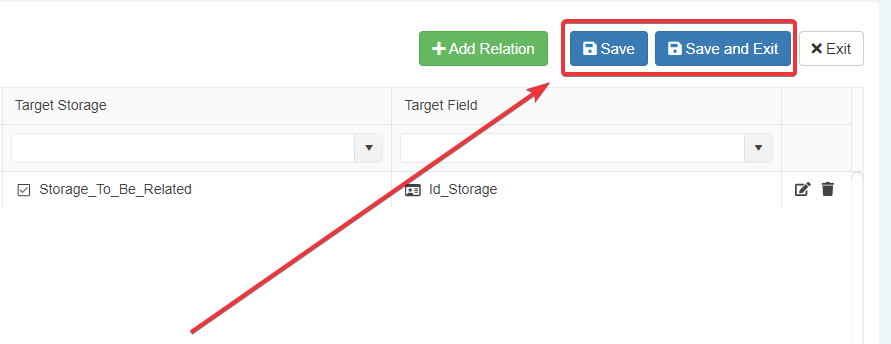
The relation will appear on the table in the Relations sub-panel.

-
If you have done with the rest of the Storage's settings, click on Save Save and Exit to save the changes.
Note
You can establish multiple Relations on the same fields.
Hint
In the Relations panel's table, you can edit or remove a Relation:
- Click on the icon to open again the Relation and change its settings.
- Click on the icon to delete the Relation.
![]()
Danger
When you edit or remove a Relation, verify what applications and Storages the actions involves. Your choice might affect a user's workflow or certain applications' features like Lookup drop-down list or Detail tables.
If you change or delete a Relation without think carefully:
- You could lose the connection between Detail rows and their Master row.
- You could remove a Detail table from an application accidentally.
- Lookup drop-down lists cells could display just the choices' Numeric Ids instead of the choice's label with colors and icons.
Success
You have configured a Relation between Storages.
Read below a summary of how to configure the relations for Lookup drop-down lists and Details.
Relations for Lookup Drop-down Lists
If you want to establish a Relation between Storages for a Lookup, you need a Numeric as source field on the current Storage and an Identity field as target field of the Storage containing the options to choose from.
| Source Field | Target Field |
|---|---|
| Numeric | Identity |
The Source Field records the Identity field's value on the Target Field. If configured as a Lookup drop-down list, the Source Field will record the Id of one of the options from a drop-down list.
![]()
See How to Configure a Table Cell as a Drop-Down List to learn how to display a Relation in an application as a Lookup.
Relations for Details
If you want to establish a Relation between two Storages for a Detail, you need an Identity as source field on the current Storage and an Numeric field as target field on the Storage that will be the Detail table.
| Source Field | Target Field |
|---|---|
| Identity | Numeric |
Hint
Relations for Details are the opposite of those for Lookups: they invert Numeric and Identity fields.
The Source Field injects the Identity field's value in the Detail Storage's Numeric field. The Relation labels the rows in the Storage to be employed as Detail table with the Ids of the Master rows.
If configured as a Detail table, the application displays the Relation as a separate table with secondary data attached to the Master row.
![]()
See How to Create a Detail and Attach It to a Row to learn how to display a Relation in an application as a Detail.