Add a Shortcut to Edit Data in Another Application from the Table - AppLinks
Required Permissions
This section requires the Application Designer permission from your Domain's administrator.
Check What are the Design Tasks? to learn more about permissions to work with Design Mode and other tools.
Summary
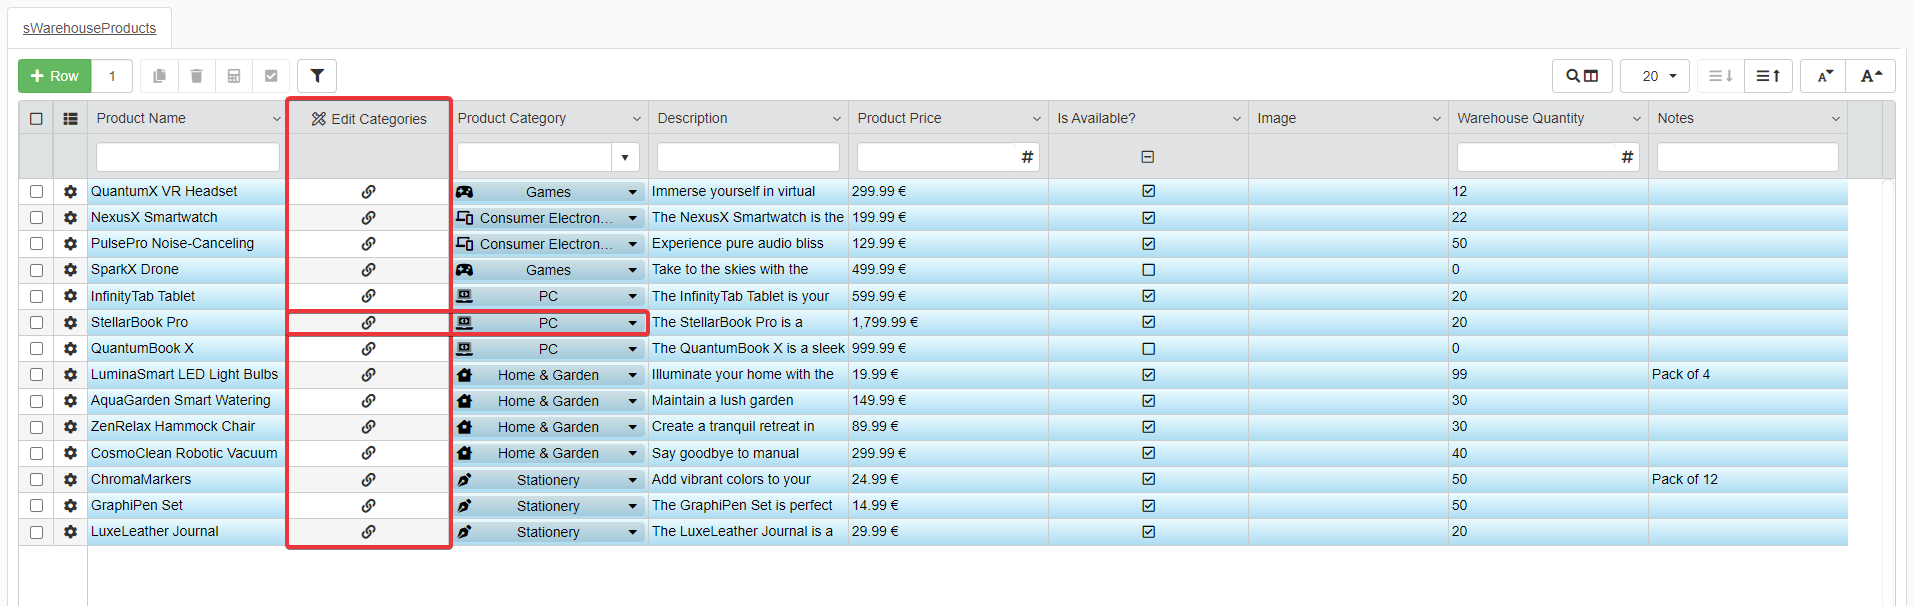
You can add to an application's table a column button opening another application in a window and edit data.
These kind of shortcuts are called AppLinks.
What are AppLinks?
Info
AppLinks are a type of Logical Columns. This section focuses only on AppLink Logical Column types.
You can find more general info on Logical Columns in the Configure Calculations Without the Necessity of Storage: Logical Columns section.
Don't worry: this section contains everything you must know about AppLinks without the need to read the document above.
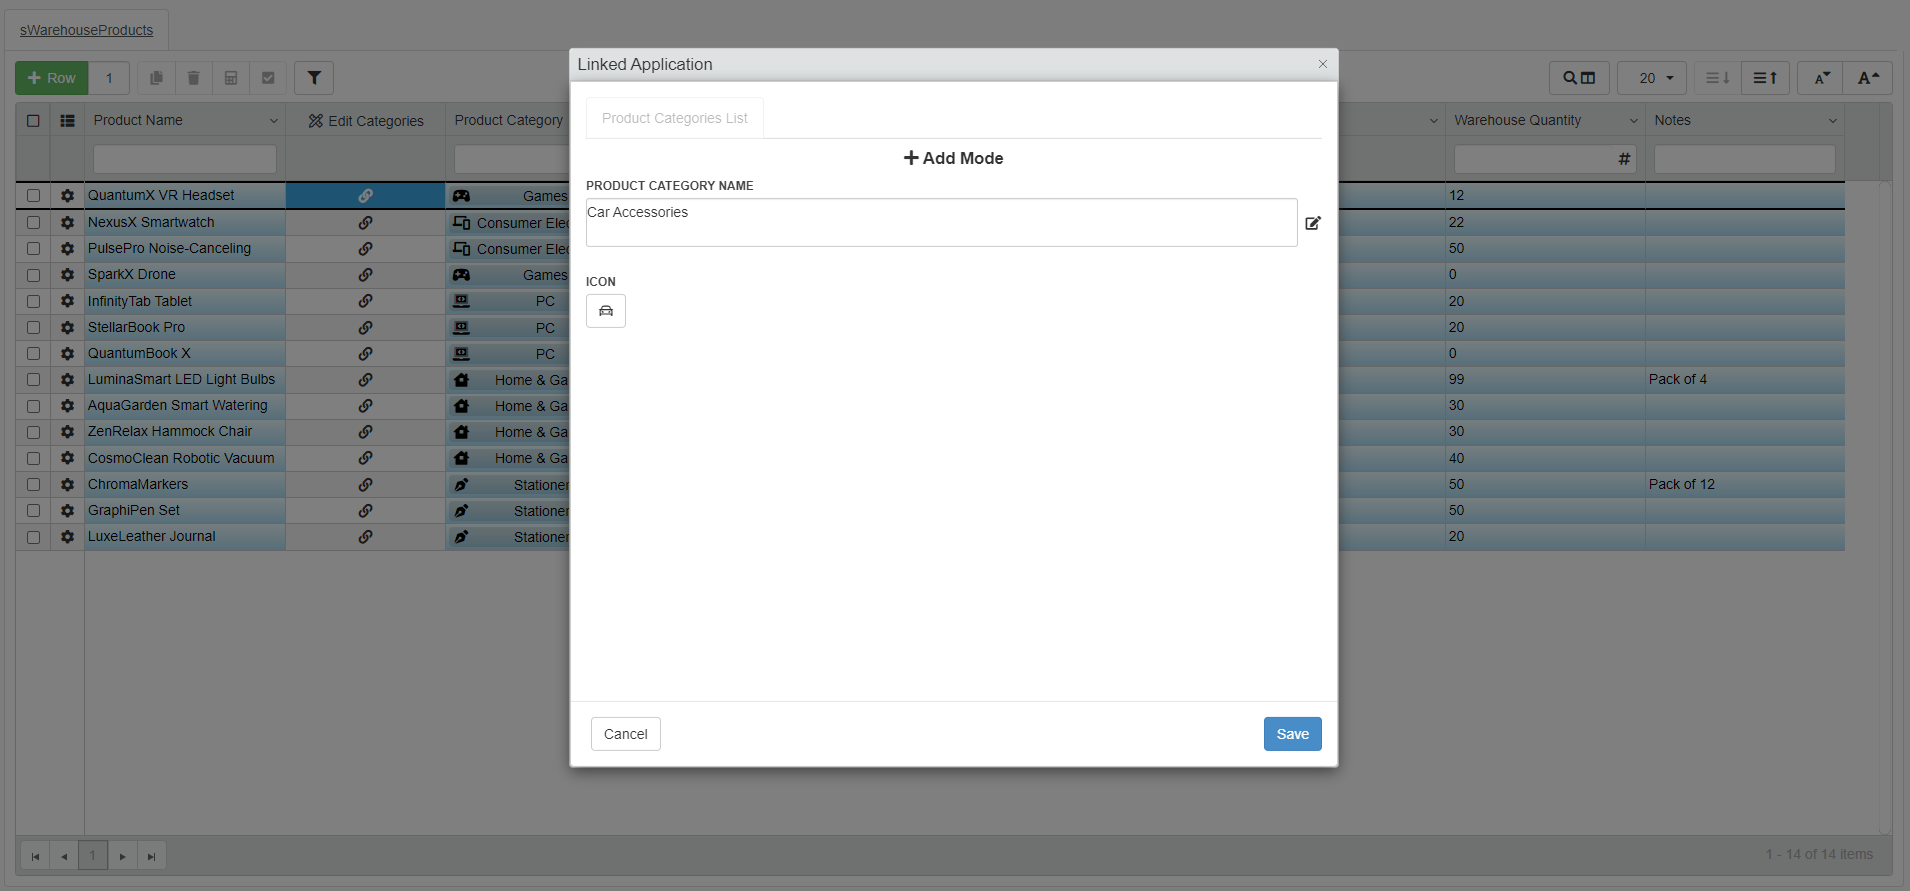
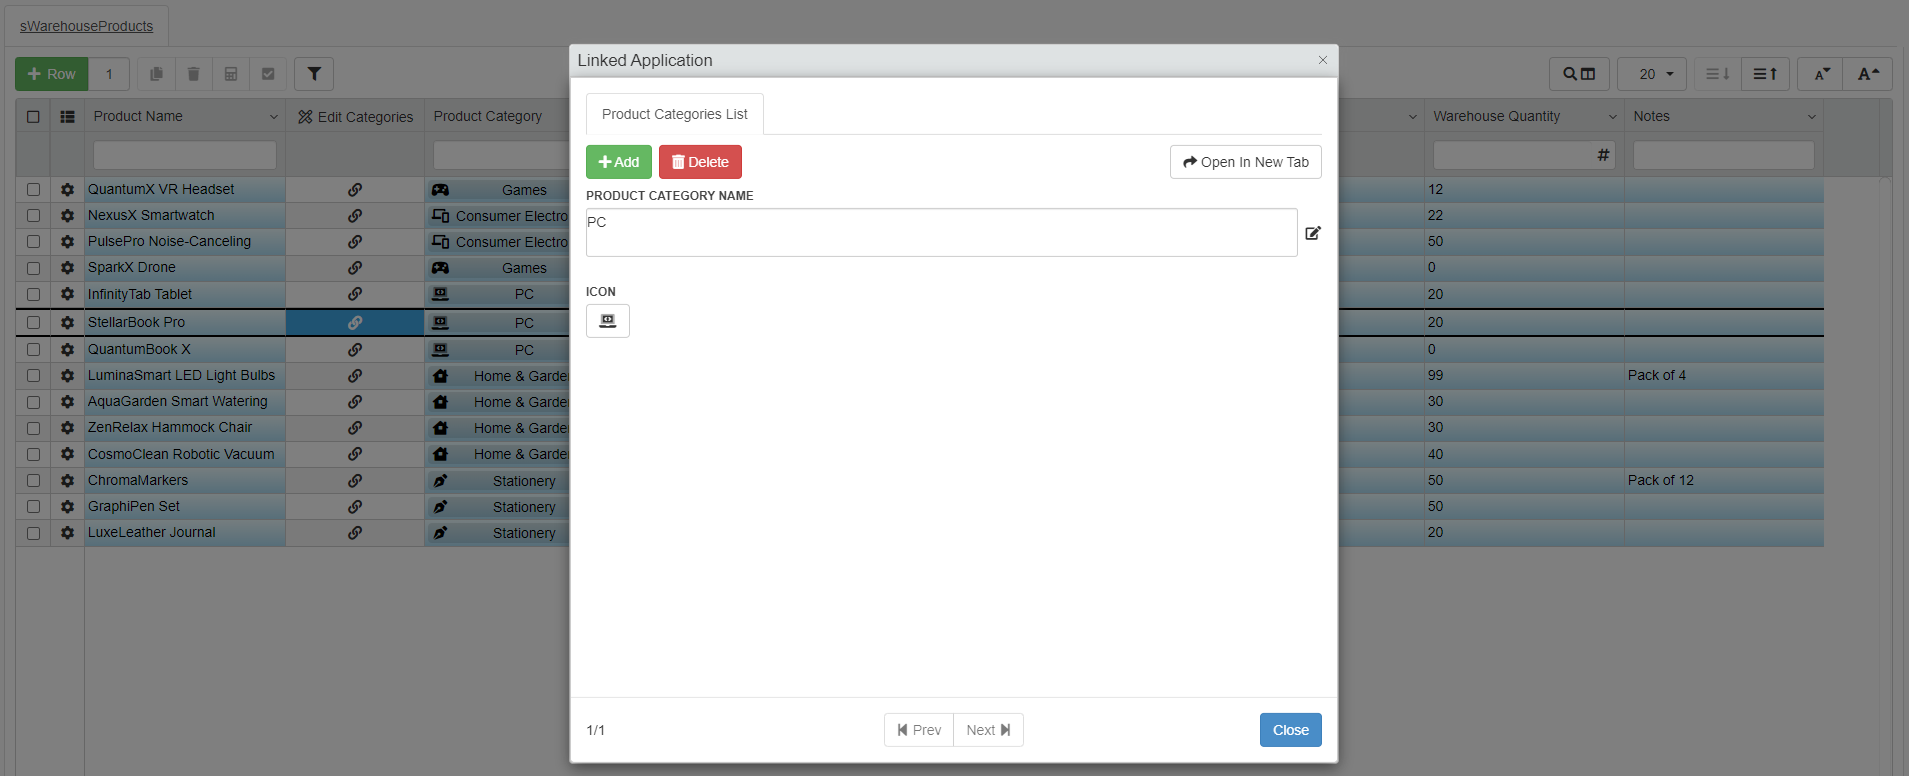
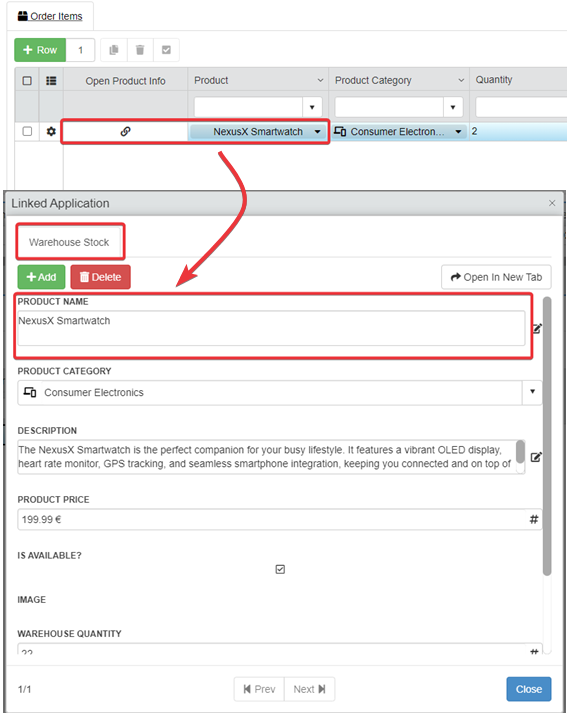
AppLinks are columns enabling the Users to open an external application to edit data inside a window without leaving the current application.
Each AppLink's button is associated to each table's row and opens data connected to that row.
Example
A shortcut in an application to catalogue products to add, edit or remove Product Categories.
An AppLink helps when you have to view, insert or edit data related to the current row in an external application.
Example
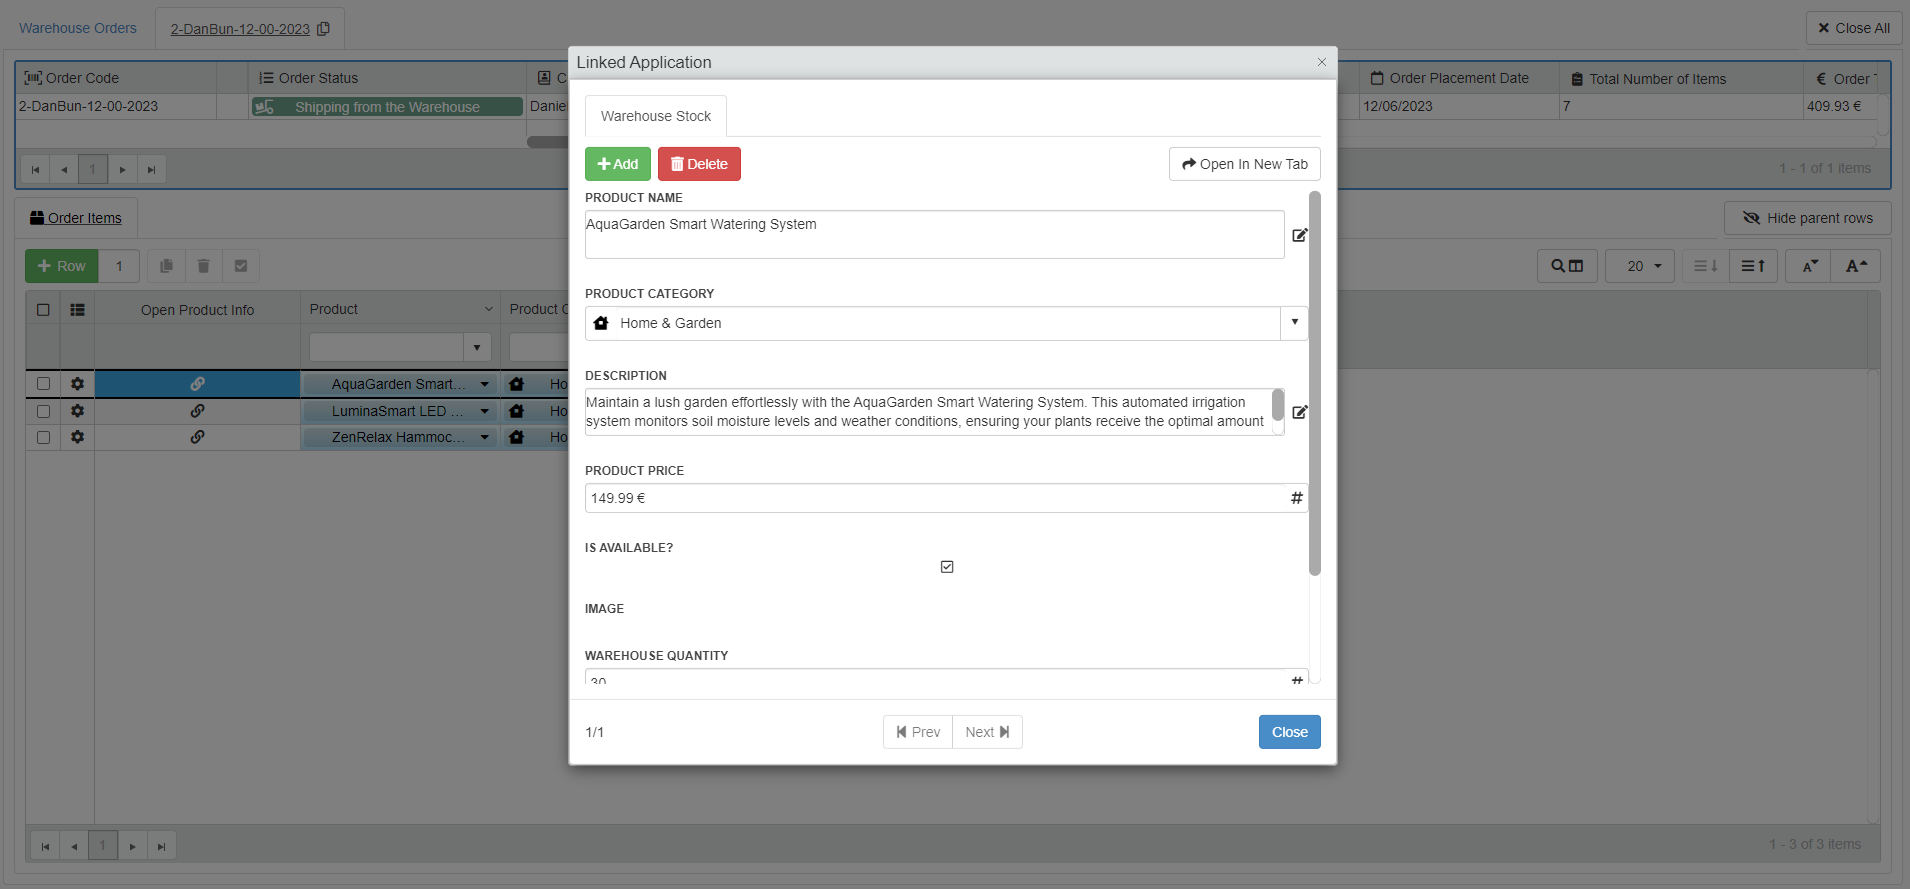
The application Warehouse Orders manages a warehouse's orders and shipments.
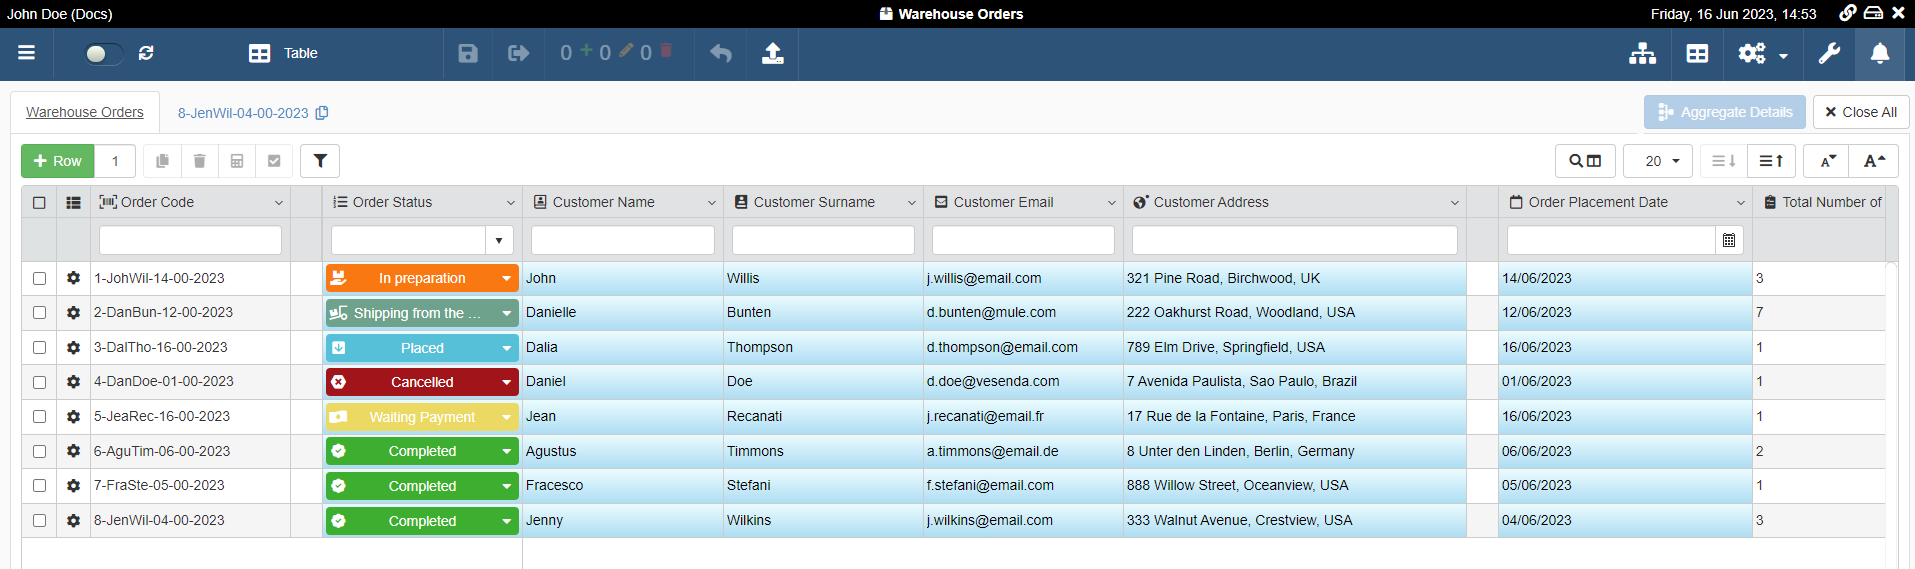
In Warehouse Orders, each Master row is an Order from a Customer. Each Order has a Detail table called Order Items containing the list of purchased items.
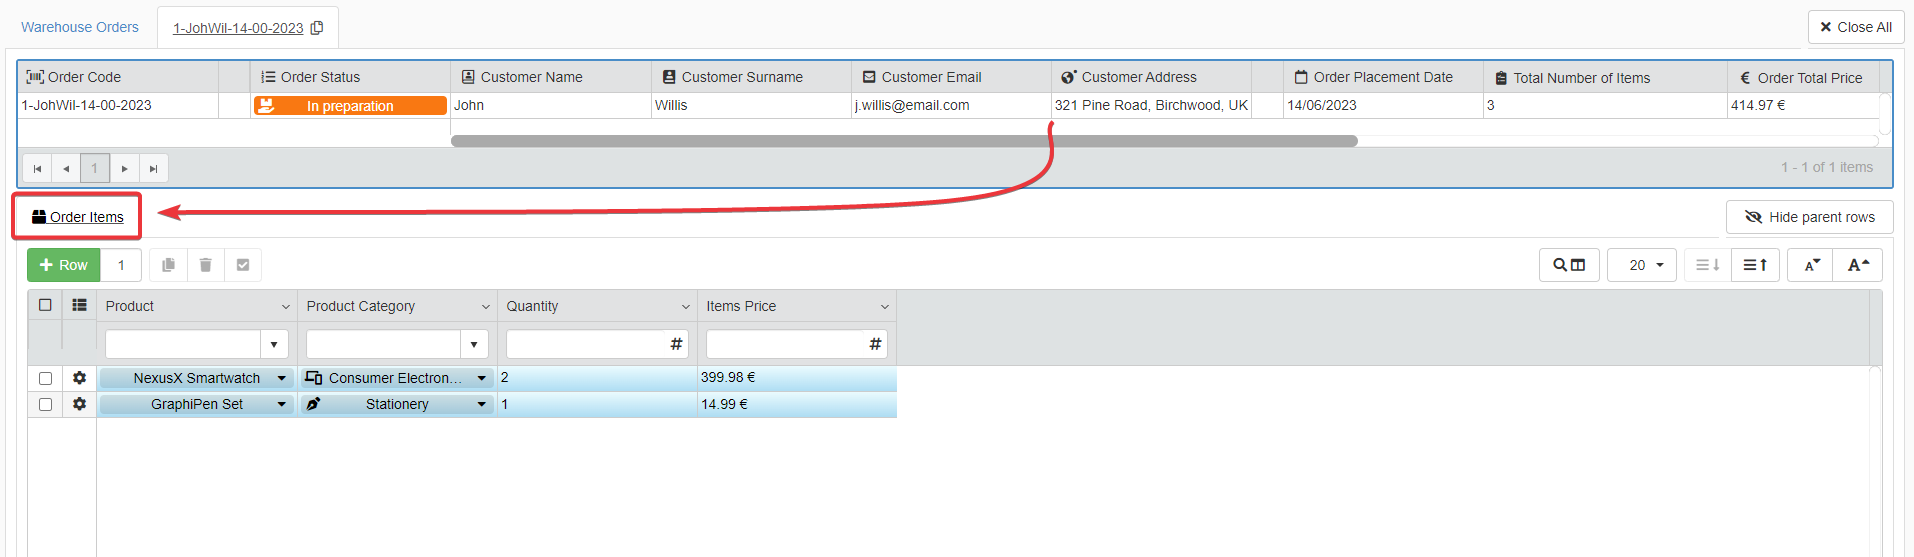
Another application called Warehouse Stock lists the products (and their cost) that you can add to an Order.

The User should change a product's price without leaving the application.
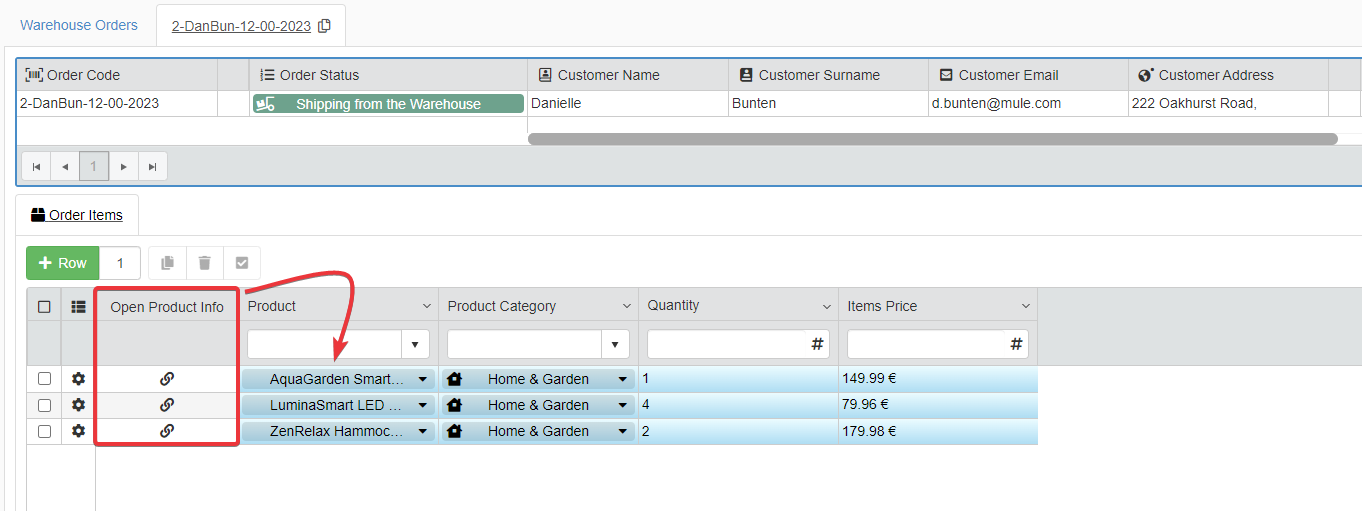
The solution involves an AppLink "Order Product Info" in the Order Items Detail table. The AppLink will open the chosen product's row from Warehouse Stock in a window without leaving Warehouse Orders.
Create and Configure an AppLink
Learn how to create and configure an AppLink.
Note
The process is the same for both the Master table and the Detail tables. Follow the steps below either in the Master sub-panel or in the Detail subpanel according to your case.
See How to Customize an Application’s Table? chapter and What are Details? section for more information about Master and Detail panels.
The explanation below discusses the case of Warehouse Orders to explain AppLinks.
Follow the steps below to create an AppLink in any table (either Master or Detail).
-
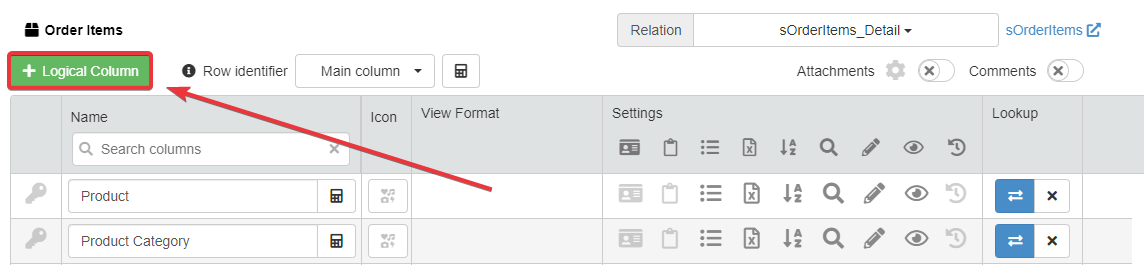
In the table you want to add the AppLink, click on the Add Logical Column button. The action opens the Add Logical Column window. You find Add Logical Column above the table's configuration in both the Master sub-panel and the Detail table sub-panels.
-
In the Add Logical Column window.
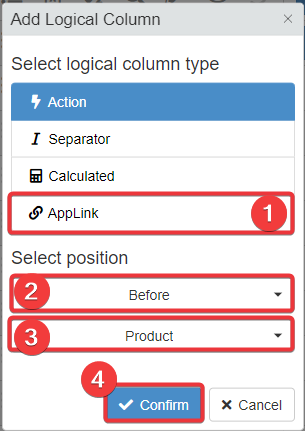
- (1) Choose AppLink as Logical Column type.
- (2) Choose to position the AppLink column Before\After a specified table field.
- (3) Choose the field that will be before or after the AppLink column in the table.
- (4) Click on Confirm to save the choice. (If you want to abort the AppLink's configuration, click on Cancel instead.)
-
After the AppLink creation, you will be moved to the Logical panel. If you want, type a name for the AppLink's header in the Name column's textbox.
optional
-
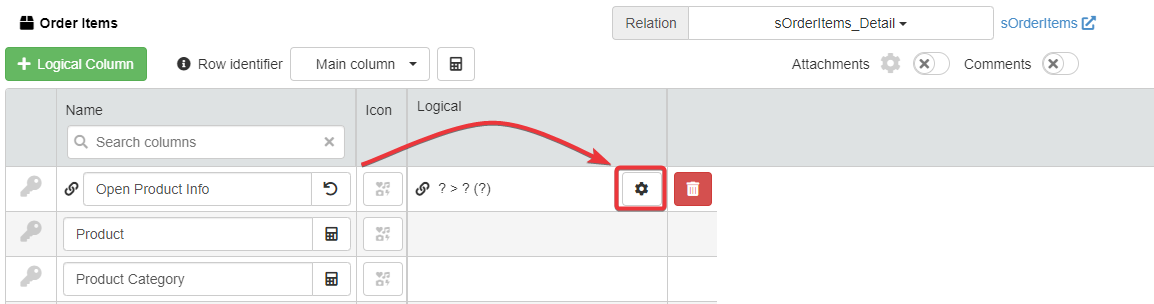
In the panel, click on the icon under the Logical column to configure the AppLink. The action opens the AppLink window.
-
In the AppLink window:
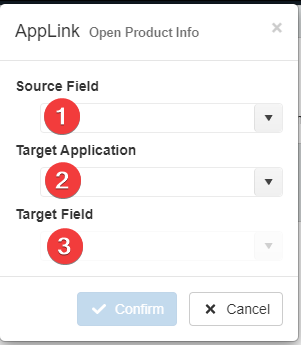
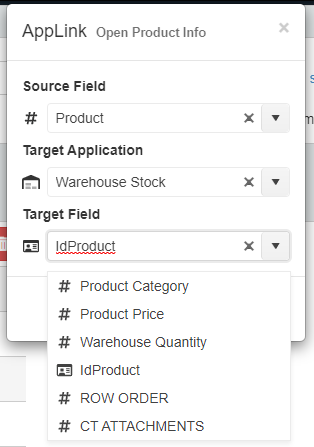
- (1) Choose a Source Field from the drop-down list. The field column which values the AppLink will filter the rows in the Target Application.
- (2) Choose a Target Application from the drop-down list. The external application containing the data that you want to access from the current application's table.
- (3) Choose a Target Field from the drop-down list. The AppLink filters the Target Application Rows through the Target Field column. The AppLink filters the Target Field by the value of the Source Field
Example
In Warehouse Orders, users want to edit a Product's info from the Order Items Detail table without leaving the application. You need an AppLink called Order Product Info. To build an AppLink, you need to define a Source Field, a Target Application, and a Target Field.
The AppLink Order Product Info's configuration is the following:
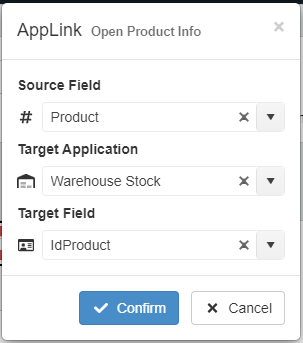
- Product is the Source Field. When you open the AppLink from a row, the AppLink filters the Target Application by the row's value of the Product field.
- Warehouse Stock is the Target Application: the application containing the Products' information. Each Product is a row from Warehouse Stock.
- The Identity field IdProduct is the Target Field. The AppLink filters the rows through IdProduct by the value of Product and retrieves all the result.
In this example, the result is only one: there is only one Product having that Id. The User can edit all its info from the AppLink's window.
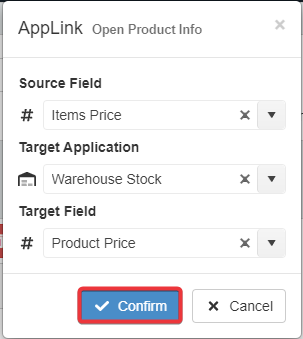
-
Click on Confirm to save the AppLink's configuration. (If you want to abort the AppLink's configuration, click on Cancel instead.)
-
Click on the Save button () in the top-left corner of the Design Mode to save all the changes.
Success
You have configured the AppLink.
How to Edit an AppLink
Learn how to edit an AppLink's settings.
Note
The process is the same for both the Master table and the Detail tables. Follow the steps below either in the Master sub-panel or in the Detail subpanel according to your case.
See How to Customize an Application’s Table? chapter and What are Details? section for more information about Master and Detail panels.
At any time, you can edit an AppLink's configuration from the Logical panel of your table.
-
From the chosen table (either Master or Detail Table), go to the Logical sub-panel.
-
Logical sub-panel from the Master Table:

-
Logical sub-panel in any Detail's table configuration:

-
-
Click on the icon next to the AppLink's column.

-
Edit the desired settings.
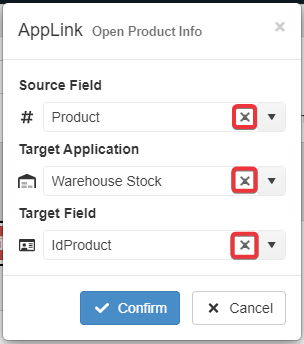
Hint
Click on the icon to clear a drop-down list in the AppLink's configuration.
-
Click on Confirm to save the AppLink's configuration. (If you want to abort the AppLink's changes, click on Cancel instead.)
-
Click on the Save button () in the top-left corner to save all the changes in Design Mode.
Success
You have changed the AppLink's settings.
How to Remove an AppLink
Learn how to remove an AppLink from a table.
Note
The process is the same for both the Master table and the Detail tables. Follow the steps below either in the Master sub-panel or in the Detail subpanel according to your case.
See How to Customize an Application’s Table? chapter and What are Details? section for more information about Master and Detail panels.
At any time, you can delete an AppLink column from the Logical panel of your Master or Detail table.
-
From the chosen table (either Master or Detail Table), go to the Logical sub-panel.
-
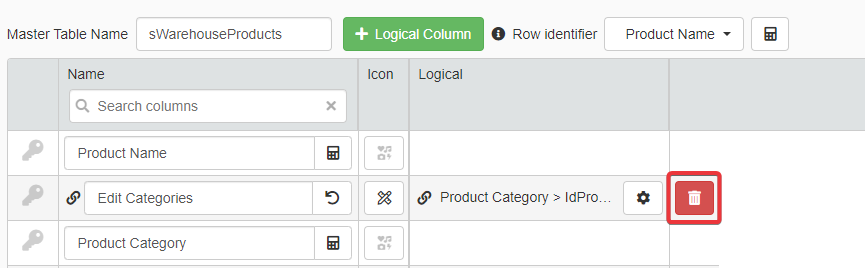
Logical Panel from the Master Table:
-
Logical Panel in a Detail's table configuration:
-
-
Click on the Remove Logical Column button () next to the AppLink's column.
-
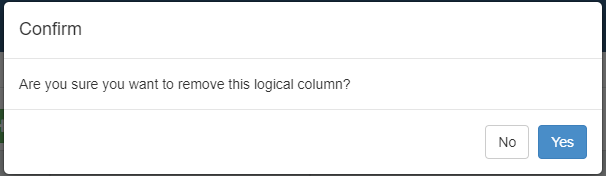
A window will ask for confirmation. Click Yes to delete the AppLink. (Click No if you have changed your mind.)
-
Click on the Save button () in the top-left corner to save all the changes in Design Mode.
Success
You have deleted the AppLink.