Configure Calculations Without the Necessity of Storage - Logical Columns
Required Permissions
This section requires the Application Designer permission from your Domain's administrator.
Check What are the Design Tasks? to learn more about permissions to work with Design Mode and other tools.
Summary
Learn about what Logical Columns are and how you can create, configure or delete one in Design Mode.
What are the Logical Columns?
eLegere applications store data in Storages organized as tables. Each column stands for a field on the Storage recording certain information. (See Define a Source to Store the Application’s Data: Storages for more information about the Storages.)
In some cases:
- There are data that don't require a column on the Storage.
- Users need a column containing a shortcut to speed up certain actions on the table.
Application can calculate on the fly these data at their launch or display a button to run an action through Logical Columns.
Logical Columns are table columns that:
- Don't correspond to a field on the Storage.
- Calculate in real time information that you don't have to record or execute actions when clicked.
Example
Examples of Logical Columns you might create:
- A column counting the number of items in an order.
- A column calculating the total money spent or earned this month on the bank account.
- A button sending an email reminder related to a row.
- A column linking information to another application.
Types
Logical Columns belongs to different types according to their task in the application.
Here a list of Logical Columns types available and what they do:
| Type | Description |
|---|---|
| Action | The Logical Column display a button executing a Custom Action. |
| Separator | The Logical Column divides in sections the table. |
| Calculated | The Logical Column executes a Formula. |
| AppLink | The Logical Column opens a window to read and edit data in another application. |
When you create a Logical Column, you will have to choose the type before proceeding with its configuration. (See How to Create and Configure a Logical Column to learn how to create and configure each type.)
How to Create and Configure a Logical Column
Note
The procedure is the same for both Master and Detail tables.
For a Detail Table, you find the same interface by going into Details > [Desired Detail table] > Configure.
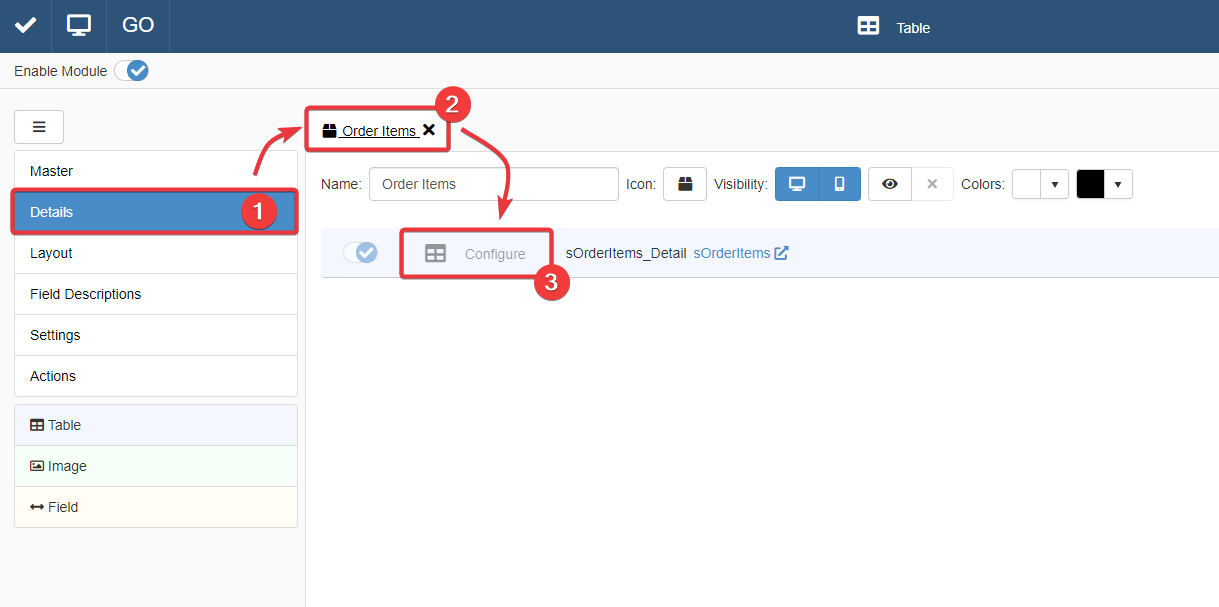
The action leads you to an interface that behaves like that of the Master Table in the Master sub-panel.

For more information about Details, check How to Attach a Table with Further Information to a Row: Detail Tables.
-
In Design Mode, go to the table's settings containing the field column where you want to insert the Logical Column.
For Master Table, you can find the table settings under the Master sub-panel. The Master sub-panel is the first panel opening by default when you access the Design Mode.
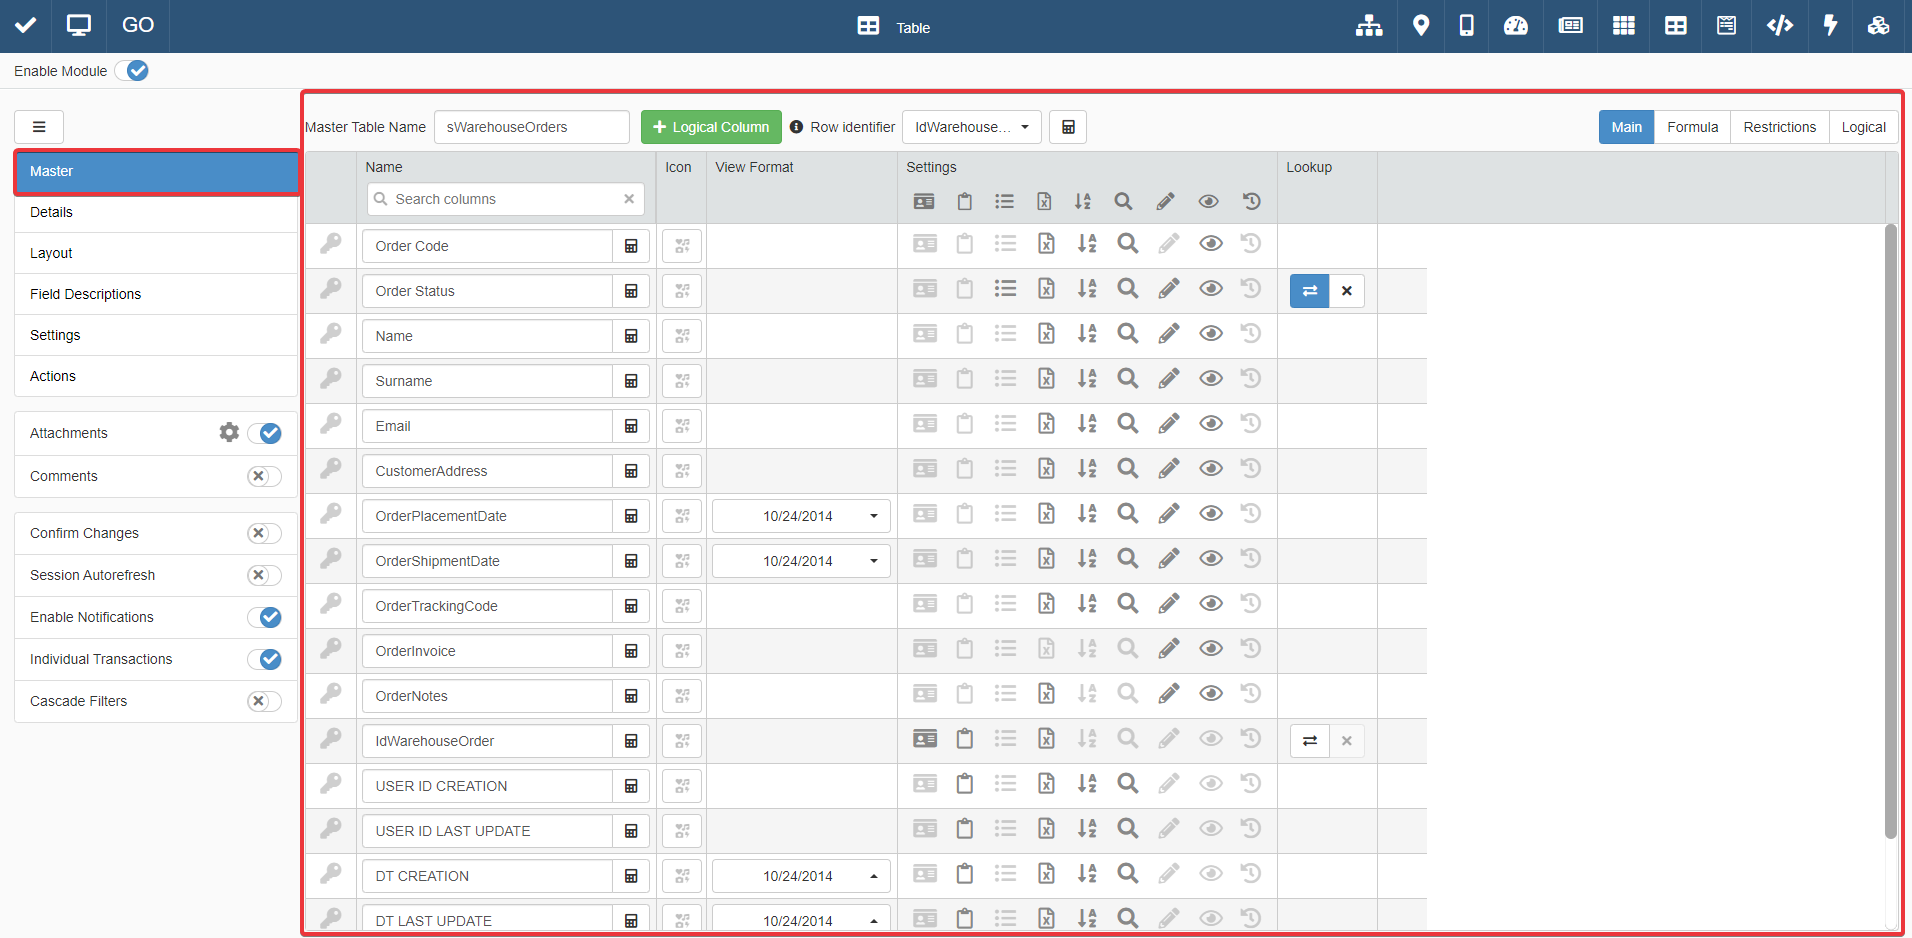
For Detail tables, you must go to the Details sub-panel. Choose one of the Detail tables and click on Configure.
-
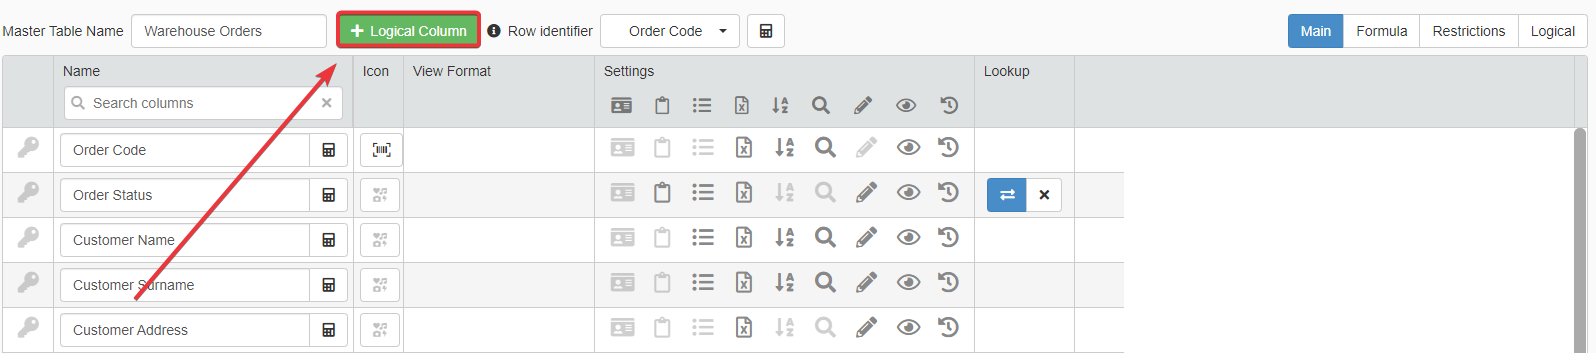
Click on the Logical Column button above the table settings. The action creates the Logical Column and opens the Add Logical Column window for the configuration.
-
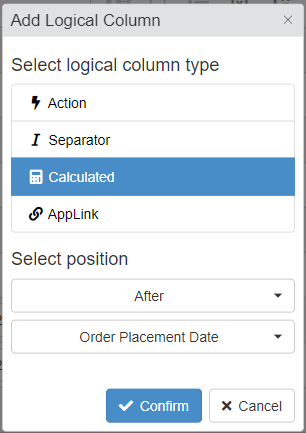
In the Add Logical Column window:
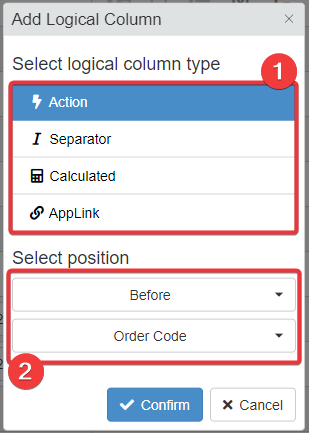
- (1) Choose the column's type.
- (2) Choose from the drop-down lists where to insert the Logical Column before or after a specific table's column.
Click on Confirm button to save the configuration. (Click Cancel if you want to abort the Logical Column's creation.) If you confirm, you will land at the Logical table settings' sub-panel.

-
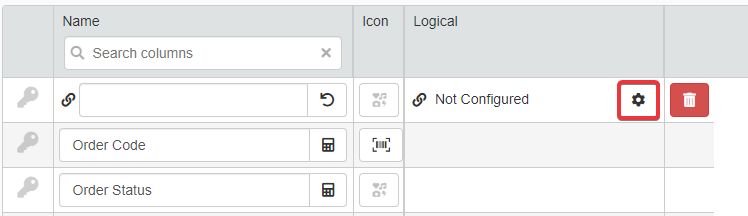
This step changes according to the Logical Column type chosen at step 3. From the Logical table setting's sub-panel:
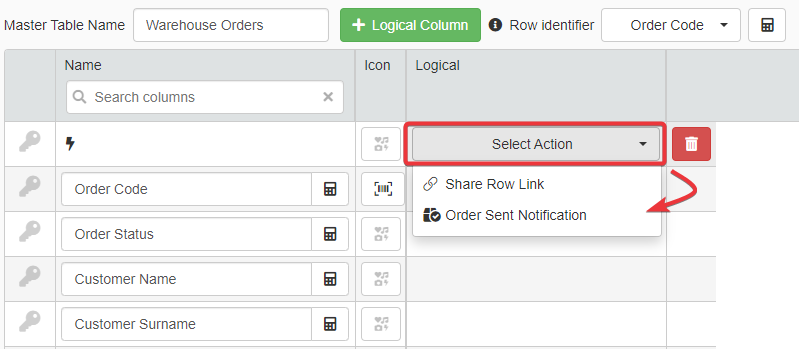
-
If you have chosen the Action type, click on the drop-down list and select the Custom Action to associate to the Logical Column. The icon on the Logical Column's cells will display the selected Custom Action's icon.
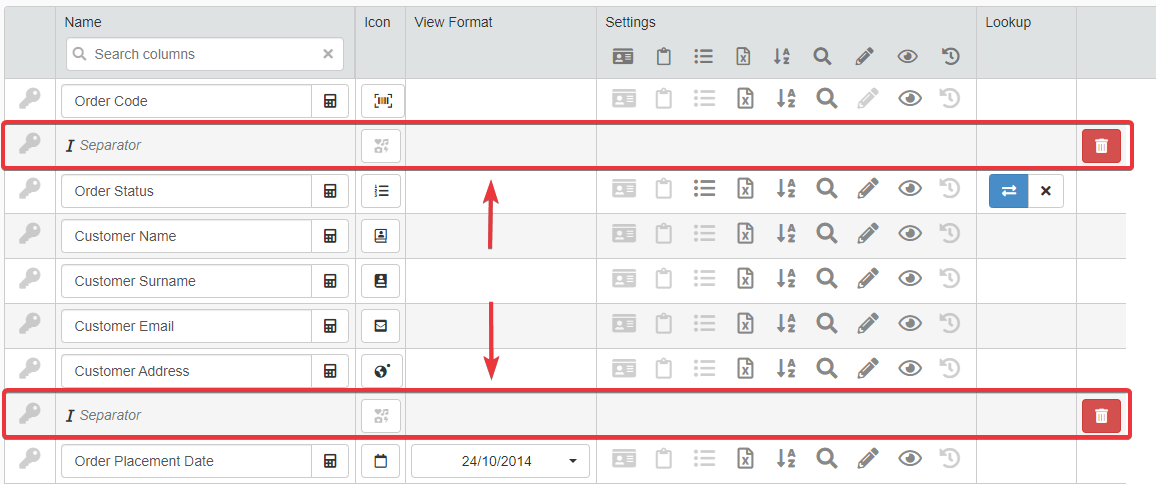
-
If you have chosen Separator type, no further action is required. The separator divides the table in the position chosen at step 3.
-
If you have chosen the Calculated type:
- (1) Choose a data type from the drop-down list. (e.g. String, Numeric, Boolean, and so on).
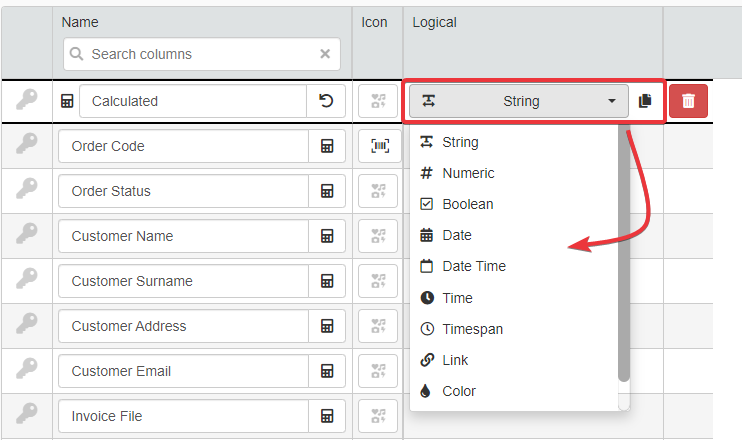
- (2) Configure the field as any other Calculated Field. See How to Calculate Values Automatically to learn how to configure a Calculated Field.

-
If you have chosen the AppLink type, choose what application to link by clicking on the icon. Follow the instructions at the Add a Shortcut to Edit Data in Another Application from the Table: AppLinks section to configure the AppLink Logical Column.
Hint
In some cases, you must refer to a Calculated Logical Column () in a Formula.
In the Logical sub-panel in the table settings, click on the icon.

The action copies the Logical Column's reference (i.e.
$$logicalColumnName) that you can paste in the Formula Editor.
Attention
You cannot employ a Logical Column (i.e.
$$logicalColumnName) in a Row Restriction formula. The Formula Editor won't validate Formulas employing Logical Column references in Row Restrictions.See Restrict Automatically Who Can Add, View, and Edit the Rows for more information about Row Restrictions.
Hint
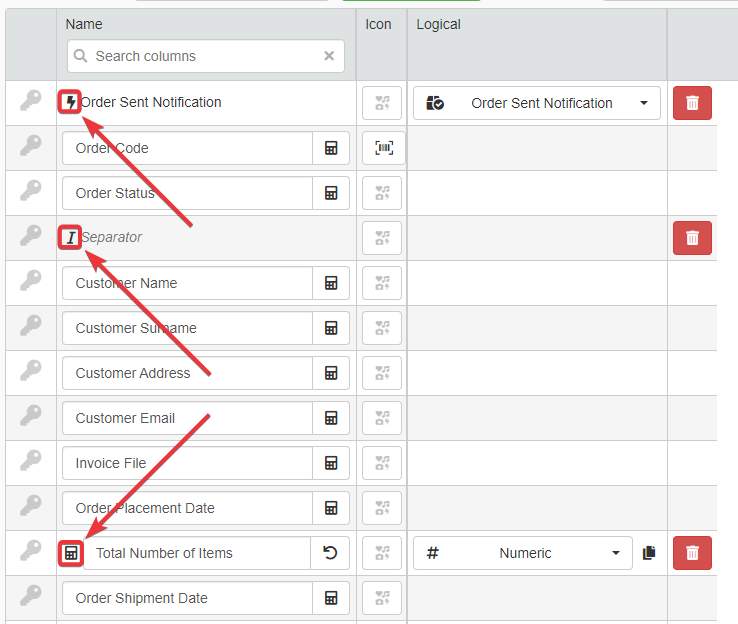
You can verify the Logical Column type by checking the icon next to the Logical Column's textbox under the Name column.
-
-
Type a name for the Logical Column in the textbox under the Name column in the table settings. (Note that you cannot choose a name for Separators Logical Columns.)
-
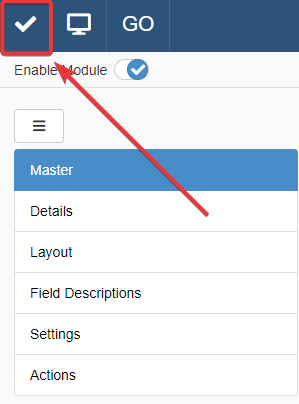
Click on the Save button to save the Logical Column. You find the Save in the upper-left corner of the Design Mode.
Hint
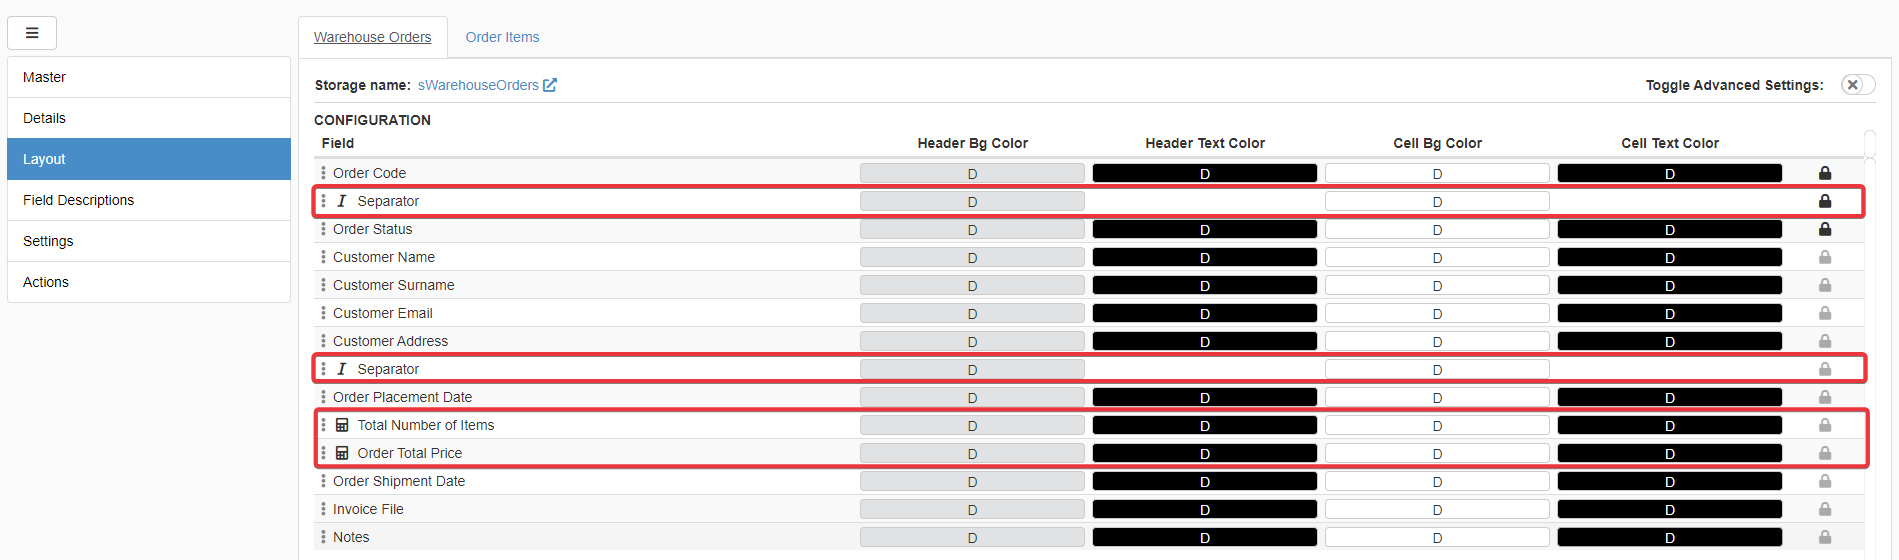
In the panel Layout, you can arrange and customize Logical Columns on a table like any other field column.
Example
The Warehouse Orders application manages all the orders from a warehouse.
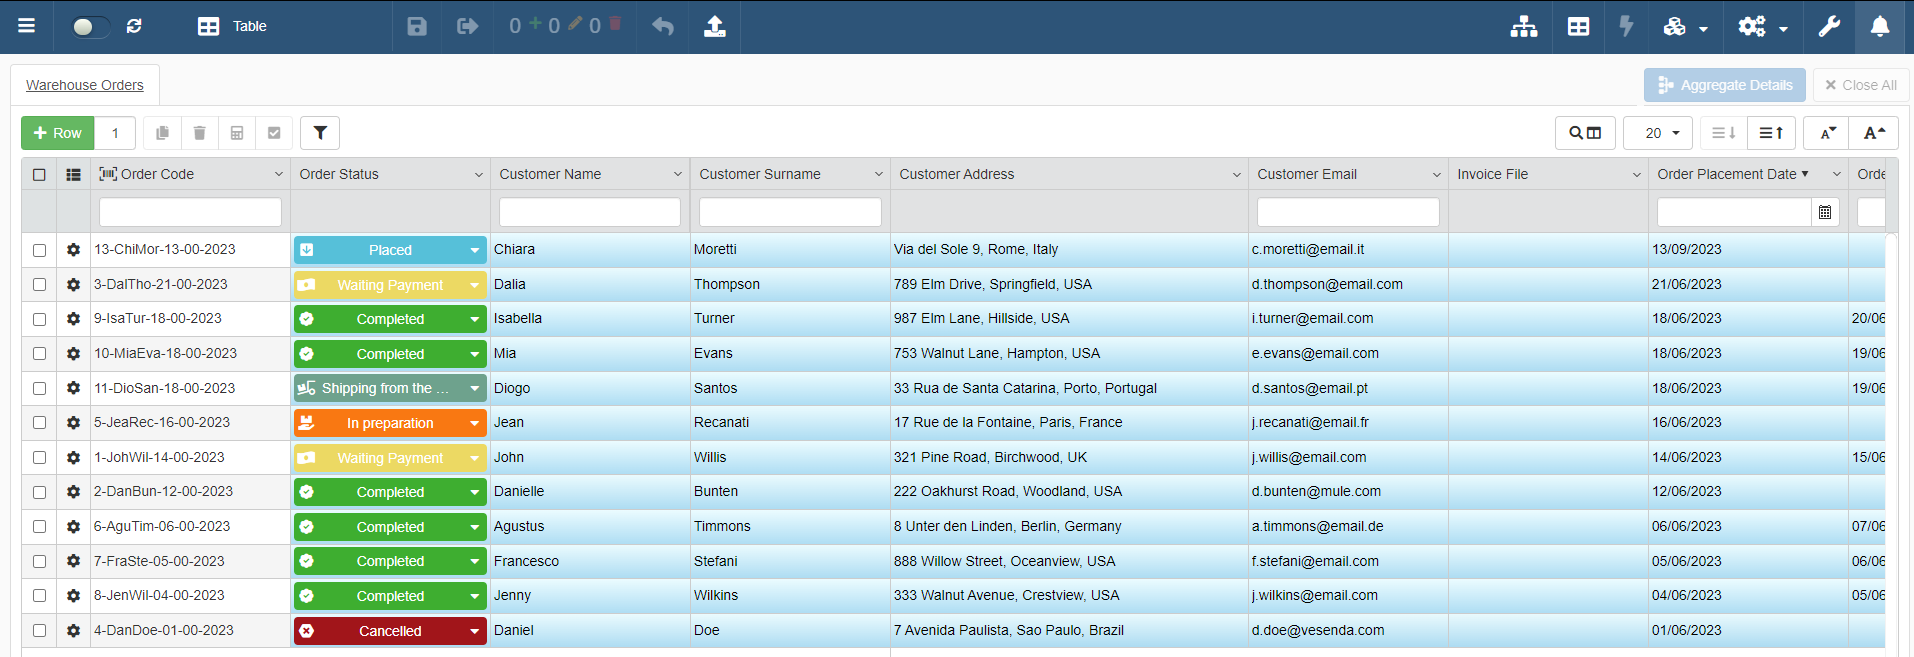
Each row on the Master table is an order. Each order has a Detail called Order Items (Check What are the Details? for more information about Details.)
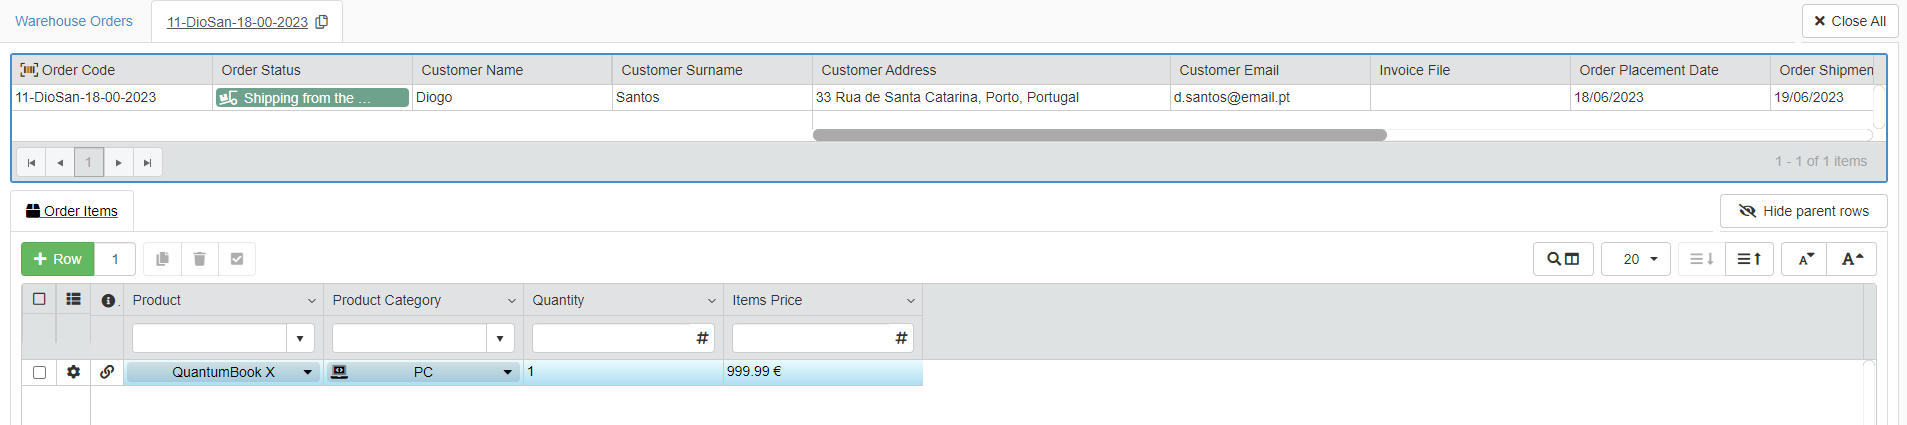
Order Items lists the included items, their quantity, and their price.
On the Master table, the users should see how many items an order includes. It's an information that users should see but the application doesn't need to record on a Storage: each time, the application can calculate the value on the fly by checking the Order Items's rows. For this reason, the best solution is using a Calculated Logical Column.
The Designer goes to the Master table settings and clicks on the Logical Column button.

The Designer chooses the Calculated type.
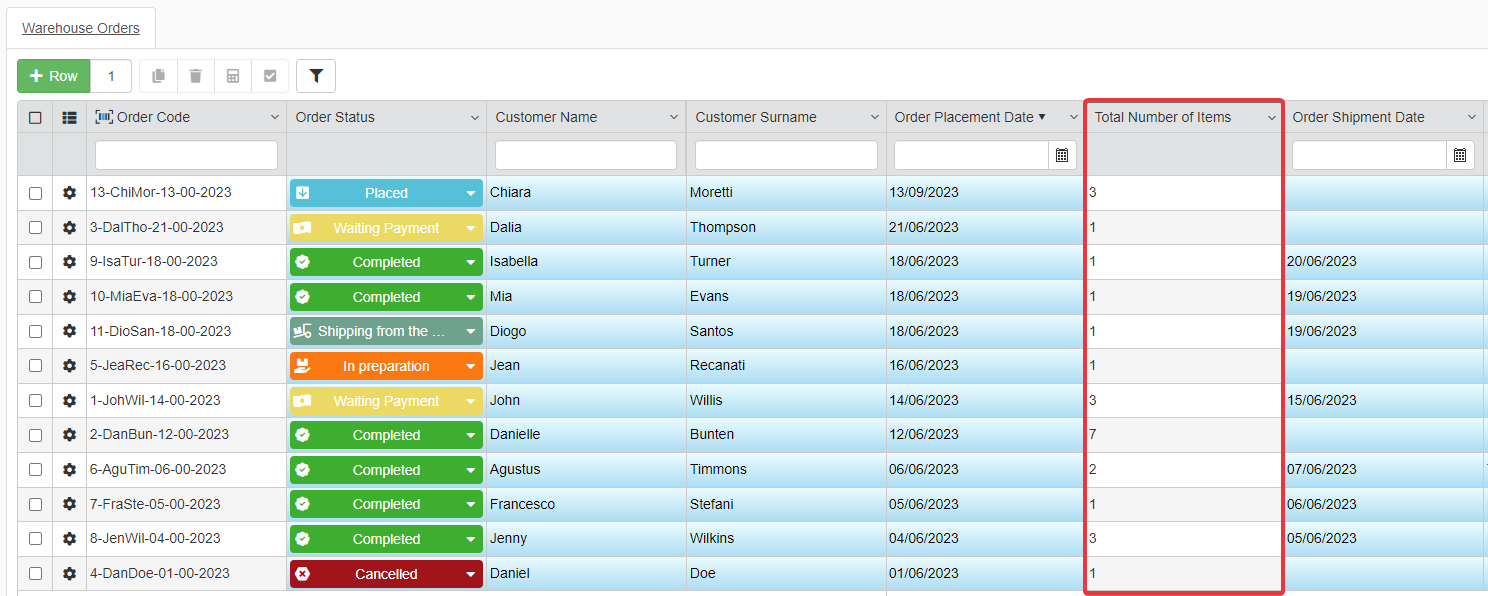
The Designer decides to place the Logical Column after the Order Placement Date column.
The Designer clicks on the Confirm once they configured all the settings.
After the configuration, the Designer chooses the data type Numeric from the drop-down list in the Logical sub-panel. Also, the Designer types "Total Number of Items" as column name.

Then the Designer goes to the Formula sub-panel and clicks on the icon to open the Formula Editor.
They insert the following Formula to count the number of items for each Detail:
1 2 3 4 5 6 7 8 9 10 11 12 13 14 15 16 17 18 19 20 21 22 | |
Then the Designer saves the changes after the Total Number of Items' configuration in Design Mode.

Total Number of Items will summarize the total number of items in an order without the necessity to save the value on a Storage.
You can create another Logical Column to calculate the total price of an order by following the same process and inserting a similar formula.

Configure another Numeric-type Calculated Logical Column called "Order Total Price" and use the following formula:
1 2 3 4 5 6 7 8 9 10 11 | |
Success
You have created and configured a Logical Column on the chosen table.
How to Edit a Logical Column
Learn how to edit or delete an existing Logical Column in Design Mode.
Changing Logical Column's Settings
Learn how to modify the Logical Column's settings according to each type.
Action
You can edit an Action Logical Column from the Logical sub-panel in the table's settings.
Click on the drop-down list and choose another Custom Action.

The icon on the Logical Column's cells will change according to the selected Custom Action.
Click on the Save button in Design Mode to save the changes.
Separator
You can edit a Separator's position among the columns like any other column in the Layout panel. (See Change the Position and Size of a Column in the Table for more information about the Layout panel.)
In the Layout panel, drag & drop the Separator in the new position.
Click on the Save button in Design Mode to save the changes.
Calculated
You can edit an Calculated Logical Column from the Logical sub-panel in the table's settings.
Choose a different data type by clicking on the drop-down list under the Logical column.

You can change a Calculated Logical Column's formula from the Formula sub-panel like any other field. (See How to Calculate Values Automatically for more information about Calculated Fields.)

Click on the Save button in Design Mode to save the changes.
AppLink
You can edit an AppLink Logical Column from the Logical sub-panel in the table's settings.
Click on the icon under the Logical column to modify the AppLink.

See the Add a Shortcut to Edit Data in Another Application from the Table - AppLinks section to check what settings you can change.
Deleting a Logical Column
If you want to delete a Logical Column, click on the button in any table settings' sub-panel. You find the button next to Logical Column's row that you want to remove.
A window will ask for confirmation. Click on Yes to delete the Logical Column (or No to abort the deletion).

Click on the Save button in Design Mode to save the changes.