How to Add a Property as a Filter
Required Permissions
This section requires the Application Designer permission from your Domain's administrator.
Check What are the Design Tasks? to learn more about permissions to work with Design Mode and other tools.
Learn how to enable Properties and add one or more Properties to an application.
Follow the steps below to add a Property to your application.
Note
This guide assumes that you enable for the first time the Properties and you have only the default Group Group. If you have an application that another Designer has already configured with different Groups, the same process applies to any other the Group.
Check What are the Groups? in What are the Properties? and How to Organize the Properties in Sets to Help the Navigation: Groups for more information about Groups.
Note
You can add as Properties only fields on the Storage. You can't add Logical Columns as Properties. (You can find more general info on Logical Columns in the Configure Calculations Without the Necessity of Storage: Logical Columns section.)
-
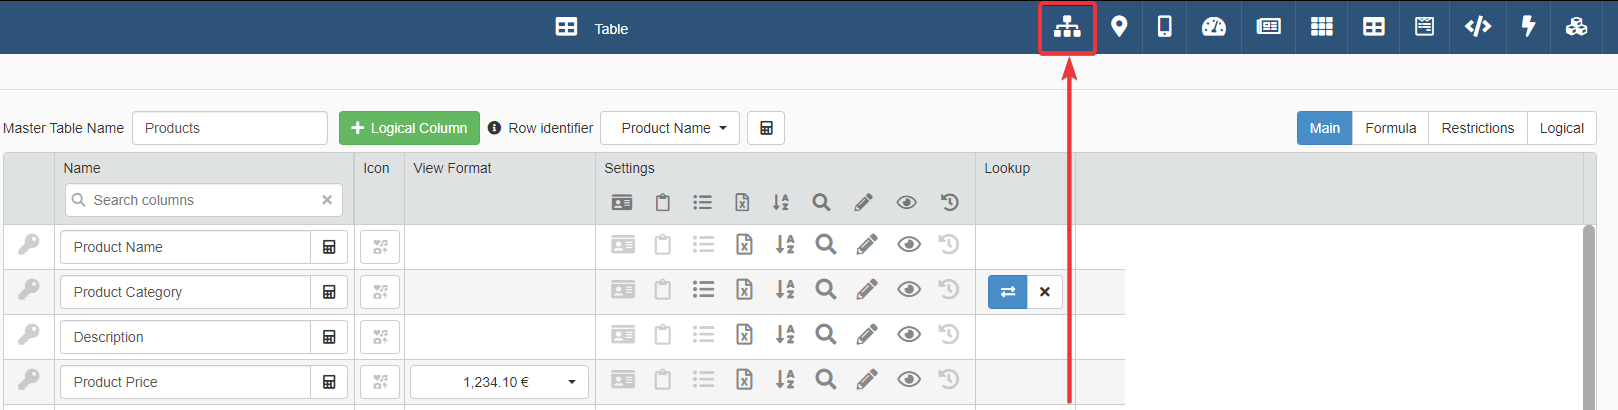
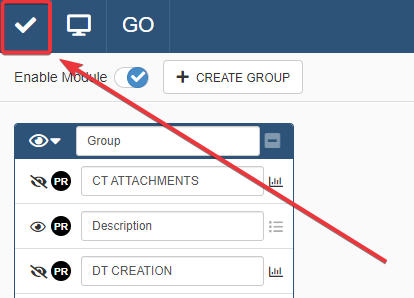
In Design Mode, click on the icon on the top-right corner of any panel.
-
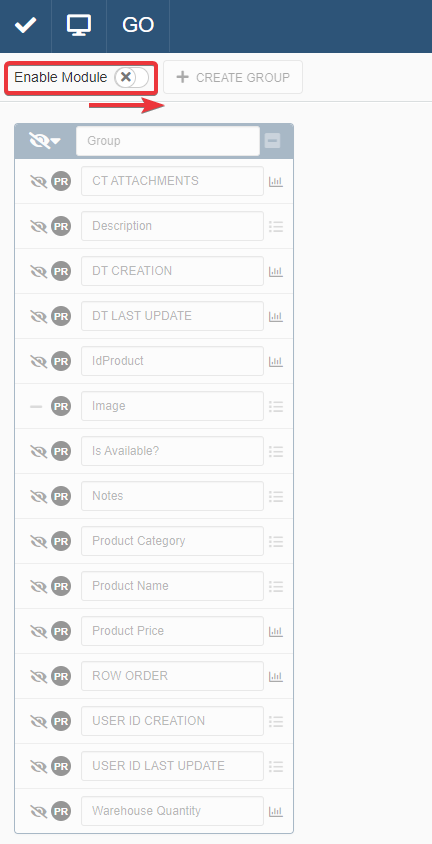
In the Properties panel, turn ON the Enable Module toggle-switch to enable the Properties in the application.
-
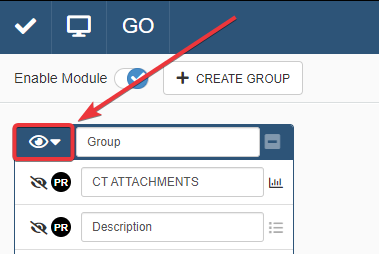
In the Properties panel, you can decide what Properties make available in your application. By default, the Design Mode arranges the Properties in a generic Group called "Group". Click on the icon next to the name to make the default Group visible in the application.
If you see the icon, the Group and its enabled Properties (see step 4) will appear in the application.
Attention
If you don't make the Group visible by clicking on the icon, Users won't see the Properties that you enable at step 4 below.
Note
By default, if your application has Details, the panel lists the Detail table's fields available as Properties in a separated Group. Such Group has the same name of the Detail's table**.
Like any other Group, you must make visible the Detail table's Group by clicking on the icon. If you see the icon, the Groups will appear in the application.
Hint
You aren't oblige to keep all the Properties in the default Group "Group" . You can arrange in different Groups your Properties.
Check How to Organize the Properties in Sets to Help the Navigation: Groups to learn how to customize the Groups for your application's Properties.
If you don't find the default "Group" in the application's Properties panel, don't worry. Other Designers having access to the application could might already renamed "Groups" or replaced "Groups" with custom Groups with different names.
-
The panel arranges Properties in each Group in alphabetical order. Click on the icon to make a field available as a Property in the application. If you see the icon next to a field, that field is available as Property in the application.
Info
If you see the icon next to a field, you can't configure that field type as Property. For example, fields that you can't use as Properties include File, Icon, Color, and Rich Text File type fields.
Question
The Properties include by default also the System Fields:
CT ATTACHMENTS,DT CREATION,DT LAST UPDATE,ROW ORDER,USER ID CREATION, andUSER ID LAST UPDATE. You can ignore or enable them to filter the table for the data subset.See What Are Storages and Why Do You Need Them? and Hide or Show a Field on the Table for more information about System Fields.
-
If you want, type a name of a Property different from the field name.
optional
Note
The change affects only that Property in the Properties list. The change of name won't affect the field names on the table.
-
After having chosen the Properties to enable, click on the Save button () on the Design Mode's top-left corner. The action saves the Properties' configuration.
Success
You have configured the Properties for your application. The User will be able to create data subsets one or more of the enabled Properties.
Example
The Warehouse Orders application manages the orders and their shipment from a warehouse.
The Users need a more powerful set of filters and must work only on the rows satisfying the criteria. They need the Properties.
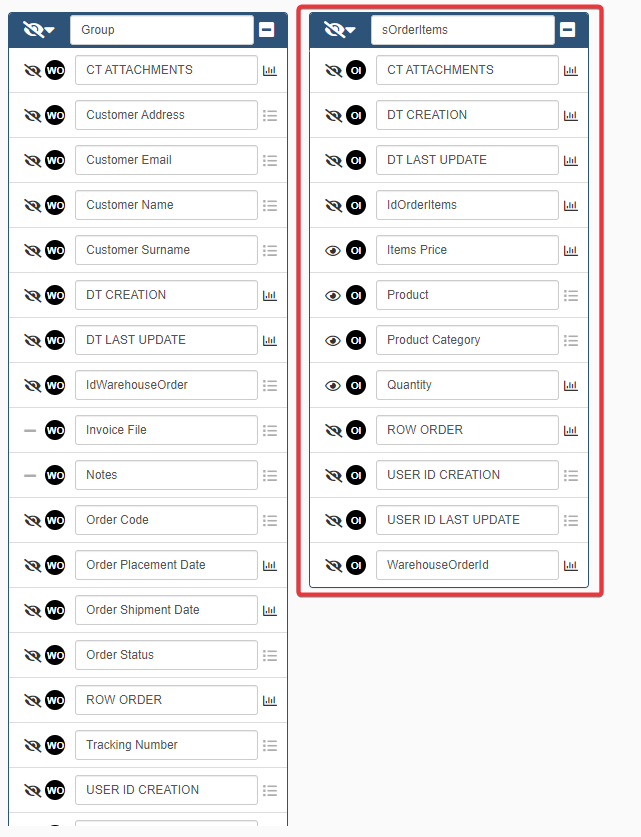
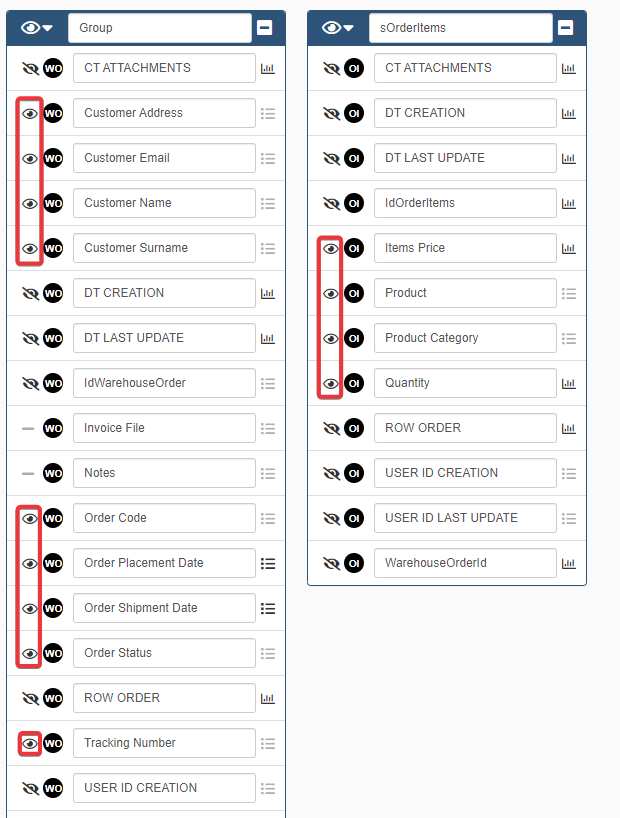
The Designer goes in Design Mode > Properties to enable the Properties. They enable the Properties by turning on the Enable Module toggle switch and finds the default Group and the Detail's table Group of Properties sOrderItems. (sOrderItems corresponds to the Detail recording the order's items list in Warehouse Orders.)

The Designer makes visible the Groups Group and sOrderItems.

The Designer enables as Properties all the fields. The exception are the System Fields, the Identity fields, and the Parent Key field relating the Detail to the Master Table (i.e. WarehouseOrderId). (See How to Create a Detail and Attach It to a Row for more information about Detail tables and Parent Keys.) They don't think that Users need to filter using these fields as Properties.
The Designer saves the configuration by clicking on the Save button ().
Now the User can filter and create data subsets through the Properties in Warehouse Orders.